RE-EMBRACING THE RANDOM
By MICHAEL PERKINS
LIFE FOR PHOTOGRAPHERS HAS BECOME ENTIRELY TOO SAFE.
It’s to be expected, really. In recent decades the forward tsunami of technical improvement in cameras and editing options has almost completely “idiot-proofed” the process of making pictures. In nearly every possible scenario, today’s gear guarantees that you will at least get something usable every time you take a shot, and, in many cases, images that are far better than even your best efforts could have guaranteed just a few years ago. The risk of making visuall lousy photographs has been nearly zeroed out.
And that’s the problem. Because with the randomness of luck, which used to mean the potential for ruined images, there’s also the potential for the happy accident, the unplanned discovery that comes when something unpredictable is introduced into the mix. I was reminded of that in a recent return to the tabletop fun of light painting, where you shoot an object in complete darkness, with your camera set on full manual and mounted on a tripod. Using a remote shutter release for extra stability, you start the exposure on “bulb” setting, meaning that the shutter will stay open until you click it shut. You then selectively “paint” light onto the subject, passing over different parts of it with a small penlight. Unlike a static lighting scheme, this system more or less guarantees randomness, since you will never pass the light over the scene twice exactly the same way. And that very randomness affords you a kind of impulsive, instinctual indulgence from frame to frame.
I usually shoot anywhere from thirty to fifty frames when doing a light painting, as I am always surprised or inspired by how the smallest variation in my passes will drastically affect the results. I can literally make the light look like it came from any direction, with whatever intensity I desire, from deep shadows to total blowouts. I can even let the flashlight itself be seen in the frame to suggest motion or speed, as seen in the above shot.
Is it art? Well, in that randomness is an element of risk/reward in photography, I’d say that art occurs when you can’t absolutely nail everything down. It’s often considered an alibi to say, of one’s occasional errors, “hey, I’m only human”, but, in photography, the same phrase might actually be a valid brag.
YOU AND YOUR BRIGHT IDEAS
A simple manipulation of single–source light produces a wide range of effects.
By MICHAEL PERKINS
THE SELF–EDUCATION PROCESS INHERENT in photography is perpetual: that is, the lesson-learning doesn’t “clock out” merely because a given task is completed, but flows equally during the in-between moments, the spaces outside of,or adjacent to, the big ideas and big projects. Down time need not be wasted time.
Often it’s because the pressure of delivering on a deadline is absent that we relax into a more open frame of mind as regards experimentation. You find something because you’re not looking for it.
One such area for me is lighting. I seldom use flash or formal studio lights, so I obsess over cheap, mobile, and flexible means of either maximizing natural light or adding artificial illumination in some simple fashion. This isn’t just about making an object seem plausibly lit, or, if you like, “real: it’s also about choosing or sculpting lighting schemes, making something look like I want it to.
Small, powerful LEDs have really given me the chance to fill spare moments cranking out a wide array of experimental shots in a limited space with little or no prep, producing shaping light from every conceivable angle. I just lock the camera down on a tripod, make some simple arrangement on a table top, and shoot dozens of frames with different directional sweeps of the light, usually over the space of a time exposure of around a half a minute. I can move the light in any pattern, either by holding it static or tracking high/low, left/right, etc.
Frequently this activity does not result in a so-called “keeper” image. Such spare-time experiments are about process, not product. The real pay-off comes somewhere further down the road, when you have need of a skill that you developed over several days when you had.. nothing to do.
HOLDING HANDS IN THE DARK
By MICHAEL PERKINS
ONE THING OF WHICH THE PHOTOGRAPHIC COSMOS IS NOT IN SHORT SUPPLY IS THE SELF-PORTRAIT. What might have been a specialized kind of image-making just a few scant years ago is now, in the mobile era, a flat-out obsession. We snap ourselves being happy, being moody, eating a cheeseburger, or giving that cheeseburger a thumbs up with friends, etc, etc. We make more photographs than ever of our faces, and, it could be argued, say less and less in the process.
I think that a good self-portrait, if it is to say or imply anything true about the life behind the face, requires a little prep time, or at least a pre-conceived notion of what one is trying to reveal about that person. That said, I think our concept of a selfie is, at the very same time that it’s overdone, is also far too narrow. Simply speaking, there are other parts of our physical envelope that convey information about who we are and what we’ve been in the world. The hands, for example.
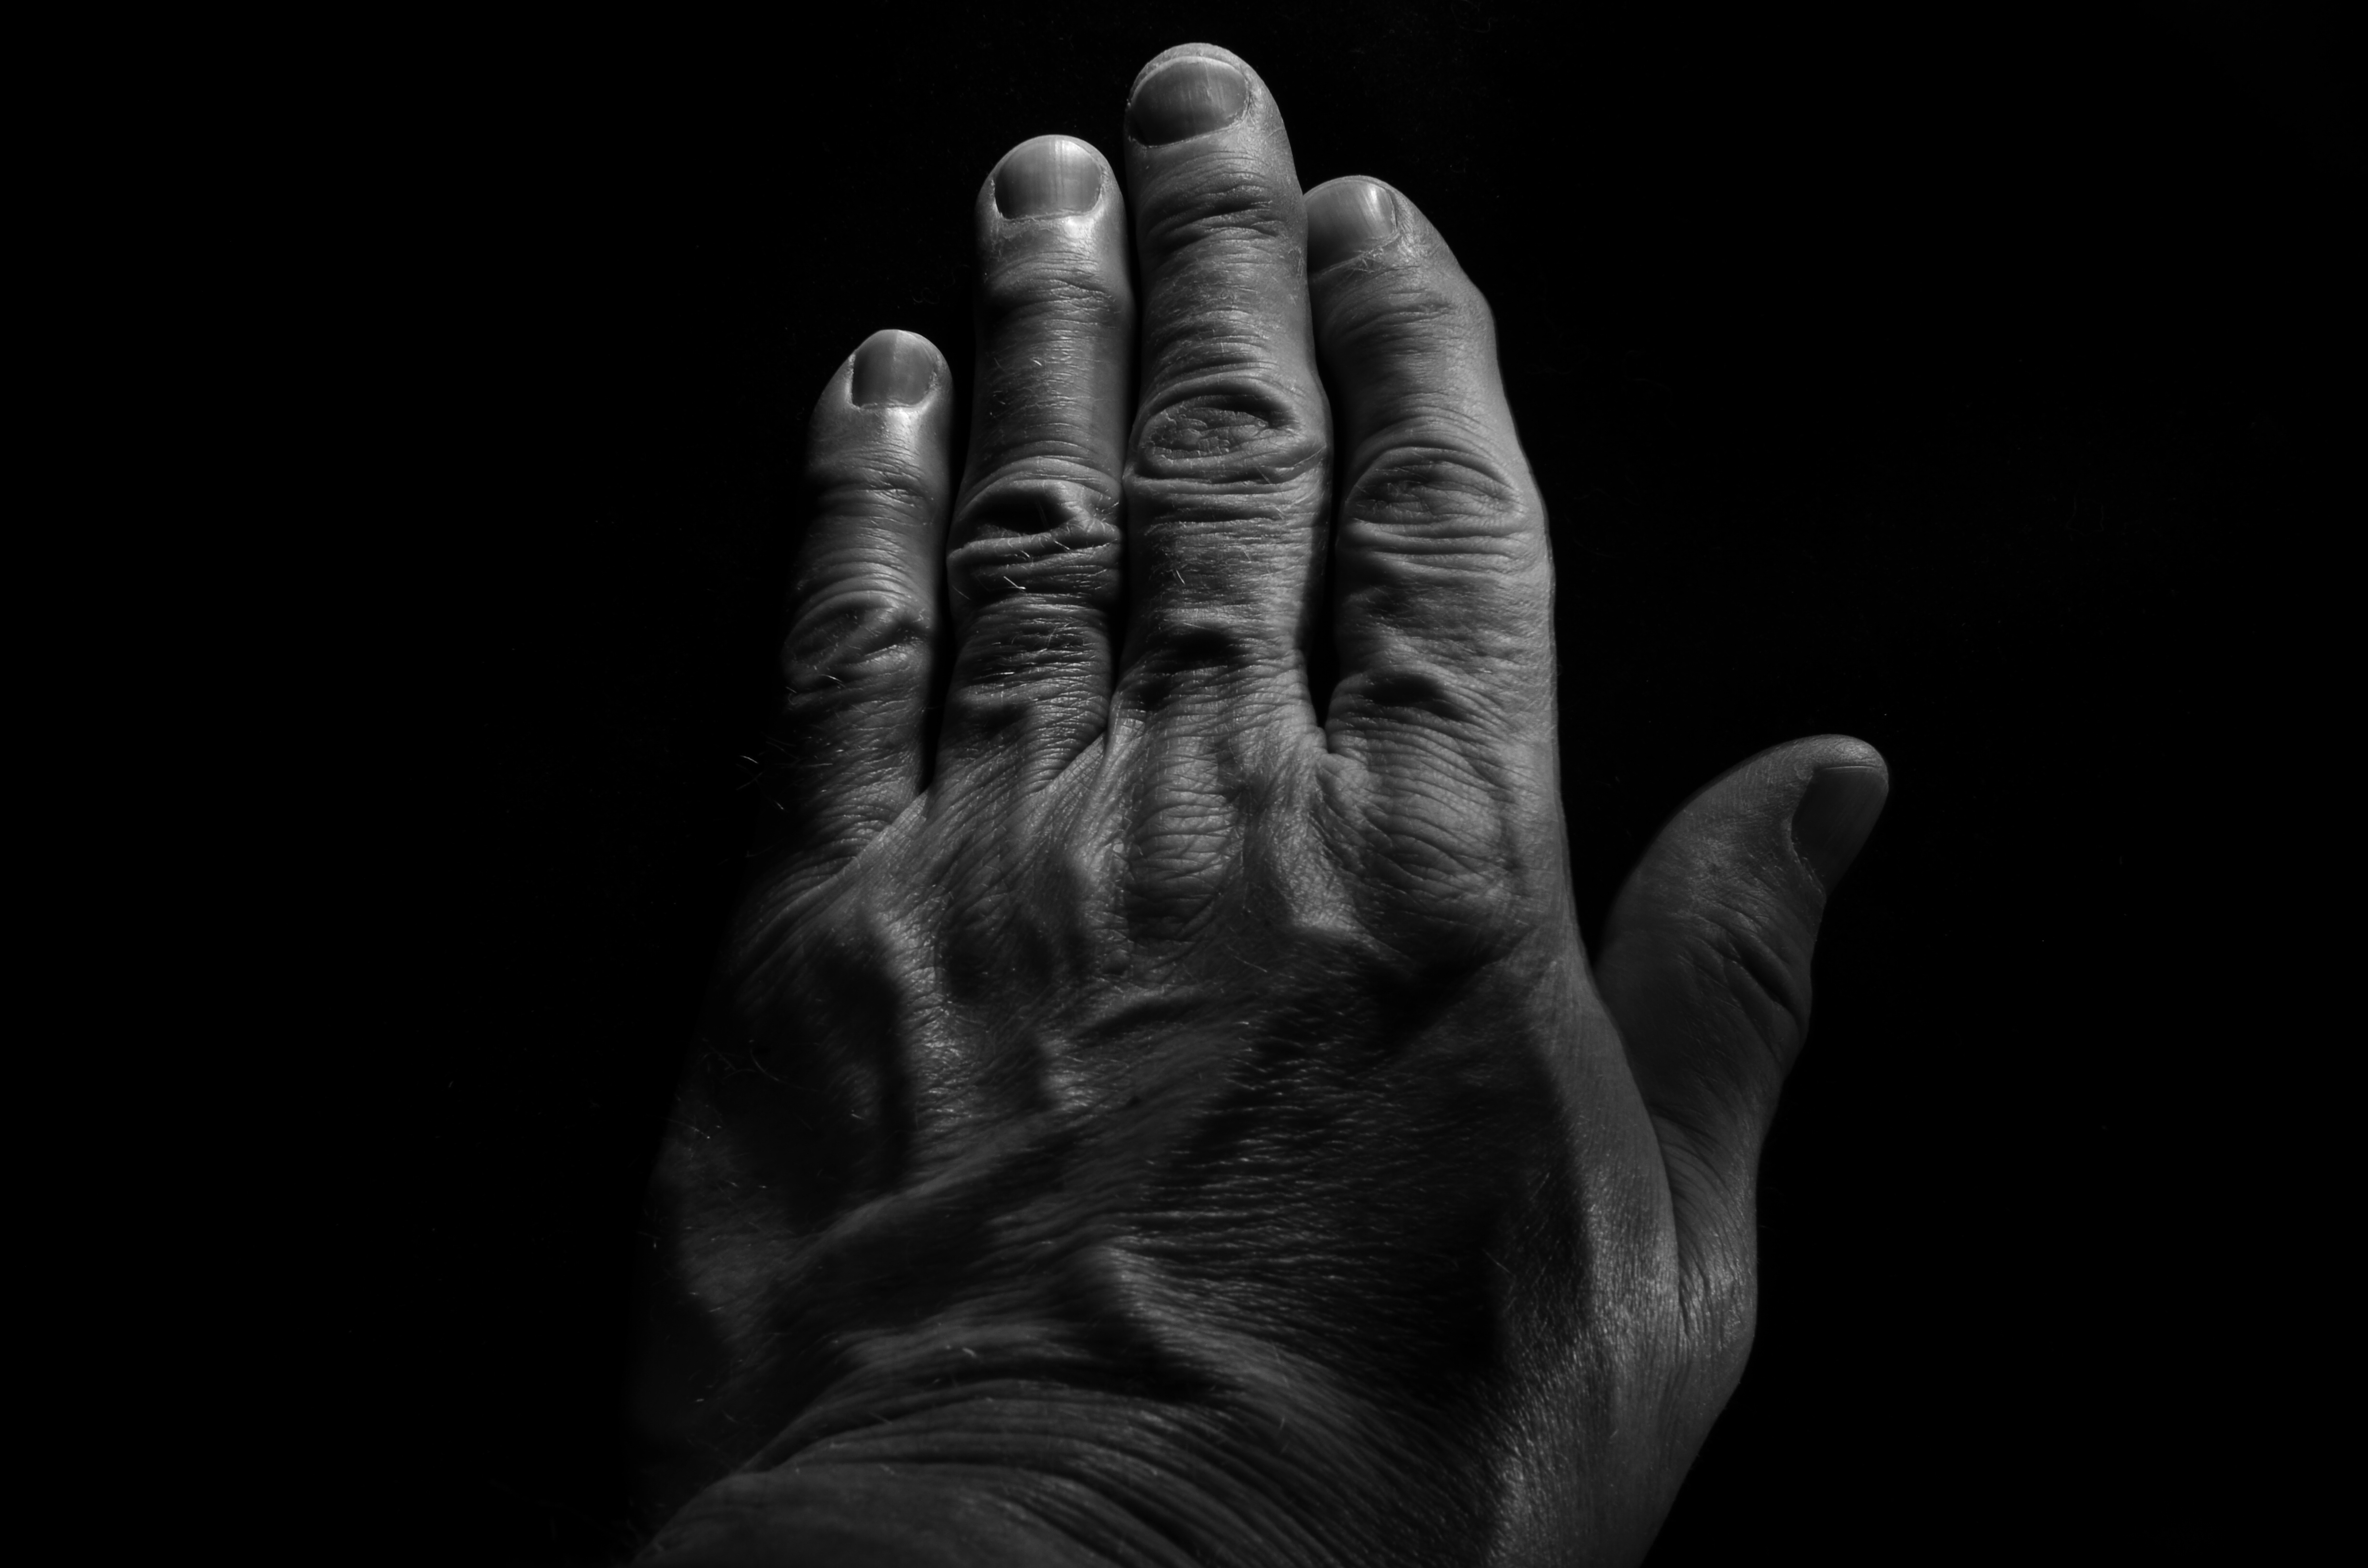
Pax Humana (2017). Hand-held LEDs used to “light-paint” in the dark can create interesting textures in human skin. 18 sec., f/16, ISO 100, 35mm.
If the eyes are the window to the soul, the fingers are the foot-soldiers who carry out the orders that the soul dreams up. The mind behind the face can certainly shine through a good facial portrait, but consider that the hands are the real agents of change in a person’s life. They lift: they move: they put plans into action. Moreover, hands bear the traceable time-stamps of all that agency. Each wrinkle and scar is a document of both deliberate action and unforeseen consequence. Hands belong in any serious study of a person’s life, no less than the face. The trick, as with photographing every other subject, is in getting the image you want.
I find, for example, that normal room light keeps a lot of fine detail from registering in an image, since human skin is highly reflective, causing the grain of the skin to wash out. One way to get around that is to use light painting, a technique we’ve discussed here before. Set up your composition and focus with the camera on a tripod in normal light, then leave everything in place until nightfall and make the image in a completely darkened room while experimenting with a range of exposure times. Your only illumination will be a small hand-held LED, such as a miniature key chain flashlight….nothing wide-beam or super-powered. Use a wireless remote to trigger your shutter, then “write” light paths over the hand, slowly tracking the LED over small areas until all have been “hit” before the trigger snaps back shut.
In the above example, I wanted greater contrast between the hills and valleys of my knuckles, veins, etc., and I wanted to minimize the shine-making effect of the light, so I lit from an angle, sideways from the tips of the fingers. That bumped up the pores and hairs into starker relief as well. Two things to remember: using short stabs of light, that is, turning the LED rapidly on and off, is better than a continuous beam, since you can pinpoint the effect more precisely. Also, using a very small aperture (f/16 here) provides maximum depth of field and enhanced detail. Other than that, it’s truly trial-and-error. This frame, as an example, is one of forty attempts, so it’s not a project you do on the fly. But this, I feel, is my hand, my real hand, its labors and history in full view. And it’s as much a portrait as any face can ever provide.
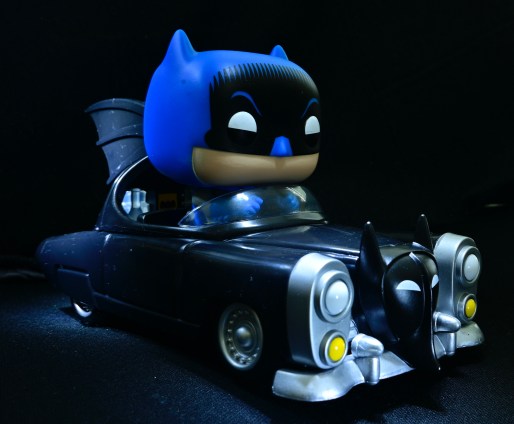
FROM A DARK PLACE

A fifteen-second “light painting” exposure with the product illuminated in a dark room with a hand-held LED.
By MICHAEL PERKINS
THE STANDARD RECIPE FOR A PHOTOGRAPHIC “PRODUCT SHOT” is rooted in the formal studio lighting set-up. Regardless of whether you’re trying to create an idealized picture of a bottle of soda or a grand piano, the traditional approach is to set up a careful balance of artificial lights, then measure and meter until the object is lit wonderfully from every angle. It’s a system honored by time and tradition, with millions of magazine ads and commercials to attest to its appeal.
Which is fine, except I just happen to find it boring.
Instead of starting with a fully lit room and tweaking towards the ideal, I prefer, with the technique known as light writing, to start at the opposite end of the equation…with a totally dark room, the object in question, and a small, handheld LED, using each shot to light various contours of the object and comparing the results over several dozen frames. Instead of instantaneous exposures, I hold my lens open for as long as it takes for me to move my little torch into place, click on for several seconds at a time, then click off, re-position, and apply lighting to another surface on the object, repeating until I use a remote to close the shutter for good. Results vary wildly from frame to frame, and there is a lot of experimentation to get the look I want, simply because, well, I have no idea what that is when I start.

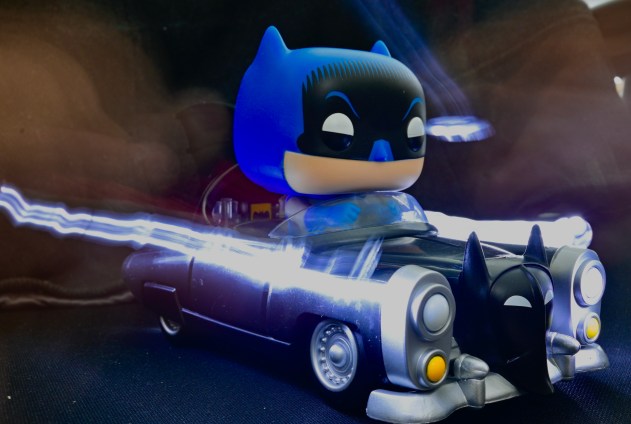
Slightly different tracking with the LED produces a completely different lighting effect.
I may begin by imagining the object as being lit from the side, then try a few takes where the light source comes from above, or even behind. Unlike a traditional studio lighting scheme, light painting allows me to break the rules of nature completely, creating light patterns that could never be achieved in nature. I can spend several seconds arching the LED from one side to another, like a rapidly crossing sun, with the final image bearing every trace of where I’ve tracked over a long exposure.
If I change my mind about what to illuminate in the first ten seconds, for example, I can just adjust it in the next ten. I just re-position the lamp and either augment or erase what’s been stored in the camera in the moments prior. Most importantly, it gives me an infinite number of choices for showcasing the object, settling for a fairly realistic depiction or an utter fantasy or something in between. Comparing the two examples shown here of a series on a whiskey bottle shows how even minute variations in the application of the light give the object a distinctly different identity. And with light painting, the shooter exercises much finer control than is possible with even the best studio set-up….and at a fraction of the cost.
Whether you’re molding an image from a room full of lights or building illumination beam by beam in a darkened room, the whole idea is control. Light painting generates a lot of randomness, and requires a patient eye, but the sheer variety of interpretations it gives you can teach you a lot about the infinitesimal things that can mold a picture, bring more of them under your command.
AS DIFFERENT AS DAY AND NIGHT
By MICHAEL PERKINS
PHOTOGRAPHY OFTEN PRESENTS ITSELF AS A SUDDEN, REACTIVE OPPORTUNITY, a moment in time where certain light and compositional conditions seem ripe for either recording or interpreting. In such cases there may be little chance to ponder the best way to visualize the subject at hand, and so we snap up the visualization that’s presented in the moment. It’s the kind of use-it-or-lose-it bargain we’re all acquainted with. Sometimes it yields something amazing. Other times we do the best with what we’re handed, and it looks like it.
Having the option to shape light as we like takes time and deliberate planning, as anyone who has done any kind of studio set-up will attest. The stronger your conception to start with, the better chance you have of devising a light strategy for making that idea real. That’s why I regard light painting, which I’ve written about here several times, as a great exercise in building your image’s visual identity in stages. You slow down and make the photograph evolve, working upwards from absolute darkness.
Shock-Top, 2014. Light-painted with a hand-held LED over the course of a six-second exposure, at f/5.6, ISO 100, 35mm.
To refresh, light painting refers to the selective handheld illumination of subjects for a particular look or effect. The path that your flashlight or LED takes across your subject’s contours during a tripod-mounted time exposure can vary dramatically, based on your moving your light source either right or left, arcing up or down, flickering it, or using it as a constant source. Light painting is different from the conditions of, say, a product shoot, where the idea is to supply enough light to make the image appear “normal” in a daytime orientation. Painting with light is a bit like wielding a magic wand, in that you can produce an endless number of looks as you develop your own concept of what the final image should project in terms of mood. It isn’t shooting in a “realistic” manner, which is why the best light painters can render subjects super-real, un-real, abstract or combinations of all three. Fact is, the most amazing paint-lit photos often completely violate the normal paths of natural light. And that’s fine.
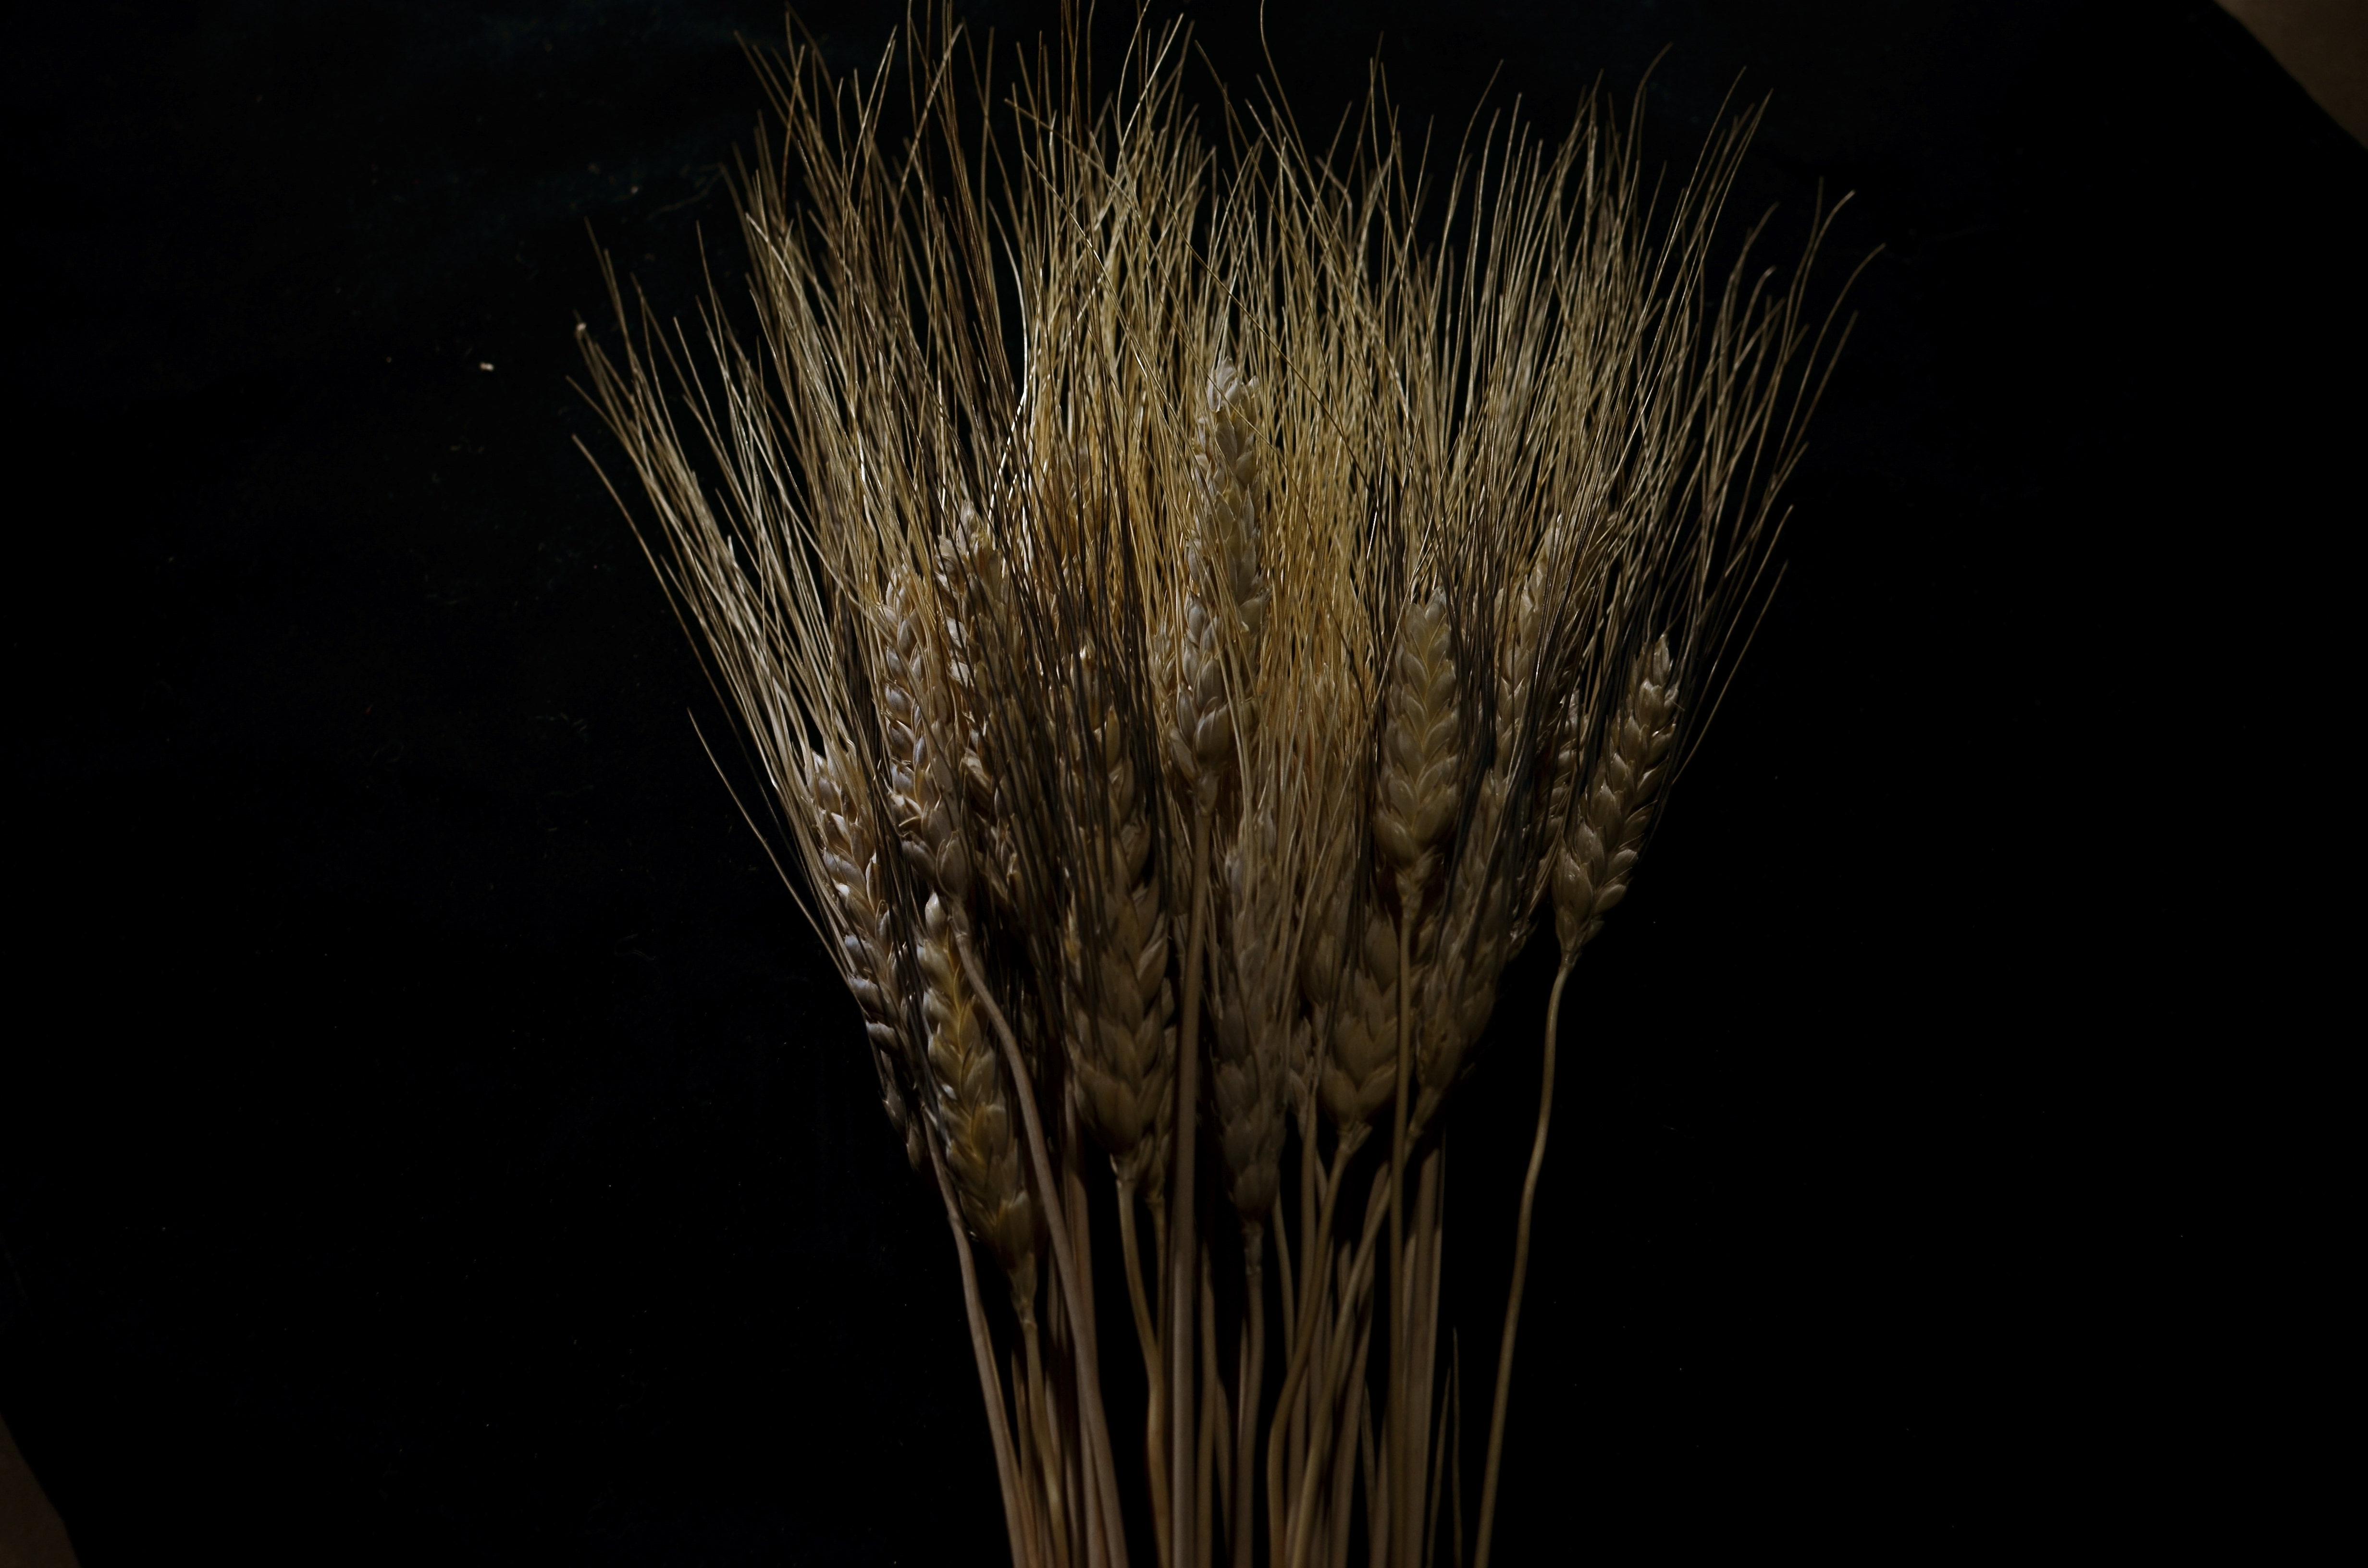
In light painting, I believe that total darkness in the space surrounding your central subject is as important a compositional tool as how your subject itself is arranged. As a strong contrast, it calls immediate and total attention to what you choose to illuminate. I also think that the grain, texture and dimensional quality of the subject can be drastically changed by altering which parts of it are lit, as in the shock of wheat seen here. In daylight, half of the plant’s detail can be lost in a kind of brown neutrality, but, when light painted, its filaments, blossoms and staffs all relate boldly to each other in fresh ways; the language of light and shadow has been re-ordered. Pictorially, it becomes a more complex object. It’s actually freed from the restraints of looking “real” or “normal”.
Developed beyond its initial novelty, light painting isn’t an effect or a gimmick. It’s another technique for shaping light, which is really our aim anytime we take off our lens caps.
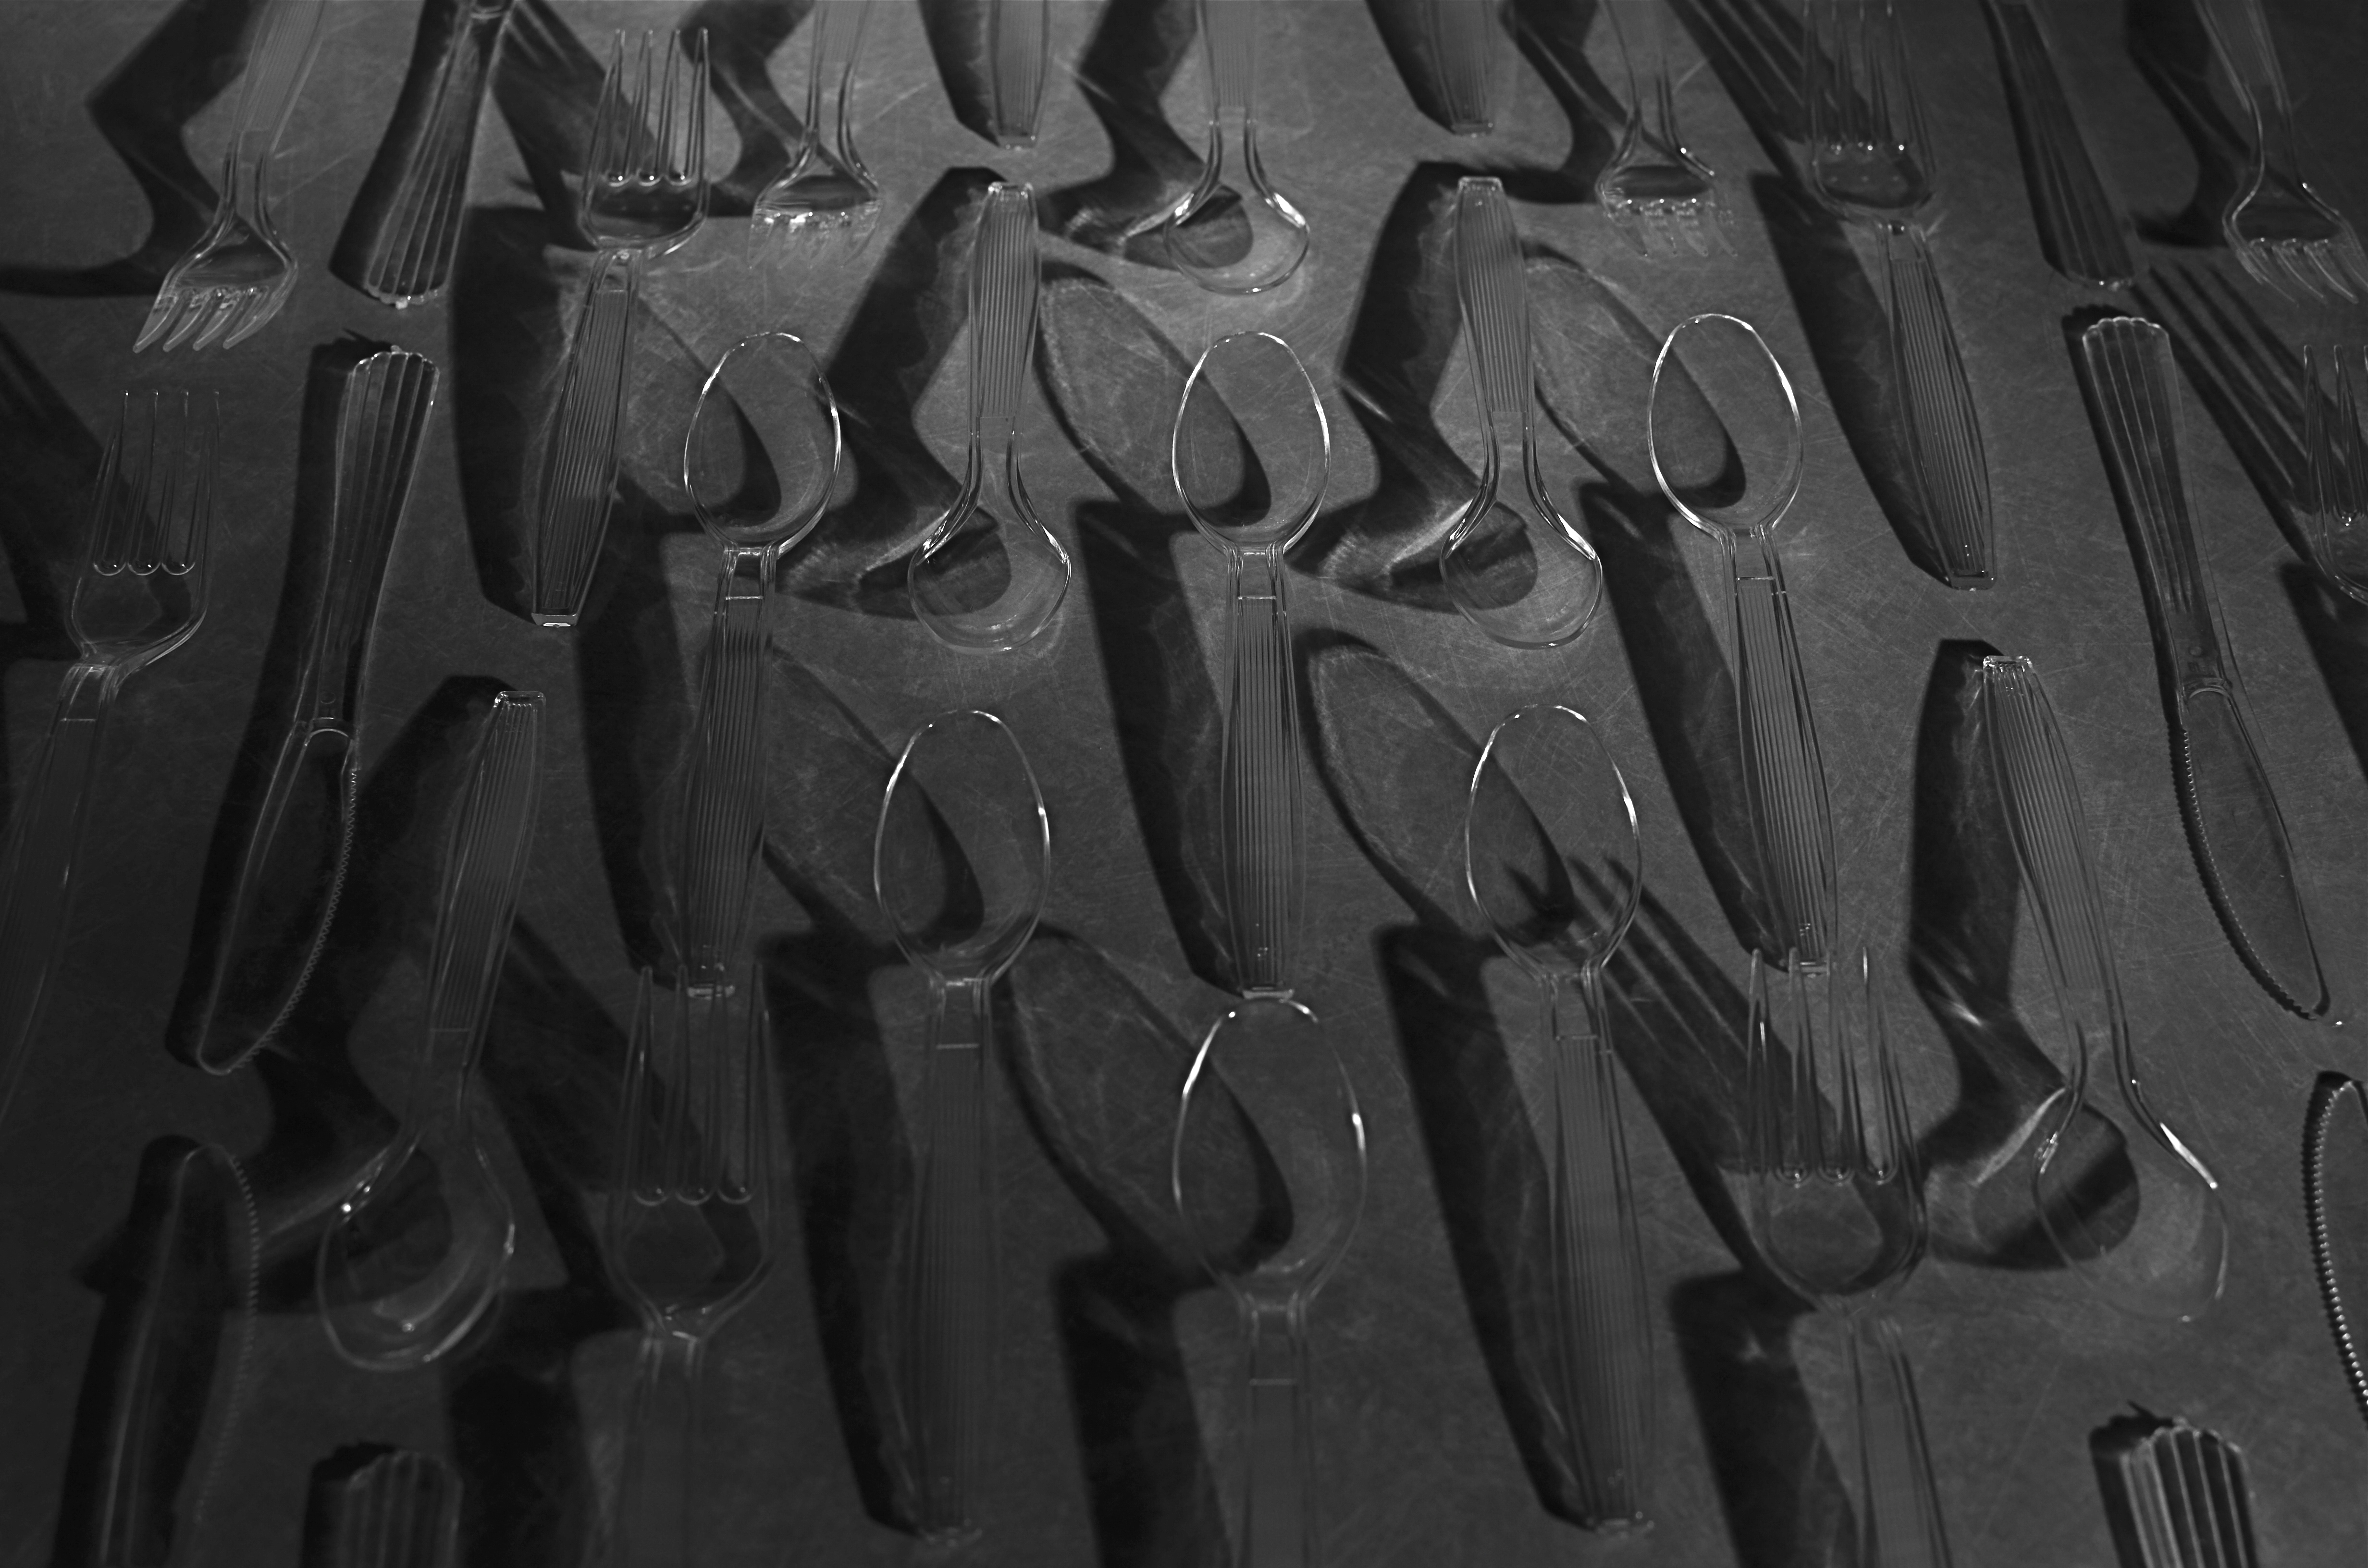
IN STEICHEN’S SHADOW
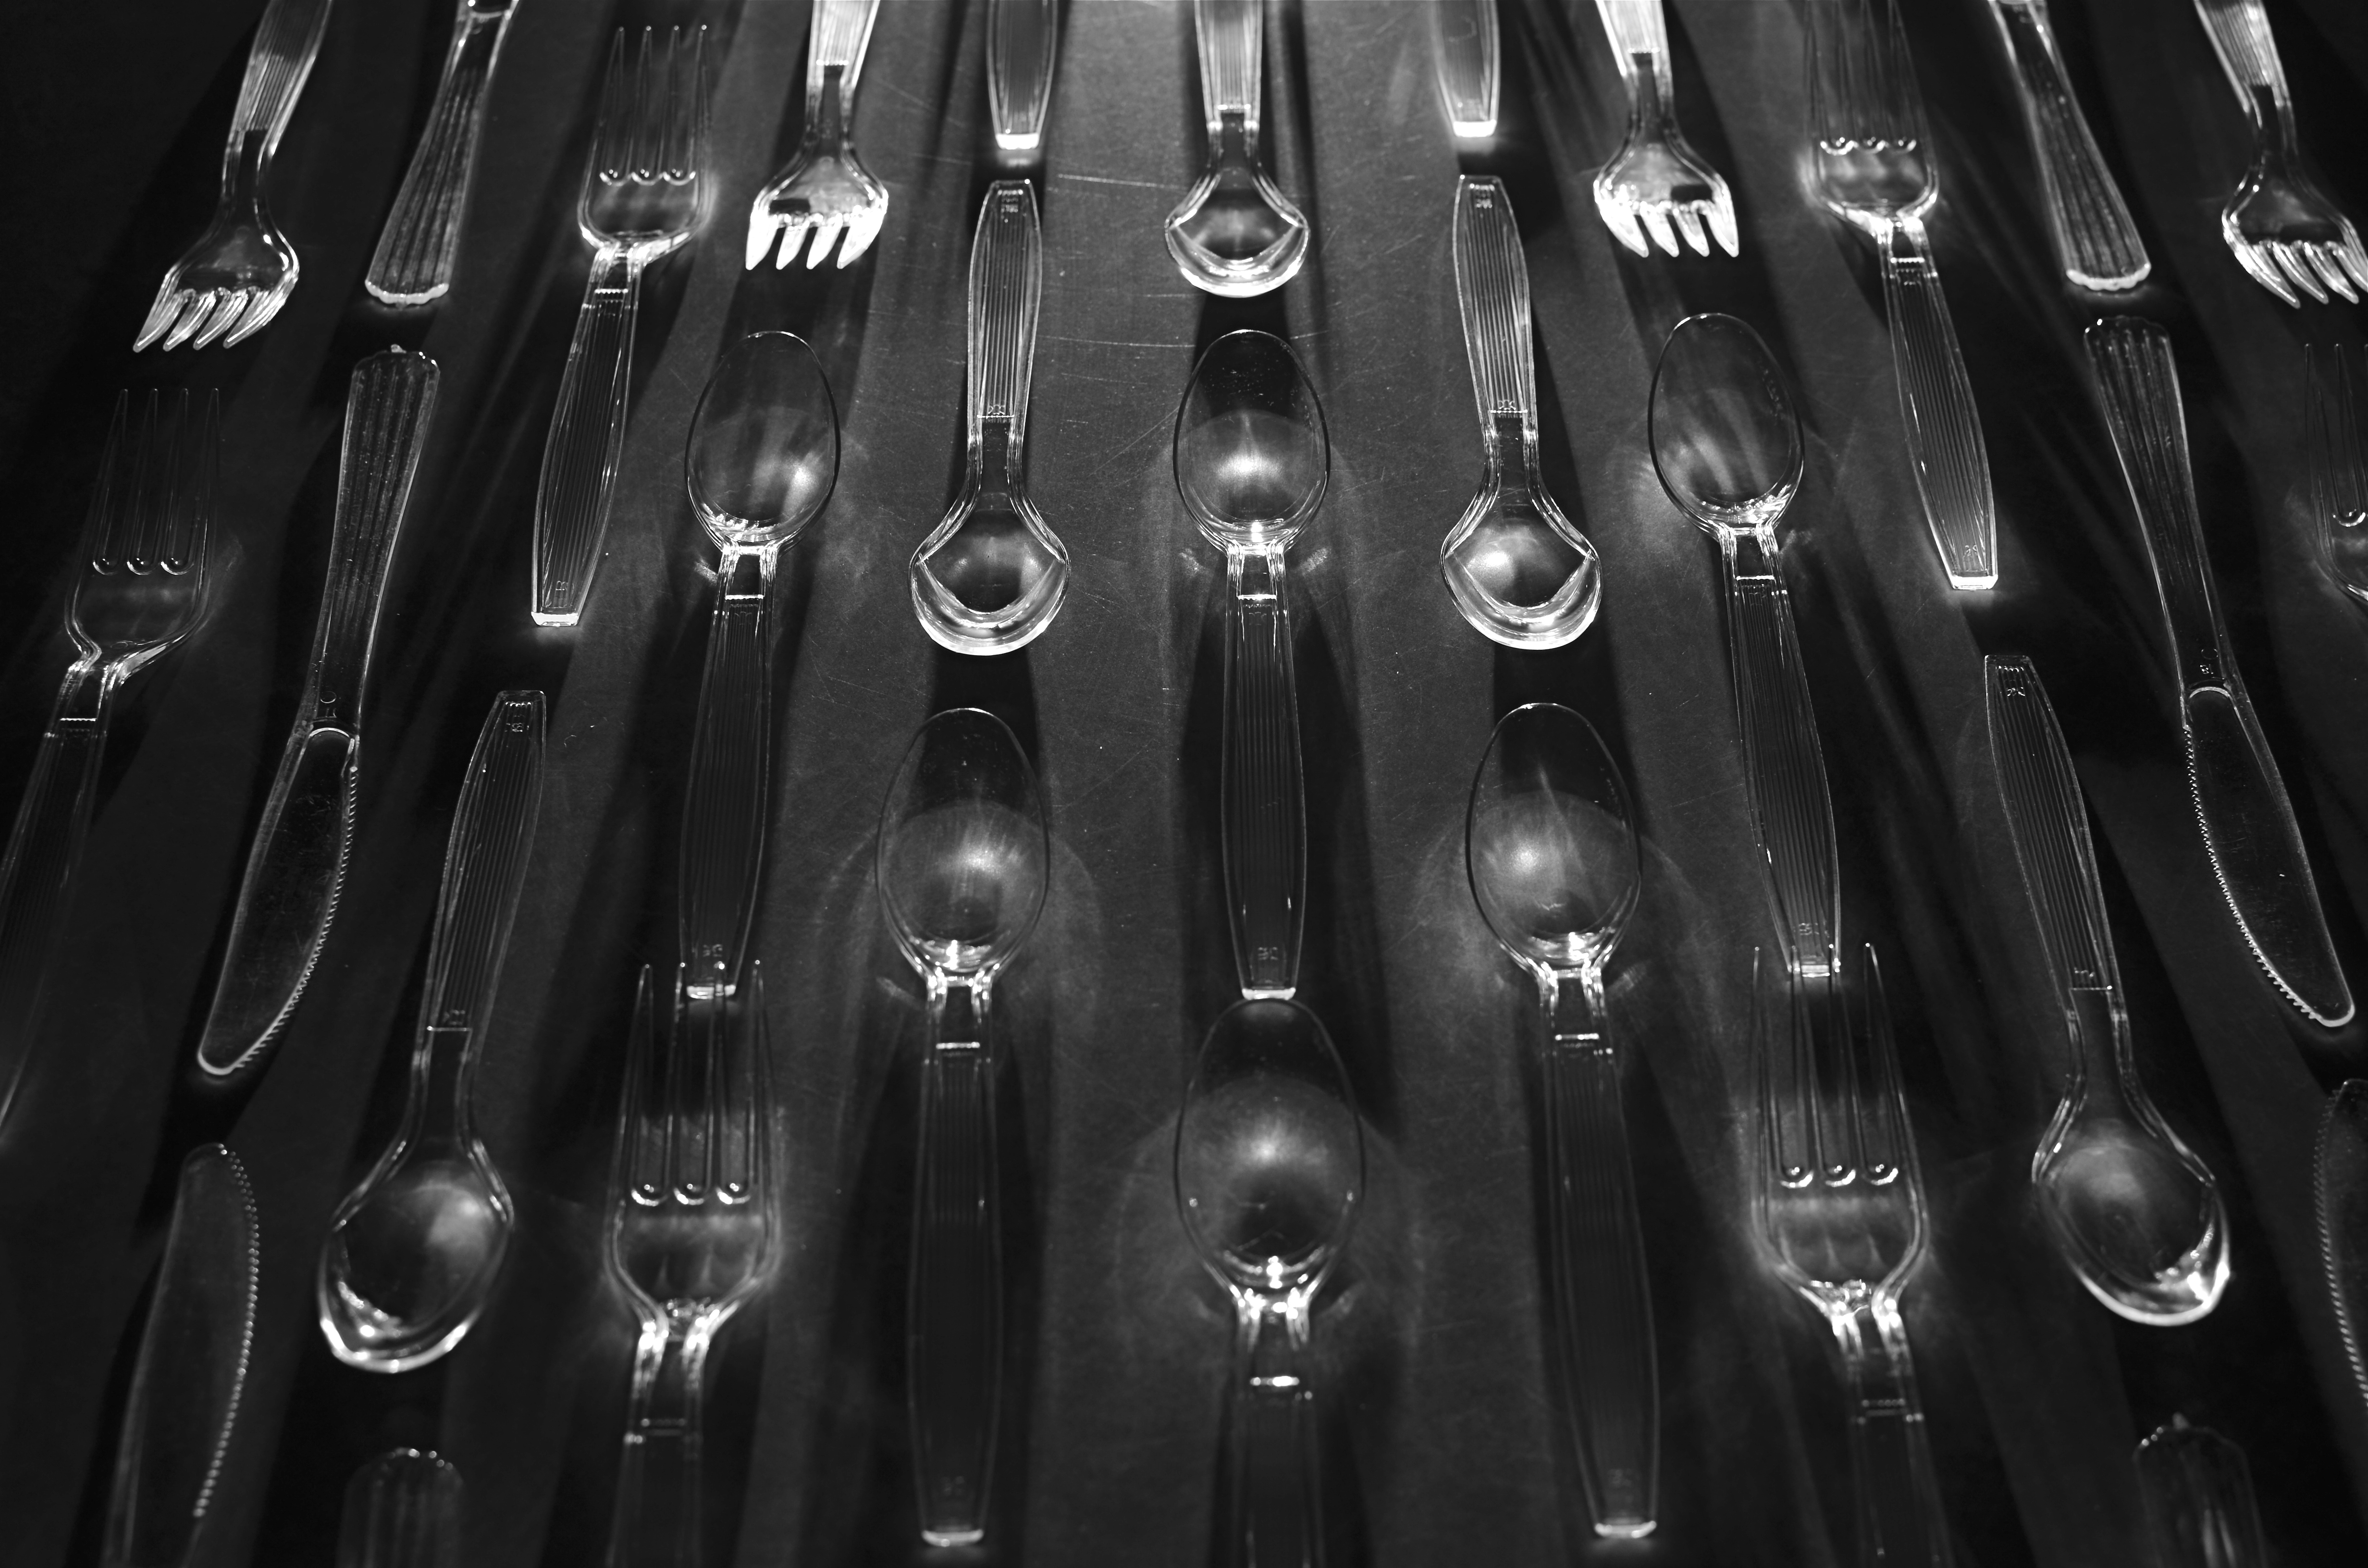
“Le Regiment Plastique”. Shot in a dark room and light-painted from the top edge of the composition. 5 seconds, f/5.6, ISO 100, 35mm.
By MICHAEL PERKINS
I’VE POSTED SEVERAL PIECES HERE ON “LIGHT-PAINTING”, or the practice of manually applying light to selective areas of objects during long exposures in the dark. The ability to “paint” additional colors, highlights and shadows “onto” even the most mundane materials can transform the whole light-to-dark ratio of the familiar and render it in new, if unpredictable ways. It’s kind of random and a lot of hands-on fun.
Some of the greatest transformations of ordinary objects ever seen in photography were obtained by Edward Steichen, arguably the greatest shooter in any style over the entire 20th century. Working for advertising agency J.Walter Thompson in the 1930’s, Steichen managed to romanticize everything from perfume bottles to kitchen matches to cutlery by arranging visually original ballets not only of these everyday items, but, through multiple source lighting, creating geometrically intricate patterns of shadows. His success in morphing the most common elements of our lives into fascinating abstractions remains the final word on this kind of lighting, and it’s fun to use light painting to pay tribute to it.
Same composition, but lit diagonally from right bottom. 5 seconds, f/5.6, ISO 100, 35mm.
For my own tabletop arrangement of spoons, knives and forks, seen here, I am using clear plastic cutlery instead of silver (fashions change, alas), but that actually allows any light I paint into the scene to make the utensils fairly glow with clear definition. You can’t really paint onto or across the items, since they will pick up too much hot glare after even a few seconds, but you can light from the edge of the table underneath them, giving them plenty of shadow-casting power without whiting out. I took over 25 frames of this arrangement from various angles, since light painting is all about the randomness of effect achieved with just a few inches’ deviation in approach, and, as with all photography, the more editing choices at the end, the better.
The whole thing is really just an exercise in forced re-imagining, in making yourself consider the objects as visually new. Think of it as a puff of fresh air blowing the cobwebs out of your perception of what you “know”. Emulating even a small part of Steichen’s vast output is like me flapping my wings and trying to become a bald eagle, so let’s call it a tribute.
Or envy embodied in action.
Or both.
DON’T SETTLE FOR REALITY
By MICHAEL PERKINS
IN PHOTOGRAPHY, WE FIRST LEARN HOW TO CONTROL LIGHT WHEN THERE IS A PRETTY GOOD SUPPLY OF IT. Our baby-step pictures are usually taken in the middle of the day, where it’s easier to over-expose than under-expose the shot. The sun is out and it’s a constant resource. We may step in and out of a shadow or need to fill a few gaps with flash, but mostly the issue of light is about managing something you have a big bunch of.
Once we venture into night shots, light becomes a precious commodity, like water in the desert. The equation is flipped. Now we’re struggling to get enough illumination to shape a shot, or sometimes just save it. We can shoot in the reduced light that’s on hand, but it takes a little more orchestration. Move into time exposures and the terms of engagement change again, with the ability to play God with the physics of things.
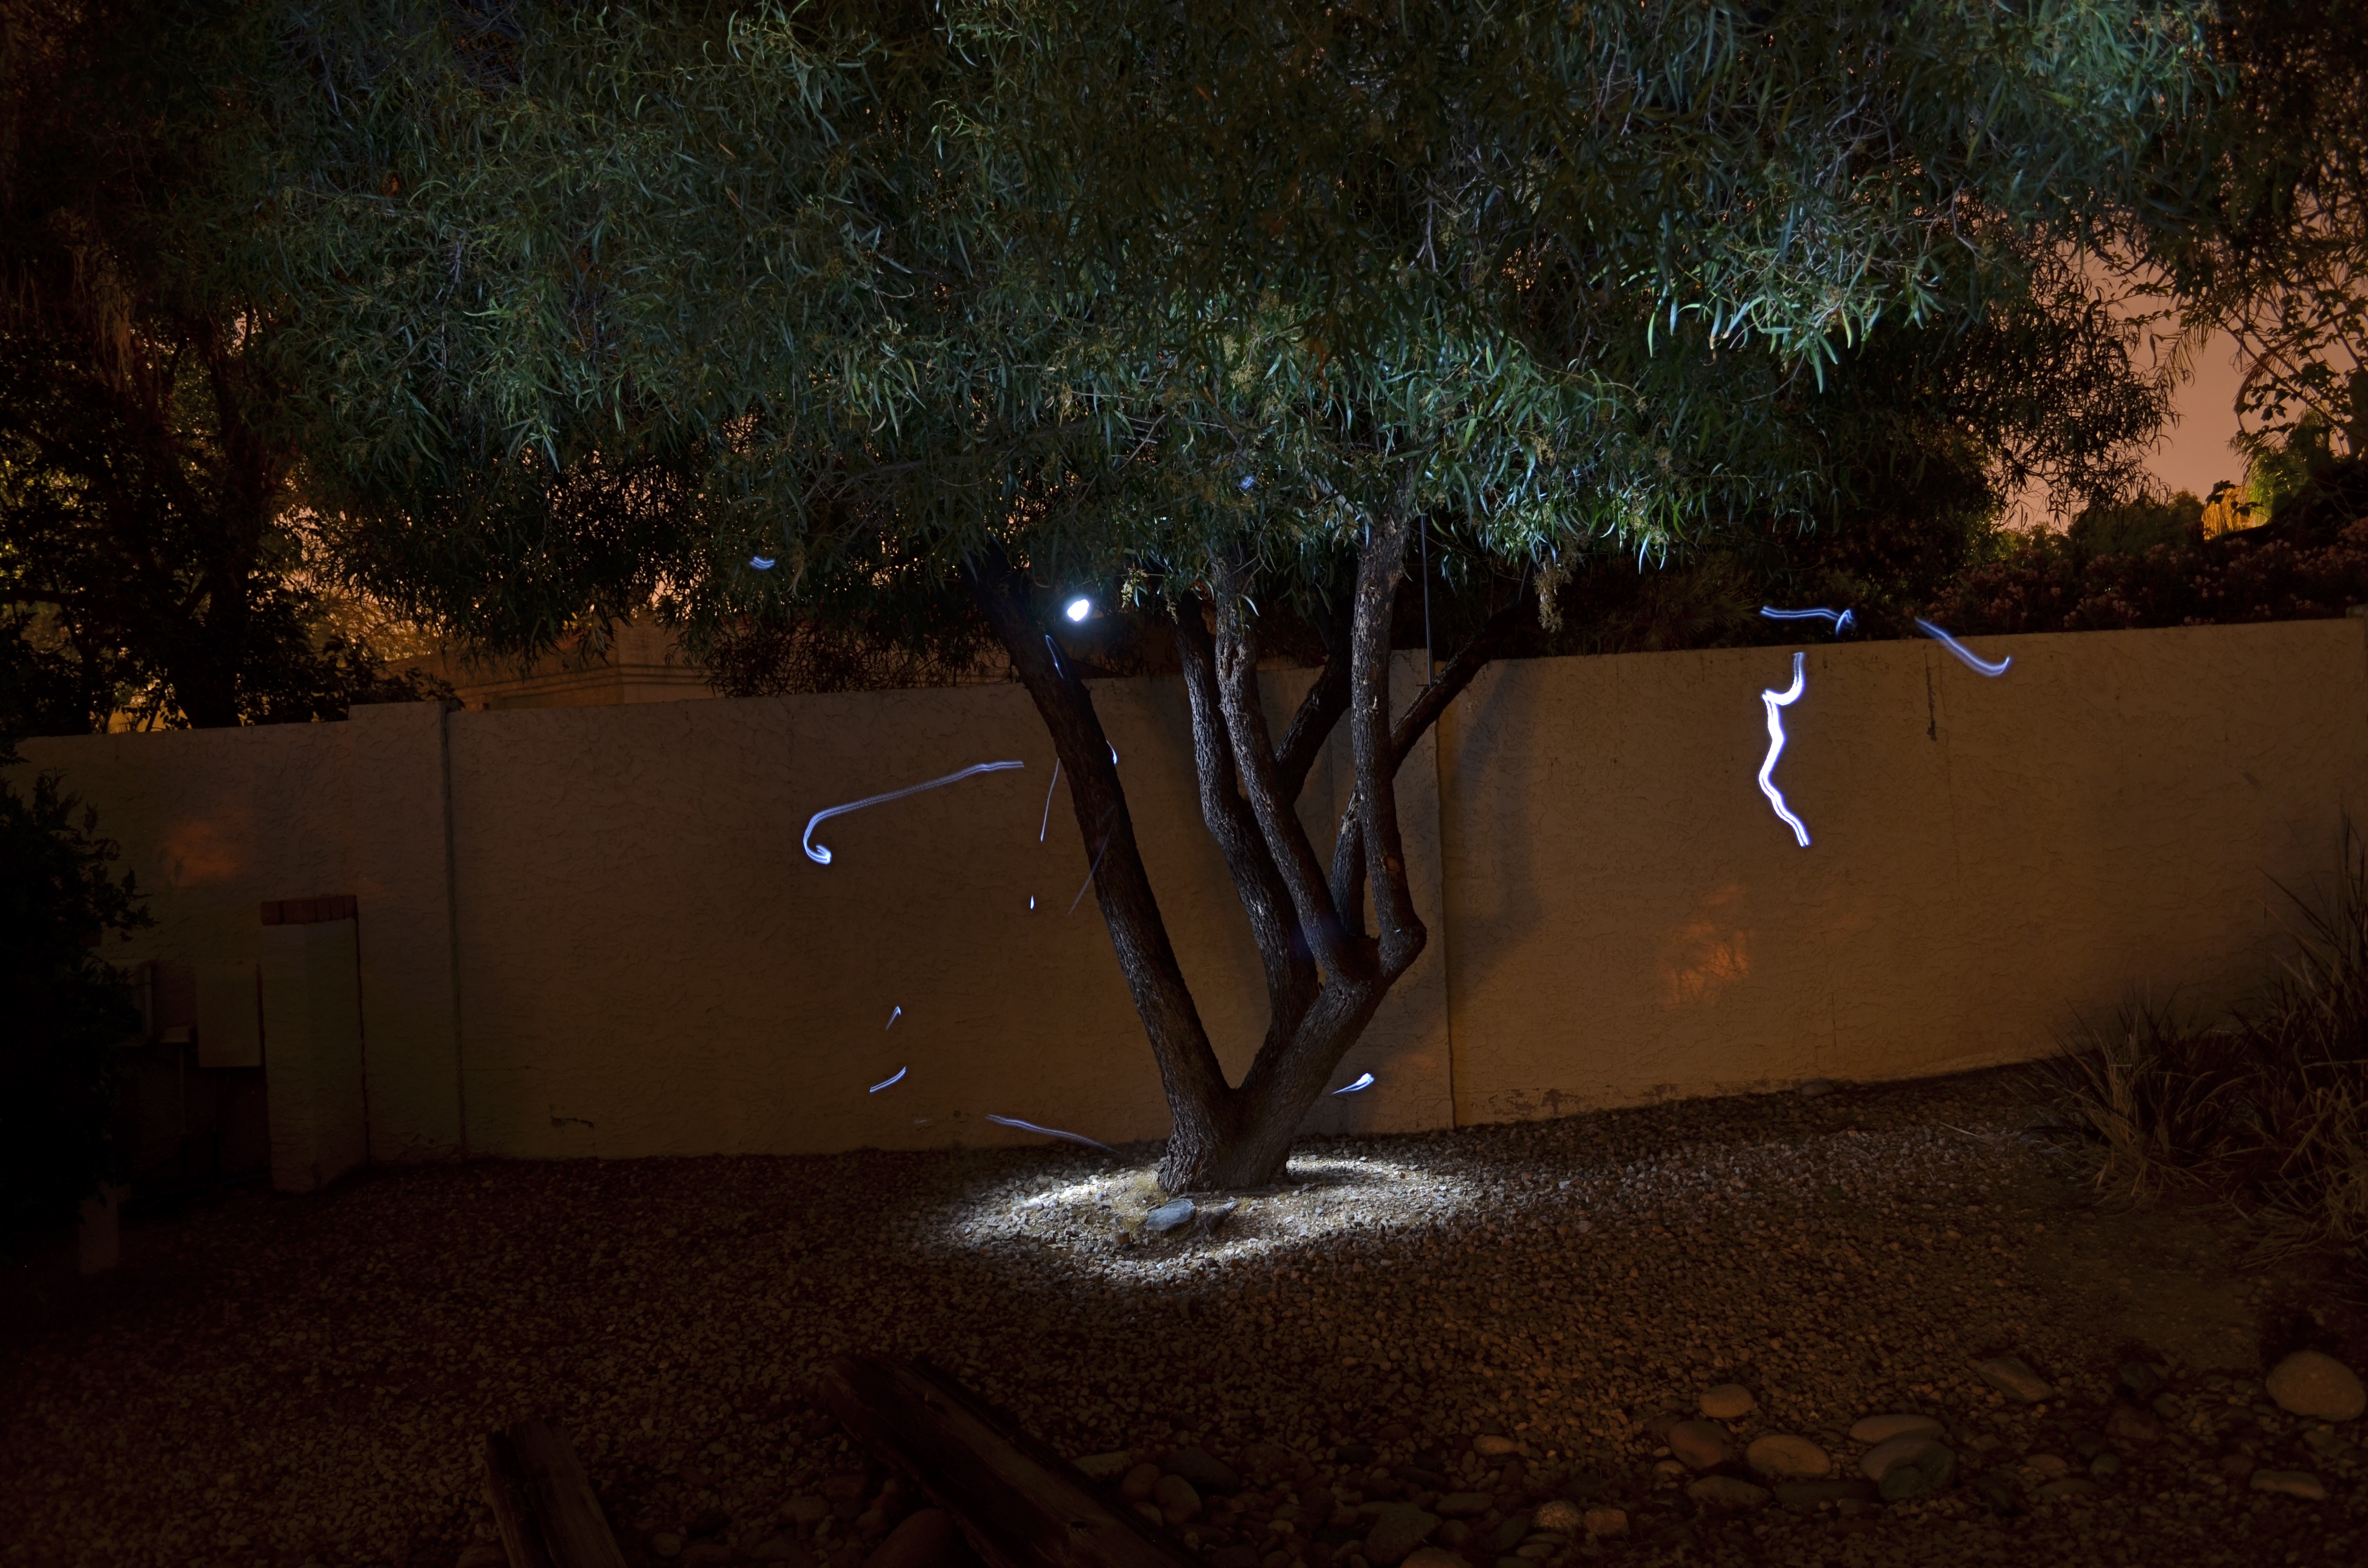
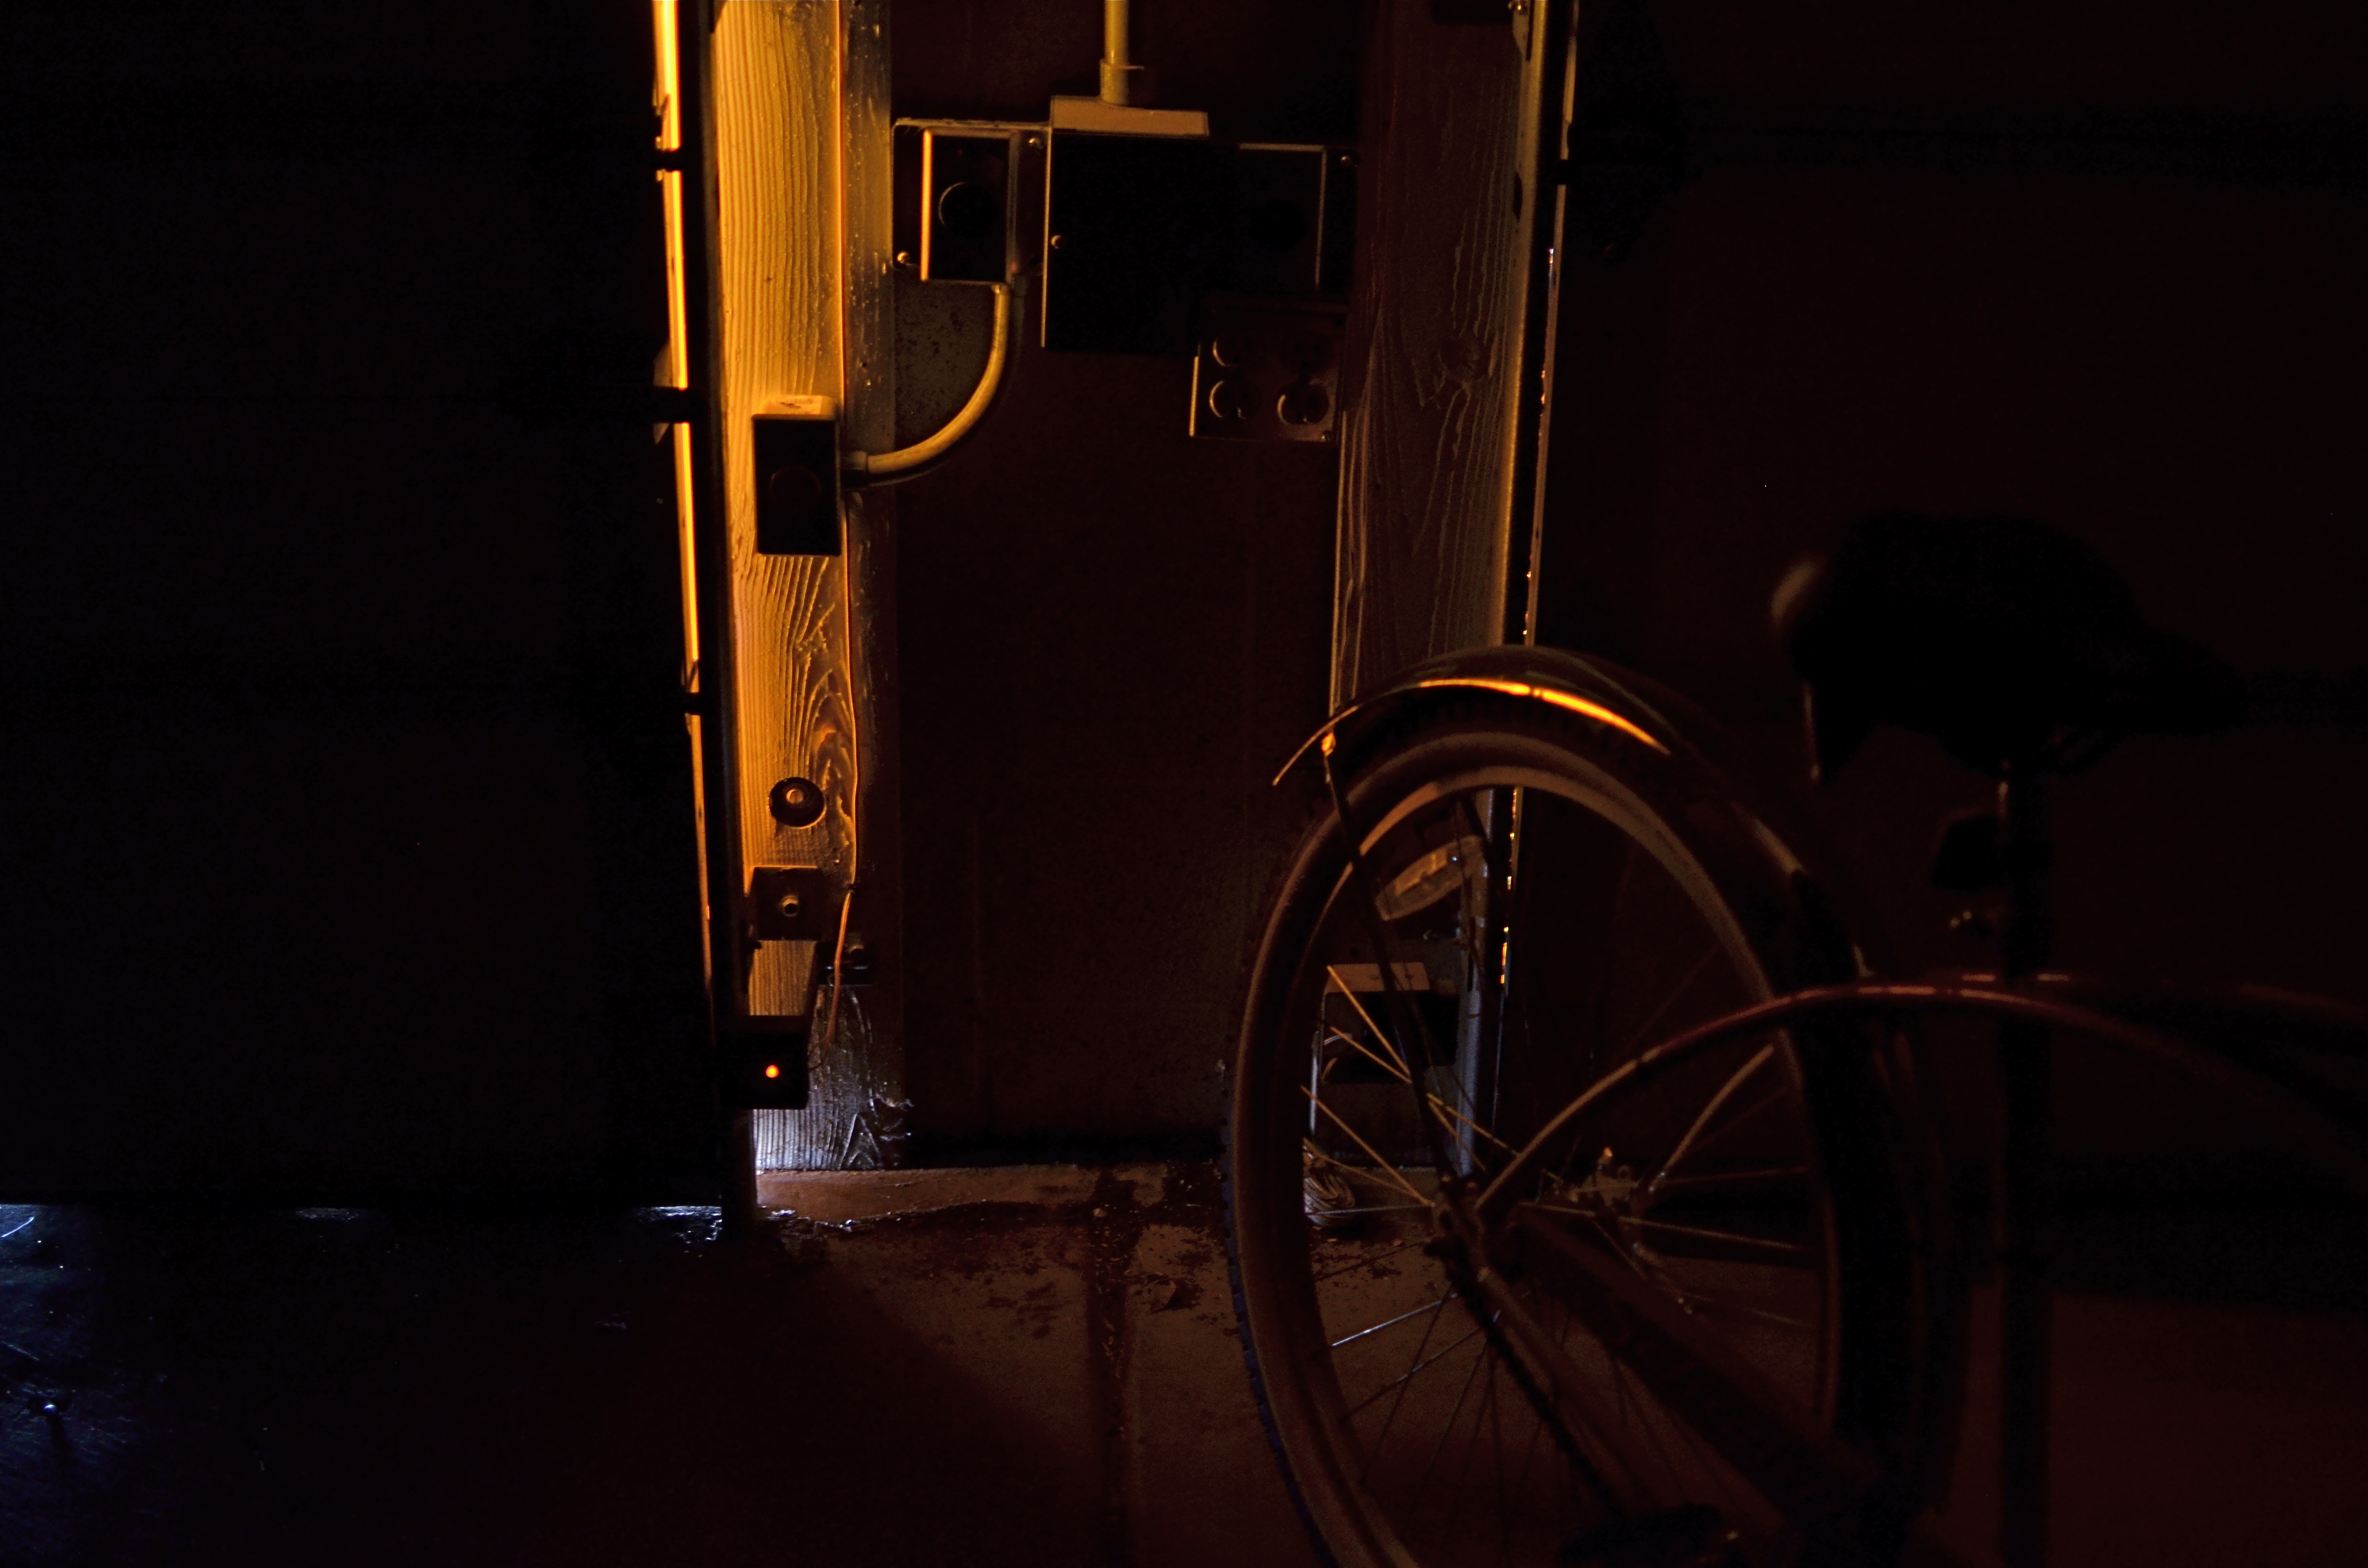
Shot in complete darkness and selectively light-painted with a handheld LED. Exposed for 73 seconds at f/4.5, ISO 100, 18mm. The light streaks are “wrong turns” with my flashlight. Oops.
And then there’s light painting, selective hand illumination during long exposures, where the aim is suddenly beyond the merely real. In fact, light painting is about deliberately manipulating mood and atmosphere, of bringing a magical quality where none exists. It also is the kind of low-light photography with the least predictable results, and the highest possible failure rate. You are constantly in uncharted waters, since no two exposures come out even remotely alike. You’re flying blind with your eyes open.
I have recently begun to head outdoors to re-imagine trees in these artificial, fantasy-flavored “light compositions”, in an effort to lend heft to subjects that, in daylight, would register pretty low on the wow meter. Over the years, I have honed my technique with tabletop light painting in controlled interiors, but if I get one exterior shot in thirty that I can live with, that’s an amazing day, er, night.
I don’t have any wisdom to impart on these shots, since their value is so crazy subjective. You do it until you like it, that’s all. But do yourself a favor sometime and do wade in. You might catch the fever, or you may experience the urge to hurl your tripod over the neighbor’s wall like a javelin of rage.When you don’t have enough light, you’re kind of in free fall.
But even if you don’t stick the landing, it ain’t fatal.
NIGHT GALLERY
By MICHAEL PERKINS
I RECENTLY READ AN INTRIGUING STATEMENT ON THE DIFFERENCE BETWEEN PAINTING AND PHOTOGRAPHY to the effect that painters start with nothing, and add information until the image is created, whereas photographers start with total information and work to selectively remove things until their pictures are made. Of course, there are times when both artists borrow the approach of the other, and the practice of “light painting” is one place where photogs can actually wield a kind of brush, beginning in pure darkness and then adding illumination, literally by hand, until a picture, layer by layer, emerges.
Bascially, you’re going down two potential paths with light painting. One is the depiction of fantasy, a custom light creation that is the central subject of the image, rather than an augmentation of something else. Visit the tutorial link below to view some of these visions, as they are truly fascinating (not to mention work-intensive): the flaming fireball dancing across the lake, the geometric noodlings hanging in mid-air, the angel wings growing out of your girlfriend’s back, and so on. The other approach is to amplify the impact of a subject which has either no illumination at night or a lighting scheme that is counter to the mood you’re going for. In this case, your flashlight, LED or light coil is creating the visual reality that you wish existed. It’s “reality-plus”, rather than a complete fantasy. This is the avenue I have tended to favor.
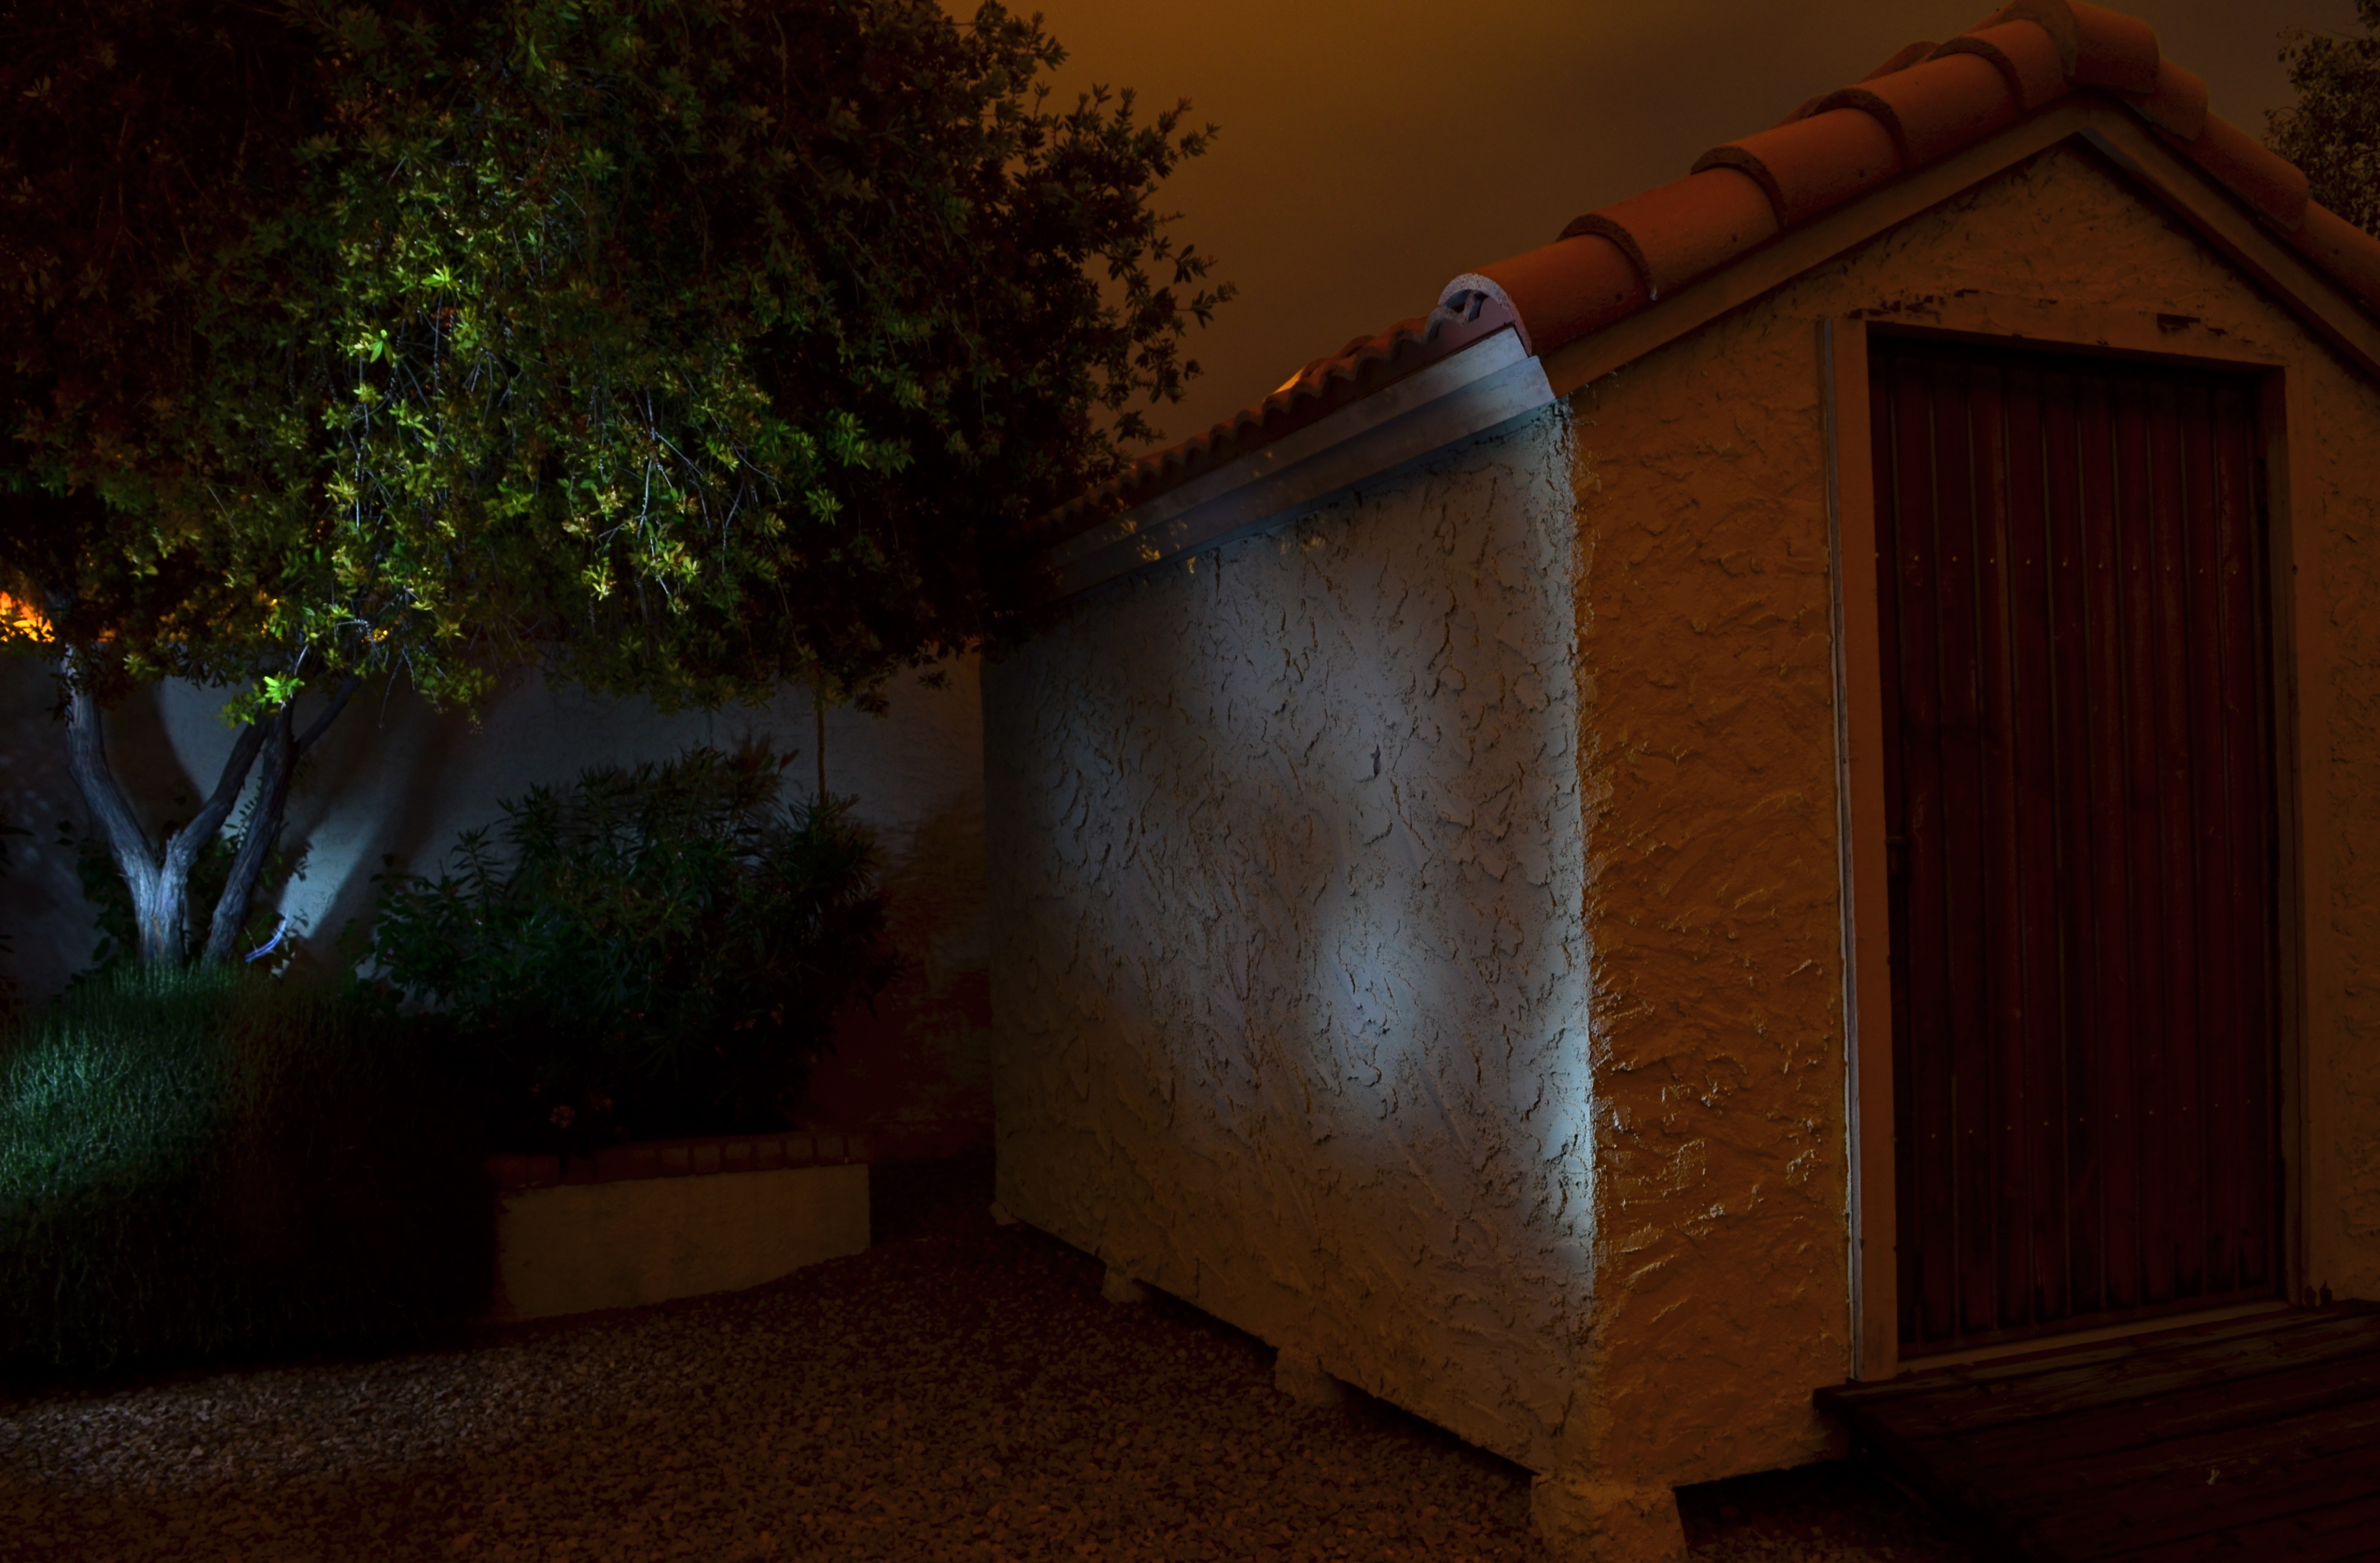
No lighting in the back yard, unless you “paint” it on: 30 sec., f/8, ISO 100, 18mm.
After a year away from light painting, I have started to slink back into it, moving from tabletop arrangements, where control is less of an issue, to exterior locales, which are, frankly, the very definition of trial-and-error.With the camera locked onto its tripod and with a pre-determined exposure and aperture, the responsibility for whether the magic happens is literally in your hands, hands that need real-world training in this technique.
As for lighting: these days, even dollar-store LEDs provide a pretty intense white light in darkness but they don’t throw it very far, and they are also pretty narrowly focused, so, if you want to paint the side of, say, a barn, it’s really hard to do so evenly. Best thing is to avoid the bargain lights: get yourself a powerful torch with a variable focus, something that can shoot both soft and wide. It’ll save you lots of time trying to guess about coverage on larger surfaces. Also, within a single exposure, you can still change off to the pencil-thin lights for special detailing, since, in complete darkness, your shutter will be open long enough for you to switch lights on and off, change position, and touch things up.
The above image was done in a yard with no landscape lighting on hand, other than the light I am applying during a thirty-second exposure. Not a perfect execution, but a quick example of how you can impart night mood to objects that are duller than dishwater in daylight. Lighting is all about setting the terms of view, and hand-painting the light allows you to control that mood, almost as completely as you would with oil, brush or canvas.
More to look at:
NOT A LEG TO STAND ON
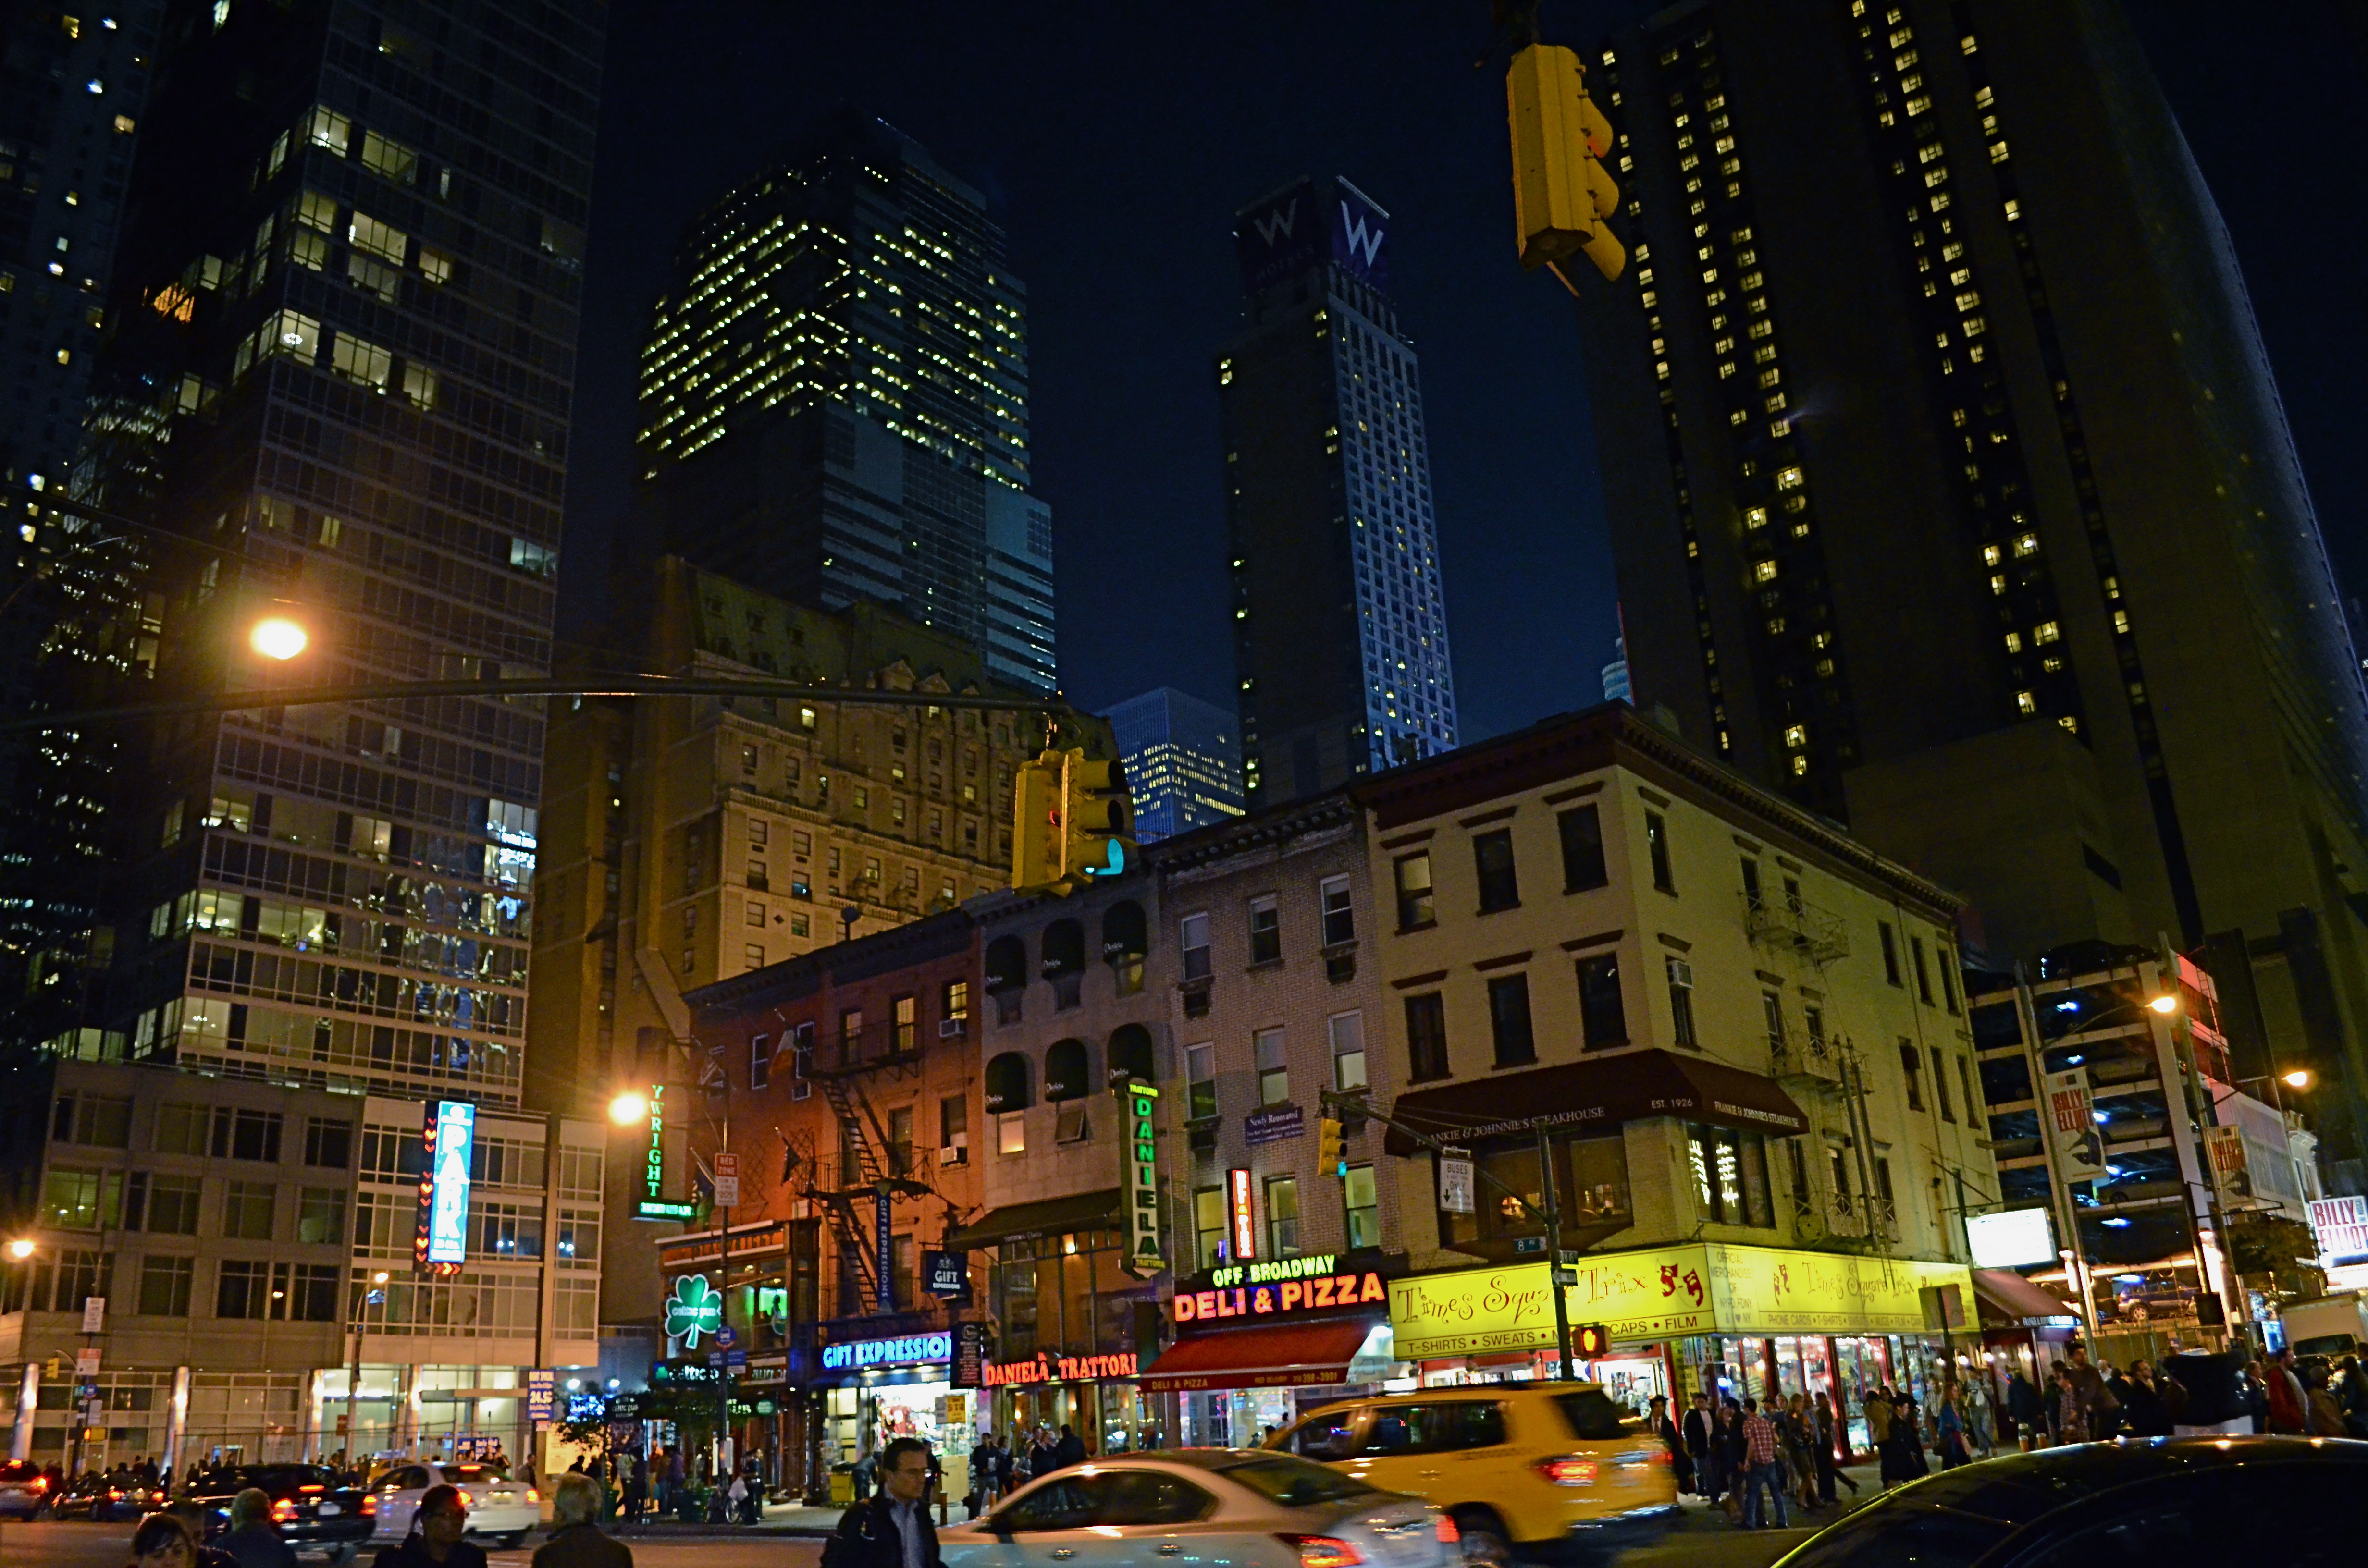
No tripod, no problem. Minimal noise even at 3200 ISO. Handheld in NYC’s theatre district at 1/50 sec., f/3.5, 18mm.
By MICHAEL PERKINS
ADVANCES IN PHOTOGRAPHY, WHETHER IN THE SCIENCES OF LENSES, FILMS, SENSORS OR TECHNIQUE, ALL HAVE, AS THEIR AIM, THE SAME RESULT: to make it easier to take more pictures…more often, and with fewer barriers between what you see and what you can catch in the box. Taking more pictures means increasing the yield of wonderful pictures, even if 95% of what you shoot is doody, and getting to the decisive moment of the “click” beats any other imperative. Any gimmicks or toys that don’t increase your readiness to shoot are wasteful detours.
This means that we are constantly weeding out dead growth, trimming away systems or ideas that have outgrown their usefulness. Rusty ways of doing things that cost us time, require extra steps, and eventually rob us of shots.
And that’s why it’s the age of the tripod is nearly over.
Getting past our artistic bias toward the ‘pod as a vital tool in the successful creation of images is tough; we still associate it with the “serious” photographer, even though today’s cameras solve nearly all of the problems tripods were once reliable in offsetting. What we’re left with, regarding the tripod’s real value, then, is old brain wiring and, let’s face it, sentiment.
More importantly, to my first point, the tripod is not about, “Okay, I’m ready!”. It’s about, “Hold on, I’ll be ready in a minute.” Worse yet, to the petty dictators who act as the camera police in churches, monuments, retail establishments and museums, they scream, “you can’t be here”. Call me crazy, but I still think of lack of access (spelled “getting kicked out”) as, well, sort of a hindrance to photography.
Just sayin’.
Tripods were, once upon a time, wonderful protection again several key problems, among them: slow film/sensor speed, vibration risk, and sharpness at wider apertures, all of which have long since been solved. Moreover, tripods may tempt people to shoot at smaller apertures, which could lead to softer overall images.
Had I stopped to set up a tripod here, my light, and my chance, would have melted away. 1/15 sec,. handheld, with a 35mm prime, wide-open, at f/1.8, ISO 640.
I readily concede that tripods are absolutely vital for extended night exposures, light painting, miniature work, and some other very selective professional settings. But for more than a century, ‘pods have mostly been used to compensate where our cameras were either flawed or limited. So, if those limits and flaws have faded sufficiently to allow you to take a nighttime snap, handheld at f/1.8, with a 1/15 shutter speed and the virtual guarantee of a well-lit shot, with negligible noise, why would you carry around twice the gear, pretty much ensuring that you would lose time, flexibility, and opportunities as a result?
The tripod has served us well, as was once true of flash powder, glass plates, even the torturous neck braces used to hold people’s heads in position during long exposures. But it no longer has a leg to stand on.
Follow Michael Perkins on Twitter @MPnormaleye.
HELLO DARKNESS MY OLD FRIEND

This still life, designed to recall the “cold war” feel of the tape recorder and other props, was shot in a completely darkened room, and lit with sweeps and stabs of light from a handheld LED, used to selectively create the patterns of bright spots and shadows. Taken at 19 seconds, f/6.3, ISO 100 at 50mm.
By MICHAEL PERKINS
MOST OF THE PICTURES WE TAKE involve shaping and selecting details from subjects that are already bathed, to some degree, in light. “Darkness” is in such images, but it resides peripherally in the nooks and crannies where the light didn’t naturally flow or was prevented from going. Dark is thus the fat that marbles the meat, the characterizing texture in a generally bright palette of colors. It is seasoning, not substance.
By contrast, shooting that begins in total darkness means entering a realm of mystery, since you start with nothing, a blank and black slate, onto which you selectively import some light, not enough to banish the dark, but light that suggests, implies, hints at definition. For the viewer, it is the difference between the bright window light of a chat at a mid-afternoon cafe and the intimacy of a shared huddle around a midnight campfire. What I call “absolute night” shots are often more personal work than just managing to snap a well-lit public night spot like an urban street or an illuminated monument after dusk. It’s teaching yourself to show the minimum, to employ just enough light to the tell the story, and no more. It is about deciding to leave out things. It is an editorial, rather than a reportorial process.
The only constants about “absolute dark” shooting are these:
You need a tripod-mounted camera. Your shutter will be open as long as it takes to create what you want, and far longer than you can hope to hold the camera steady. If you have a timer and/or a remote shutter release, break those out of the bag, too. The less you touch that camera, the better. Besides, you’ll be busy with other things.
Set the minimum ISO. If you’re quickly snapping a dark subject, you can compromise quality with a higher and thus slightly noisier ISO setting. When you have all the time you need to slowly expose your subject, however, you can keep ISO at 100 and banish most of that grain. Some cameras will develop wild or “hot” pixels once the shutter’s open for more than a minute, but for many hand-illuminated dark shots, you can get what you need in far less than that amount of time.
Use some kind of small hand-held illumination. Something about the size of a keychain-sized LED, with an extremely narrow focus of very white light. Pick them up at the dollar store and get a model that works well in your hand. This is your magic wand, with which, after beginning the exposure in complete darkness, you will be painting light onto various parts of your subject, depending on what kind of effect you want. Get a light with a handy and responsive power switch, since you may turn the light on and off many times during a single exposure.
You can use autofocus, even in manual mode, but compose and lock the focus when all the room lights are on. Set it, forget it, douse the power and get to work.
Which brings us to an important caveat. Even though you are avoiding the absolute blast-out of white that would result if you were using a conventional flash, lingering over a particular contour of your subject for more than a second or so will really burn a hot spot into its surface, perhaps blowing out an entire portion of the shot. Best way to curb this is to click on, paint, click off, re-position, click back on and repeat the sequence as needed. Another method could involve making slow but steady passes over the subject….back and forth, imagining in your mind what you want to see lit and what you want to remain dark. It’s your project and your mood, so you’ll want to shoot lots of frames and pause between each exposure to adjust what you’re doing, again based on what kind of look you’re going for.
Beyond that, there are no rules, and, over the course of a long shoot, you will probably change your mind as to what your destination is anyhow. No one is getting a grade on this, and the results aren’t going in your permanent file, so have fun with it.

Also shot in a darkened room, but with simpler lighting plan and a shorter exposure time. The dial created its own glow and a handheld light gave some detail to the grillwork. 1/2 sec., 5/4.8, ISO 100, 32mm.
Some objects lend themselves to absolute night than others. For example, I am part of the last generation that often listened to radio in the dark. You just won’t get the same eerie thrill listening to The Shadow or Inner Sanctum in a gaily lit room, so, for the above image of my mid-1930’s I.T.I. radio, I wanted a somber mood. I decided to make the tuning dial’s “spook light” my primary source of interest, with a selective wash of hand-held light on the speaker grille, since the dial was too weak (even with a longer exposure) to throw a glow onto the rest of the radio’s face. Knobs are less cool so they are darker, and the overall chassis is far less cool, so it generally resides in shadow. Result: one ooky-spooky radio. Add murder mystery and stir well.
Flickr and other online photo-sharing sites can give you a lot of examples on what subjects really come alive in the dark. The most intoxicating part of point-and-paint lighting is the sheer control you have over the process, which, with practice, is virtually absolute. Control freaks of the world rejoice.
Head for the heart of darkness. You’ll be amazed what you can see, or, better yet, what you can enable others to see.
Thoughts?
NOTE: If you wish to see comments on this essay, click on the title at the top of the article and they should be viewable after the end of the post.
Related articles
- Lighting Techniques: Light Painting (nikonusa.com)
- Light Writing (cutoutandkeep.net)
