THE GENTLE WELCOME
By MICHAEL PERKINS
But soft! What light through yonder window breaks? —Shakespeare
OKAY. AS IT TURNS OUT, IN THE ABOVE LINE, ROMEO WAS ACTUALLY RHAPSODIZING about his main squeeze, rather than ideal photographic conditions. Still, I often think of the quote when a sudden shaft of gold explodes from behind a cloud or a sunset lengthens shadows, just so. I have lots of But, soft! moments as a photographer, since light is the first shaper of the image, the one element that defines the terms of engagement.
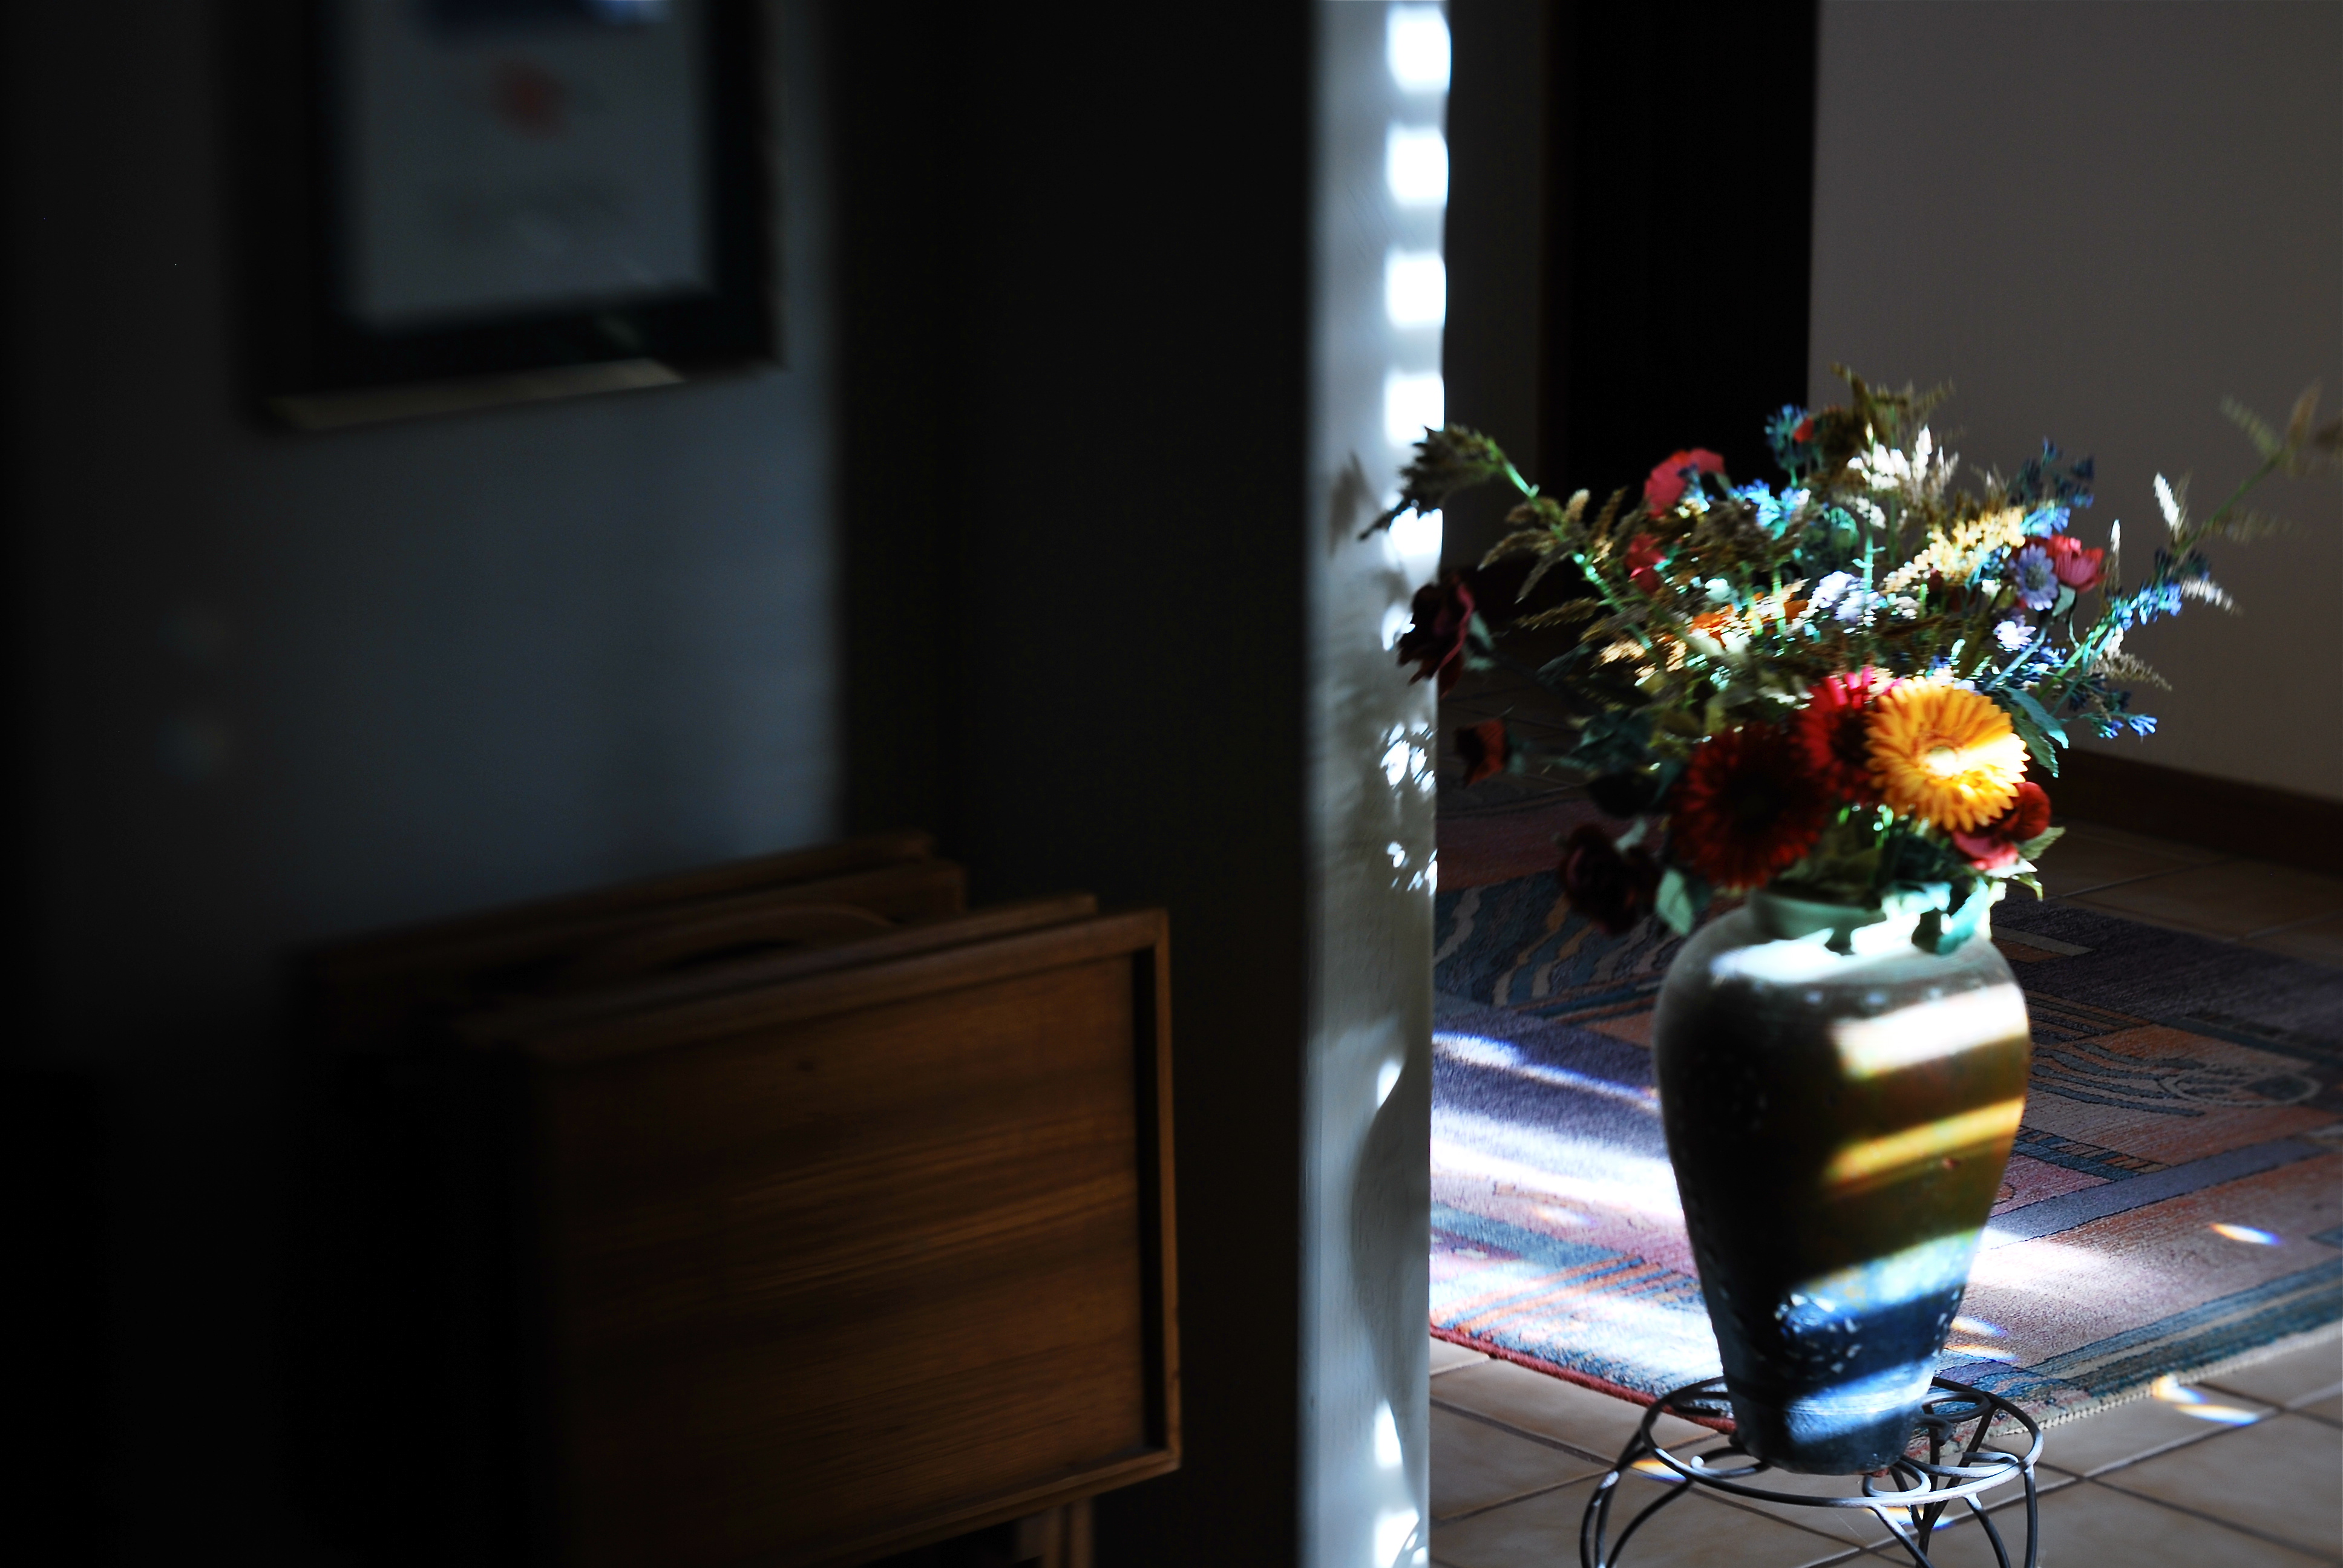
Selective focus on the cheap: image made with the economical Lensbaby Spark lens. 1/40 sec., f/5.6, ISO 100, 50mm.
After light, for me, comes focus. Where it hits, where it peaks, where it falls off, and how all these aspects shape a composition. Soft or selective focus especially seems more intimate to me, a gentle welcome to share something special between picture and viewer. In recent years, focus has become almost as fine-tune-able as light itself, with the introduction of new, affordable alternatives to expensive “tilt-shift” lenses, which allow the selective blurring of elements within the frame. For example, the revolutionary Lensbaby products are now helping shooters make their own choices on where the focal “sweet spot” should occur in a picture, and at a fraction of the cost of a true tilt-shift. It’s a fiscal shortcut that makes it possible for almost anyone to learn how to create this effect.
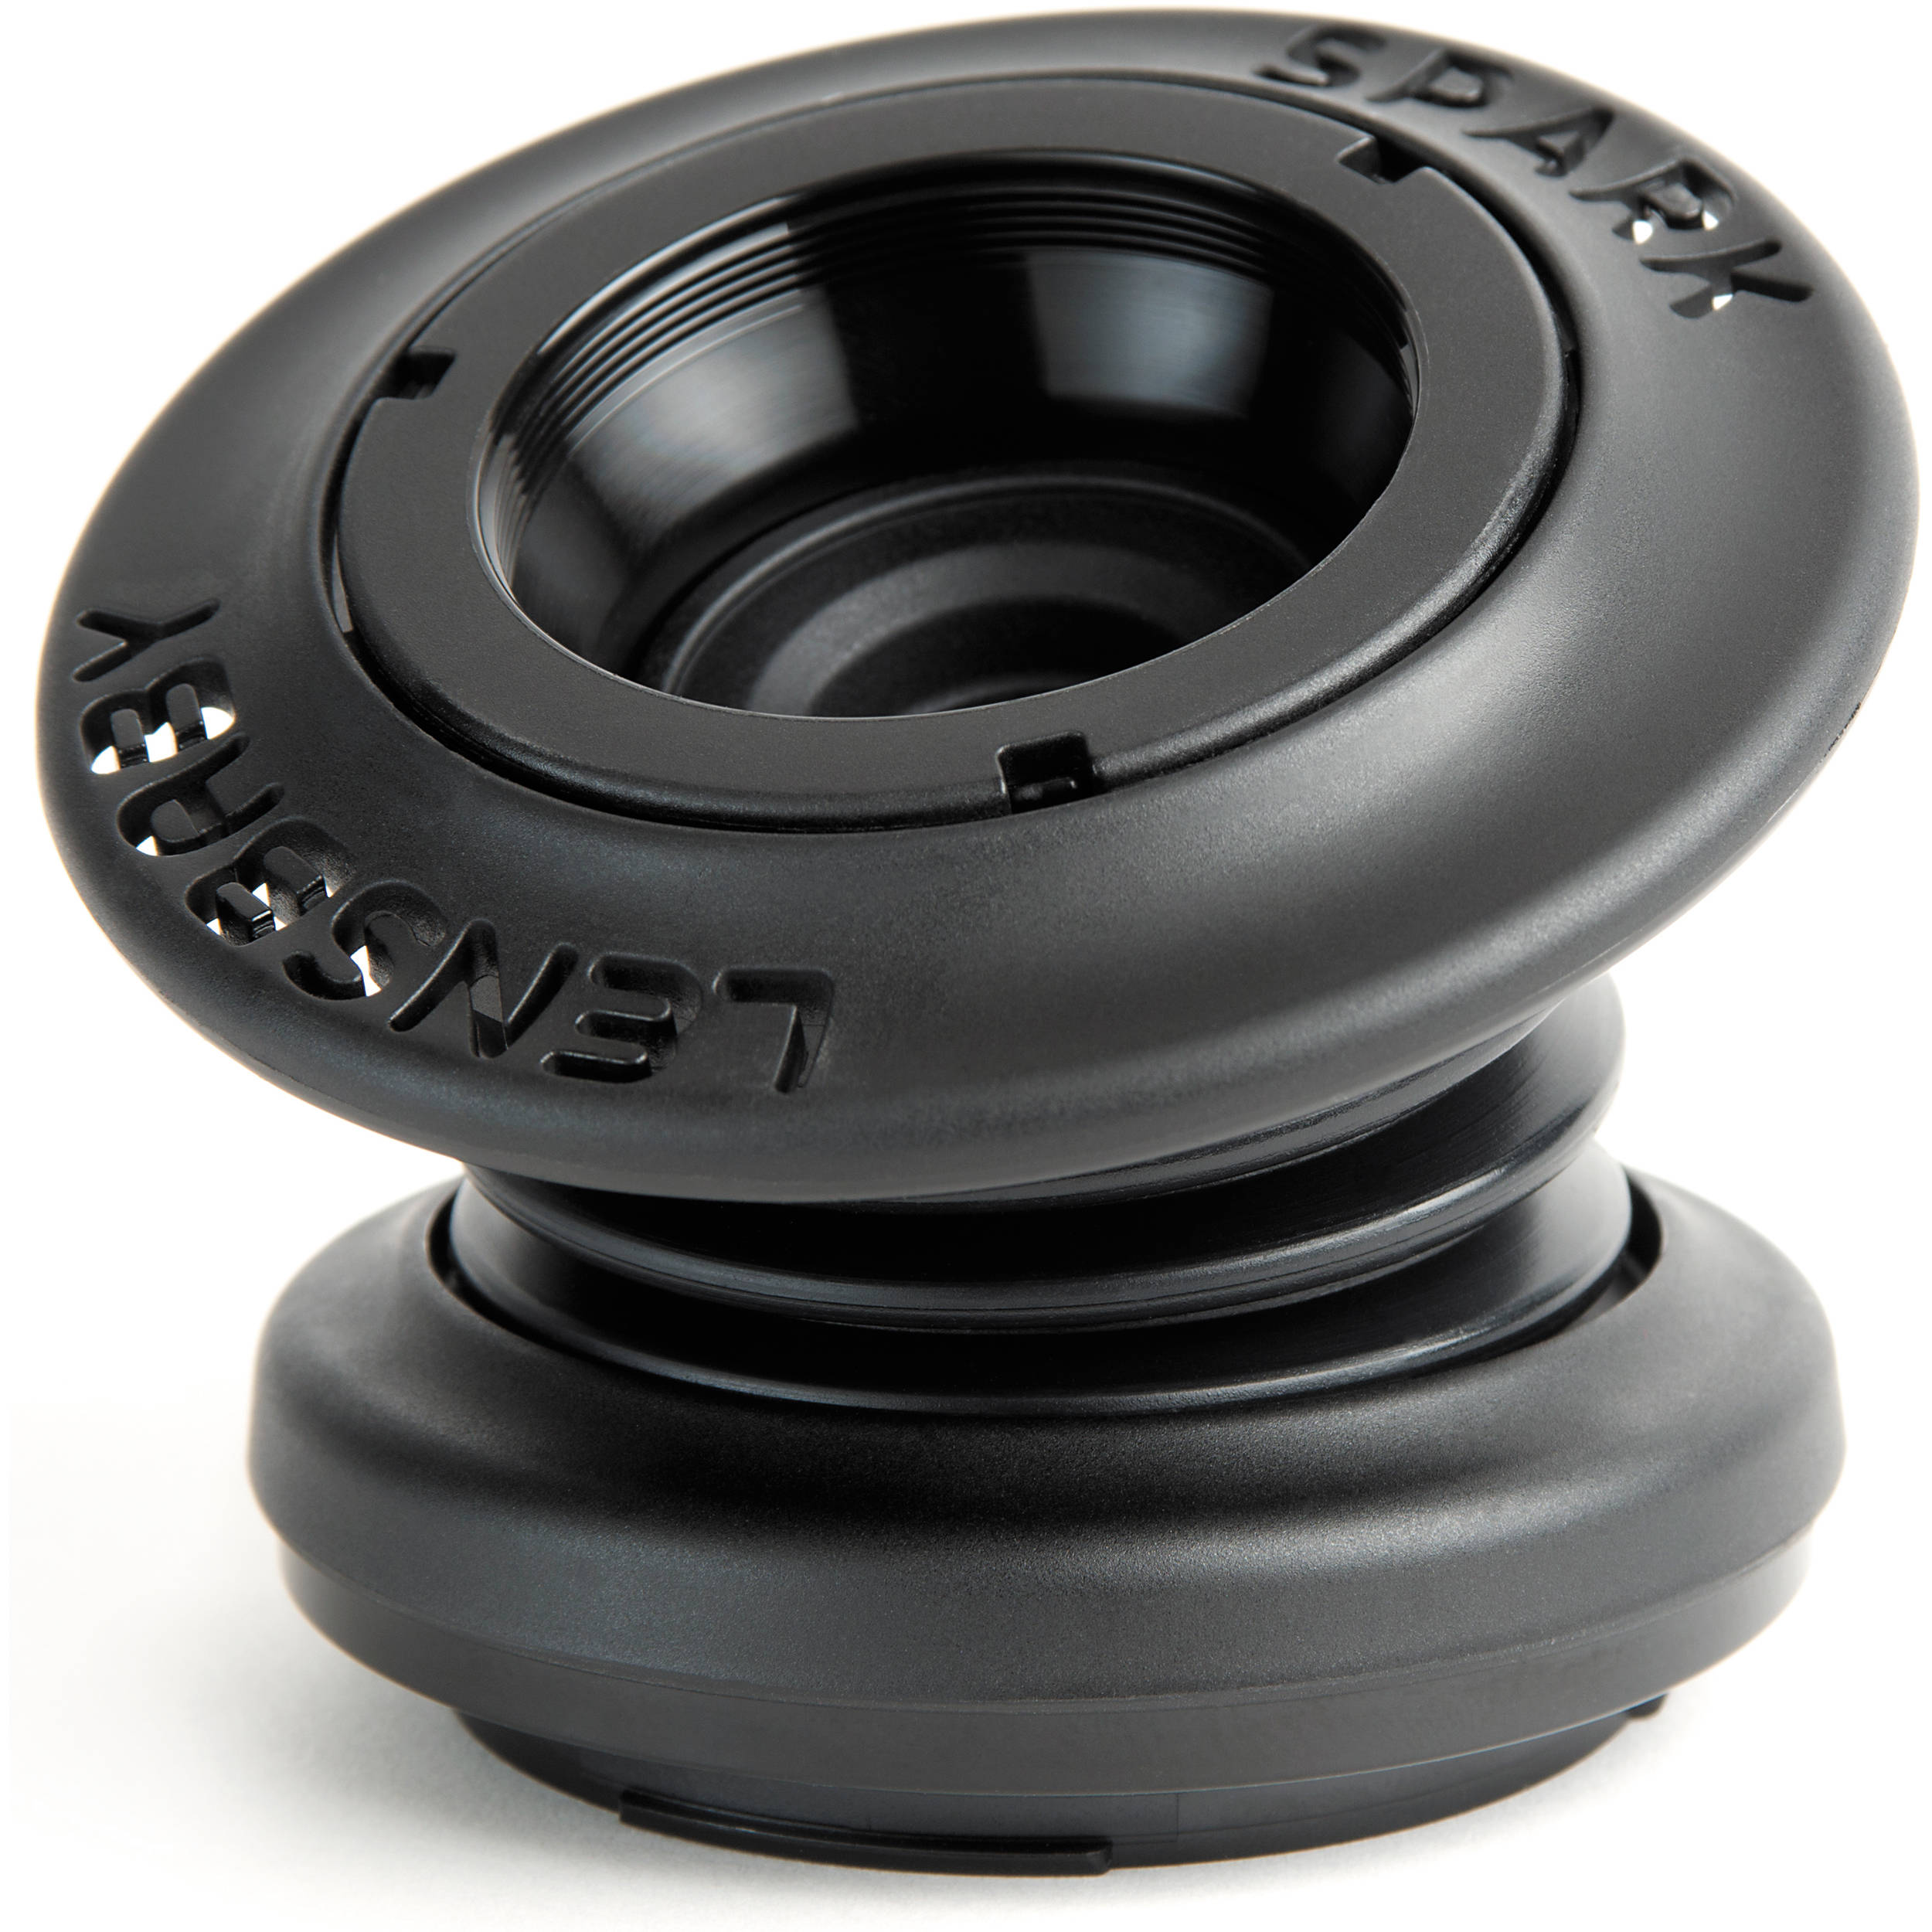
Focus on the Lensbaby Spark is achieved by squeezing the lens bellows until focus registers wherever you want to place it.
Some Lensbabies can run to several hundred dollars and have precise systems for dialing in the part of a photograph that will, through sharp focus, attract optimum attention to a subject, gently blurring the image on all sides around that point. However, for those with steady fingers and shallow pockets, the company’s gateway drug, coming in at around $90, is the Lensbaby Spark, a springy bellows lens that snaps onto your DSLR in place of a regular lens and can be compressed around the edges to place the focal sweet spot wherever you want it.
The Spark takes more muscle control and practice than the more mechanical Lensbaby models, but it’s a thrifty way to see if this kind of imaging is for you. Just squeeze the fixed f/5.6, 50mm lens until the image is sharp at the place you want it, and snap. Some DSLRs allow the Spark to be used on aperture priority, but for most of us, it’s manual all the way, with a lot of trial-and-error until you develop a feel for the process. The company also sells several insert cups so that you can choose different apertures. Pop one f-stop out, pop another one in.
For those of you who like to custom-sculpt focus and light, the gauzy, intimate effect of the Lensbaby will in fact be a gentle welcome. Finally, it’s one more component that could be either toy or tool. Your shots, your choice.
THE BEST KIND OF SECOND-GUESSING

You don’t need a dedicated macro lens to shoot this image. Just maximize the average glass that you have. 1/100 sec., f/2.8, ISO 100, 35mm.
By MICHAEL PERKINS
I TRY MY BEST TO ANTICIPATE EXACTLY WHAT KINDS OF SHOTS I will be taking in a given photo situation. This helps minimize the delay and hassle of changing gear in the field by heading out with a single lens that will do most of what I want. It saves me lugging along every hunk of glass I own on a project (trying vainly to be ready for anything), and makes me far more familiar with the real limits of whatever lens I decide will be my primary go-to for the day. Not a perfect plan…still, a loose plan is better than totally trusting to instinct or luck.
You can, of course, plan too generally and accidentally limit yourself. For example, on a day in which you’re to shoot a ton of landscapes, it’s easy to assume you’ll want an ultra-wide lens to capture those vast vistas. However, if something amazing appears on a far horizon and you can’t zoom any closer than, say, 55mm, you’ve suddenly got the wrong lens. Moreover, if your day takes you inside a dark cave, and your ultra-wide can’t shoot any faster than f/3.5, you’re likewise hamstrung to some degree.
In the above image, I decided, as I often do, to spend the entire day with a 35mm prime, a lens which affords me more latitude in more situations than any other glass I own. Of course, I can’t zoom with that lens, so I have to be reasonably sure that anything I want to shoot with it can be framed by simply walking closer or farther away. The 35 can open up to f/1.8, so it’s great in the shade, or where I want a shallow depth of field, and that can make it a viable, if modest, close-up lens…not true macro, but a good tool for selective subjects just a short distance away (in this case, about five feet). Also, shooting with the biggest image file setting available allowed me to crop away up to 75% of my original, as I did here, and still maintain good resolution. However, is the 35 of any value if I suddenly spy a bald eagle on the wing 300 yards away? Not so much.
But it’s not about finding a universal, one-lens-fits-all solution. It is about anticipating. The most valuable habit you can develop before every sustained shoot is to mentally rehearse (a) what kind of situations you’re likely to encounter and (b) what you want to be able to do about it. That sounds absurdly simple, but it really is about taking as many obstacles out of your own path before they even appear as obstacles. In other words, practice getting out of your own way.
THE ONLY REAL PRIORITY
By MICHAEL PERKINS
THERE ARE MANY VALUABLE SERVICES OUR CAMERAS WILL RENDER without our consent or participation. Without even considering how many people shoot on full automatic 100% of the time, there are a hundred small calculations that these marvelous devices make to prevent the kind of errors in judgment that used to routinely trip us up, from autofocus and white balance, face detection and contrast control. However, there is a variable percentage of decisions on which we should really take personal action, despite the camera’s best efforts to, in effect, save us from ourselves.
In iffy light situations, for example, several key “semi-auto” modes are truly handy in helping us compensate for grey days or dark corners. One of these is called aperture control, in which you dial in the f-stop you want, based on your preferred depth of field, leaving the camera to set the shutter speed needed to properly expose at that aperture. At first blush, this seems to be a great short cut, and is in fact a neat option for people who are “running and gunning”..shooting lots of frames in a very quick time span. However, what looks like cutting your work in half can also mean cutting the legs off your creativity.
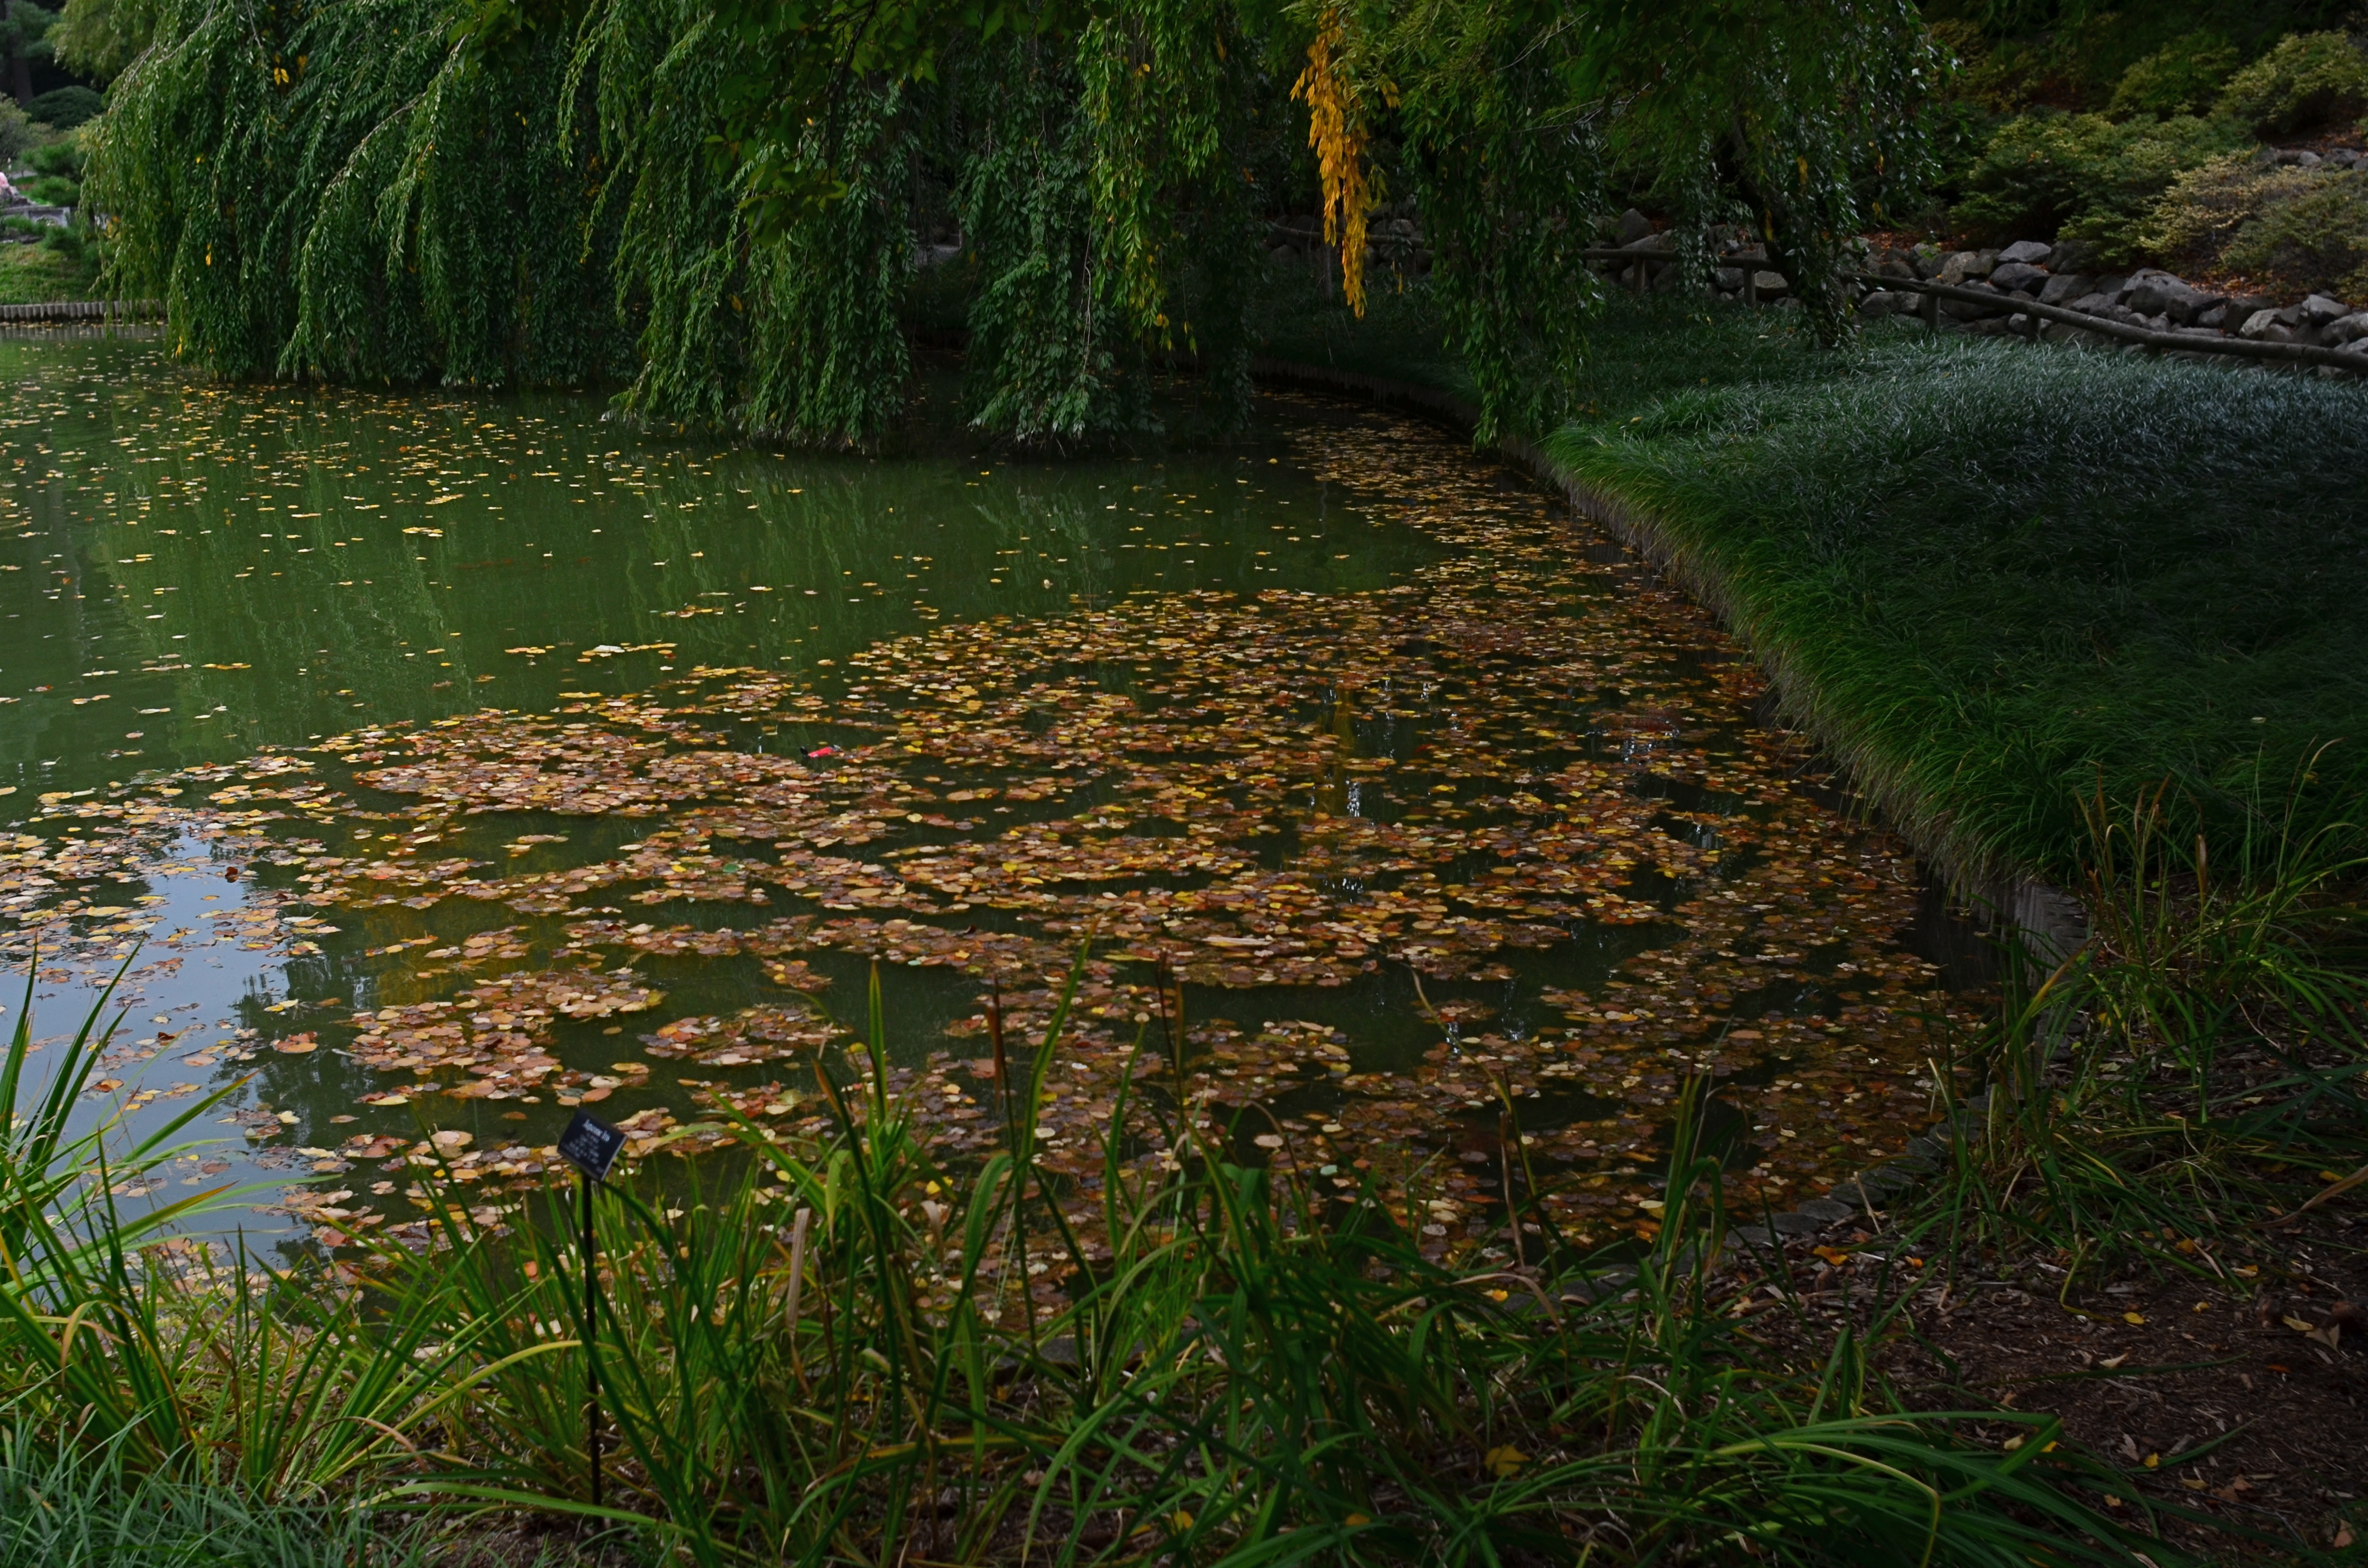
Aperture priority would have worked too hard to make this exposure “balanced”, which was the opposite of what I wanted.
In the above situation, I had a severely overcast day in a lushly green Japanese garden. Without shadows for contrast, I would need colors to be as deep as possible to bring off the mood I was going for, so a slightly underexposed look seemed to be in order. Dialing in f/5.6 as a desired D.O.F. in aperture priority was giving me very slow shutter speeds as the camera tried to give me an ideal exposure. This made a handheld shot a little tougher and gave me way too much high color to suggest anything quiet or moody.
Going to full manual, I dialed in a shutter speed that would render the greens nice and deep, around 1/80, and bumped up the ISO a tad as insurance. It was true that I was shooting a lot at the same f-stop, but not so fast that I would have to surrender fine control by shooting in aperture priority for mere convenience’s sake.
I love some of the protections against my own folly offered by today’s devices, but I just can’t go completely driver-less and feel that I am taking enough responsibility for my results. Hey, if I blow it completely, I can still explain a lousy shot in two simple words.
“…stupid camera…”
WITHOUT A LEG TO STAND ON
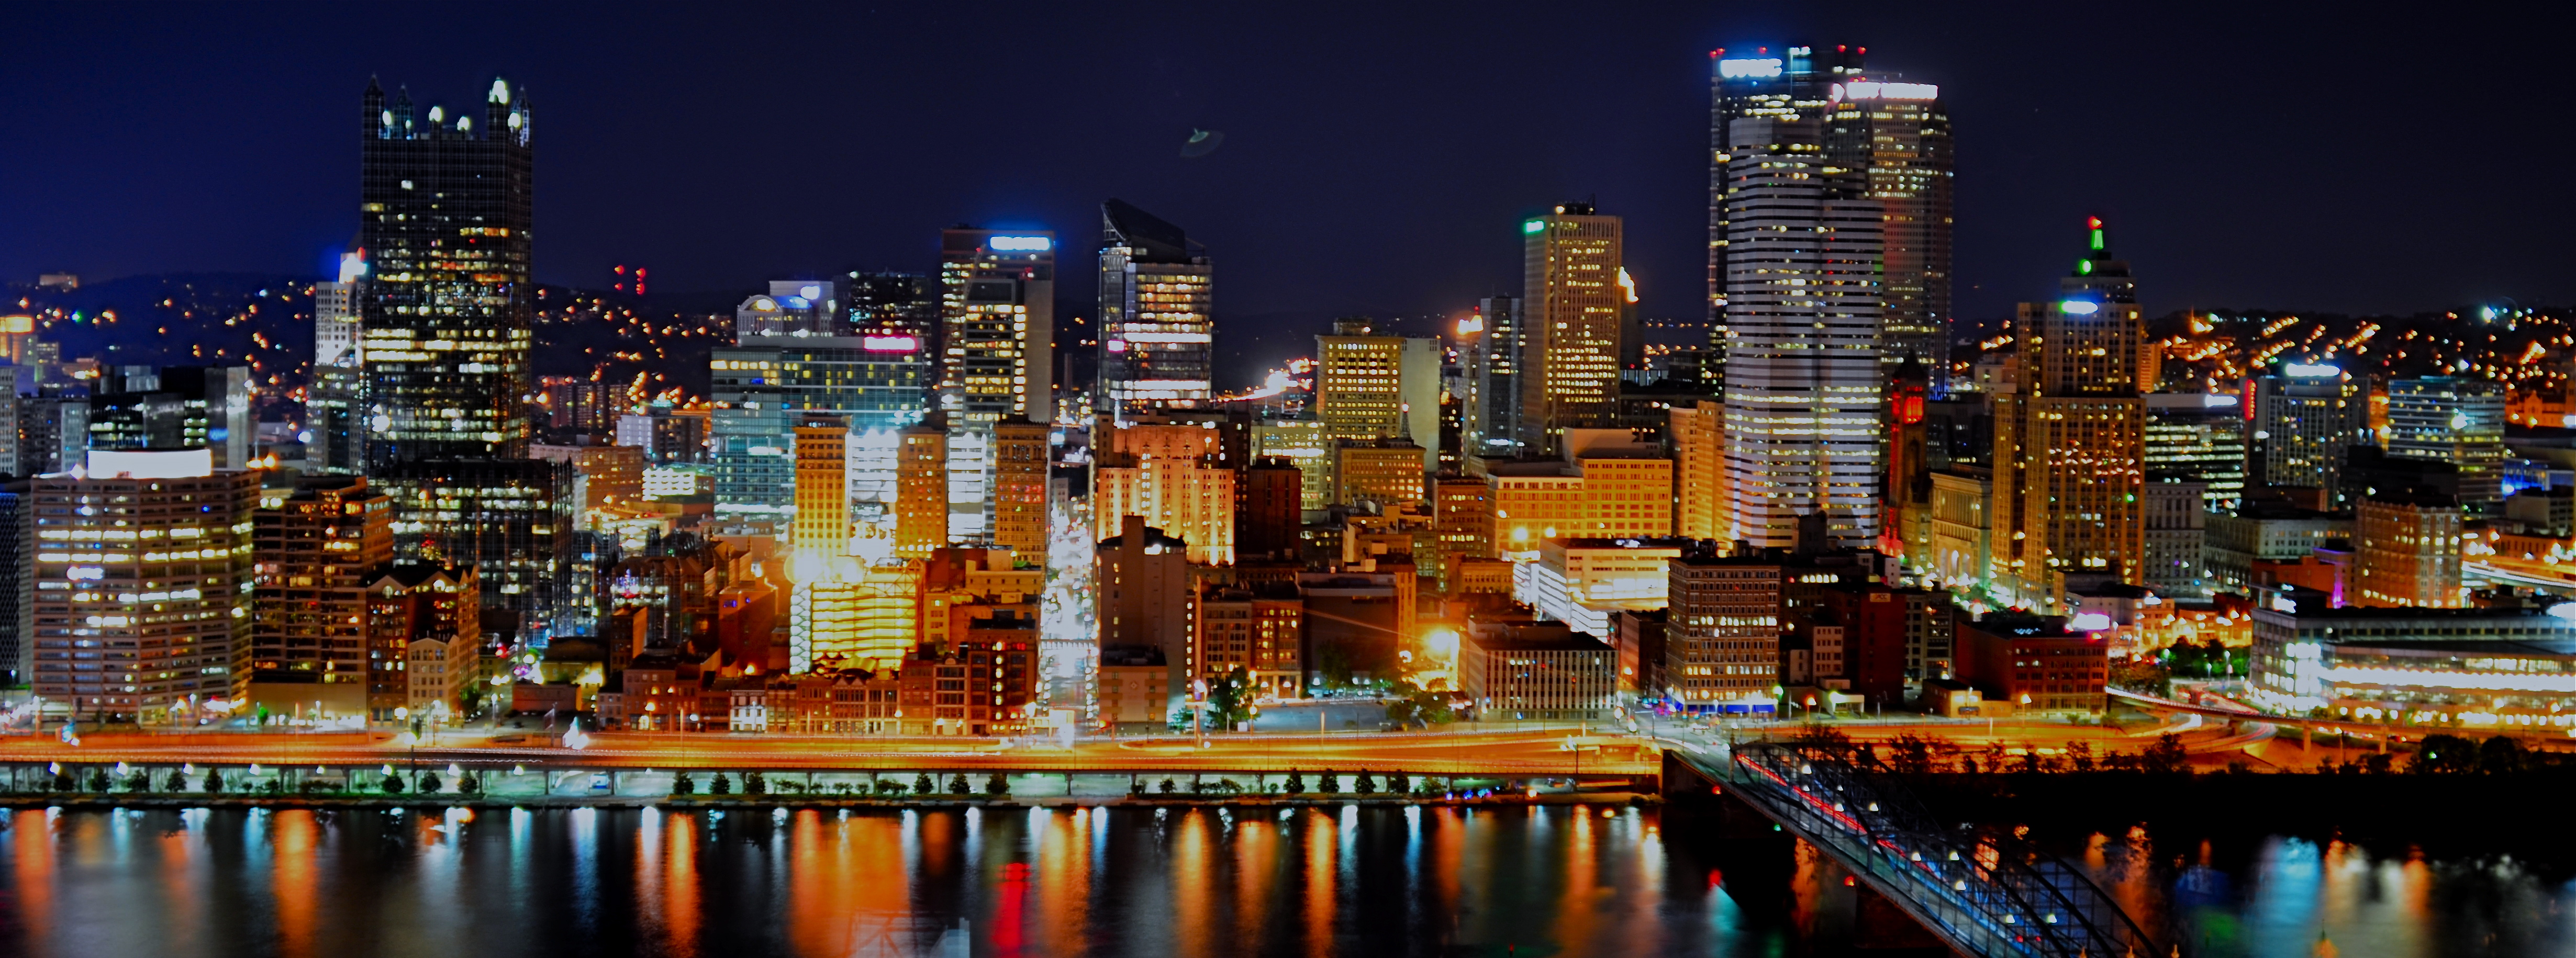
A tripod night exposure that could have been a contender, had I truly been prepared.
By MICHAEL PERKINS
SHOOTING ON A TRIPOD IS OFTEN RECOMMENDED as the way to afford yourself the most stability in a long exposure. After all, few of us are robotic enough to hold a camera stock-still for anything below a third of a second, so it’s a no-brainer to park your camera on something that’s too inhuman to flinch. You can also take amazing stuff hand-held on shorter night exposures, so long as you (a) have a lens that will shoot around f/1.8 or wider and (b) you can live with the noise a higher ISO will engender.
So, yeah, tripods have their place, but they are not the only determinants in the success of a night-time shoot. And those other x-factors can severely compromise your results. There is the stability of the tripod itself, which isn’t a big sweat if you shelled out $900 for a carbon-fiber Gitzo Pan/Tilt GK, but might generate heartburn if you got something closer to a set of metallic popsicle sticks for $29 at Office Max. The shot above was taken using my own modest (cheap) rig atop Mount Washington across from downtown Pittsburgh, and a few of the healthier gusts threatened to take it and me on a quick lap around the riverfront. Some people buy sandbags. Some believe in the power of prayer. Your choice.
Another x-factor for ‘pod shots is the actual weather you’re shooting in, which will, let’s say, shape your enthusiasm for staying out long enough to get the perfect shot. The smaller your aperture, the longer the exposure. The more long exposures you take, the longer you, yourself, are “exposed”…to snow, sleet, and all that other stuff that mailmen laugh at. Again, referencing the above image, I was contending with freezing drizzle and a windbreaker that was way too thin for heroics. Did I cut my session short? i confess that I did.
I could also mention the nagging catcalls of the other people in my party, who wanted me to, in their profound words, “just take the damned picture” so they could partake of (a)a warm bar, (b) a cold beer, (c) a hot waitress. Result: a less than perfect capture of a fairly good skyline. A little over-exposed, washing out the color. A little mushy, since the selfsame over-exposure allowed the building lights to burn in, rendering them glow-y instead of pin sharp. I was able to fix some of the color deficiencies later, but this is not a “greatest hits” image by any stretch.
Tripods can be lifesavers, but you must learn to maximize their effectiveness just like any other piece of camera equipment. If you’re going to go to a buncha trouble to get a shot, the final result should reflect all that effort, quality-wise.
THE FASTEST MAN ALIVE
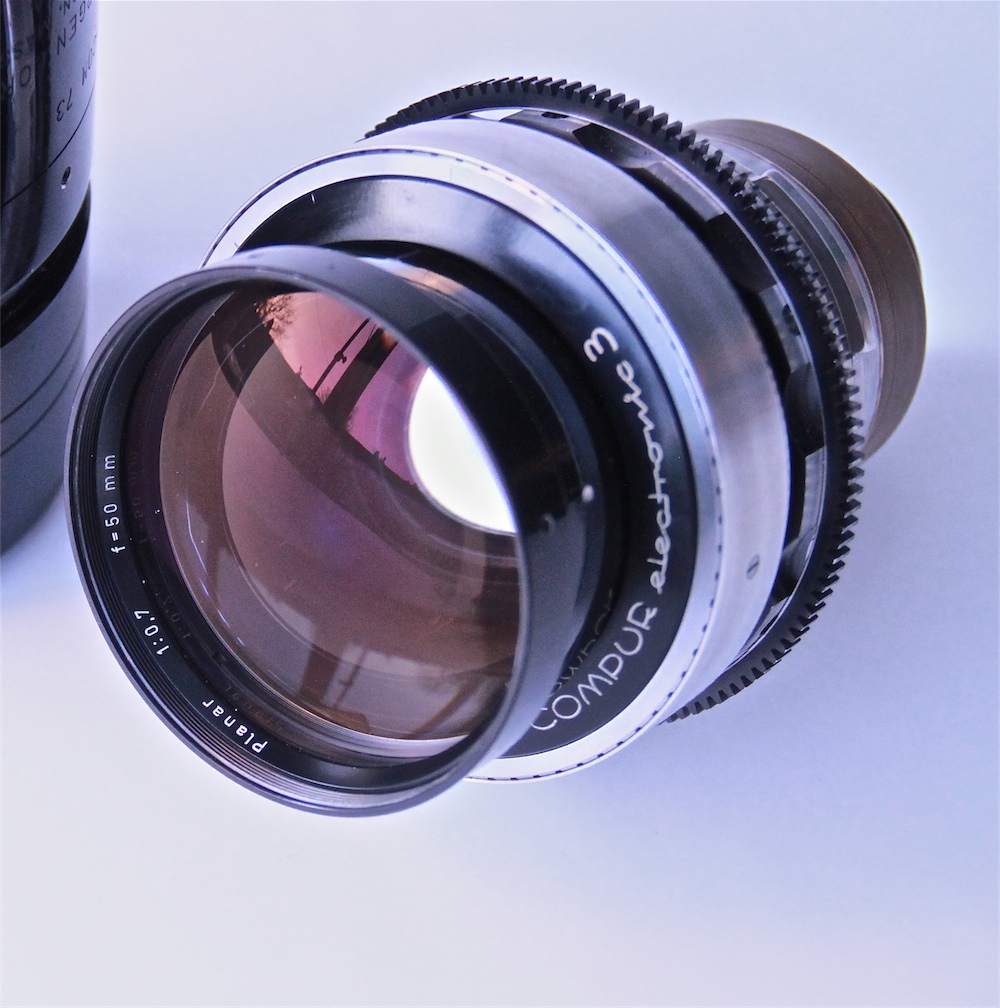
The Mutant: Stanley Kubrick’s unbeatable light sucker, the Zeiss 50mm f/0.7 lens.
By MICHAEL PERKINS
IF THE SUPREME BEING IS CORRECTLY QUOTED, as having proclaimed, at the dawn of time, “Let There Be Light!”, then photographers, since the beginning of their own Creation, have more specifically pleaded, “let there be more light.” Indeed, incredible leaps in imaging technology over the last two centuries have taken us from ten-minute daguerreotype exposures to sharp, bright images snapped in thousandths of a second, and, still, the fight for more light and faster lenses continues unabated.
Between here and there, a few photographers have made their mark by pushing this envelope a little farther than the rest of us. One of them, however, tore that envelope to shreds, and his achievement in this area has never been surpassed, or even matched, by any of his peers.
That man’s name is Stanley Kubrick.
Before he began his directing career in the early 1950’s, Kubrick had years of experience under his belt as the youngest staff photographer for Look magazine, second only to Life as the premier photo-dominant national news weekly. Years before he wielded a Leica IIIf on that job, he had spent his early childhood learning the ins-and-outs of his own Graflex, one of the monster machines that battle-hardened newspaper photogs lugged to crime scenes and fires in dozens of “B” movies (stop the press). By his early ’30’s, Kubrick had amassed a personal collection of lenses and cameras that he would continue to modify and alter for use in his feature films, and by the ’70’s, he was ready to take a giant step attaining a kind of nirvana in the use of available light.
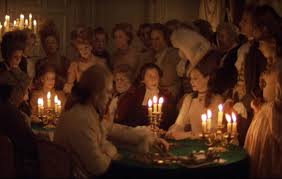
Hey, anyone got a match? The Zeiss delivers Kubrick’s candles-only visions for Barry Lyndon (1975).
As he prepared to adapt William Thackeray’s novel of 19th karmic komeuppance, Barry Lyndon, to the screen in 1974, Kubrick pondered filming the interior scenes of the story’s powdered-wig salons with no lighting whatever beyond that of candle power. Now, we’re not using the term “candle power” to refer to the measurement of light. No, I’m referring here to actual candles, and nothing else. To do so, he would have to have gear that simply did not exist in the gear closets of any major studio, or, in fact, the entire movie industry. To become the fastest man alive, lens-wise, he would have to go shopping at the same place NASA shopped.
Most commercial lenses available at the time opened no wider than around f/1.4, enough to give you and me more than enough light-gathering power for dark times around the house but far too slow to operate on a movie set without a huge battery of kliegs and floods to boost the illumination. However, Kubrick had heard that NASA had developed a lens specifically designed to allow scientists to get sharp images on the dark side of the moon, a Zeiss 50mm with a focal length of …gasp…f/0.7. Zeiss made just ten of these mutants. Six went to Houston. The company kept another one for a rainy day. And the remaining three were gobbled up by Stanley Kubrick.
Taking the aforementioned benchmark of f/1.4 as the 1970’s yardstick for “man, that’s fast”, the ability to open up to f/0.7 represented a quantum leap of at least two-and-a-half stops of extra light (check my math), allowing Kubrick’s film to be, absolutely, the only cinema feature to date to be lit exclusively by ambient light. Of course, it wasn’t all sugar cookies and Kool-Aid, since that also meant working in a range of focus so shallow that only selective parts of actors’ faces were in sharp registration at any given time, giving the players the extra problem of remembering how little their heads could move without screwing up the shot. It was the only thing that could force even more re-takes than Kubrick’s renowned mania for perfection. We’re not talking a fun shoot here.
The resulting, soft, soft, soffffft look of Barry Lyndon is intimate, delicate, and absolutely gorgeous (click the image for a slightly larger version). Practical? Not so much, but for the specific mood of that material, spot on. Critics of the final film either hailed the technique as a new benchmark or sniggered at what they regarded as a showy gimmick. Of course, audiences avoided the film like Jim Carrey fleeing vaccines, so the entire thing remains, for many, a kind of grandiose Guiness-book stunt. Still, while ever-faster lenses and films eventually allowed directors much greater freedom, Uncle Stanley’s claim as fastest gun still merits its place in the hall of frame.
As a strange post-script to the story, several companies have recently boasted that you, too, might rent the same kind of hack-hybrid that Kubrick had fashioned to support the light-sponging Zeiss glass, their ads suggesting that you might secure the needed funding with the sale of several of your more expendable internal organs. Cheap at the price. The Lord got all the light he wanted pretty much on demand. The rest of us have to curse the darkness and, well, light another candle.
MAKING LIGHT OF THE SITUATION
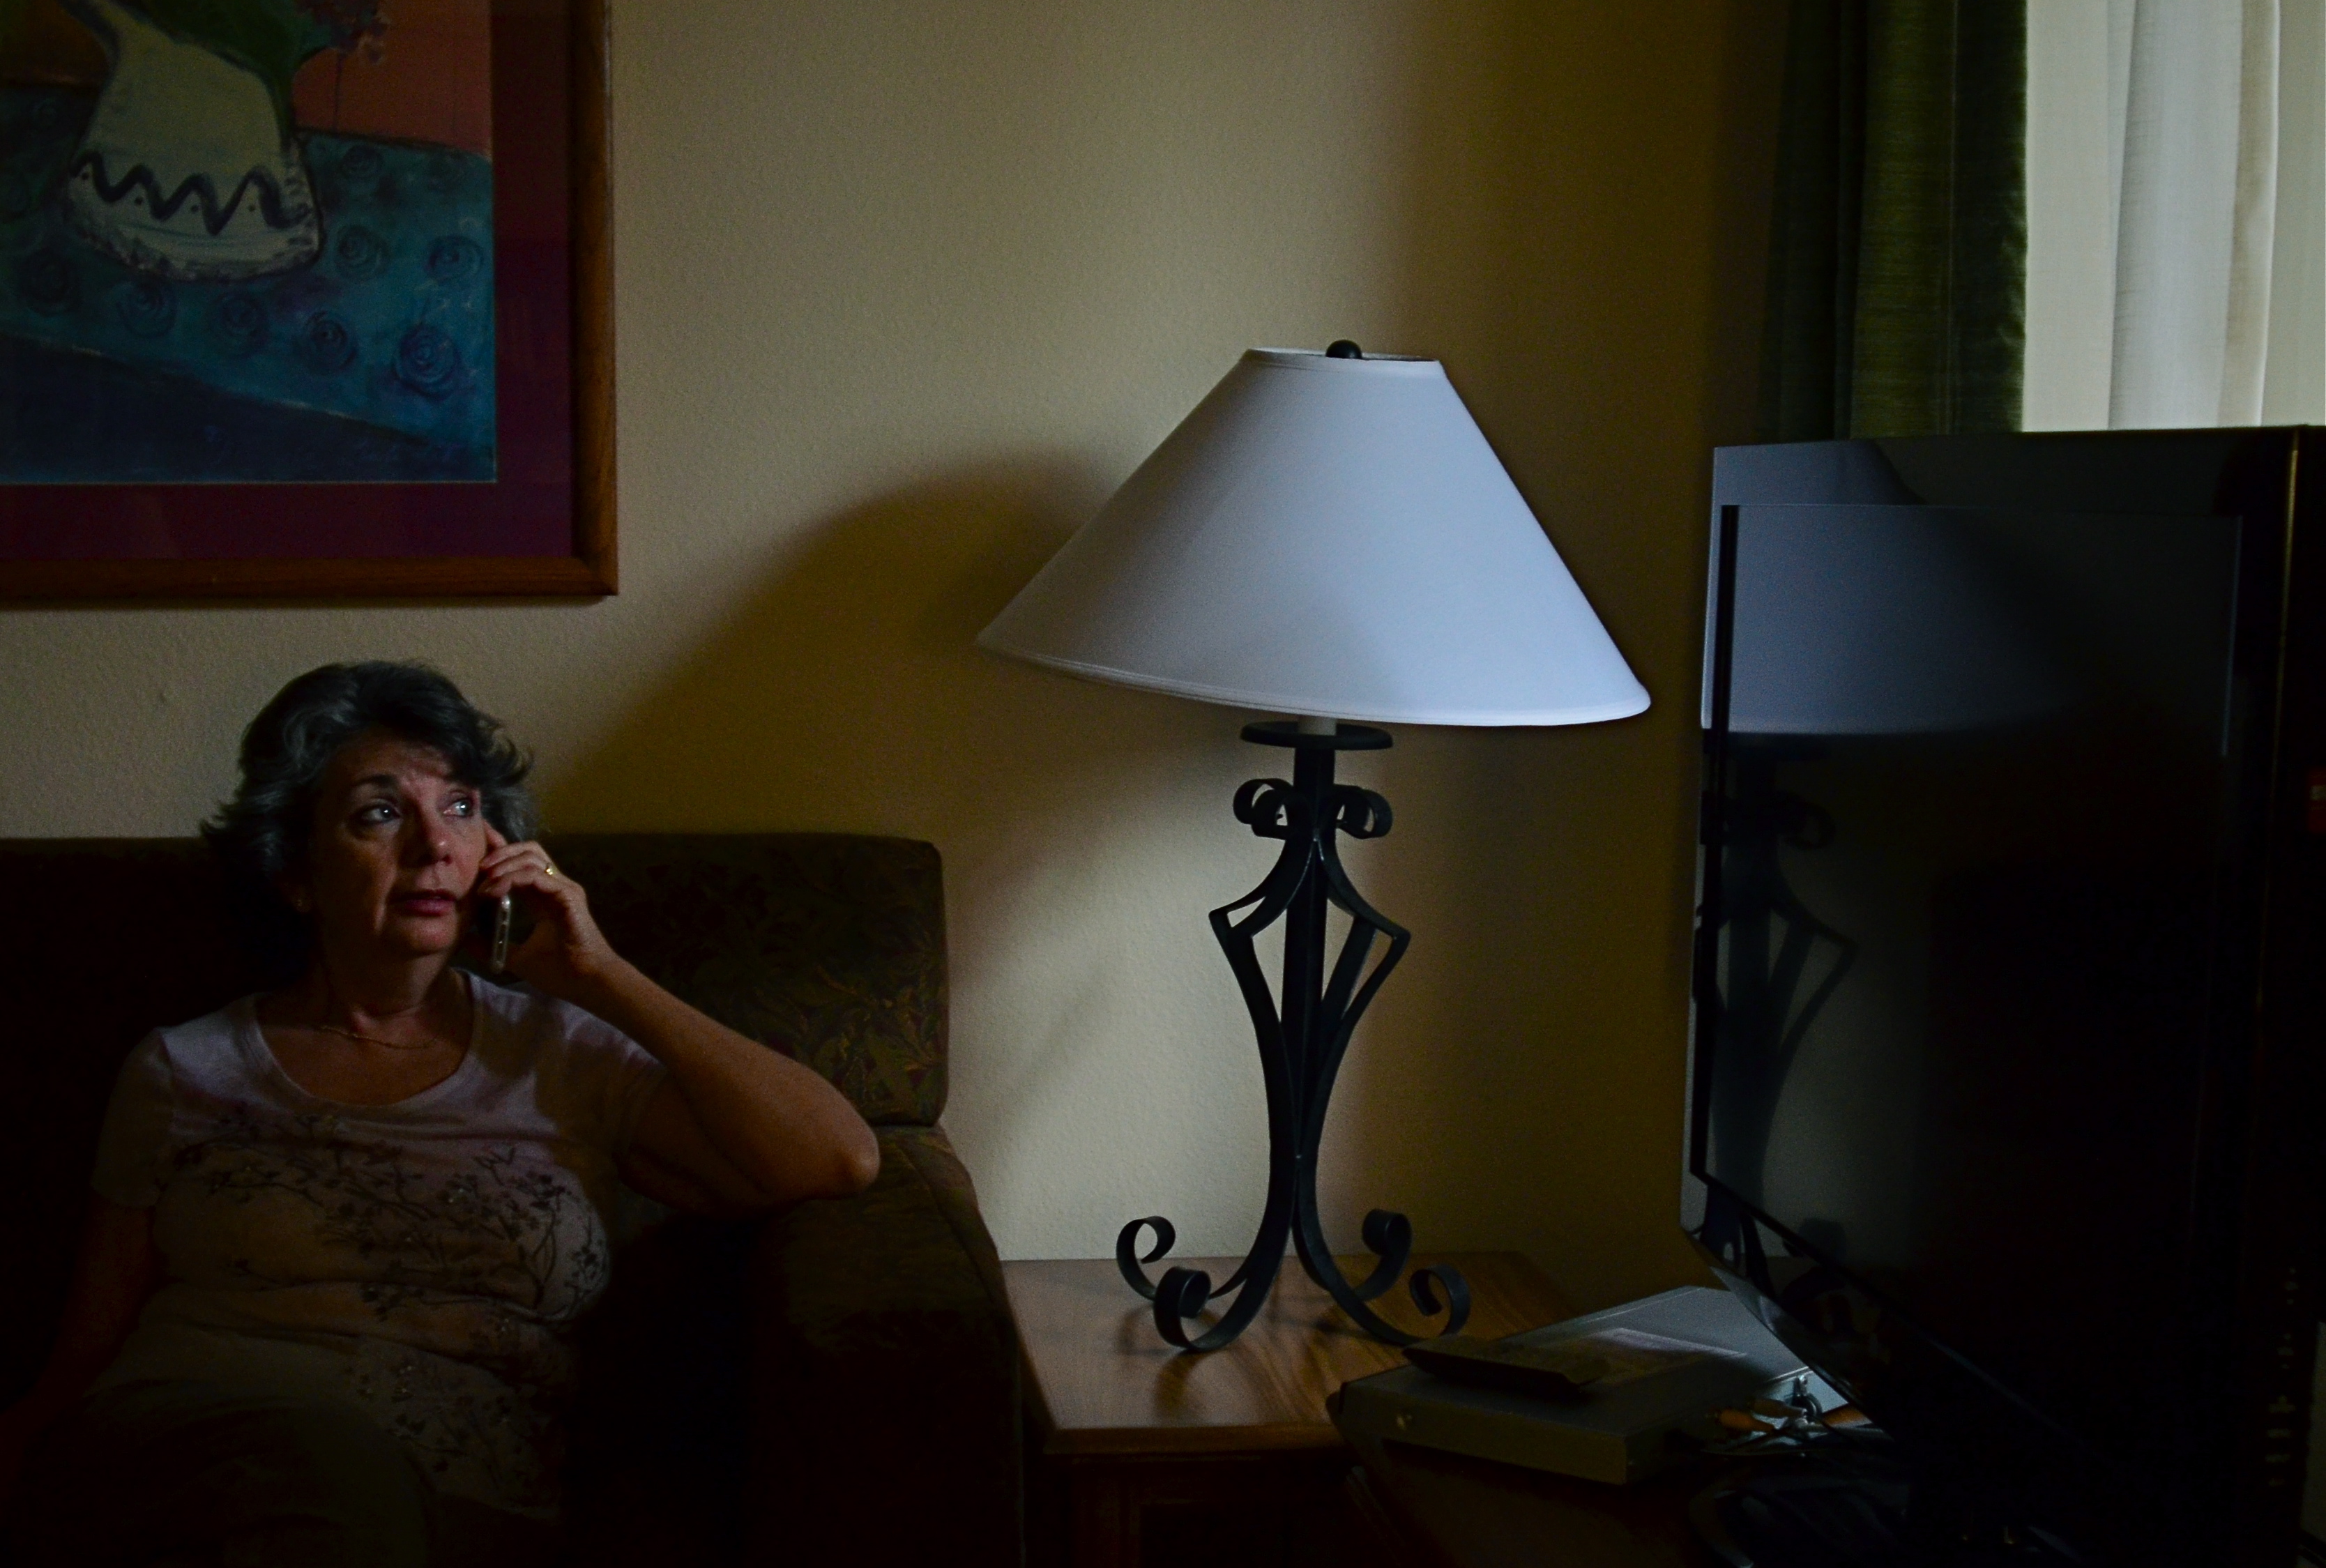
One lady, one source of light, one shot: 1/40 sec., f/1.8, ISO 640, 35mm.
BY MICHAEL PERKINS
IN PORTRAITS, PHOTOGRAPHERS SOMETIMES HAVE TO SUBSTITUTE INTIMACY FOR TECHNICAL PERFECTION. We understandably want to come as near as possible to meticulously modulated light in telling the story of a face, and so we try to ride the line between natural, if inadequate light, and light which is shaped so much that we dull the naturalness of the moment.
It’s a maddening tug of war. If we don’t intervene, we might make an image which is less than flattering, or, worse, unfit for publication. If we nib in too much, we get a result whose beauty can border on the sterile. I find that, more often than not, I lean toward the technically limited side, choosing to err in favor of a studied snapshot rather than a polished studio look. If the face I’m shooting is giving me something real, I worry more about throwing a rock into that perfect pond with extra tinkering.
If my subject is personally close to me, I find it harder, not easier, to direct them, lest the quality I’m seeing in their natural state be replaced by a distancing self-consciousness. It puts me in the strange position of having to wait until the situation all but gifts me with the picture, as adding even one more technical element can endanger the feel of the thing. It’s times like this that I’m jammed nose-up against the limits of my own technical ability, and I feel that a less challenged shooter would preserve the delicacy of the situation and still bring home a better photograph.
In the above frame, the window light is strong enough to saturate the central part of my wife’s face, dumping over three-fourths of her into deep shadow. But it’s a portrait. How much more do I need? Would a second source of light, and the additional detail it would deliver on the left side of her head be more “telling” or merely be brighter? I’m lucky enough in this instance for the angle of the window light to create a little twinkle in her eye, anchoring attention in the right place, but, even at a very wide aperture, I still have to crank ISO so far that the shot is grainy, with noise reduction just making the tones flatter. It’s the old trade-off. I’m getting the feel that I’m after, but I have to take the hit on the technical side.
Then there was the problem that Marian hates to have her picture taken. If she hadn’t been on the phone, she would already have been too aware of me, and then there goes the unguarded quality that I want. I can ask a model to “just give me one more” or earn her hourly rate by waiting while I experiment. With the Mrs., not so much.
Here’s what it comes down to: sometimes, you just have to shoot the damned thing.
RETURN OF THE POD PEOPLE
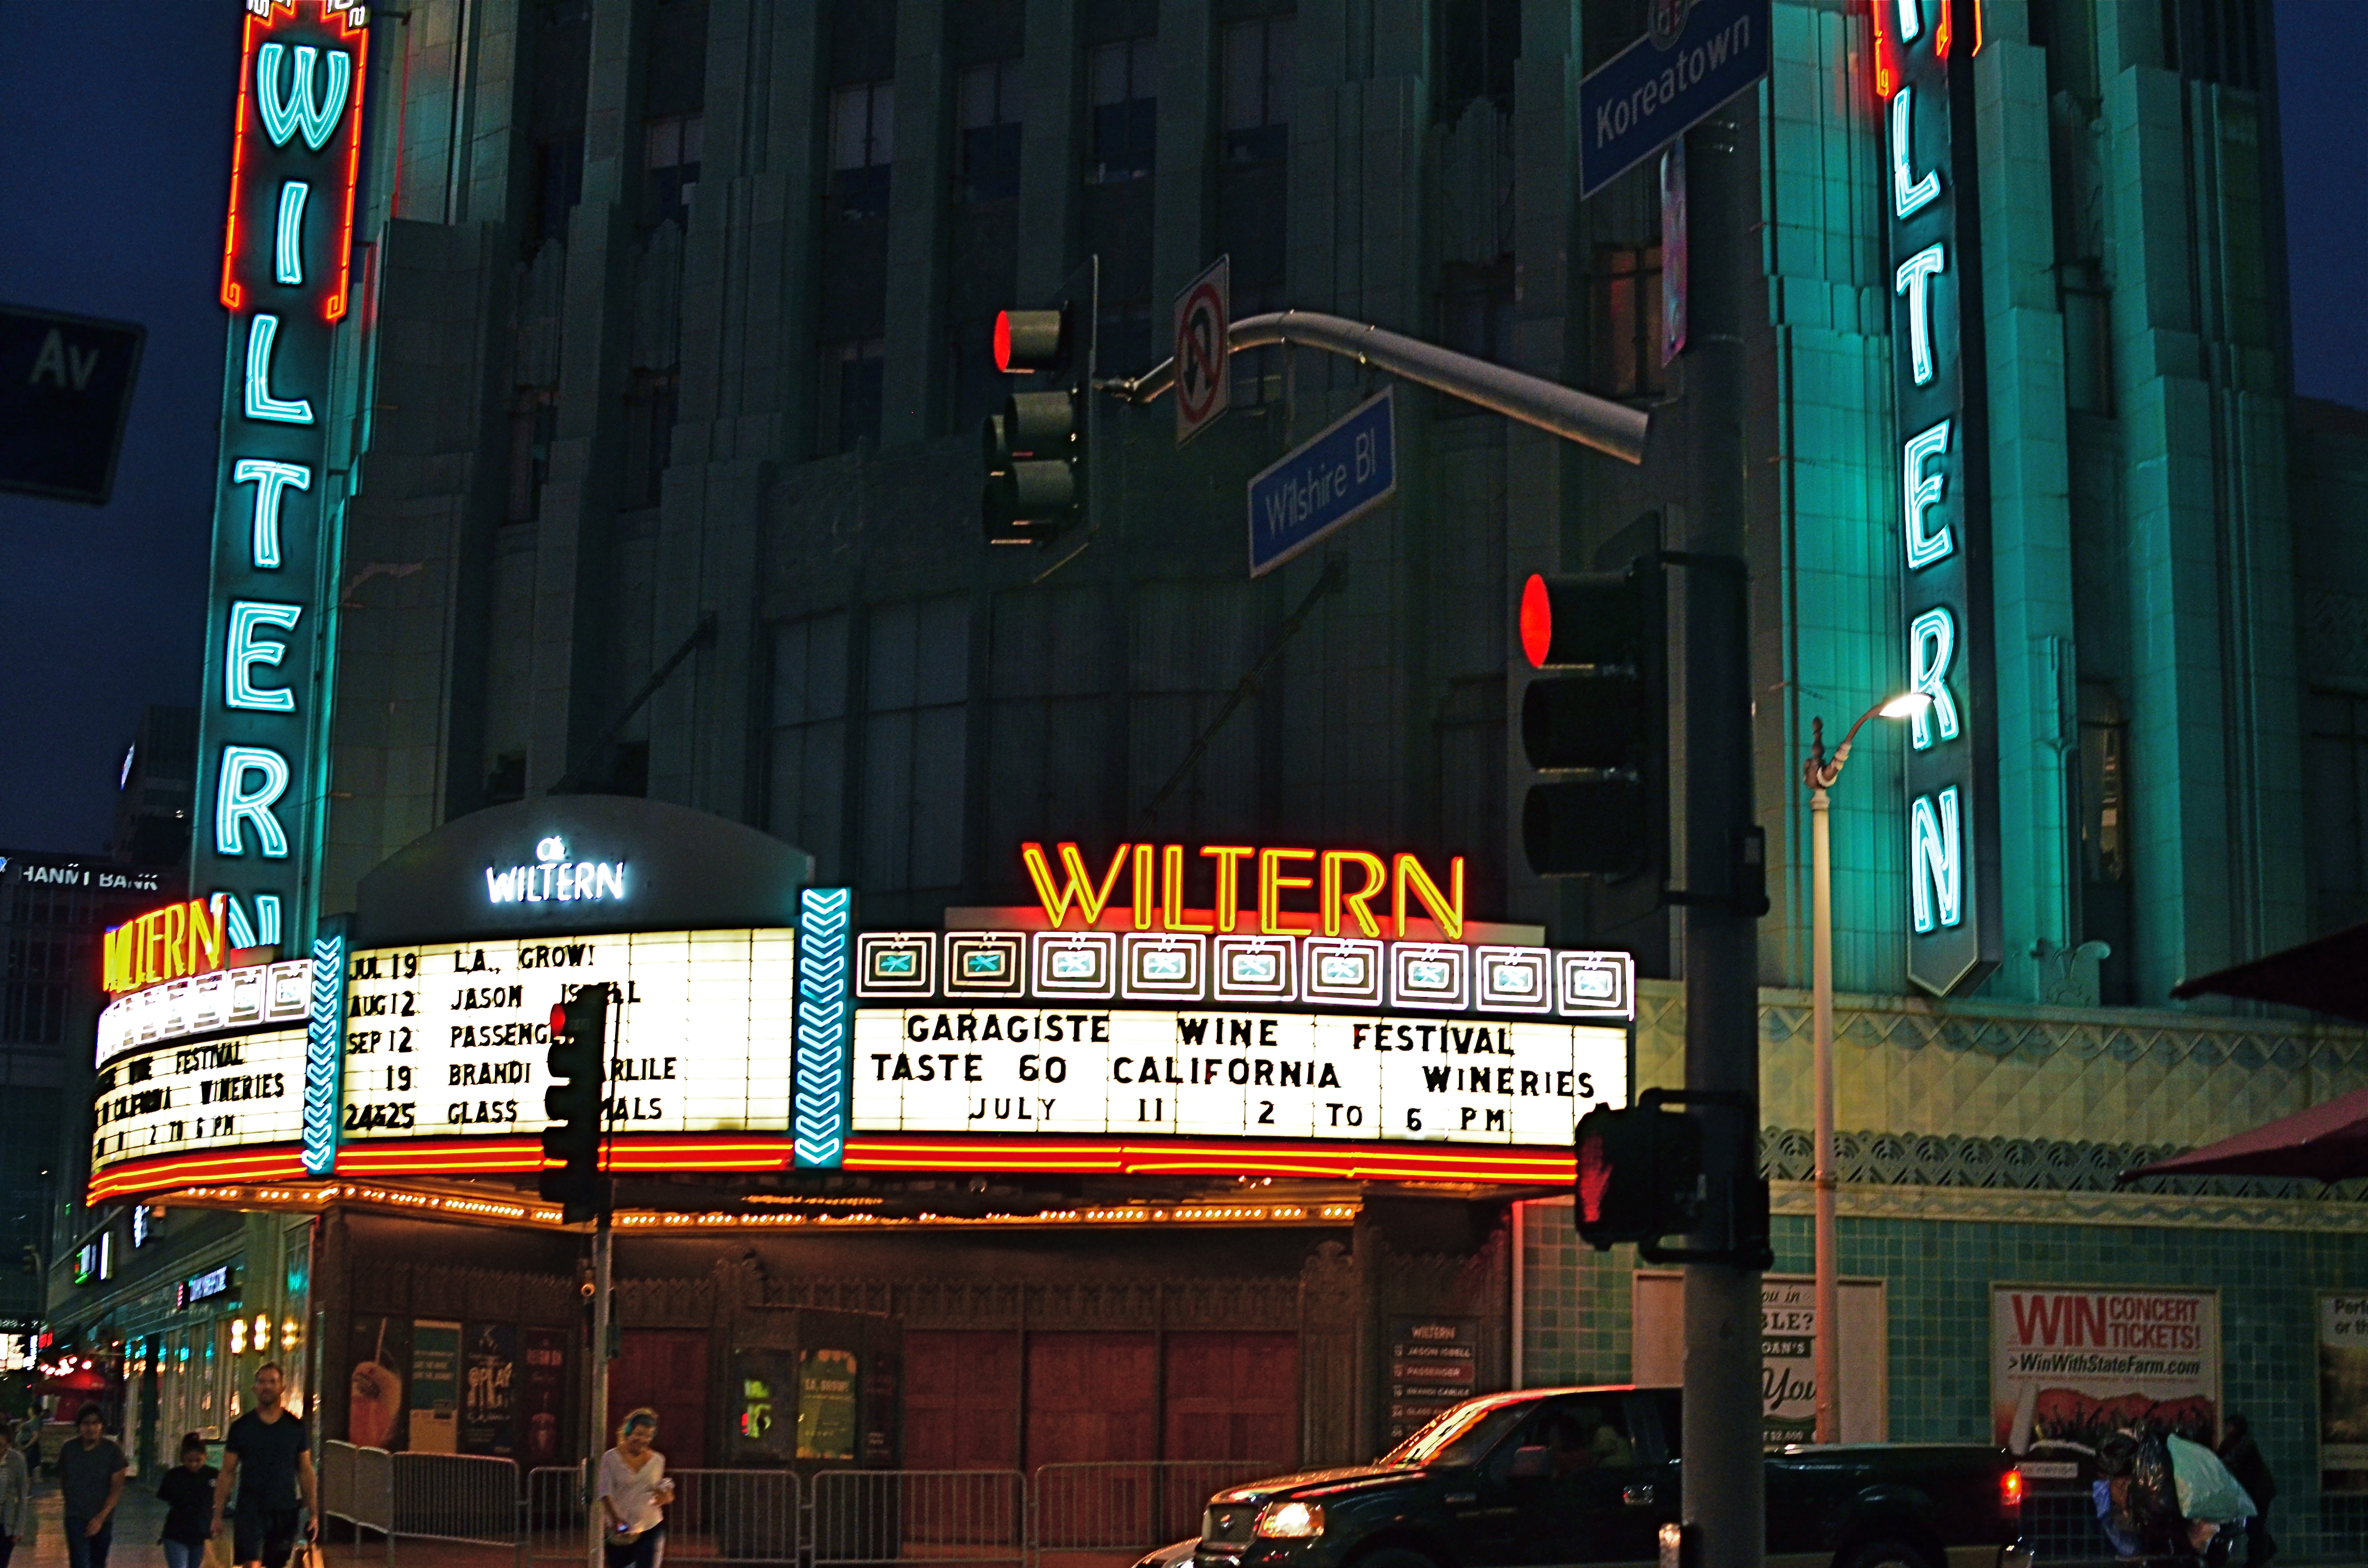
Wiltern On Wilshire, 2015. At f/3.5 and an ISO of 1000, this is an acceptably sharp hand-held exposure. Want the lights to be sharper? Might have to go tripod.
By MICHAEL PERKINS
I HAVE OCCASIONALLY SOUNDED WHAT, I ADMIT, IS A PREMATURE FUNERAL DIRGE for the lowly tripod, that balky, bulky, creaky throwback to the 19th century that continues to linger as an occasional, if fading, tool of the 21st. Part of this stems from the pure aggravation involved in trucking the things around, getting them locked and level, and praying that nothing from a stiff wind to an enraged gopher to a power-tripping mall cop will intervene to undo the entire rickety works. Hey, I’m not a hater, just a very reluctant fan.
One of the reasons I’ve mostly weaned myself from the pod is the ever-evolving speed of lenses and sensors in the digital era. This means scenes with less and less light can be captured with greater sharpness in short, hand-held exposures, albeit with a little more visual noise or grain. You can now shoot on a dark street at night, if your lens opens wide enough to keep your ISO as low as possible and if you can maintain a rock-steady grip on your camera at shutter speeds around 1/20 or so. And, for many cases, the results from this setup will be quite satisfactory.
However, we ain’t just about being satisfied, are we, mmmm?
Problem with a wide exposure and bright highlights (like the theatre marquee in the above shot) is that those elements will burn in and become diffuse, even in fast exposures, especially since your ISO setting is instructing your sensor to suck light like a maniac. As a result, instead of being sharp pinpoints of light, they will often turn soft and globby. If you can live with that, then go in peace and sin no more, my son.
However, if you really need to get those lights as sharp as you see them with your own eye, you might try doing a longer exposure at a smaller aperture, and that can mean dragging the pod down from the attic and doing it old-school. Good news is that you can now crank your ISO back down to minimum, so, yay, no noise atall, atall. You also might pick up some more contrast and detail within bright objects, like the horizontal lines on the above marquee. Bad news is, duh, you’re using a tripod. Hey, is that a mall cop I see running over here?
NAIL YOUR FOOT TO THE FLOOR
I shot this on a day when I was forcing myself to master a manual f/2.8 lens wide open, and thus shoot all day in only that aperture. That made depth-of-field tricky.
By MICHAEL PERKINS
PHOTOGRAPHY PLACES YOU IN PLENTY OF SITUATIONS WHERE YOU ARE, TO SOME DEGREE, OUT OF CONTROL. From light conditions to the technical limits of your gear to erratic weather, we have all experienced that sinking feeling that accompanies the realization that, to a great extent, we are not in the driver’s seat. Gotta wait til the sun’s up. Gotta wait for the flash to recycle. Gotta cool my heels til these people get out of the frame. Gotta getta bigger bottle of Tums.
So why, given the frequent cases in which we naturally run off the rails, would I recommend that you deliberately hobble yourself, in effect putting barriers in your own way when shooting images? Because, quite simply, failure is a better teacher than success, and you never forget the lessons gained by having to work around a disadvantage. Not only am I encouraging you to flirt with failure, I’m suggesting that there are even perfect days on which to do it…that is, the many days when there is “nothing to shoot”.
It’s really practical, when you think of it. Go out shooting on a day when the subject matter is boring, a day on which you could hardly be expected to bring back a great picture. Then nail your foot to the floor in some way, and bring back a great picture anyway. Pick an aperture and shoot everything with it, without fail (as in the picture at left). Select a shutter speed and make it work for you in every kind of light. Act as if you only have one lens and make every shot for a day with that one hunk of glass. Confine your snaps to the use of a feature or effect you don’t use or understand. Compose every shot from the same distance. The exercise matters less than the discipline. Don’t give yourself a break. Don’t cheat.
In short, shoot stuff you hate and make pictures that don’t matter, except in one respect: you utilized all of your ingenuity in making them. This redeems days that would otherwise be lost, since your shoot-or-die practice sessions make you readier when the shots really do count.
It’s not a lot different from when you were a newbie a primitive camera on which all the settings were fixed and you had zero input beyond framing and clicking. With “doesn’t matter” shooting, you’re just providing the strictures yourself, and maneuvering around all the shortcomings you’ve created. You are, in fact, involving yourself deeper in the creative process. And that’s great. Because someday there will be something to shoot, and when there is, a greater number of your blown photos are already behind you.
SWEETER, SHARPER
By MICHAEL PERKINS
AS SOME PHOTOGRAPHERS AGE, THERE IS A STRONG TEMPTATION to do more and more with less and less. For many, this manifests itself as a kind of divestiture, a relinquishing of toys. Maybe it’s just muscle fatigue, but, at some point in a shooter’s life, he or she makes a conscious decision to carry fewer hunks of gear into battle. Your approach to the work gets more complex, and, paradoxically, the mechanical doing of it gets more streamlined.
This is where the idea of a “go to” lens comes from, with photogs deciding that, yes, they can do nearly everything with the same hunk of glass. It becomes a bragging point: I shoot everything with a 24mm prime. I always use a 35. I don’t carry a big bag of stuff around anymore. But here’s the great thing: even a single lens is actually several lenses at once, since its optical properties change dramatically depending on aperture. That’s why, if you’re trying to take more kinds of pictures with fewer lenses, it’s important to do some homework on all the different ways they see.

Everyone has an “go-to” aperture that they use more than any other. For me, it’s f/5.6.
One of the things it’s best to know about your lens is where its “sweet spot”, or optimum sharpness occurs across the aperture range. Turn on your trusty Google machine and you will find more opinions on how to determine this than there are recipes for apple pie, and that’s the tricky part. Optics are a science, to be sure, but they are also somewhat subjective. Translation: if it looks good to you, it’s good. So publishing a table that proves your argument on what “sharp” is to your satisfaction just picks a scab for someone else. You have to get away from the charts and do the field work. Shoot. Look. Compare.
The chart people believe, for example, that the sweet spot for a lens is always two f-stops less light than your maximum wide-open aperture, meaning that, say an f/1.8 prime would hit its sweet spot somewhere around f/3.5. However, on my own 35mm f/1.8, I get the most uniform sharpness, from center to corners, another stop beyond that, so my “go to” aperture on my “go to” lens is more like f/5.6. I know this is true, because I have set up a tripod and shot the same subject from the same distance through the entire range of apertures and visually compared them. You know, the real-world, old-fashioned way….observation.
The better you know every property of your lens, the closer you will get to one that does most of what you want, most of the time. More pictures with fewer toys, with time and labor saved as well.
