INCIDENTALS, ACCIDENTALS AND D.L.s

By MICHAEL PERKINS
YOU CAN’T BEGIN TO WRITE THE STORY OF PHOTOGRAPHY without acknowledging the role of the fortunate accident in the output of, well, everyone. Anyone who says he’s never been handed a rose from Lady Luck from time to time is either delusional or a dead-on liar. If we admit that chance occasionally turns our best plans to piddle, why not admit that we also randomly wind up in the winner’s circle on a free pass?

Here’s my freebie for probably the rest of this year, as I can’t see the triple crown of incidentals, accidentals and dumb luck converging as they did here anytime soon. Let’s look at the recipe in detail:
1: Accidentals. While walking along the edge of a footbridge alongside Tempe Town Lake in Arizona, I spooked a small flock of birds resting out of sight just beneath my feet. I heard them flee before I saw them head into open water.
2. Incidentals. For reasons I still can’t fathom, the birds did not take to the air, as you might expect, but escaped across the water, creating gorgeously trailing coils of ripples as they went. That slowed everything down enough that my startled synapses rebooted and started to shout, get your camera up to your eye. That led me to the one element that made the crucial difference, known to us all as:
3. Dumb Luck. After a lens change, I had walked almost a mile from my car when I realized that I had forgotten to slap on a polarizing filter, making shots across water in the sun of an Arizona midday almost guaranteed to saturated with glare. I had already improvised a crude hack my taking off my clip-on sunglasses and holding them in front of my lens. This had only intermittently worked, since I either left part of the field of view uncovered, or failed to hold the specs at the right angle, incurring wild variances in polarizing. As soon as my animal brain realized that I had one shot before my bird water ballet was out of reach, I had to frame, focus (I was already at f/8, so there was some help there), and get the sunglasses in position without deforming all that blue. Even at that, there’s quite a difference between the rendering of color in various parts of the frame.
What you see here, then, is the photo goddesses throwing me a bone. A big bone. We’re talking the rear haunch of a triceratops.
But, yeah, I’ll take it.
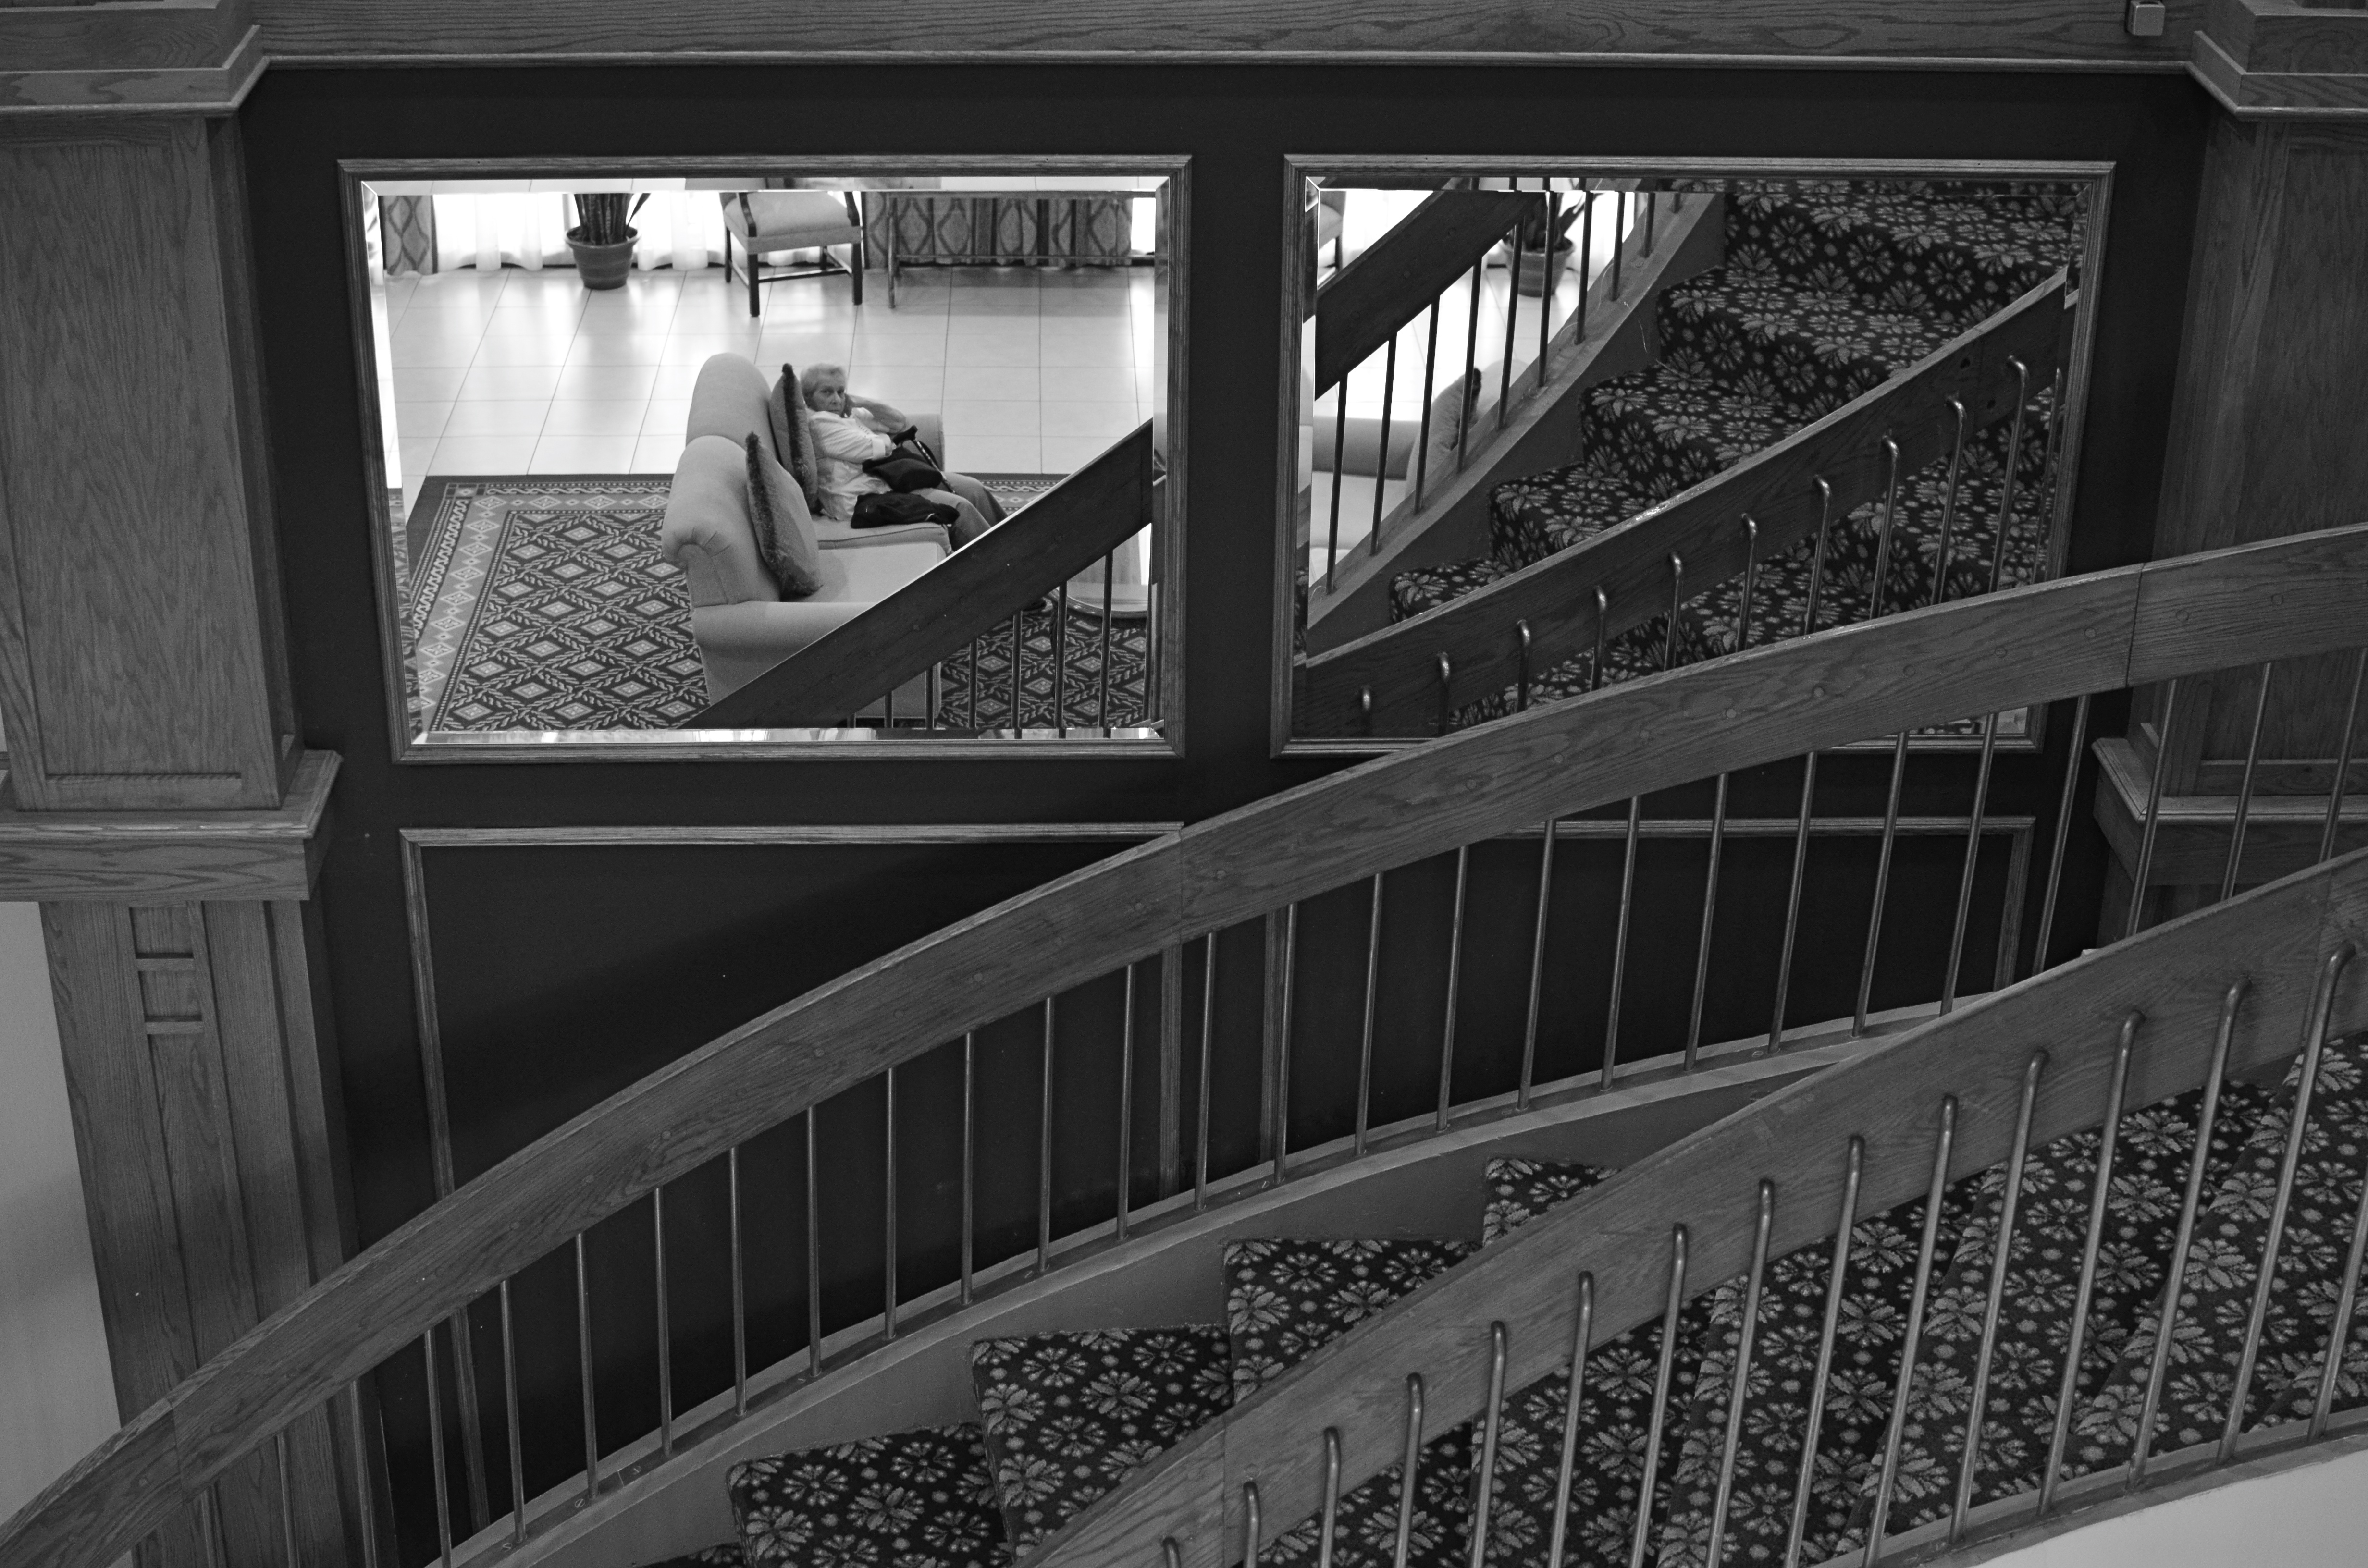
THAT’S WRONG, YOU’RE RIGHT

Cutting glare from the outside of a glass building with a circular polarizing filter…
….and using the same filter to create effects on glass from within the same structure.
By MICHAEL PERKINS
IF, AS A PHOTOGRAPHER, YOU ARE A DEDICATED RULE–BREAKER, you may view every new piece of equipment as a double opportunity….a chance to explore gear both in the way the manufacturer intended (see the user manual) and in whatever intuitive (spelled “wrong”) way you see fit (we don’t need no stinkin’ manual).
This is not as perverse as it first sounds. Shooters have been flipping telephotos backwards to create makeshift macros and partially uncoupling glass from camera bodies to “free lens” their way to selective blurring and distortion for eons. And you yourself can no doubt recount instances in which your gear has been persuaded to go off the rails to achieve some experimental end or other. Good photographers vascillate wildly between I hope I’m doing this right and I wonder what would happen if I….
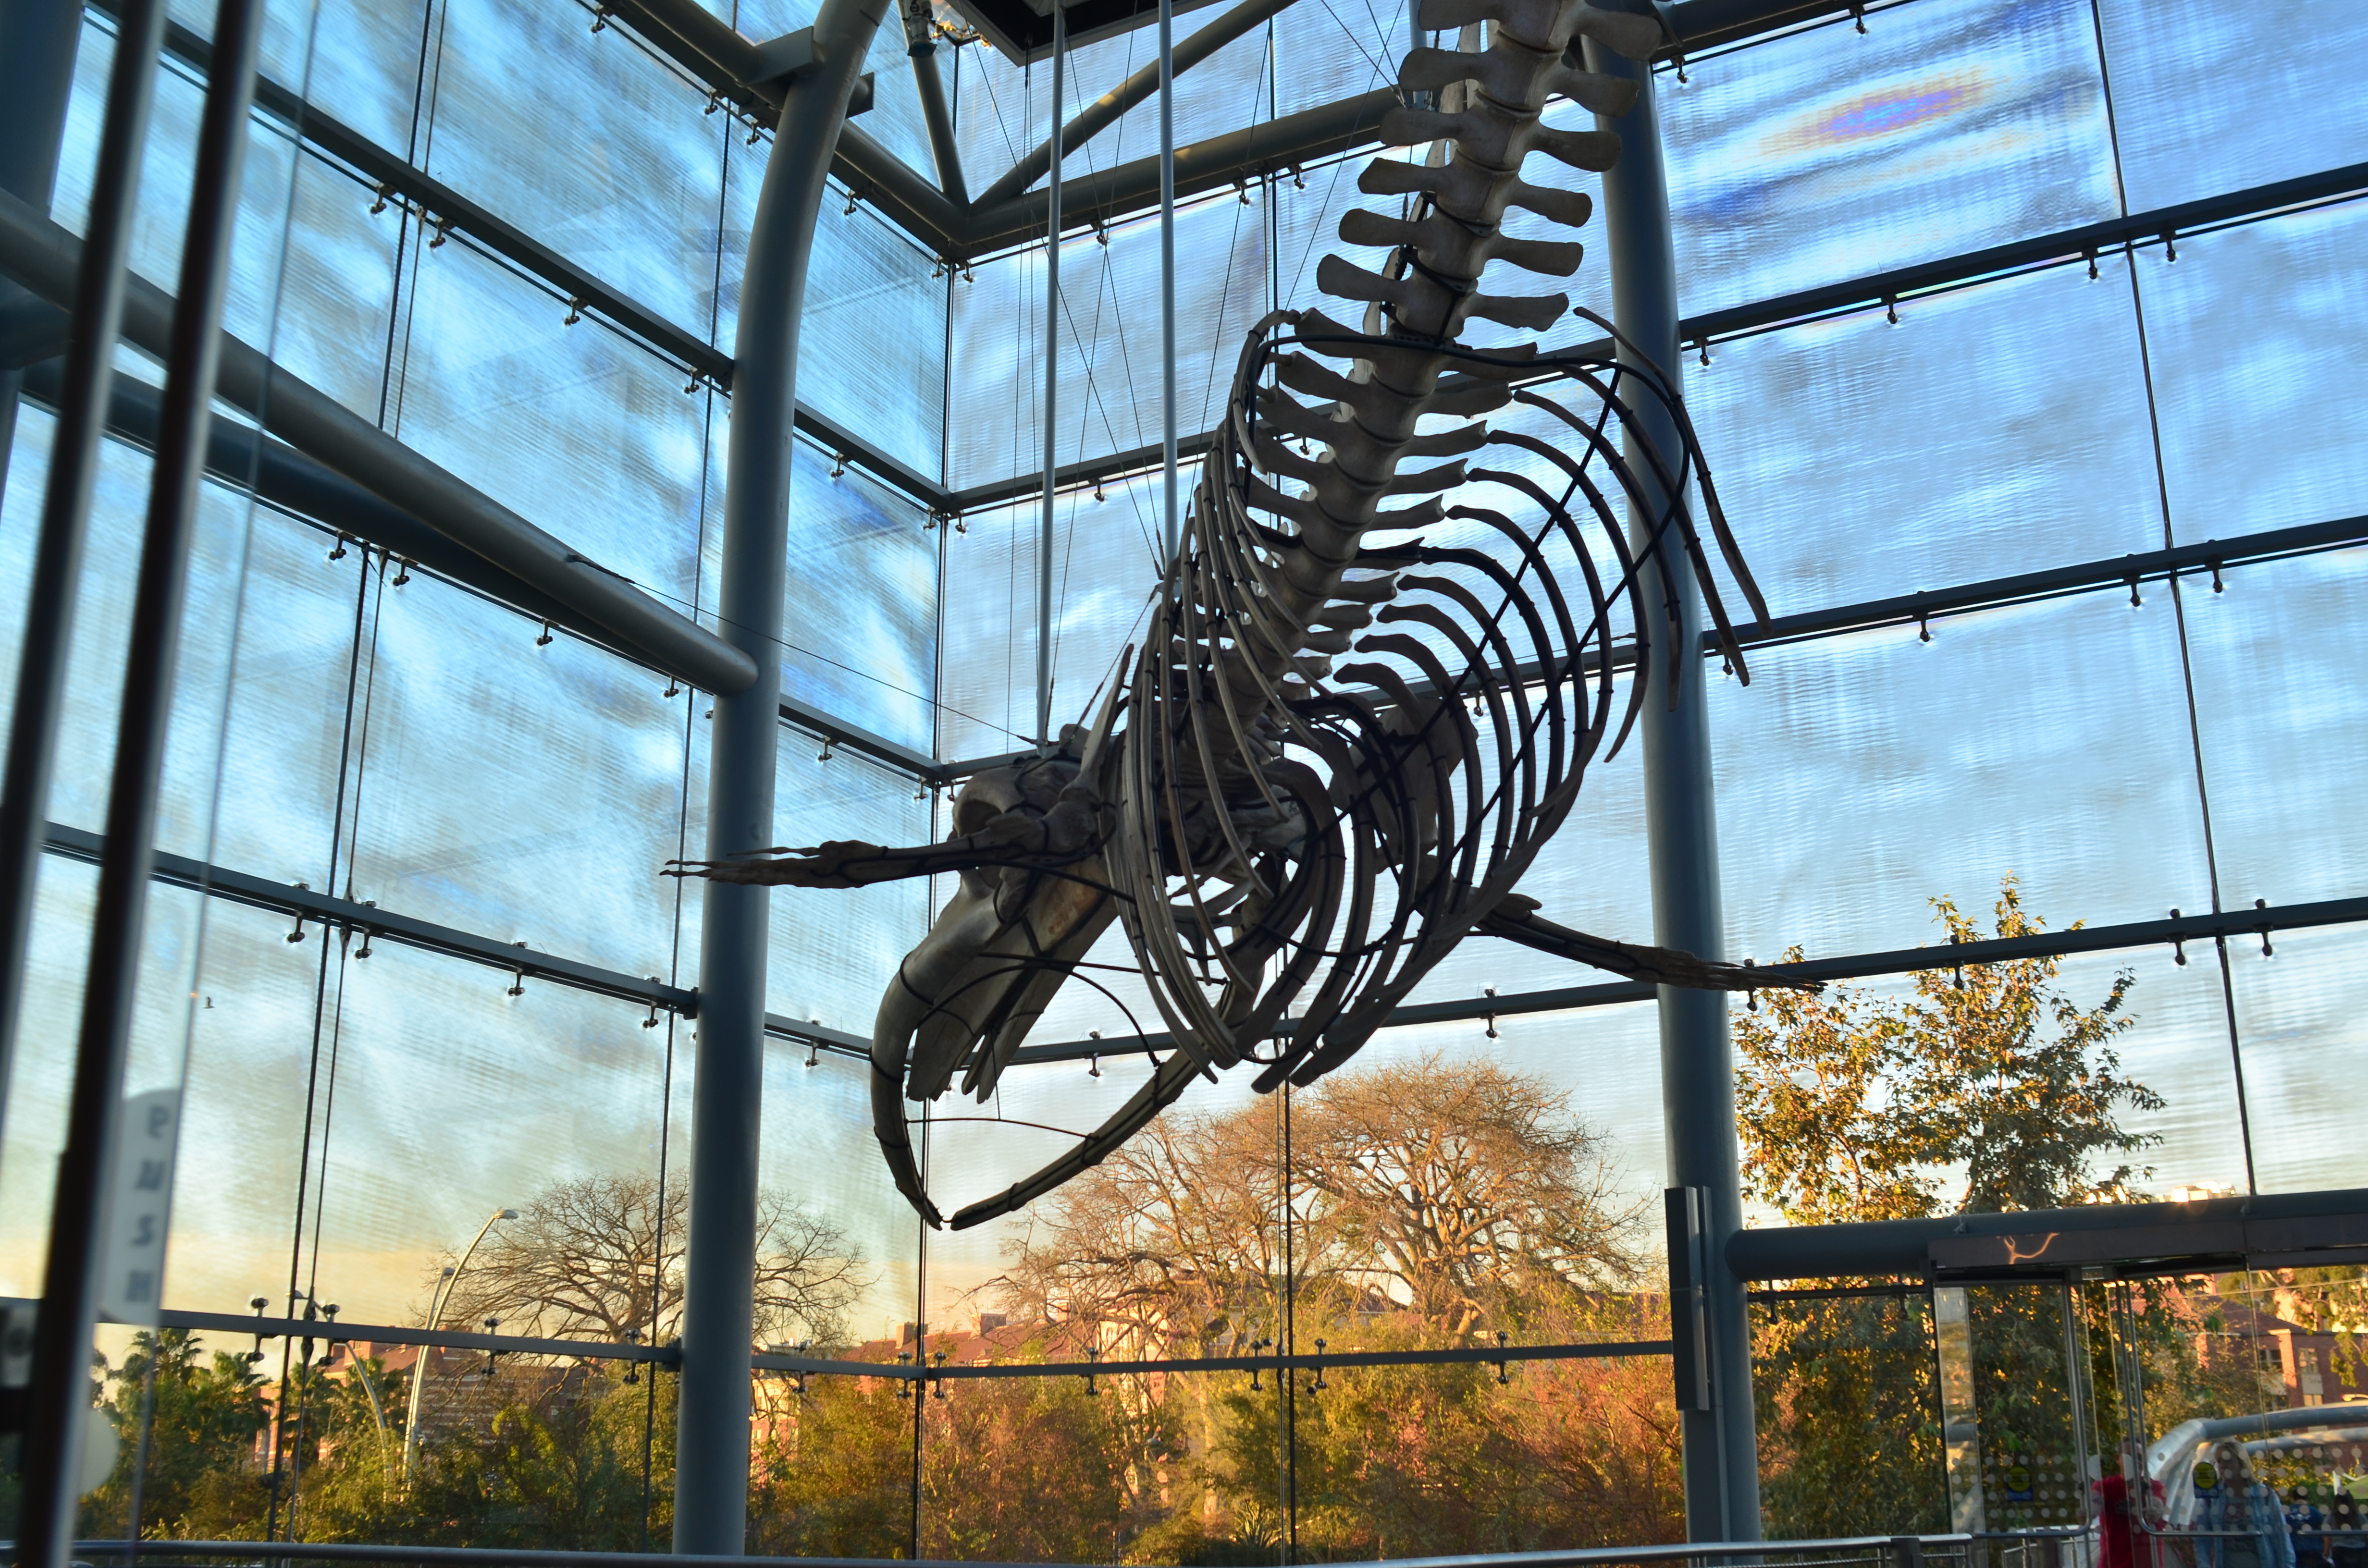
One of my favorite departures from normal practice involves circular polarizing filters, typically used to either deepen the blue of skies or remove reflective glare from surfaces like water or glass. In the image at the top of this page, it’s used in exactly that way, allowing me to view a huge fishy fossil in Los Angeles’ Museum Of Natural History. In the lower image, both the vantage point and the effect of the filter are reversed: I’m looking outwards, with the CPF producing imaginary streaky artifacts on the glass, adding dramatic framing accents to the fossil and breaking up the monotony of a large patch of sky. Is this the recommended use for the filter? Nope. Does this approach work for just any picture? Nah. Am I glad to be able to produce this look at will? Yes, please.
Around the house, driving a nail with the butt end of a screwdriver can seem, well, desperate. But in photography, stretching equipment beyond its intended use can be an adventure. It’s actually freeing, as if you’re playing hooky and getting away with it.
So, when the spirit moves you, choose the right tool. Then use it wrong. But only in the right way.
A TAIL OF TWO DUCKS
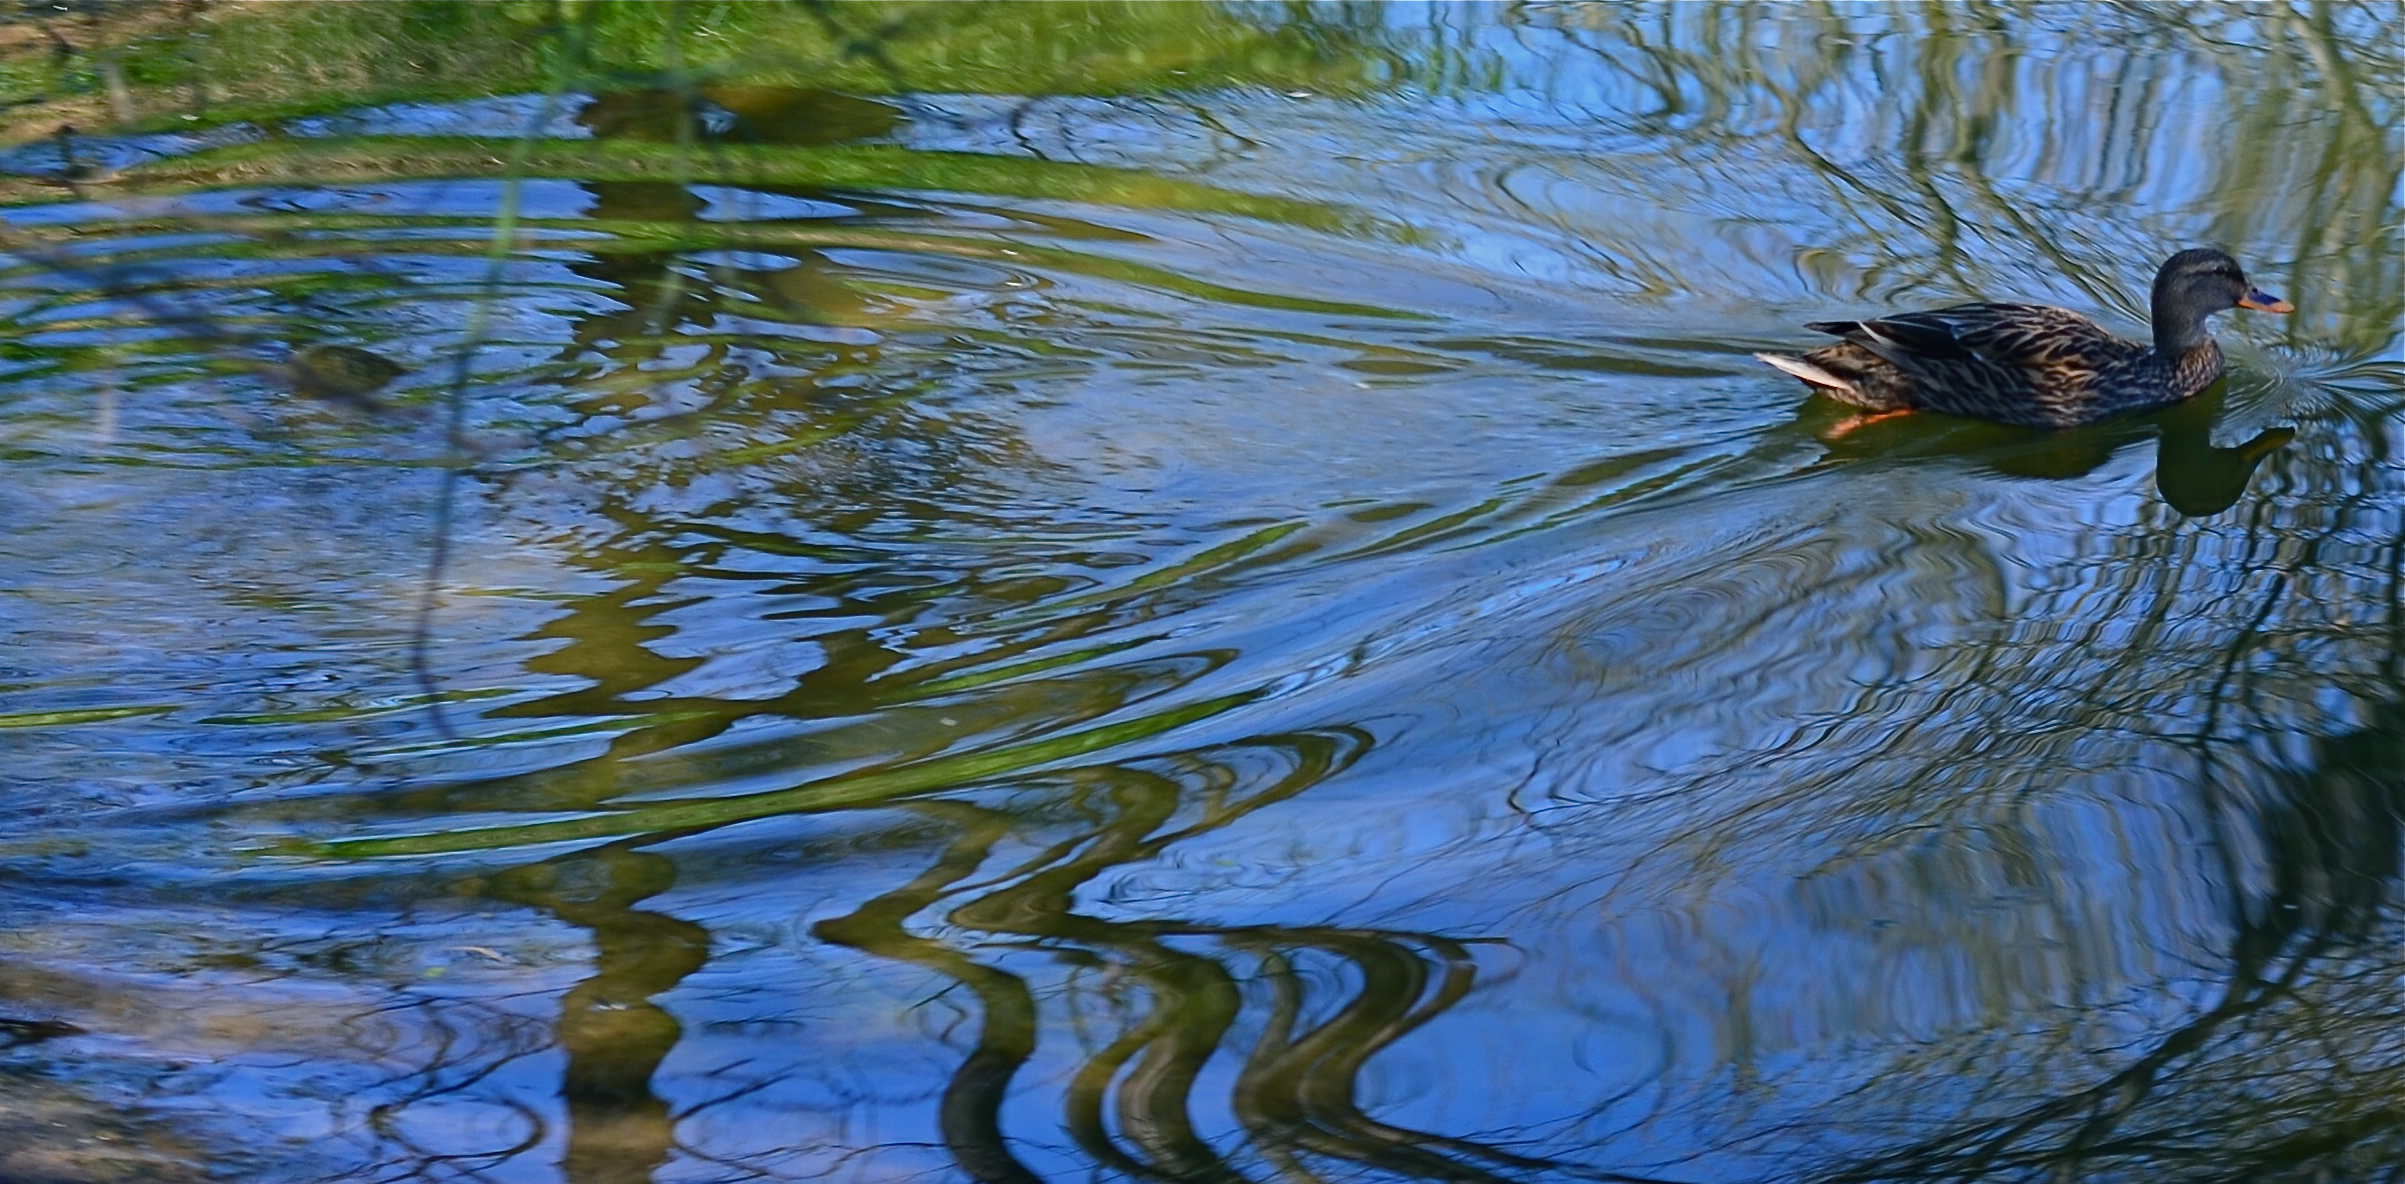
A circular polarizing filter allows you to determine how much reflective glare will be seen on water surfaces.
By MICHAEL PERKINS
PHOTOGRAPHING WATER IS A CONSTANTLY NEW CHALLENGE, since it is either an active surface, a static mirror or a revealing microscope, depending on how light on it is read by your camera. As active surface, its waves, surges and ripples break light up into endless shards. As mirror, it reflects clouds or other features that may or may not even be seen in frame, producing a reverse-angle version of reality. And as revealing microscope, it invites you to peer into its depths, providing a glimpse into a hidden world.
One of the cheapest and most effective toys available to deliver all of these renditions of water is the humble circulating polarizing filter, a quick screw-on available for virtually every kind of lens. Just match up the width of the lens threads with a filter that meets those dimensions and you’re all set. Polarizers serve two main purposes for photographers. The first is the ability to render overly bright skies a deep rich blue, helping all color pop with a little deeper impact. The second is to control the amount of glare you want in photographing water. Both functions are dialed up simply by rotating the filter’s movable outer ring, which is how you control the range of the effects you desire.
Polarizers work best when the sun is nearly directly overhead, or at a 90-degree angle with the front of your lens. In fact, though, even if this algebra is a little off, it will still produce a measurable effect, and having the time to shoot and adjust at the same pool or stream will give you an idea of how much you’ll want to apply to control the transparency of the water’s surface.

Dialing the glare back just a bit allows some features from below the water’s surface to become faintly visible.
In the image at the very top of this page the mallard’s wake creates glorious grooves in a forest pond. The polarizer has been rotated for maximum reflective effect of the sky and the tree growth overhead. Earlier in the same shoot, the squatting duck in the lower photo was shot to give a little mirror effect, but with a slight hint of transparency to allow both clouds and shore rocks to be seen in the same shot. That’s the beauty of polarized light; it can be calibrated in real time, so that you know, ahead of the shutter click, just how much you’ve opted for. As is the case with a lot of traditional photo techniques, the use of filters, decidedly old-school in nature, allows more control than trying to manipulate the same shot in post-production.
One caution: although there are dozens of manufacturers for circular polarizing filters, many of them very reasonable in price, there is some variance in the effectiveness of certain brands. Read a lot of user reviews and get the one that delivers the goods in full. Other than that, the true nature of water in your photos can have as much poetry, or mystery, as your fingers can dial up. Neat.
I’M LOOKING THROUGH YOU

Brookfield Breaklight, 2016.
By MICHAEL PERKINS
ANYONE WHO REGULARLY PHOTOGRAPHS GLASS SURFACES realizes that the process is a kind of shot-to-shot negotiation, depending on how you want the material to react and shape your subject. There is really no absolute “look” for glass, as it has the ability to both aid and block the view of anything it’s around, in front of, or near. Viewed in different conditions and angles, it can speed the impact of an image, or foil it outright.
I love shooting in urban environments, where the use of glass has shifted dramatically in recent decades. Buildings that were 90% brick or masonry just fifty years ago might be predominantly wrapped in glass today, demonstrably tilting the ratios of available light and also changing what I call the “see-through” factor…the amount of atmosphere outside a building can be observed from inside it. This presents opportunities galore of not only what can be shown but also how abstracted glass’ treatment of reflection can serve a composition.
Against the advice of many an online pundit, I keep circular polarizing filters permanently attached to the front of all my lenses so that I can modify reflections and enhance color richness at my whim. These same pundits claim that leaving the filter attached when it’s not “needed” will cost you up to two stops of light and degrade the overall image quality. I reject both these arguments based on my own experience. The filters only produce a true polarizing effect if they are either at the right viewing angle vis-a-vis the overhead sun, or if they are rotated to maximize the filtering effect. If they don’t meet either of these conditions, the filters produce no change whatever.
Even assuming that the filter might be costing you some light, if you’ve been shooting completely on manual for any amount of time, you can quickly compute any adjustments you’ll need without seriously cramping your style. Get yourself a nice fast lens capable of opening to f/1.8 or wider and you can even avoid jacking up your ISO and taking on more image noise. Buy prime lenses (only one focal length), like a 35mm, and you’ll also get better sharpness than a variable focal length lens like an 18-55mm, which are optically more complex and thus generally less crisp.
In the above image, which is a view through a glass vestibule in lower Manhattan, I wanted to incorporate the reflections of buildings behind me, see from side-to-side in the lobby to highlight selected internal features, and see details of the structures across the street from the front of the box, with all color values registering at just about the same degree of strength. A polarizer does this like nothing else. You just rotate the filter until the blend of tones works.
Some pictures are “about” the subject matter, while others are “about” what light does to that subject, according to the photographer’s vision. Polarizers are cheap and effective ways to tell your camera how much light to allow on a particular surface, giving you final say over what version of “reality” you prefer. And that’s where the fun begins.
REVERSAL OF FORTUNE
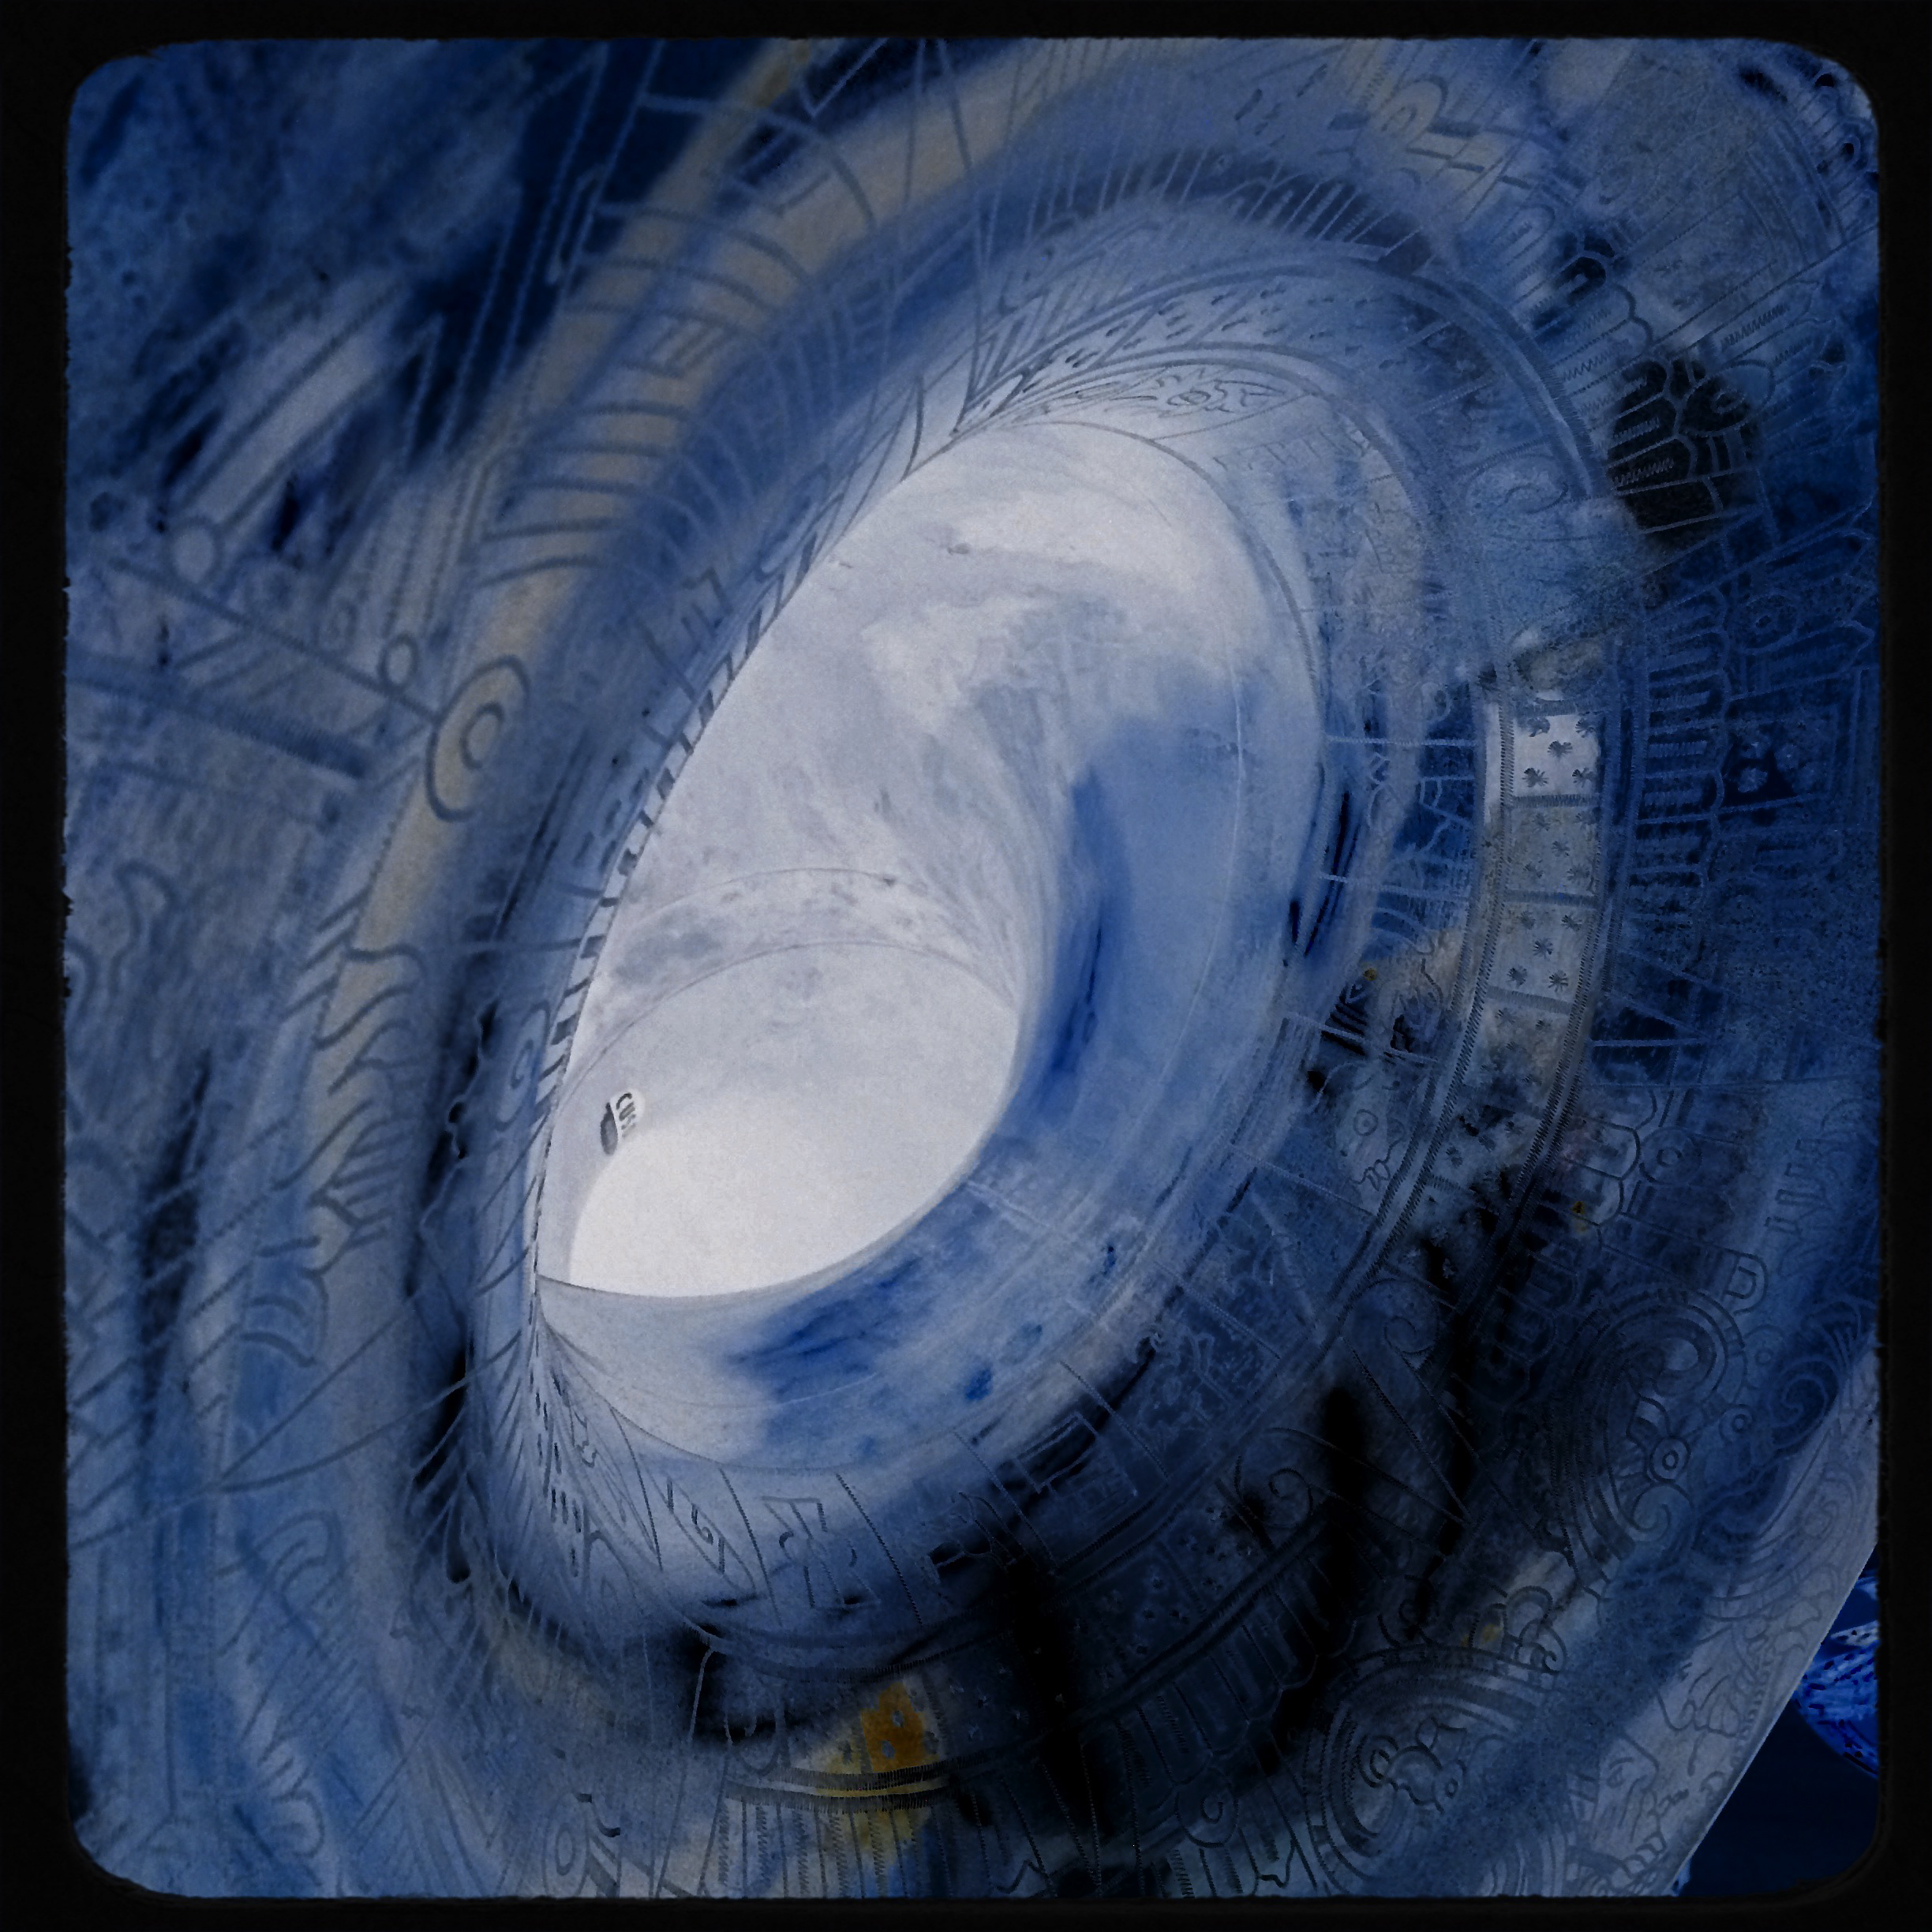
The bell of an engraved sousaphone, converted into a negative and color-boosted to resemble a faux vortex.
By MICHAEL PERKINS
FOR THOSE OF US WHO SWEATED IN LITERAL DARKROOMS (as opposed to digital ones), there has always been a fascination with the print photographer’s equivalent for “RAW” files, the celluloid negative. Manipulated properly, one neg could yield an almost endless variety of print results, as the sciences of burning, dodging and pure imagination were applied to coax subtle tonal changes and modulations out of either color or monochrome images. Ansel Adams’ frequently quoted remark that the negative was the score and the print was the performance was born out in his own visual “symphonies” along with those of millions of others.
But the negative need not merely be the understudy for the “final” version of a picture, but the final itself. And as we’re freed to experiment via new digital apps, we are more frequently re-imagining shots with reversed tones, often creating dramatically more effective results than the “positive” originals. Again, apps are speeding the time of practice and development in a way that chemically-based, film-based manipulation never could. Tap and you’re done. Tap, tap, and the result is either sent to the keeper pile or re-done in an instant. It’s pretty irresistible.
There have always been amazing examples of artists who made their negatives the “official” version of their pictures, although the neg is traditionally thought of as a step in a process, not an art form it itself. I remember being thrilled when, as a teen, I first saw F.W. Murnau’s silent masterpiece Nosferatu, which includes a thrilling, eerie scene with a ghostly, horse-drawn carriage on its way to Count Orlok’s castle, deliberately printed in negative to boost the creepy drama of the sequence. And with new phone-based apps, it’s easy and fast to get a basic version of this effect, albeit with some limits.
The app I use, called Negative Me, is a very basic (and free) tap-on layer. Choose a file photo, apply the effect, and you’re done. It’s also possible to shoot new pictures directly through the app. Yes, it’s frustrating that you can’t attenuate the tone or the intensity in any way, but, you can always take the extra step of feeding the first negative image into additional apps or editing suites where more precise processing can be added. It’s still easier than any process that was available in the film era, and, while it merely adds strangeness to many photographs, it allows some to be reborn as abstractions that are unearthly and dramatic.
Producing a negative variation on certain shots is just another way to re-interpret a shot, no less useful than any other color filter or post-processing tool. Like anything else, it’s the impact of the result, not the effect itself, that makes the shot.
A FORWARD STEP BACK
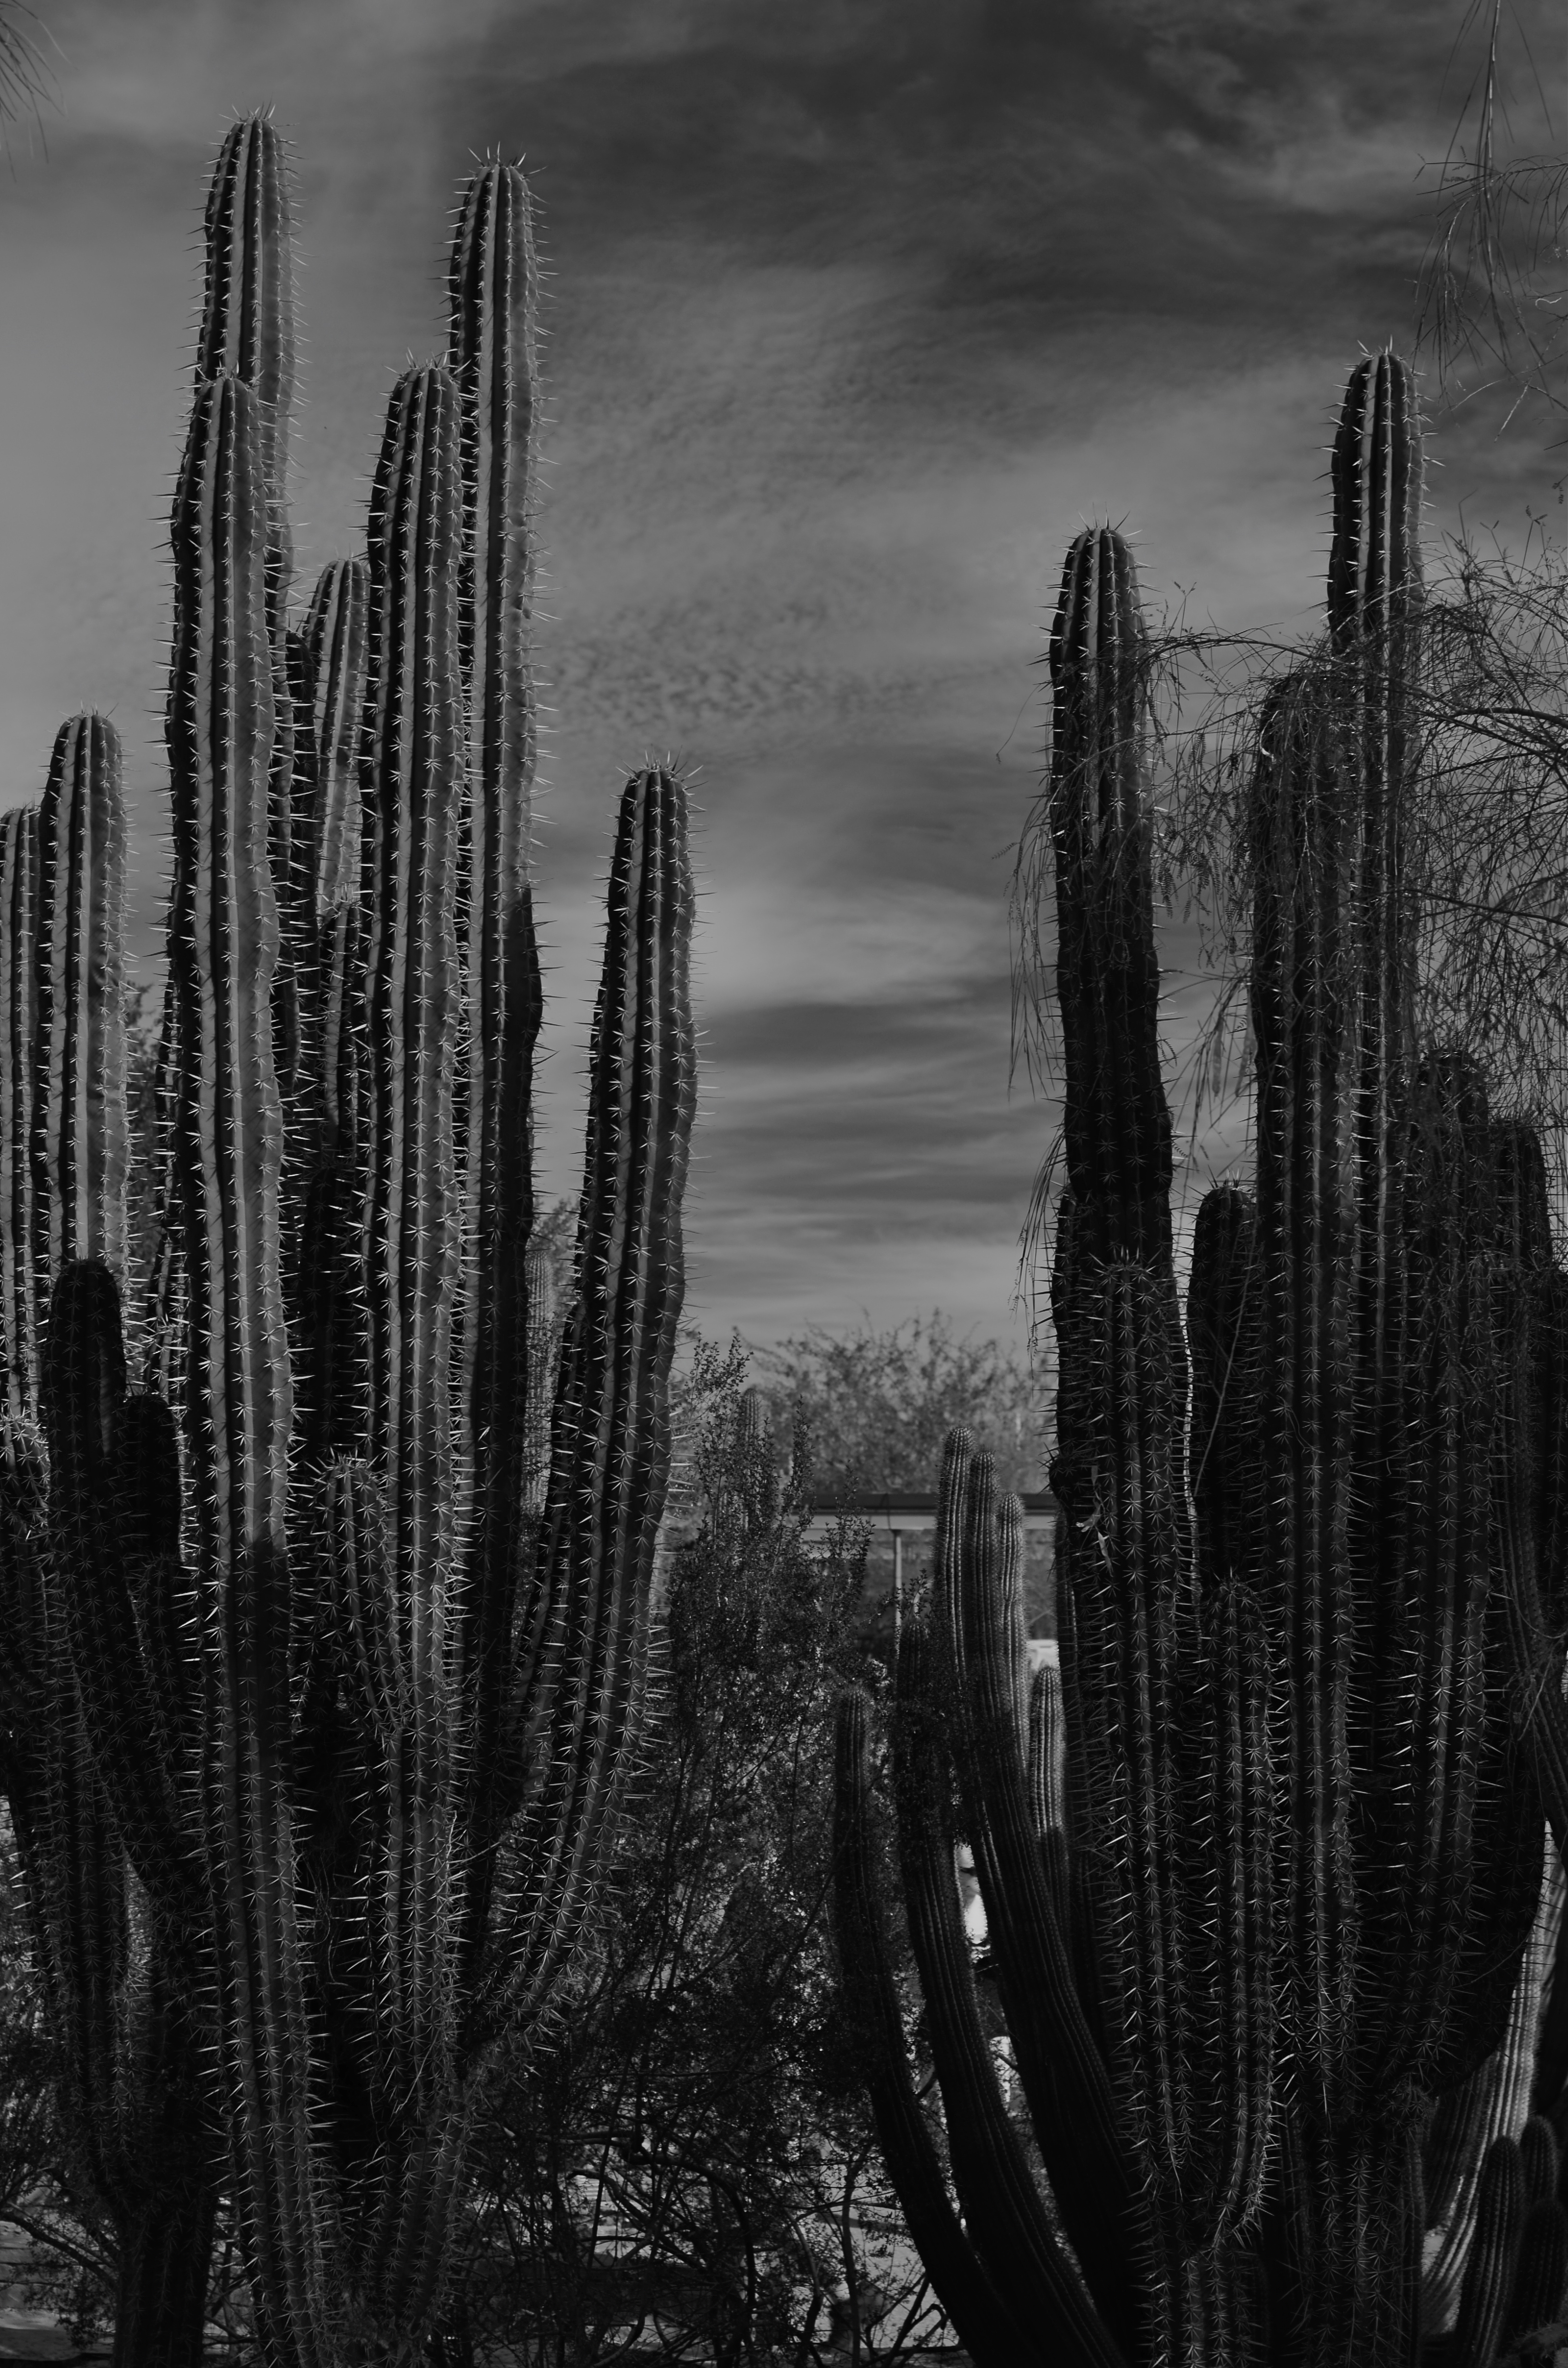
Skies which appear wispy in color can pick up some drama in black & white with the use of a red filter.
By MICHAEL PERKINS
SOME CHOICES IN LIFE ARE BINARY, EITHER YES OR NO. The light switch is either all “on” or all “off”. Photographic choices have never been binary, since there are only a few real rules about how to achieve the image you want and more than a million reasons why those rules have to be jettisoned, because they actually stand in the way of that image.
When digital photography arrived, there was a tendency to assert that everything associated with film photography was as obsolete as a roll of Kodachrome 64. In fact, the further we proceed into the digital age, the more we realize that there are many good practices from the days of emulsions and negatives that have solid application in the age of zeroes and ones. It would be ridiculous to say categorically that every tool of one era must be abandoned in the image-making of the next. Lenses, exposure, lighting basics, and many more elements of film-based creativity have equivalents in digital. None of them are good all the time, and none of them should be ruled out without exception.
The use of filters is one such element. Many film-based photogs worth their salt have used filters as a matter of course, and, despite the amazing in-camera and post-production fixes of the present day, these little bits of accent glass still produce dazzling effects with a minimum of investment, and help shooters maintain a close, hands-on control of their images in the moment. And one of my favorites here in the American southwest, land of endless, often blistering sun, is the red 25 filter.
Used to punch up contrast and accentuate detail for black and white, the red 25 renders even the lightest skies into near blackness, throwing foreground objects into bold relief and making shadows iron sharp. On a day when fluffy clouds seem to blend too much into the sky, the red 25 makes them pop, adding additional textural detail and a near-dimensional feel to your compositions. Additionally, the filter dramatically cuts haze, adding clear, even tones to the darkened skies. Caution here: the red 25 could cost you several stops of light, so adjust your technique accordingly.
Many whose style has developed in the digital age might prefer to shoot in color, then desaturate their shots later, simulating this look purely through software, but I prefer to make my own adjustments to the scene I’m shooting while I am shooting it. I wouldn’t paint a canvas in one place and then fix my choice of colors a week later, hundreds of miles away from my dream sunset. Filters are from a world where you conceive and shoot now. The immediate feedback of digital gives you the part of that equation that was absent in film days, that is, the ability to also fix it, now. Photography can’t afford to cut itself off from its own history by declaring tools from any part of that history obsolete. A forward step, back is often the deftest dance move.
LEFTOVERS
Upstairs, Downstairs, 2014. Conceived and planned as a monochrome image.
By MICHAEL PERKINS
FAR BE IT FROM ME TO DO A HATER NUMBER on photographic post-processing. We often pretend that the act of photo manipulation began at the dawn of the pixel age, when, of course, people have been futzing with their images since the first shutter snapped. We love the idea of “straight out of the camera” as an ideal, but it’s just that…an ideal. Eventually, it’s the way processing is executed in a specific instance which either justifies or condemns its use.
With that in mind, I do find that too many of us use faux b&w, or the desaturation of color images, long after they’re snapped, as a kind of last-ditch attempt to save pictures that didn’t have enough force or impact in the first place. Have I resorted to this myself? Oh, well, yeah, maybe. Which means, freaking certainly. Have I managed to “save” many images in this way? Not so much. Usually, I feel like I’m serving leftovers and trying to pawn them off as a fresh meal.

Up In Your Grille, 2015. A mere b&w conversion from color would have flattened out many of this image’s tones.
The further along I lope through life, however,the more I tend to believe that the best way to make a black and white image is to set out to intentionally do just that. An act of planning, pre-visualization, deliberation. It means looking at your subject in terms of how a color object will register over the entire tonal range of greys and whites. Also, texture, as it is accentuated by light, is particularly powerful in monochrome, so that part needs to be planned as well. Exposure, as it’s effected by polarizers or colored filters also must be planned, as values in sky, stone or foliage must be anticipated. And, always, there is the use of contrast as drama, something black and white does to great effect.
You might be able to convert a color shot into an even more appealing b&w shot in your kerputer, but the most direct route, that is, making monochrome in the moment, is still the best, since it gives you so many more options while you’re managing every other aspect of the shot in real time. It all comes down to a major philosophical point about photography, which is that the more control you can wield ahead of the click, especially with today’s shoot-it-check-it-shoot-it-again technology, the better your results will be.
SOMETIMES THE MAGIC WORKS…

Early morning in L.A., shot through a hotel wind with a polarizing filter up front of the lens.
By MICHAEL PERKINS
THE DIGITAL ERA IN PHOTOGRAPHY HAS SMASHED DOWN THE DOORS TO WHAT WAS ONCE A FAIRLY EXCLUSIVE CLUBHOUSE, a select brotherhood (or sisterhood) of wizards who held all the secrets of their special science. The wizzes got great results and created “art. The rest of us slobs just took snapshots.
Today, the emphasis in photographic method has shifted from understand, study and do, to do, understand and, maybe study. We are now a nation of confident what-the-hellers. Try it, and if it don’t work, try something else. In some ways, this is a shift away from intellect and toward instinct. We are all either a little less technically aware of why the magic works, or completely indifferent to the underlying processes at work. You can all huddle together and decide whether this is a good thing.
Which, by way of introduction, is a way of saying that sometimes you do something that flies in the face of science or sense and it still works out. To illustrate, let us consider the humble polarizing filter, which, for me, is more important than many of the lenses I attach it to. It richens colors, cuts reflections, and eliminates the washed-out look of shots taken in intense daylight sun, as well as taming the squinty haze caused by smog. Or, if you want the Cliff’s Notes version, it makes skies blue again.

Without the filter, also through the window. Haze City.
Now there is a “proper” way to get top results with a polarizer. Make an “L” with your index finger and thumb, finger pointing straight up. UP in this example is the position of the sun overhead, and your thumb, about 90 degrees opposed to your finger, roughly represents your camera’s lens. The closer to 90 degrees that “L” is, the more effective the filter will be in reducing glare and boosting color. Experts will tell you that using a polarizer any other way will deliver either small or no results. That’s it. Gospel truth, science over superstition, settled argument.
That’s why I can’t explain the two pictures in this post, taken just after sunrise, both with and without the filter. In the first, seen at left, Los Angeles’ morning haze is severe, robbing the rooftop image of contrast and impact. In the second, shown above, the sky is blue, the colors are intense and shadows are really, well, shadows. But consider: not only is the sun too low in the sky for the filter’s accepted math to work, I am standing inside a hotel room, and yet the filter still does its duty, and all is right with the world. If I had followed and obeyed package directions, this shot should not have worked. That means if I were to pre-empt myself, defaulting to what is scientific and “provable”, and ignoring my instinct, I would not even have tried this image. The takeaway: perhaps I need to preserve just enough of the ignorant noobie I once was, and let him take the wheel sometimes, even if the grown-up in me says it can’t be done.
The yin and yang wrestling match between intellect and instinct is essential to photography. Too much science and you get sterility. Too much gut and you get garbage. As usual,the correct answer is provided by what you are visualizing. Here. Now. This moment.
“EFFECT” VS. “EFFECTIVE”

Panoramic shots like this are no longer a three-day lab project, but an in-camera click. But what is being said in the picture?
By MICHAEL PERKINS
THERE ISN’T ANYTHING EMPTIER THAN THE PERFECT EXECUTION OF A FLAWED IDEA. And in the present effects-drenched photographic arena, where nearly any texture, color, or conception can be at least technically realized, we need, always, to be making one crucial distinction: separating what we can do from what we should do.
The basic “fixes” which come natively loaded in even the most basic cameras (filters, effects, nostalgic slathers of antique colors) suggest a broad palette of choices for the photographer looking to extend his reach through what is basically an instantaneous short cut. Fine and dandy, so far. Who, after all, wants to labor for hours to augment a shot with a particular look if that effect can be achieved at the touch of a button? Certainly no one gets into photography anymore with the understanding that they will also have to act as a chemist, and creativity need not be the exclusive playground of the scientifically elite. We all agree that the aim of photography always has and always should be the placing of all tools in as many hands as possible, etc., etc.
But waita seccint. Did I say the world tool? ……(will the recorder read that last part back….?……”placing of all tools in as many…”)… yep, tool. Ya see, that word has meaning. It does not mean an end unto itself. A fake fisheye doth not a picture make. Nor doth a quickie panorama app, a cheesy sepia filter, nor (let’s face it) the snotty habit of saying “doth”. These things are supposed to supplement the creative moment, not be a substitute for it. They are aids, not “fixes”.
This comes back to the earlier point. Of course we can simulate,imitate, or re-create certain visual conditions. But what are we actually saying in the picture? Did we use the effect to put a firm period at the end of a strong sentence, or did we use it as a smoke bomb to allow us to exit the stage before the audience gets wise to the fakery?
One of the original objections to photography, as stated by painters, was that we were handing off the actual act of visual artistry to a (gasp!) machine. A little hysterical, to be sure, but a concern is still worth addressing.
There is a soul in that machine, to be sure.
But only if we supply it.
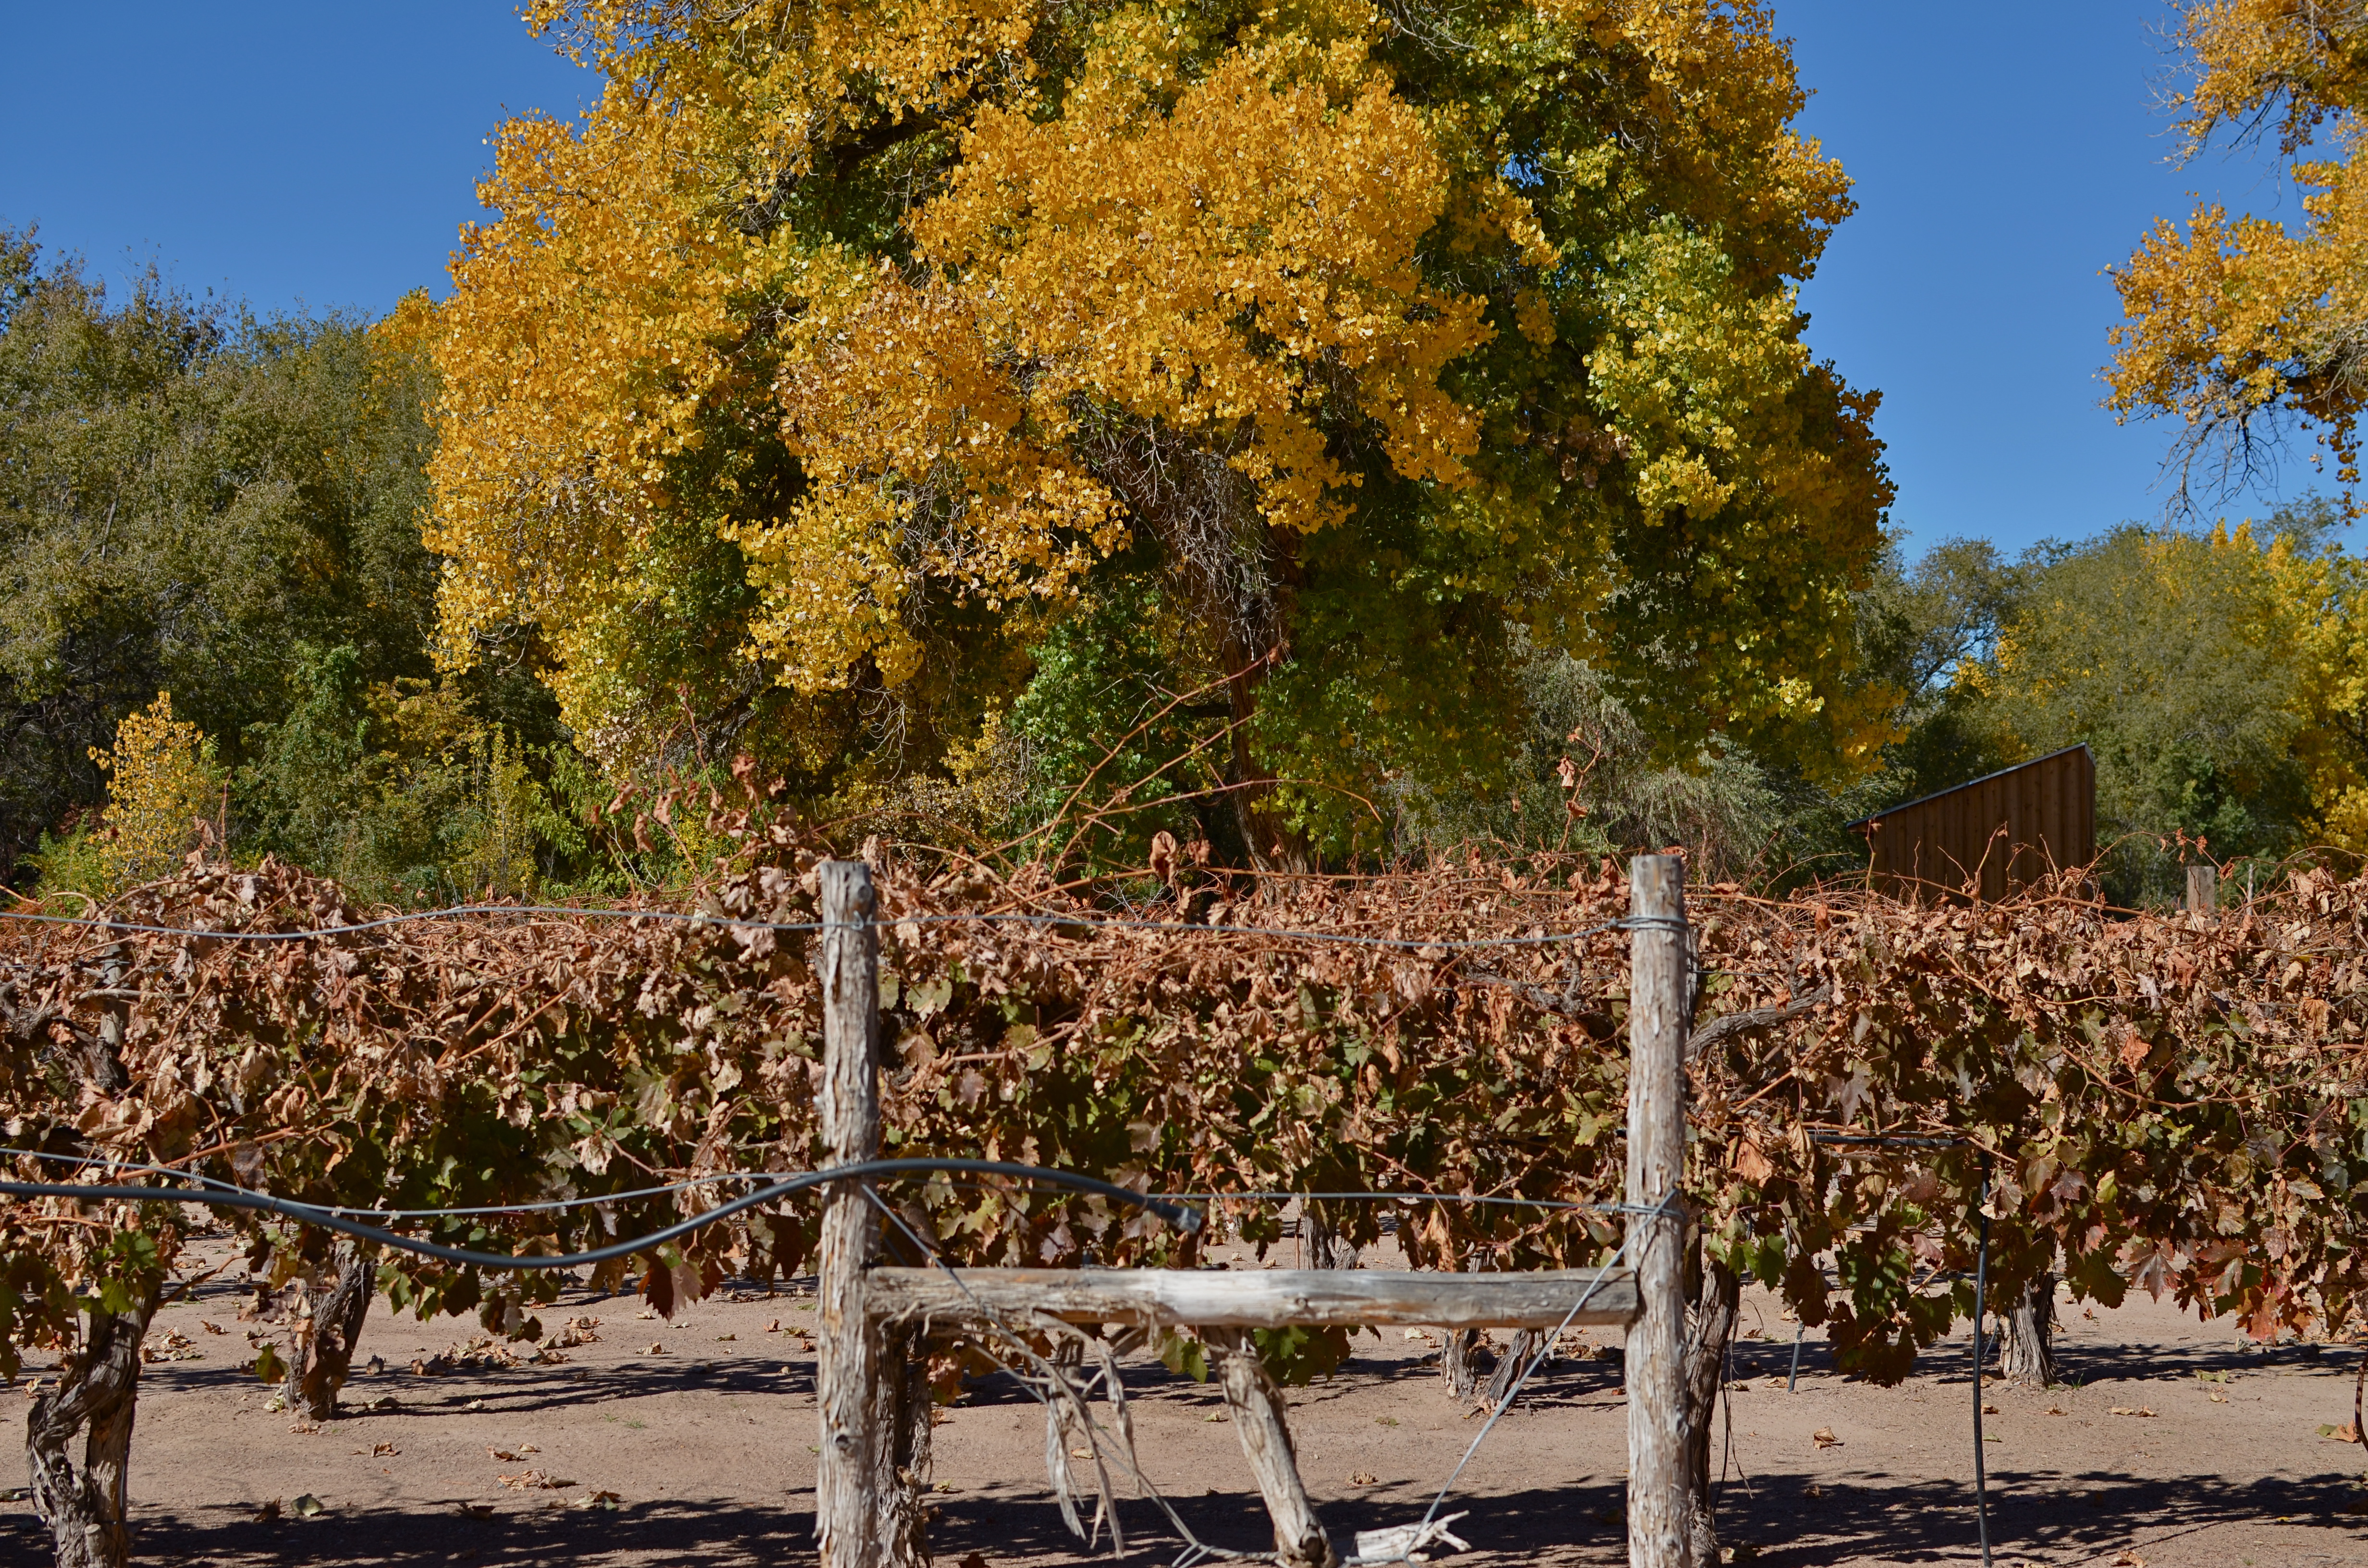
REAPING AN UNEXPECTED HARVEST
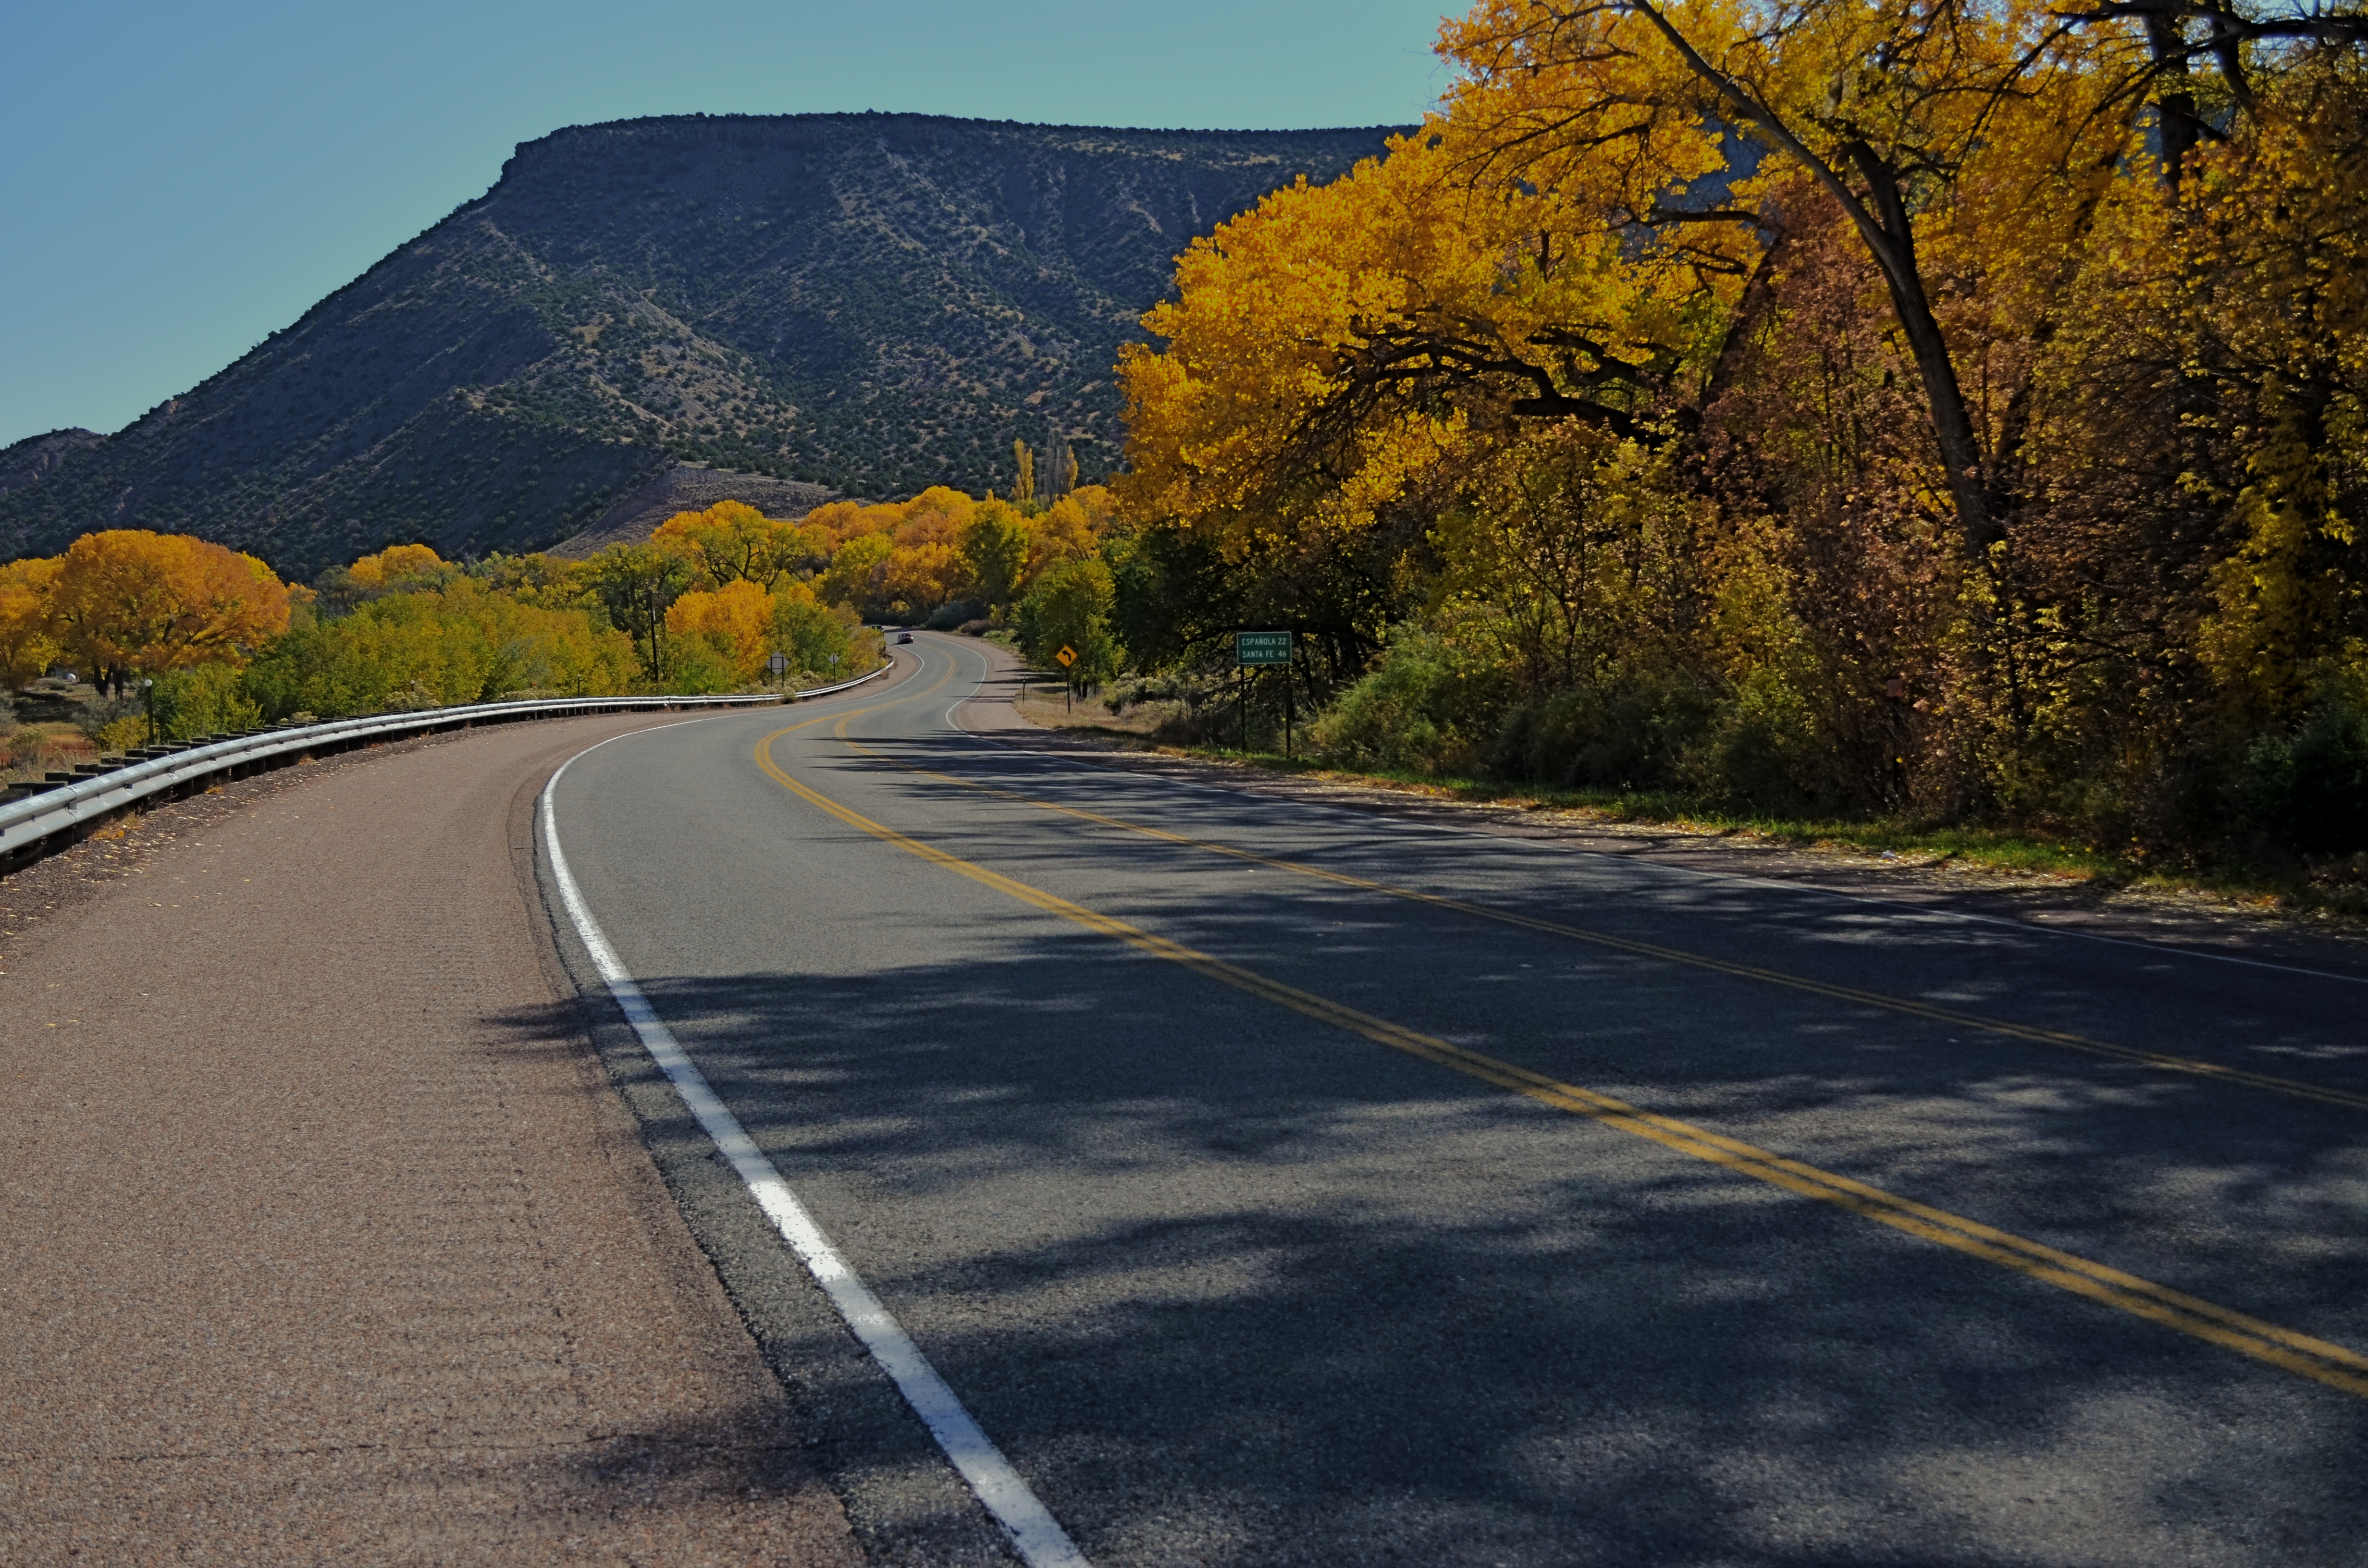
Abiquiu, New Mexico, October 8, 2013. 1/400 sec., f/5.6, ISO 100, 30mm.
IT’S NOT HARD TO RETURN FROM A SHOOT WITH FAR LESS THAN YOU HOPED FOR, BECAUSE IT HAPPENS SO MUCH OF THE TIME. Coming home with a sack full of visual Christmas that you hadn’t even thought to ask for is far more rare. With that in mind, I have just opened an entire tree-ful of treasures upon flying back from my first visit to New Mexico in three years. Maybe that should be trees full, given the golden glow of the entire state under a wash of autumnal cottonwoods during my time there.
As covered in the previous post, Redemption, One Frame At A Time , I was returning to NM for personal reasons, but also to tackle the problem of color “softness” that blunted the impact of some of my shots from previous trips. The blistering brilliance of sunlight in the southwestern states is unlike anything photographers will face within the USA, and what looks like “blue” sky to your naked eye will often register as pale blue or even white once the shutter snaps. Here in Phoenix, Arizona, I’ve learned to make a few basic exposure adjustments to compensate over the years, but recently I have also begun to attach a polarizing filter to cut the way-crazy glare of midday, and I was eager to see what could be accomplished in New Mex, where my destination would be another 4,700 feet above sea level higher, and even more blinding in its intensity.
October 29, 2013, Albuquerque, New Mexico. 1/800 sec., f/5.6, ISO 100, 35mm.
Once I got to the tiny town of Abiquiu, the historic landing point of painter Georgia O’Keeffe, I realized that, along with rendering the skies the correct blue, the filter was also going to produce an intense yellow as contrast, since the area’s native cottonwoods were exploding with gold, softening the harsher terrain and popping against the sky with a near-neon vibrancy. Having lived in the southwest for nearly fifteen years, I had long ago learned to live without the full range of hues that were a given, in states where the seasons are visually more defined. It was like coming home.
Golden leaves, earth tones, weathered wood, sand and stone all combined to deliver a textbook autumn for my grateful eyes, and I proceeded to hammer the shutter button until my arthritis threatened to end the party. Reaping an unexpected harvest is the best part of photography.
It’s the perpetual thrill of hearing light saying: See what happens when I do……this.
Follow Michael Perkins on Twitter @MPnormaleye.
Related articles
- Georgia O’Keeffe House: Art in the Southwest (ustravel.answers.com)
