MORE FROM LESS, LESS FROM MORE
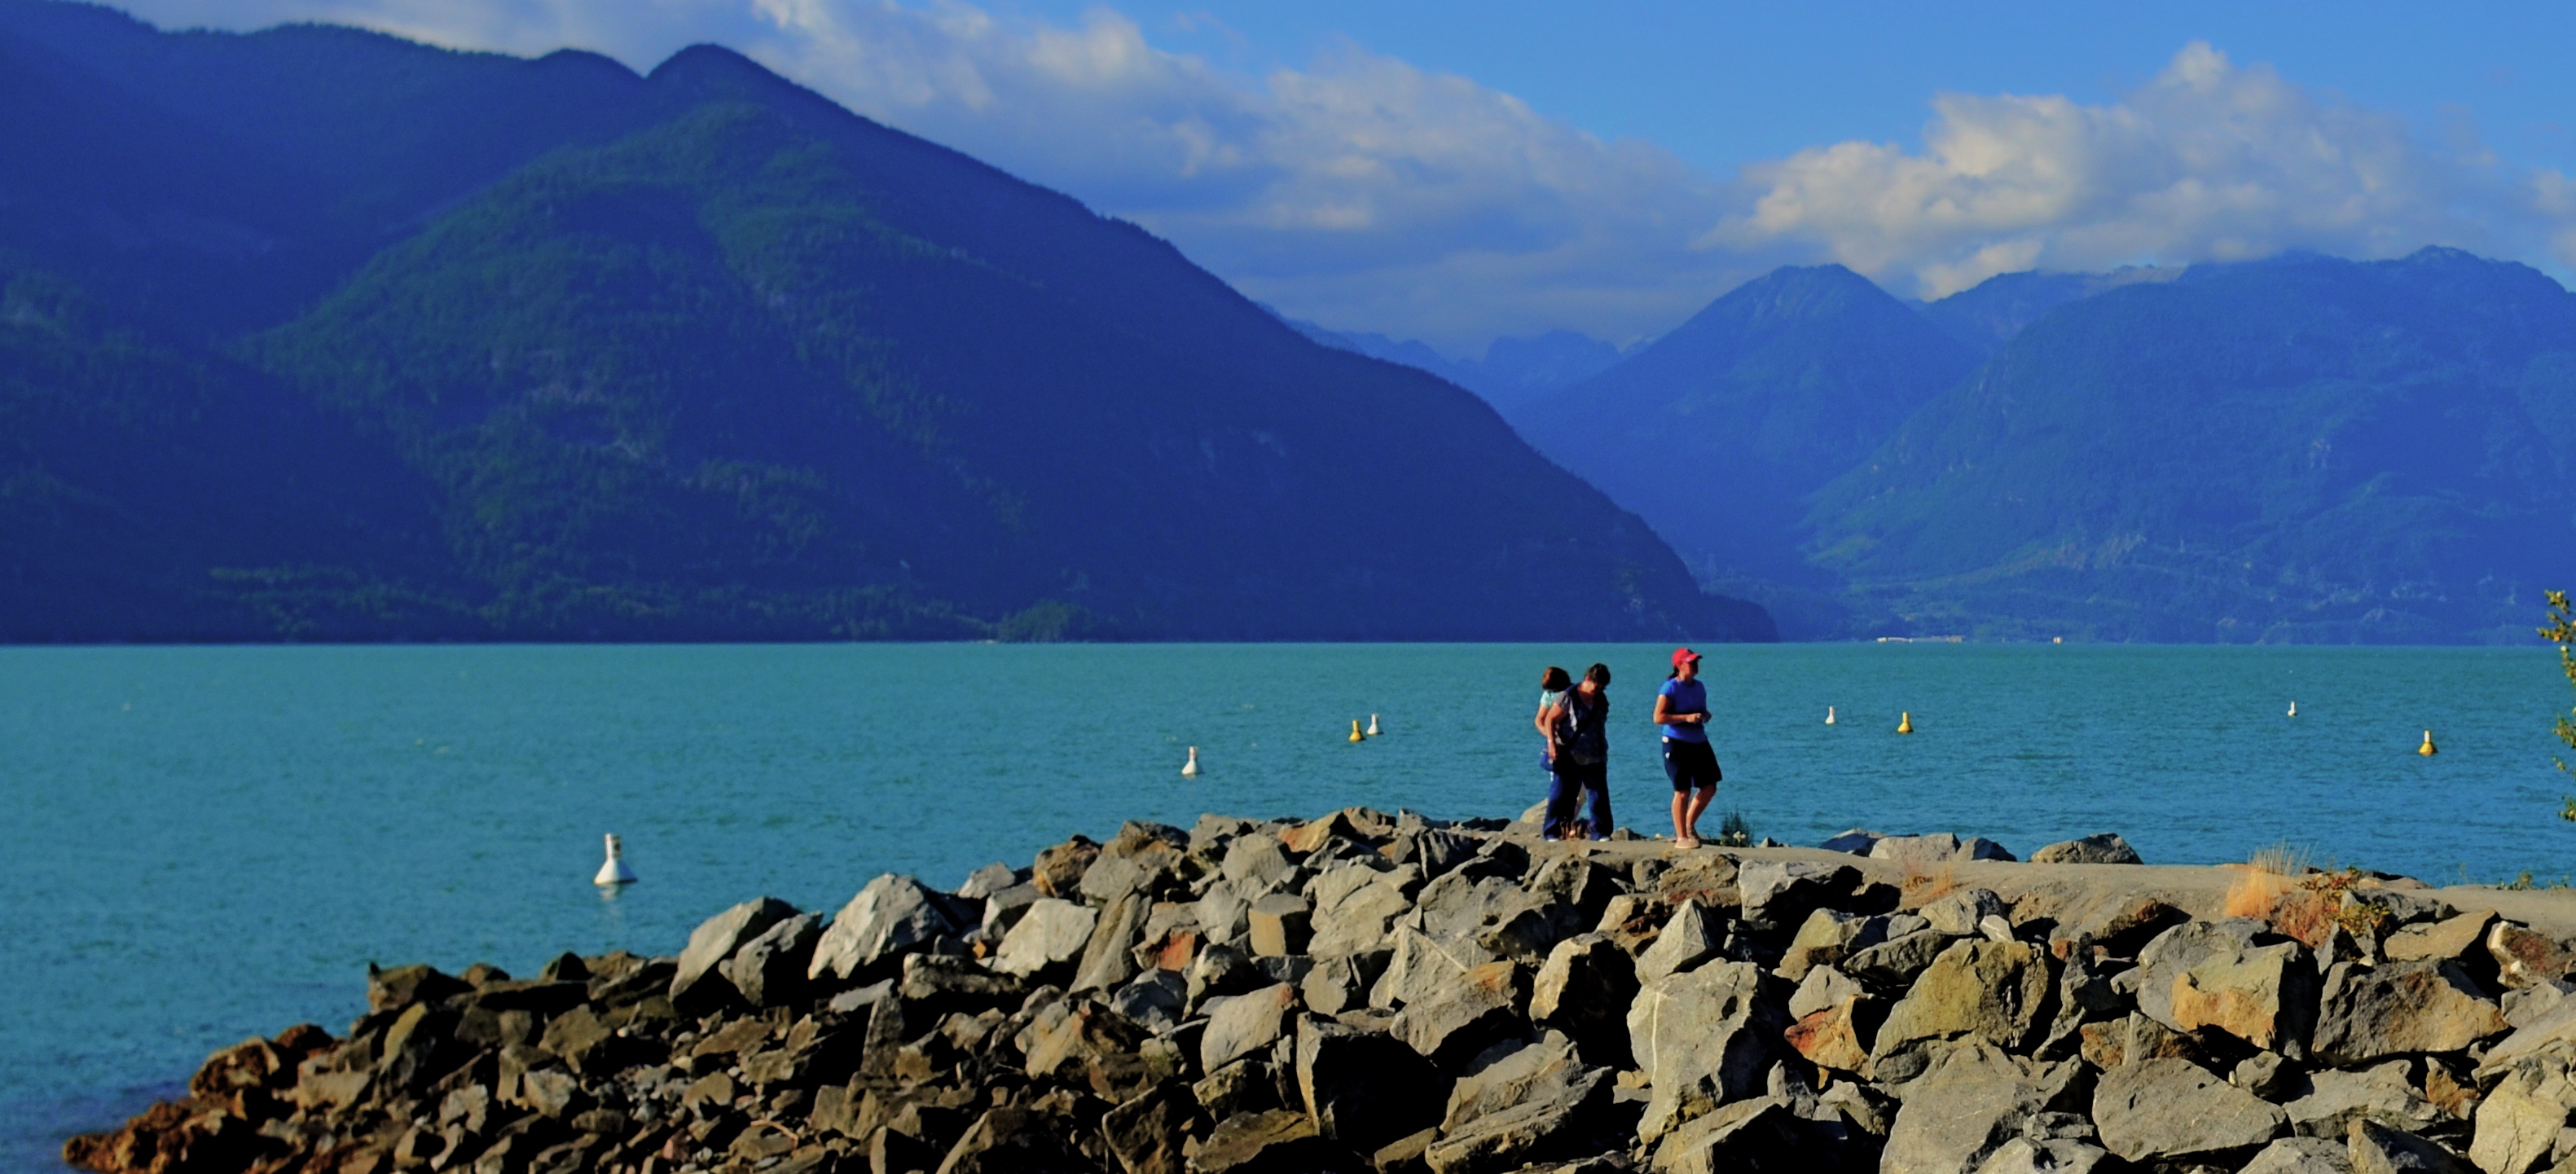
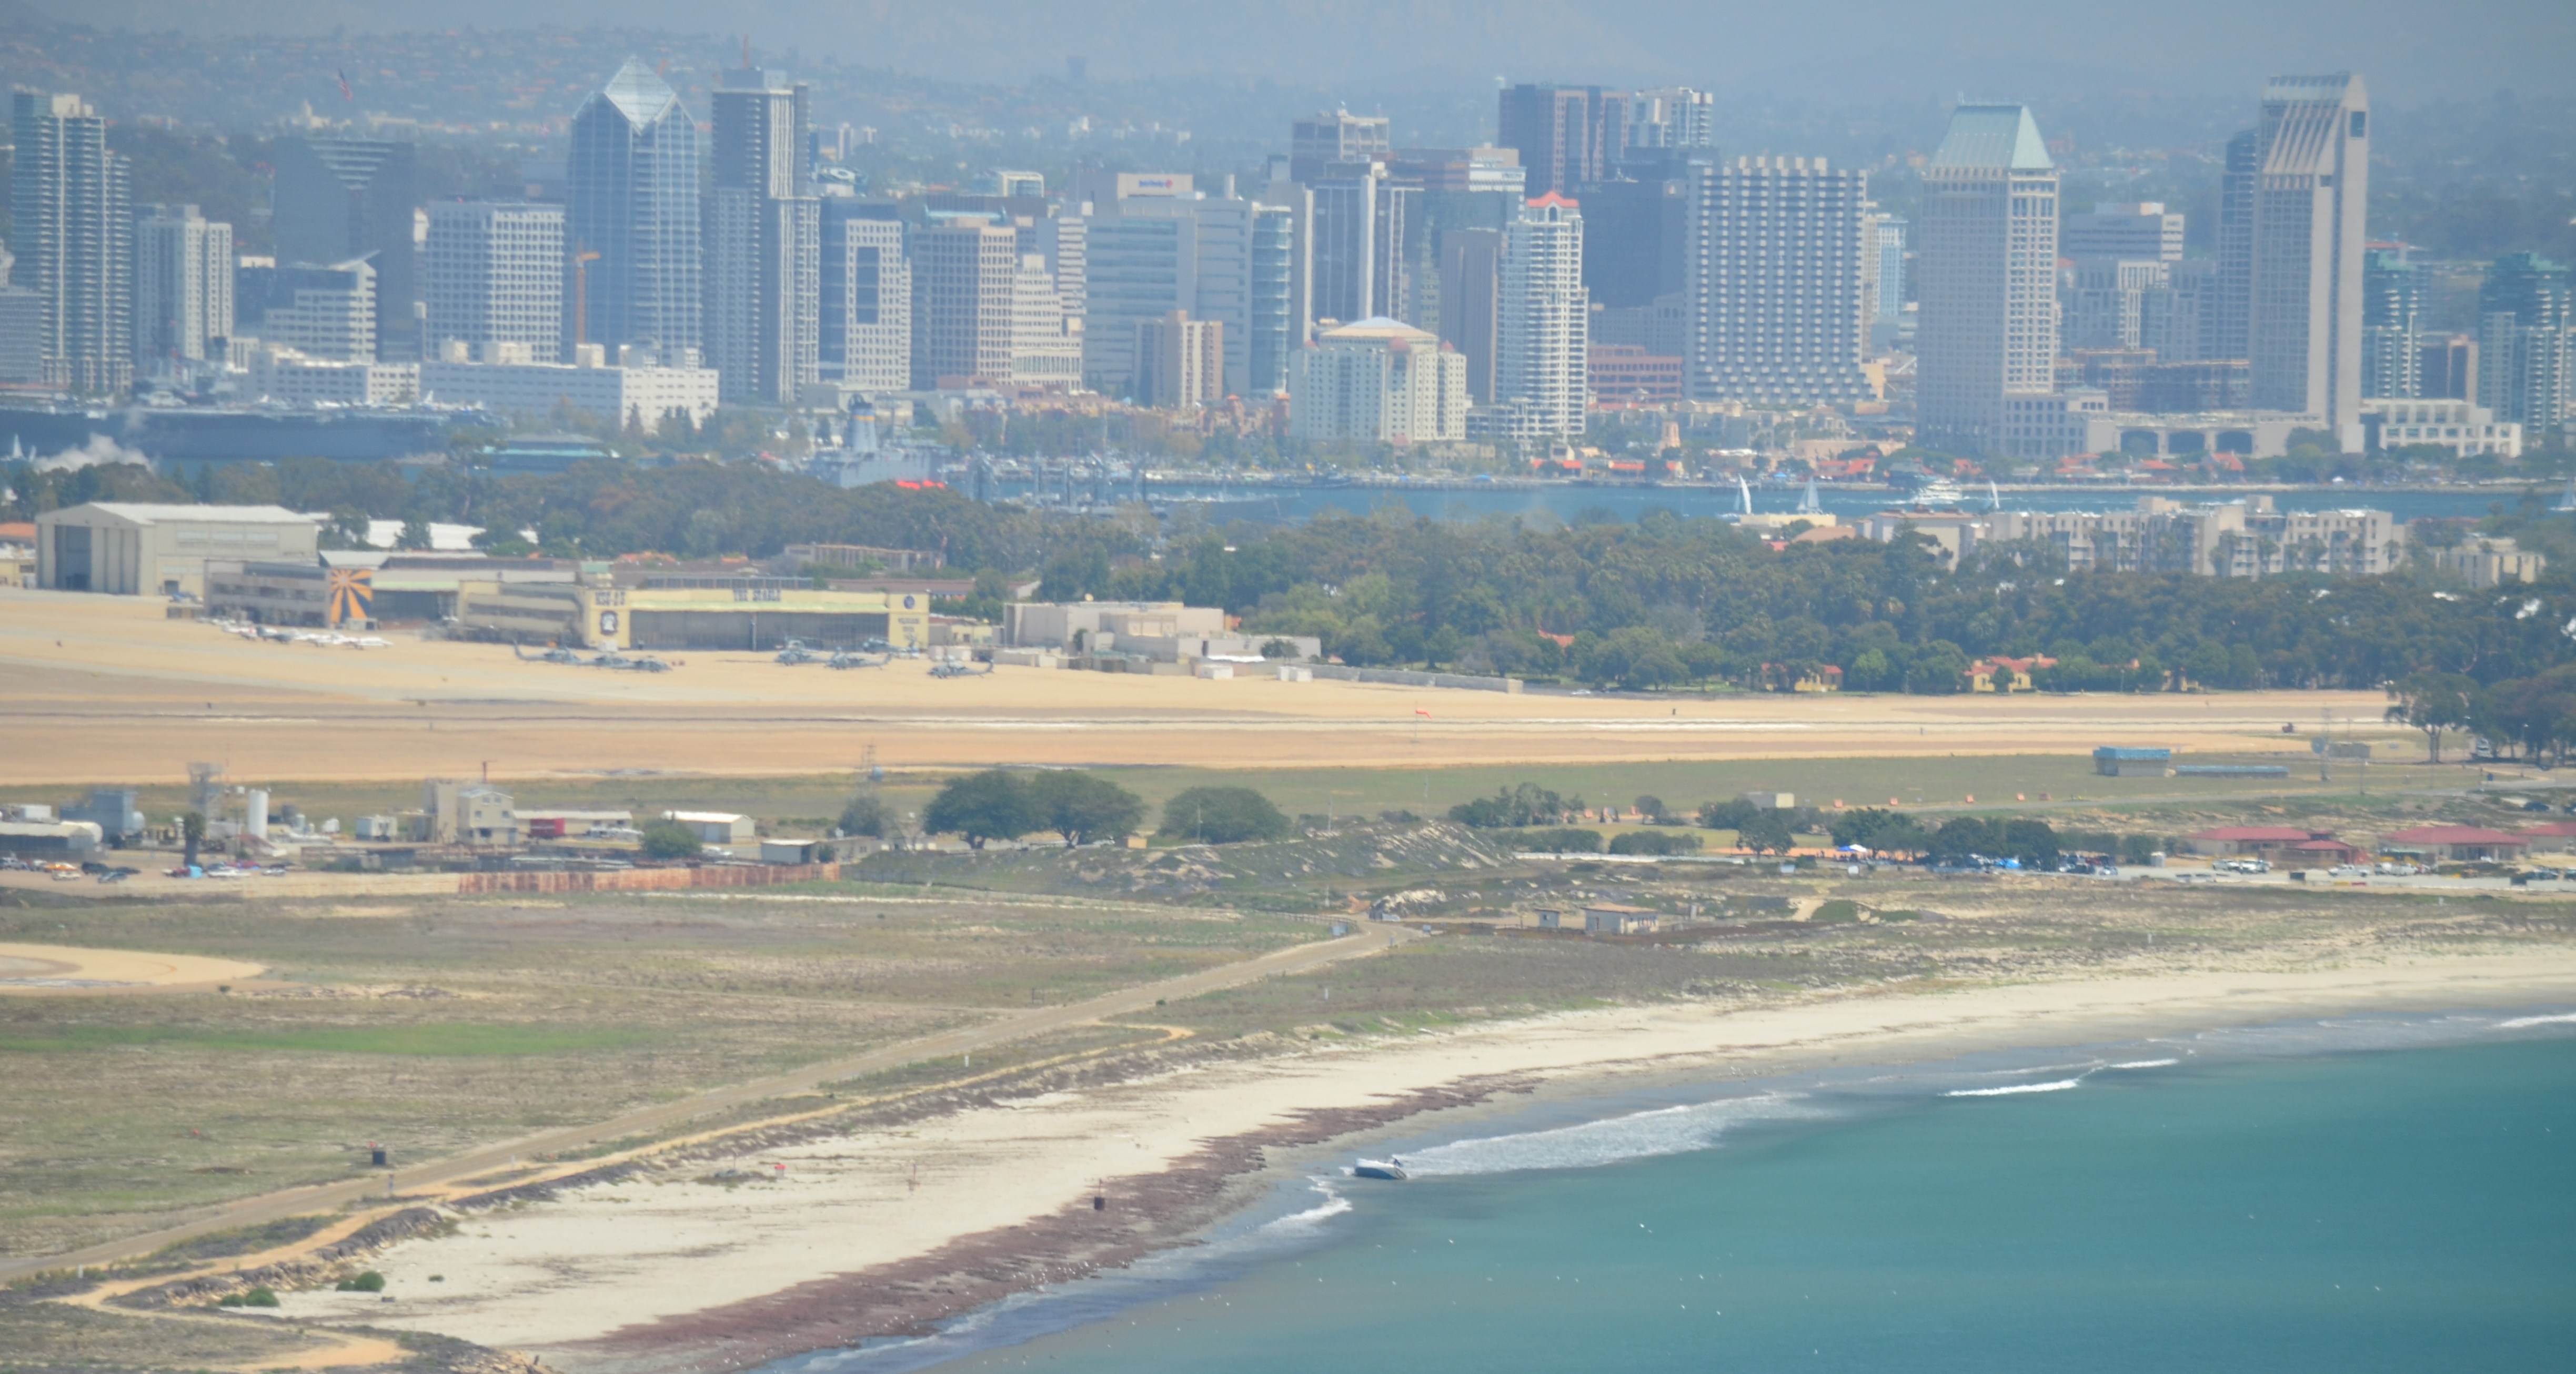
That Day At The Jetty (2016). A cropped edit of an originally larger 24mm wide-angle shot.
By MICHAEL PERKINS
EVERY PHOTOGRAPHIC LENS EVER MADE CREATES ARTIFACTS, distinct biases in the ways it renders the world it sees. When you shoot with a particular piece of glass, you’re also inviting in whatever flaws or limits are baked into that optic’s design and science. If you are the kind of shooter that constantly switches out lenses, this present less of a problem, since you’re used to snapping on the exact glass you need for every kind of shooting situation.
If, however, you try, like myself, to go nearly a day at a space with a minimum of gear, then you start to look for lenses that do most of what you want in most settings. Occasionally, this means compromising on, or even missing, a shot; but, by and large, it makes you more mindful of the image-making process from minute to minute. You plan better and react faster.
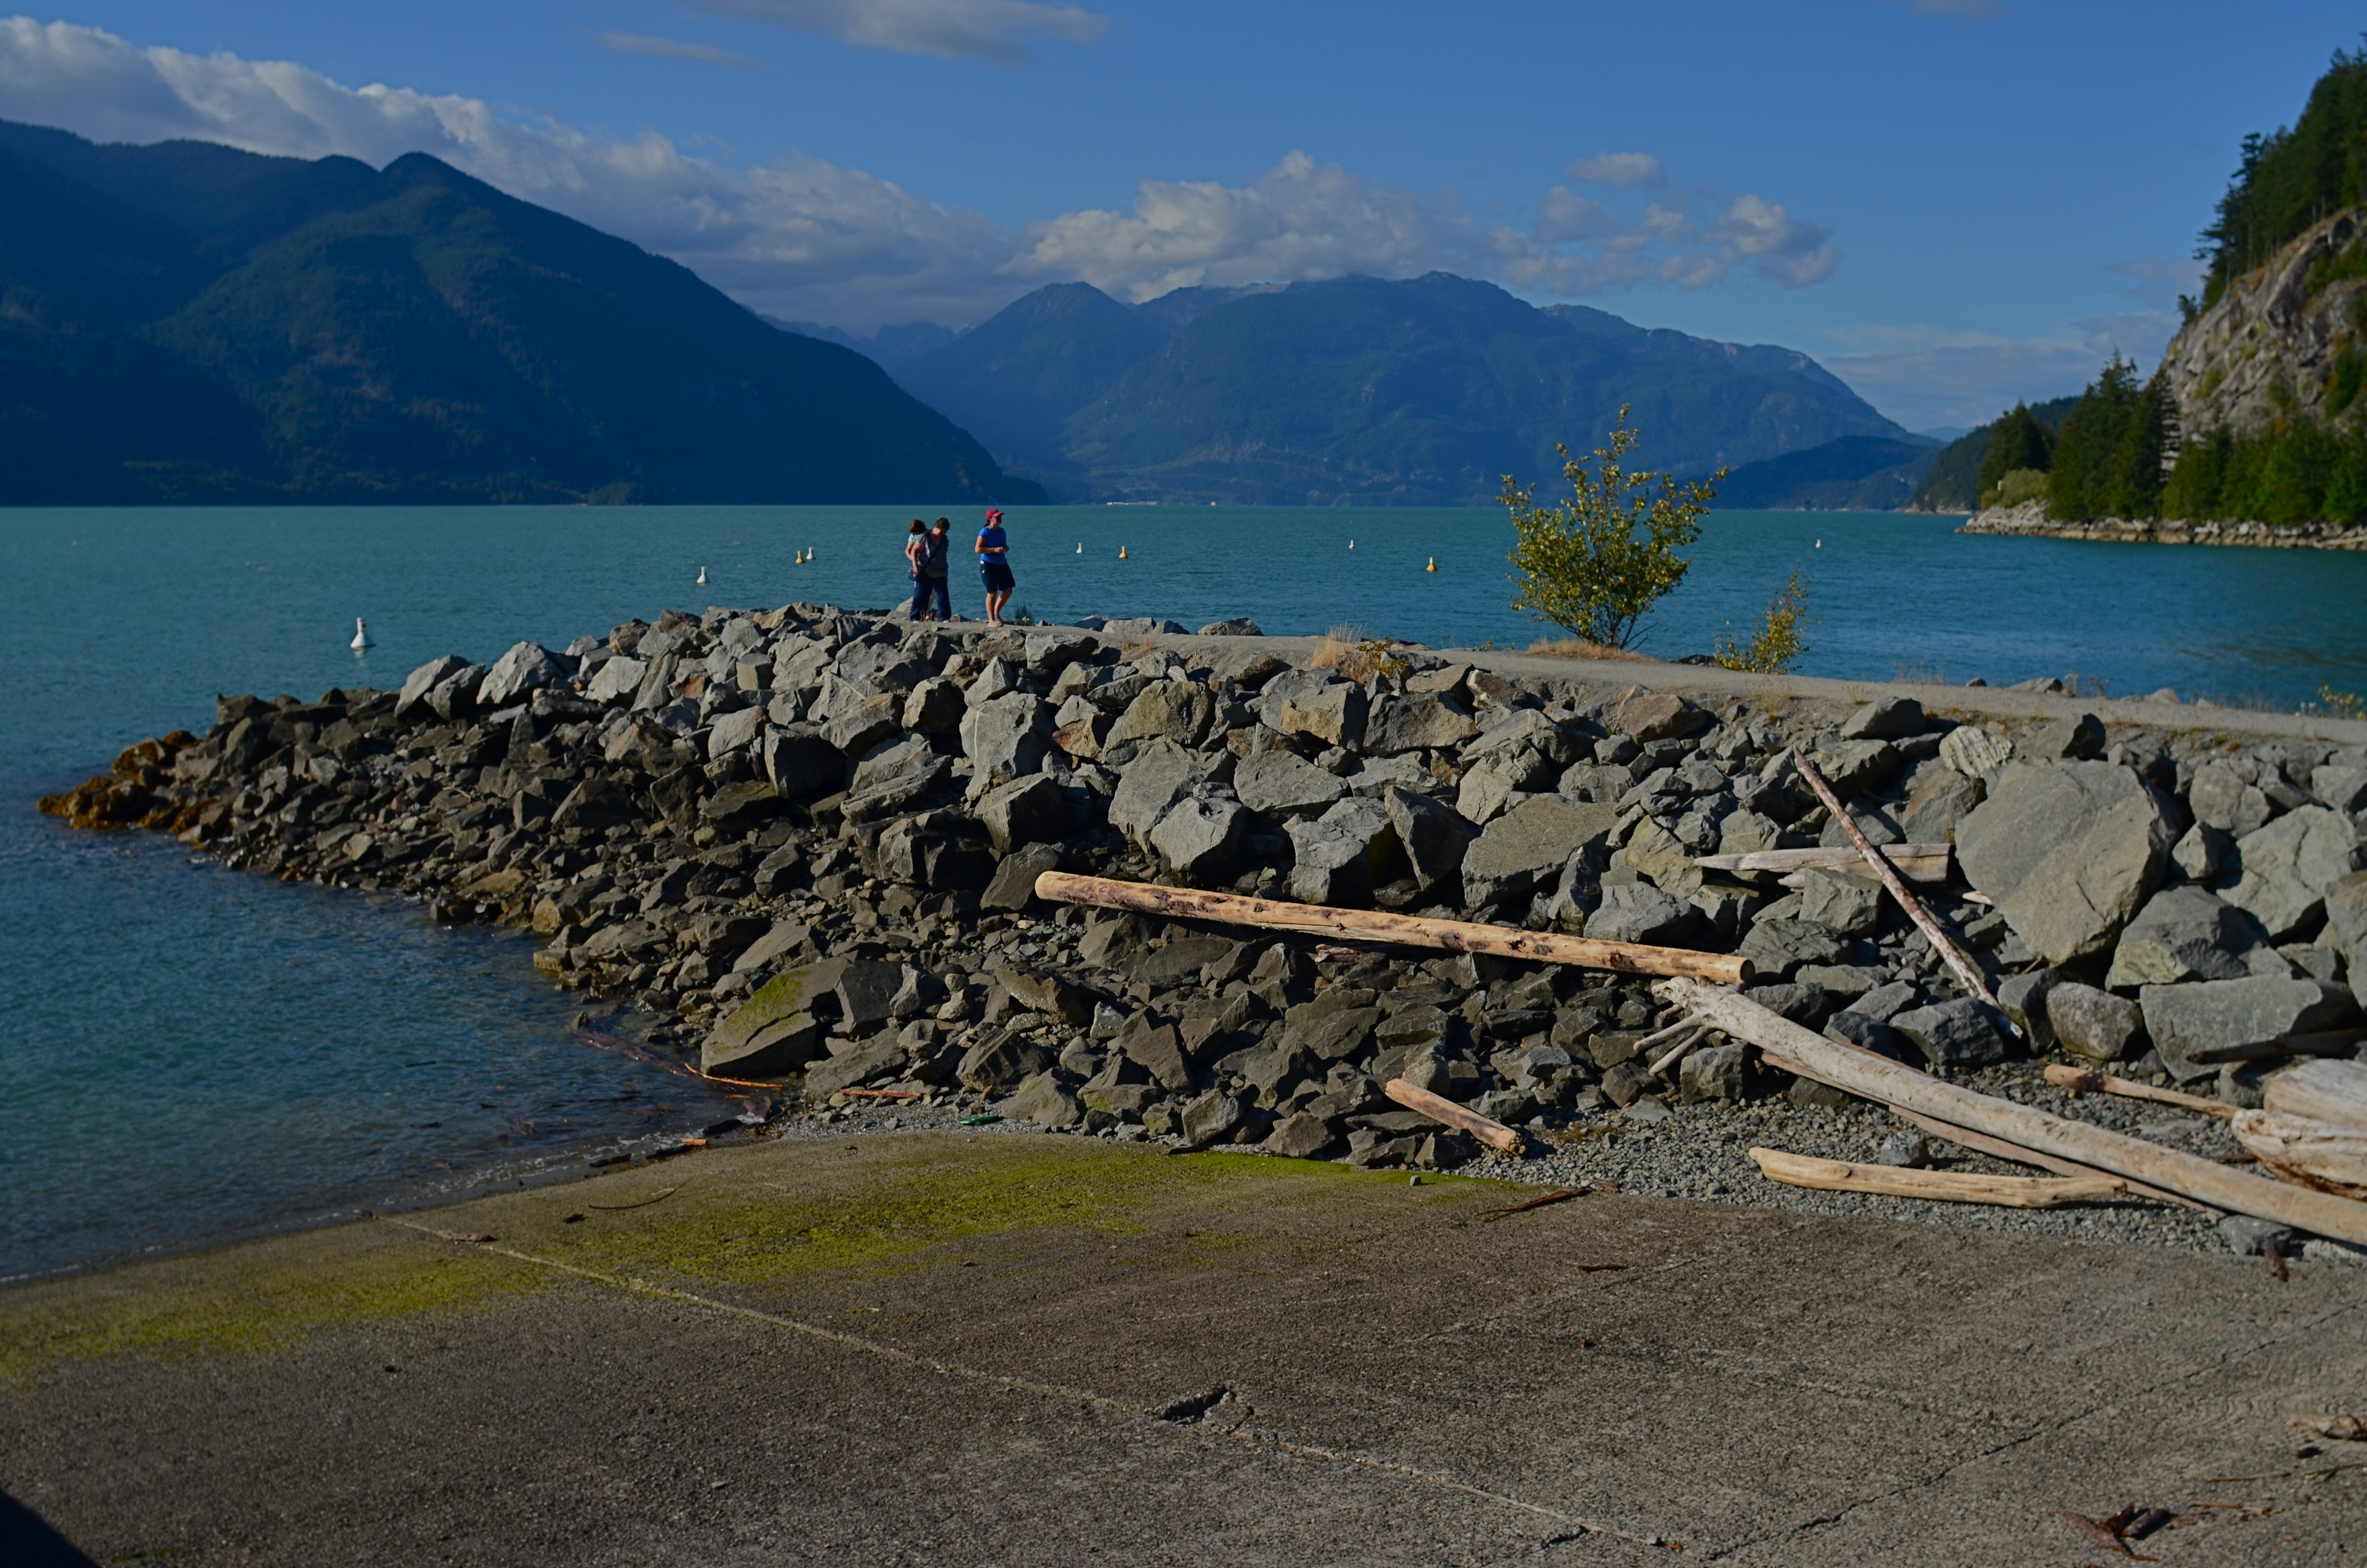
The original 24mm master shot, which is either fuller or too crowded, depending on one’s viewpoint.
In the case of one of photography’s most popular categories, that of landscape work, there seem to be two main types of lenses that do most of the heavy lifting: the ultra-wide angle, which convey “openness” and scope, and zooms, which help isolate specific parts of vast vistas. There are certainly situations in which both are ideal, but, on average, were I to be traveling very light for the day, I would probably take most of the day’s images with the ultra-wide, even if there was a particular area inside a larger scene that was more “important” than its surroundings, a situation in which most of us might utilize the zoom.
This goes to my belief that the composing process almost never stops with the click of the shutter. Rather, the click is just phase one, and a master shot that allows for many post-shot “re-thinks” is the best one to have. Let’s say, for the sake of argument, that the center of an immense mountain range is where the light or the subject story is strongest in a given image. If my master shot is a taken with a zoom, I’ve lost the ability to later discover additional approaches that remain possible if I have a wider shot’s worth of information from which to select. Starting with the larger shot, I can shift the cropping to any aspect ratio I want, change the balance of the composition, re-orient the linearity (to create a faux panorama, as in the top shot here) or even realize that there was an even stronger story to be told outside of the frame I originally envisioned with the zoomed master shot. Here’s the core point: it’s easier to have more picture than you need and pare some stuff away than to narrow your options beforehand and trust that you’ve nailed it, meanwhile ruling out any potential re-takes or second thoughts.
I do, of course use zooms at times, but, like my external flashes and tripods, I find fewer uses for them with each passing year. It’s odd how you can come to feel greater freedom with fewer tools. But sometimes it’s like the time Itzhak Perlman busted a string just before a concert, then performed the program on just three strings, to the utter amazement of the critical world. Photography proves time and again that there are times when the image’s “melody” magically comes forward. In spite of.
DATING YOUR EX
Sometimes your new favorite gear is actually your old favorite gear.
By MICHAEL PERKINS
SOME PHOTOGRAPHERS’ EQUIPMENT CASES ARE LIKE MARY POPPINS’ CARPET BAG: once they’re opened, you are just certain someone’s going to haul a floor lamp out of the thing. I myself hate being laden with a punishing load of gear when on a shoot, so I spend as much time as possible mentally rehearsing before heading out, trying to take just one lens which will do 90% of what I’ll need and leaving the rest of the toys at home. I developed this habit mainly because most of my work is done in a field orientation. Were I more consistently a studio homebody, then I could have everything I own just inches away from me at all times. So it goes.
What happens with my kind of shooting is that you fall in and out of love with certain gear, with different optics temporarily serving as your “go to” lens. I personally think it’s good to “go steady” with a lens for extended periods of time, simply because you learn to make pictures in any setting, regardless of any arbitrary limits imposed by that lens. This eventually makes you more open to experimentation, simply because you either shoot what you brung or you don’t shoot at all.
This work habit means that I may have half a dozen lenses that go unused for extended periods of time. It’s the bachelor’s dilemma: while I was going steady with one, I wasn’t returning phone calls and texts from the others. And over time, I may actually become estranged from a particular lens that at one time was my old reliable. I may have found a better way to do what it did with other equipment, or I may have ceased to make images that it was particularly designed for….or maybe I just got sick to death of it and needed to see other people.
But just as I think you should spend a protracted and exclusive period with a new lens, a dedicated time during which you use it for nearly everything, I also believe that you should occasionally re-bond with a lens you hardly use anymore, making that optic, once again, your go-to, at least for a while. Again, there is a benefit to having to use what you have on hand to make things happen. Those of us who began with cheap fixed-focus toy cameras learned early how to work around the limits of our gear to get the results we wanted, and the same idea applies to a lens that may not do everything, but also may do a hell of a lot more than we first gave it credit for.
Re-establishing a bond with an old piece of gear is like dating your ex. It may just be a one-off lunch, or you could decide that you both were really made for each other all along.
LYING WITH A STRAIGHT(ER) FACE
Most of us discovered the effects of fisheye lenses as part of the visual signature of rock’n’roll.
By MICHAEL PERKINS
THE NAME OF THIS BLOG, THE NORMAL EYE, IS A REFERENCE to the old nickname for fixed-focus “prime” lenses, non-zoomable glass like 35 and 50mm, that were once dubbed “normal” since they delivered the sense of space and proportion most closely resembling that of human vision. I’ll leave other combatants to decide whether this renders prime lenses “truer” in any way (those of you who think you know what “truth” is, advance to the fine arts class), but one things seems clear (that is, not cloudy): wide angle lenses, say 24mm or wider, tell a somewhat different truth, and thus create a distinct photographic effect.
Ultra-wides can generate the sensation that both proportion and distances (mostly front-to-back) have been stretched or distorted. They are thus great for shots where you want to “get everything in”, be it vast landscapes or city streets crowded with tall buildings packed into close quarters. They don’t really photograph things as they are, but do serve as great lenses for the deliberate effect of drama. I don’t use super-wides for too many situations, but, when I do, I make up for lost time by going overboard…again, largely as an interpretative effect.
Duets (2017). Rather than “reality”, this is more like a fisheye version of “hallucination-lite”.
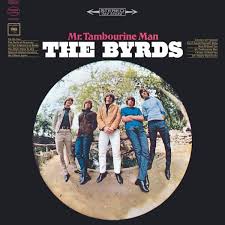
Nothing shoots wider than the fabulous fisheye lens, introduced in the 1920’s as a meteorological research tool, and shooting as wide as 8mm with a viewing arc of anywhere from 100 to 180 degrees. Starting in the 1960’s, the fisheye’s unique optics crept into wider commercial use as a kind of funhouse look, the circular image in which all extremes of the rounded frame bend inward, creating the feel of a separate world isolated inside a soap bubble. Some of our most iconic cultural images used this look to suggest a sense of disorientation or dreamlike unreality, with classic album covers like the Byrds’ Mr. Tambourine Man, the Beatles Rubber Soul and Jimi Hendrix’ Are You Experienced? using fishes to simulate the psychedelic experience. Far out, man.
However, used sparingly as simply a more extreme wideangle, the fisheye can create a drama that conforms more to a rectangular composition, especially when the inner core of the image is cropped into a kind of “mailbox” aspect, resulting in an image that is normal-ish but still clearly not “real”. Tilting the lens, along with careful framing, can keep the more extreme artifacts to a minimum, adding just enough exaggeration to generate impact without the overkill of the soap bubble. As with any other effects lens, it’s all a matter of control, of attenuation. A little of the effect goes a long way. I call it lying with a straighter face.
Fisheyes are a specialized tool, and, for most of photography, the optical quality in all but the most expensive ones have kept most of us from tinkering with the look to any significant degree. However, cheaper and optically acceptable substitutes have entered the market in the digital era, along with fisheye-“look” phone apps, allowing the common shooter to at least dip a toe into the pool. Whether that toe will look more like a digit or a fleshy fish hook is, as it always was, a matter of choice.
DEFINING SPACE

The use of an extreme wide-angle lens, like this fisheye, need not generate the bendy look of “barrel distortion”. It’s all in the composition.
By MICHAEL PERKINS
VISIT ENOUGH TOURIST SITES and you will eventually encounter the challenge of capturing very large objects, trying to squeeze the whole of a cathedral or a canyon into a single frame. Using a wide-angle lens is the first instinct, of course, but since even a 35mm is considered a wide-angle of sorts, there are any number of choices that all have their own pluses and minuses.
The lower the millimeter number, of course, the wider the lens. Simple enough on the surface, but you still have to decide what kind of wide you prefer. Each lens has slightly different coverage and properties, with the “super-wides” adding their own distinctive traits to the space you’re trying to capture. The two main properties you’ll notice most are barrel distortion and dimensional exaggeration, both of which will affect your lens choice for a given shooting situation.
Let’s look at barrel distortion. Lenses wider than about 24mm can make straight walls appear to bend outwards like the sides of a barrel, creating an unreal, and, for some, somewhat claustrophobic appearance most associated with the ultimate width of a fisheye (something around 8mm). The effect is that of a world cramped into the inside of a snow globe, and, depending on what look you’re going for, it can either be marvelous or miserable. It’s marvelous, for example, if you want to suggest tremendous depth in a shot.

A more modest wide-angle, like this 24mm delivers more conventional dimensions, but not as much coverage.
And that’s dimensional exaggeration, the other key trait of a super-wide, in which the perception of distance from front to back is greatly hyped, making a deep space look even deeper. Shooting a cavernous area like the inside of the rotunda at the Los Angeles Central Library, as seen in the frame at top, you may want to suggest vastness, and a fisheye, such as was used here, does that superbly. All I’ve done to defeat the accompanying barrel distortion is to crop away the original frame edges. Of course, using a more conventional focal length like a 24mm, as seen directly above, shows all dimensions in a much more natural way, but they sacrifice coverage area, revealing less of the ceiling and sides and creating the sensation that the shot is not inclusive of enough information. In the case of both lenses, how you frame and where you stand will produce significant variations on how you render the space.
Photography is about what to fill the frame with, of course, but it also involves some planning as to how technology does that best, based on the tools at hand and what they’re equipped to do.
(LESS THAN) PRIME OPPORTUNITY
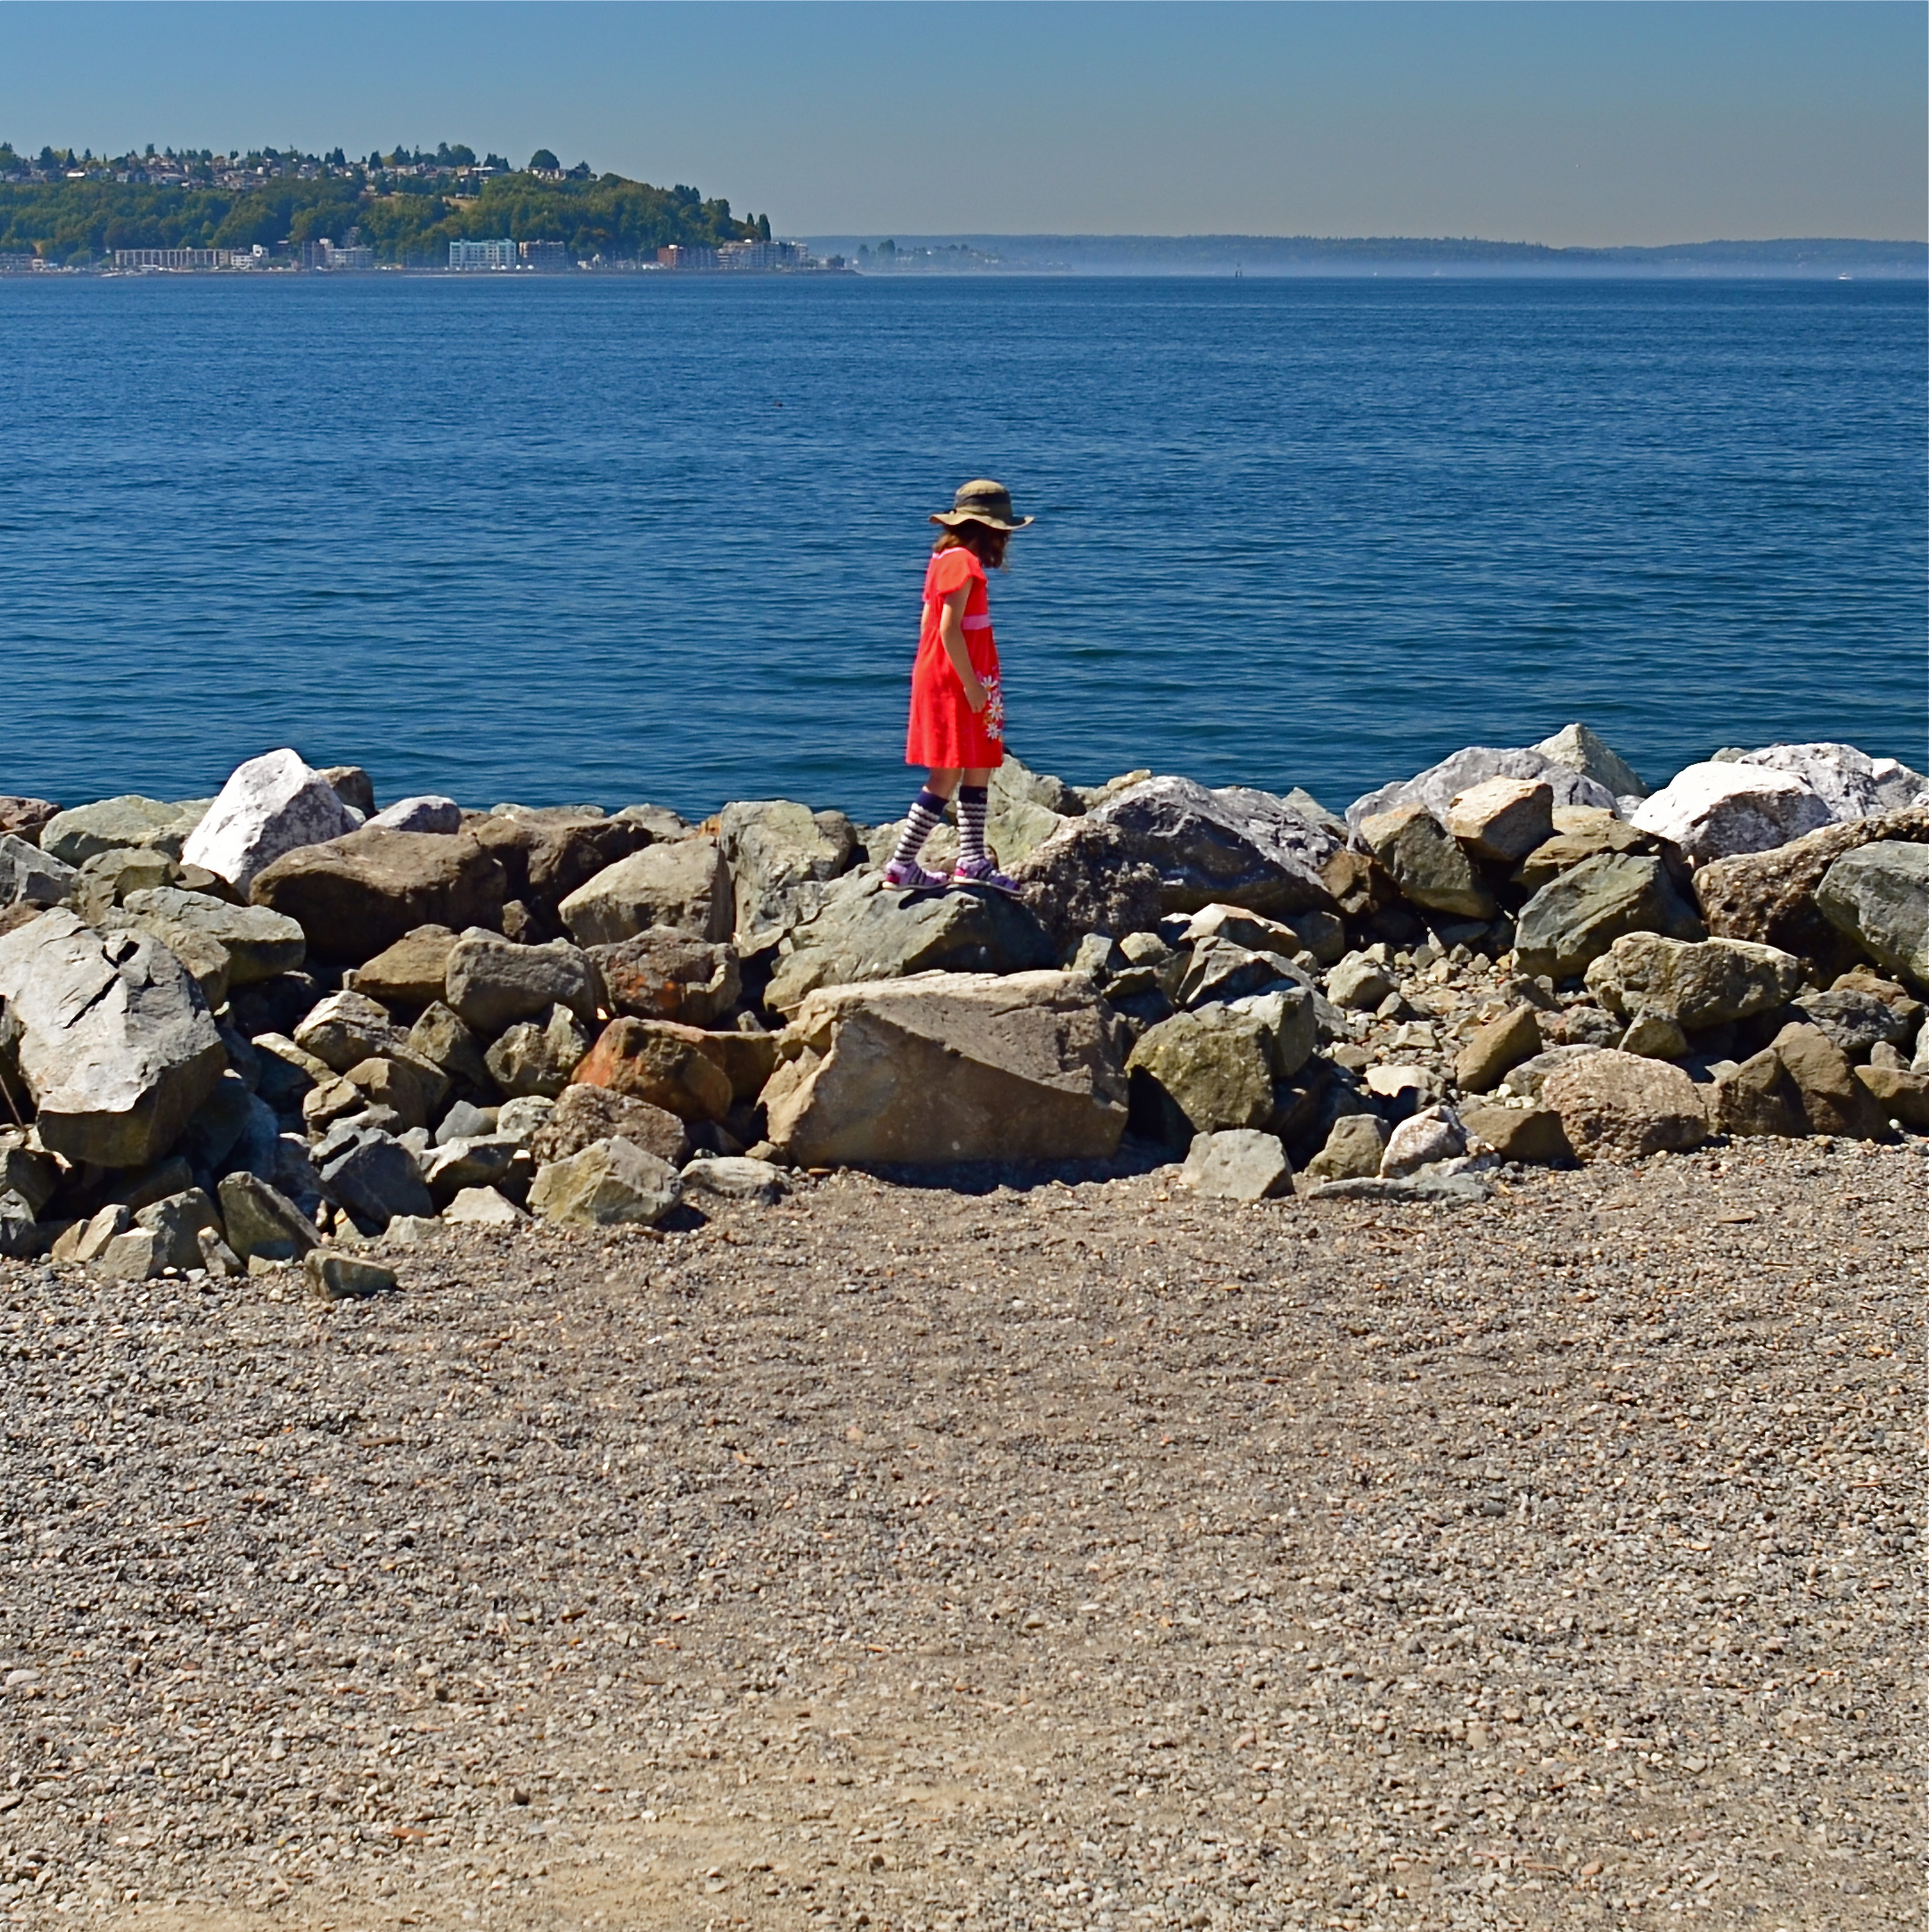
To Susan On The West Coast Waiting (2016). Shot from over 50 feet away with a 24mm wide-angle prime, then cropped nearly 70% from the original frame.
By MICHAEL PERKINS
EVERY DAY-LONG SESSION OF TRAVEL PHOTOGRAPHY dictates its own distinct rules of engagement. You can predict, to some degree, the general trend of the weather of the place where you’ll be staying/playing. You can pre-study the local attractions and map out at least a start-up list of things you might like to shoot. And you can choose, based on all your other prep, the equipment that will work best in the majority of situations, which keeps you from carting around every scrap of gear you own, saving reaction time, and, possibly, your marriage.
All well and good. However, even assuming that you make tremendously efficient choices about what lens you’ll most likely need on walkabout, there will be the occasional shot that is outside the comfort zone of said lens, something that it won’t do readily or easily. In such cases, the lens that would be perfect for that shot is likely forty miles away, back at your hotel. And here’s the place where you can pretty much predict what I advise.
Take the shot anyway.
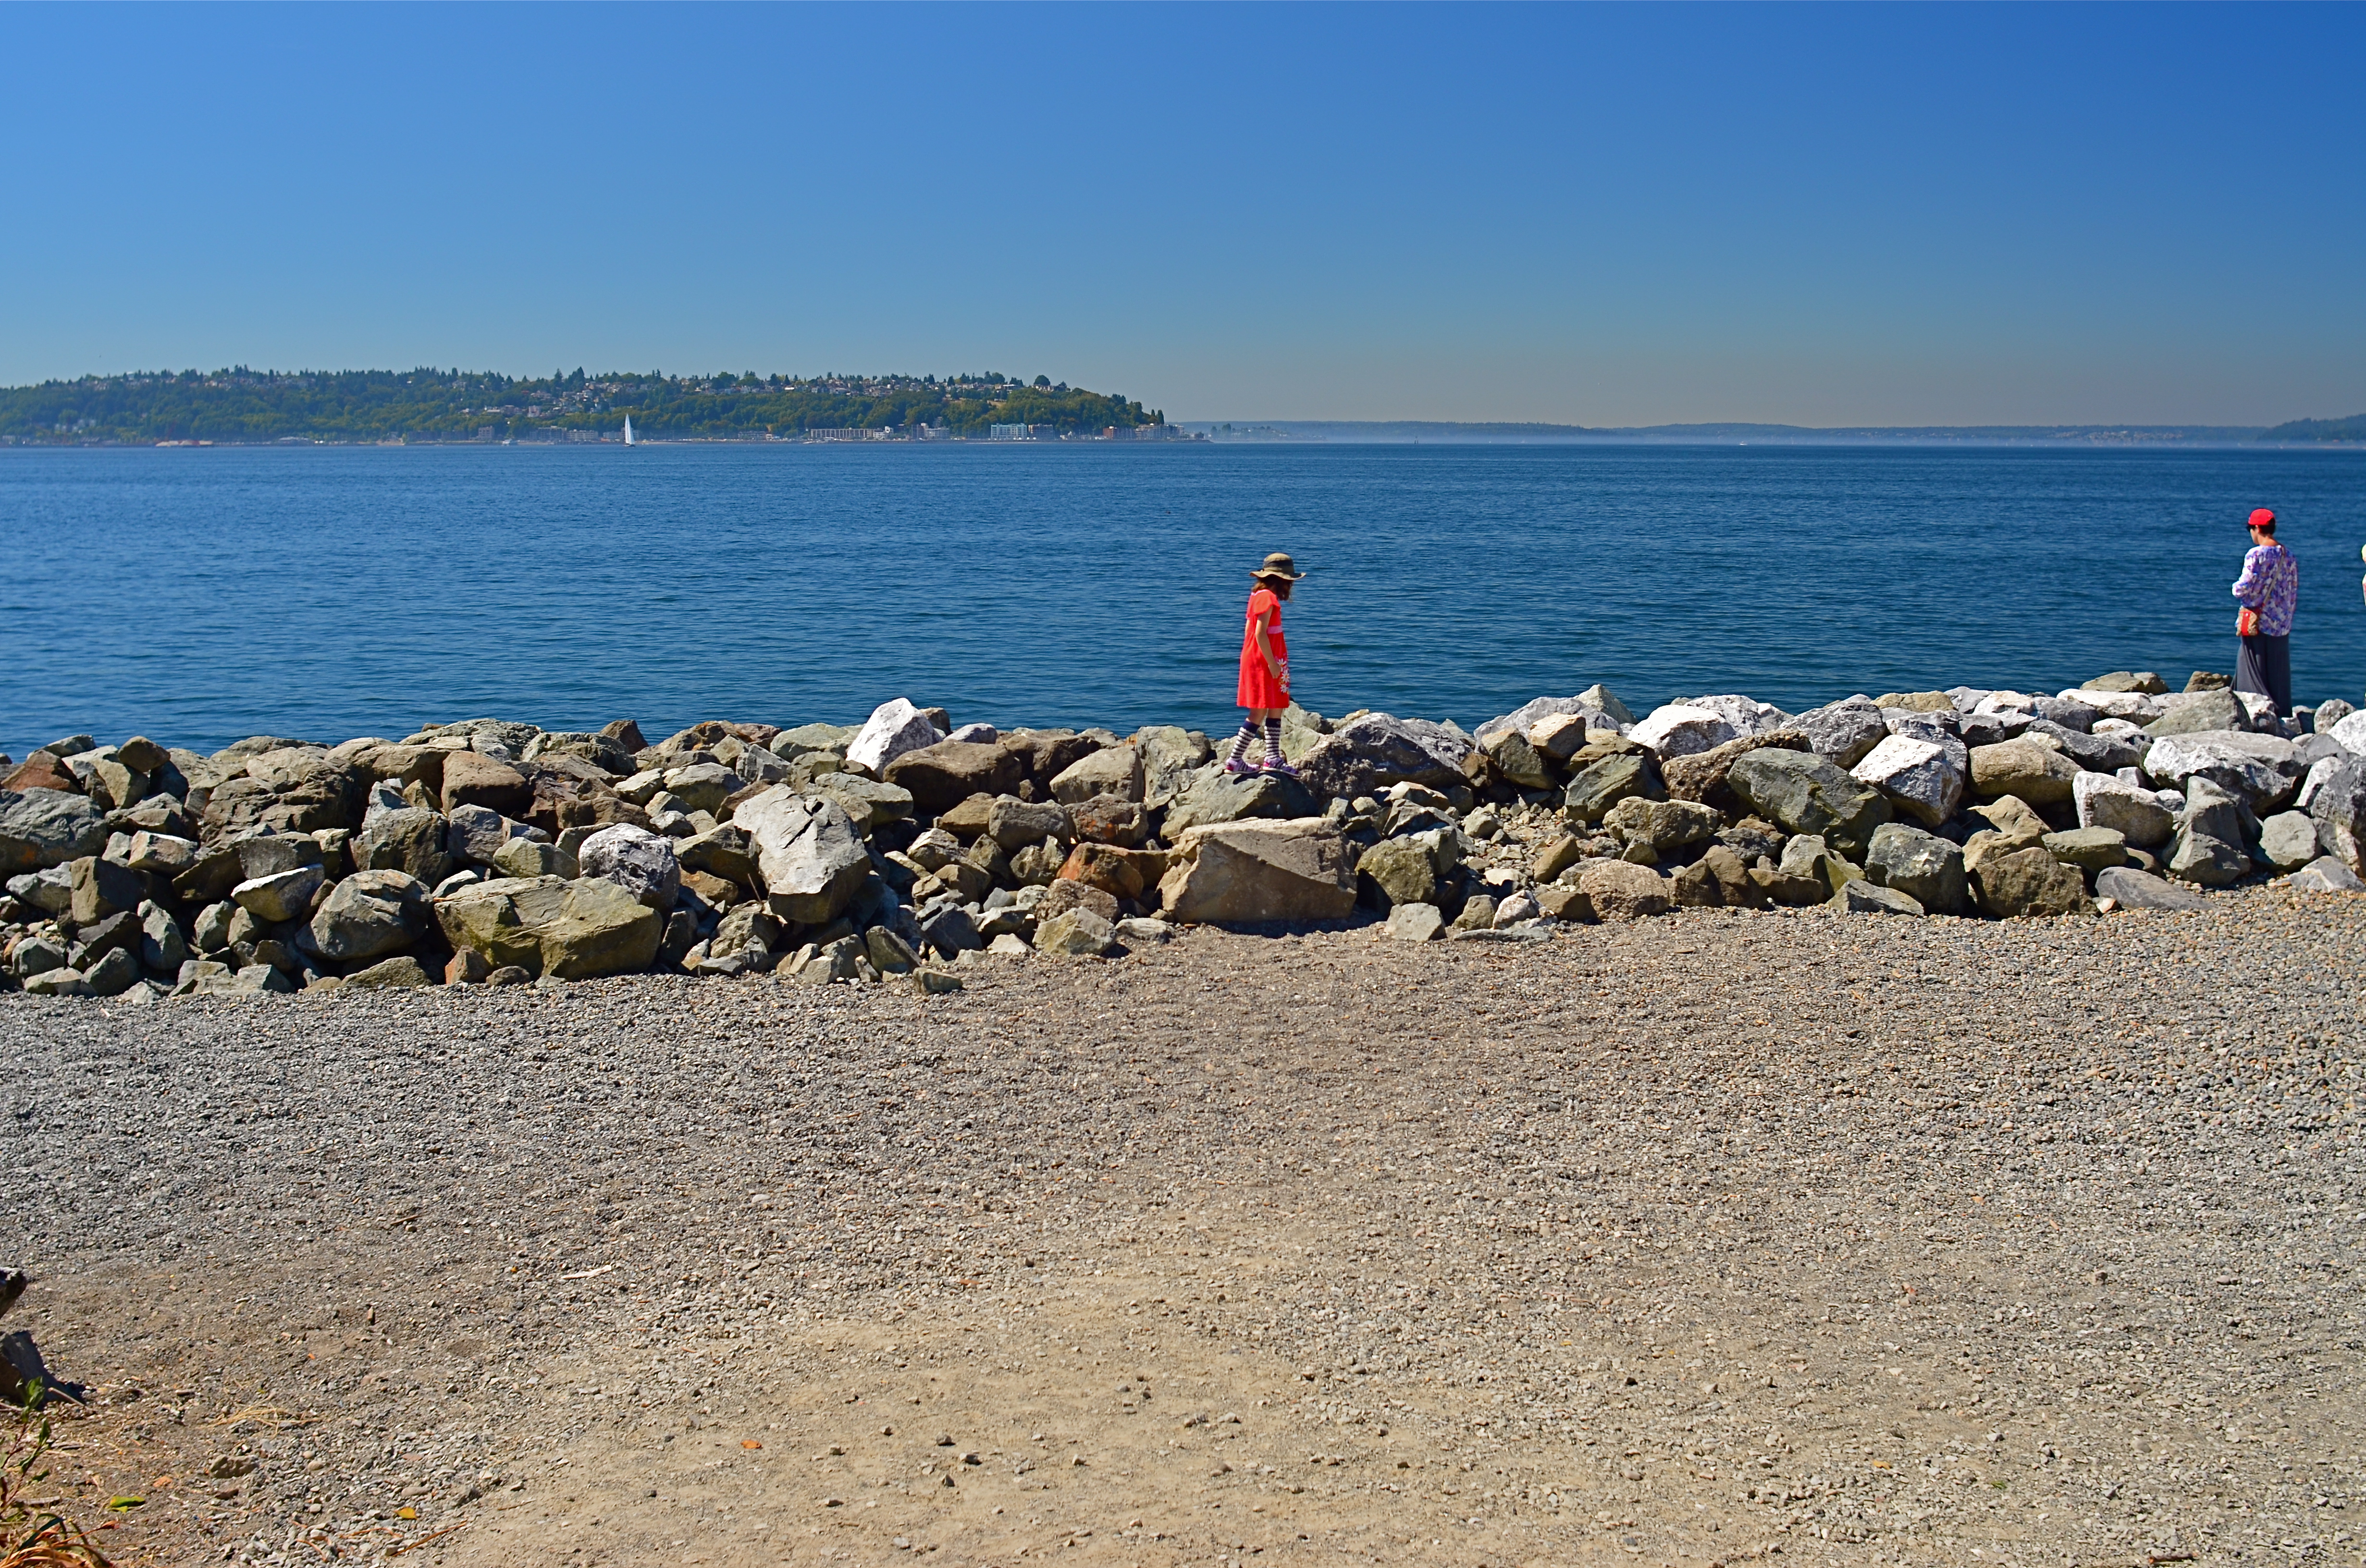
The original composition.
I tend to work with a 24mm prime f/2.8 lens when walking through urban areas. It just captures a wider field within crowded streets, allowing me to grab most vistas without standing in the path of onrushing traffic (a plus) or spending a ton of time re-framing before each shot (a pain). This particular 24 was made in the ’70’s and is both lightning fast and spectacularly sharp, which, being a manual lens, also saves time and prevents mishaps.
24mm, to me, produces a more natural image than the wide end of the more popular 18-55 kit lenses being sold today, since there is less perspective distortion (straight lines remain straight lines). However, since it is a wide-angle, front-to-back distances will appear greater than they are in reality, so that things that are already in the distance seem even more so. And, since it is also a prime, there is no zooming. In the case at left, I wanted the girl’s bonnet, dress and presence on those rocks, but, if I was going to get any picture at all, plenty of other junk that I didn’t need would have to come along for the ride.
You deal with the terms in front of you at the time. Without a zoom, I either had to take the shot, with the idea of later cropping away the excess, or lose it altogether. There are times when you just have to visualize the final composition in your mind and extract it when it’s more convenient. Simply capture what you truly need within a bigger frame of stuff you don’t need, and fix it later. It’s a cornball cliché, but the only shot you are guaranteed not to get is the one you don’t go for. And this is also a good time to remember that it’s always smart to shoot at the biggest file size you can, allowing for plenty of pixel density even in the aftermath of a severe crop.
You can’t pre-plan all the potential pitfalls out of a photo vacation. Can’t be done. Come as close as you can, and trust your eye to help you rescue the outliers down the road.
But take the shot.
A GENTLER EDGE

Storefront (2016). Details are used sparingly in the central building, even less crucial in the rest of the frame.
By MICHAEL PERKINS
CHOICES ABOUT FOCUS MIGHT JUST BE AMONG THE MOST IMPORTANT DECISIONS that a photographer will face. Clarity, sharpness, precision, call it what you might, focal crispness is a crucial determinant in the creation of an image, no less than light and subject matter. And it’s one of the easiest factors to manage, available to any one from the humblest point-and-shooter to master technicians on the Hubbell telescope.
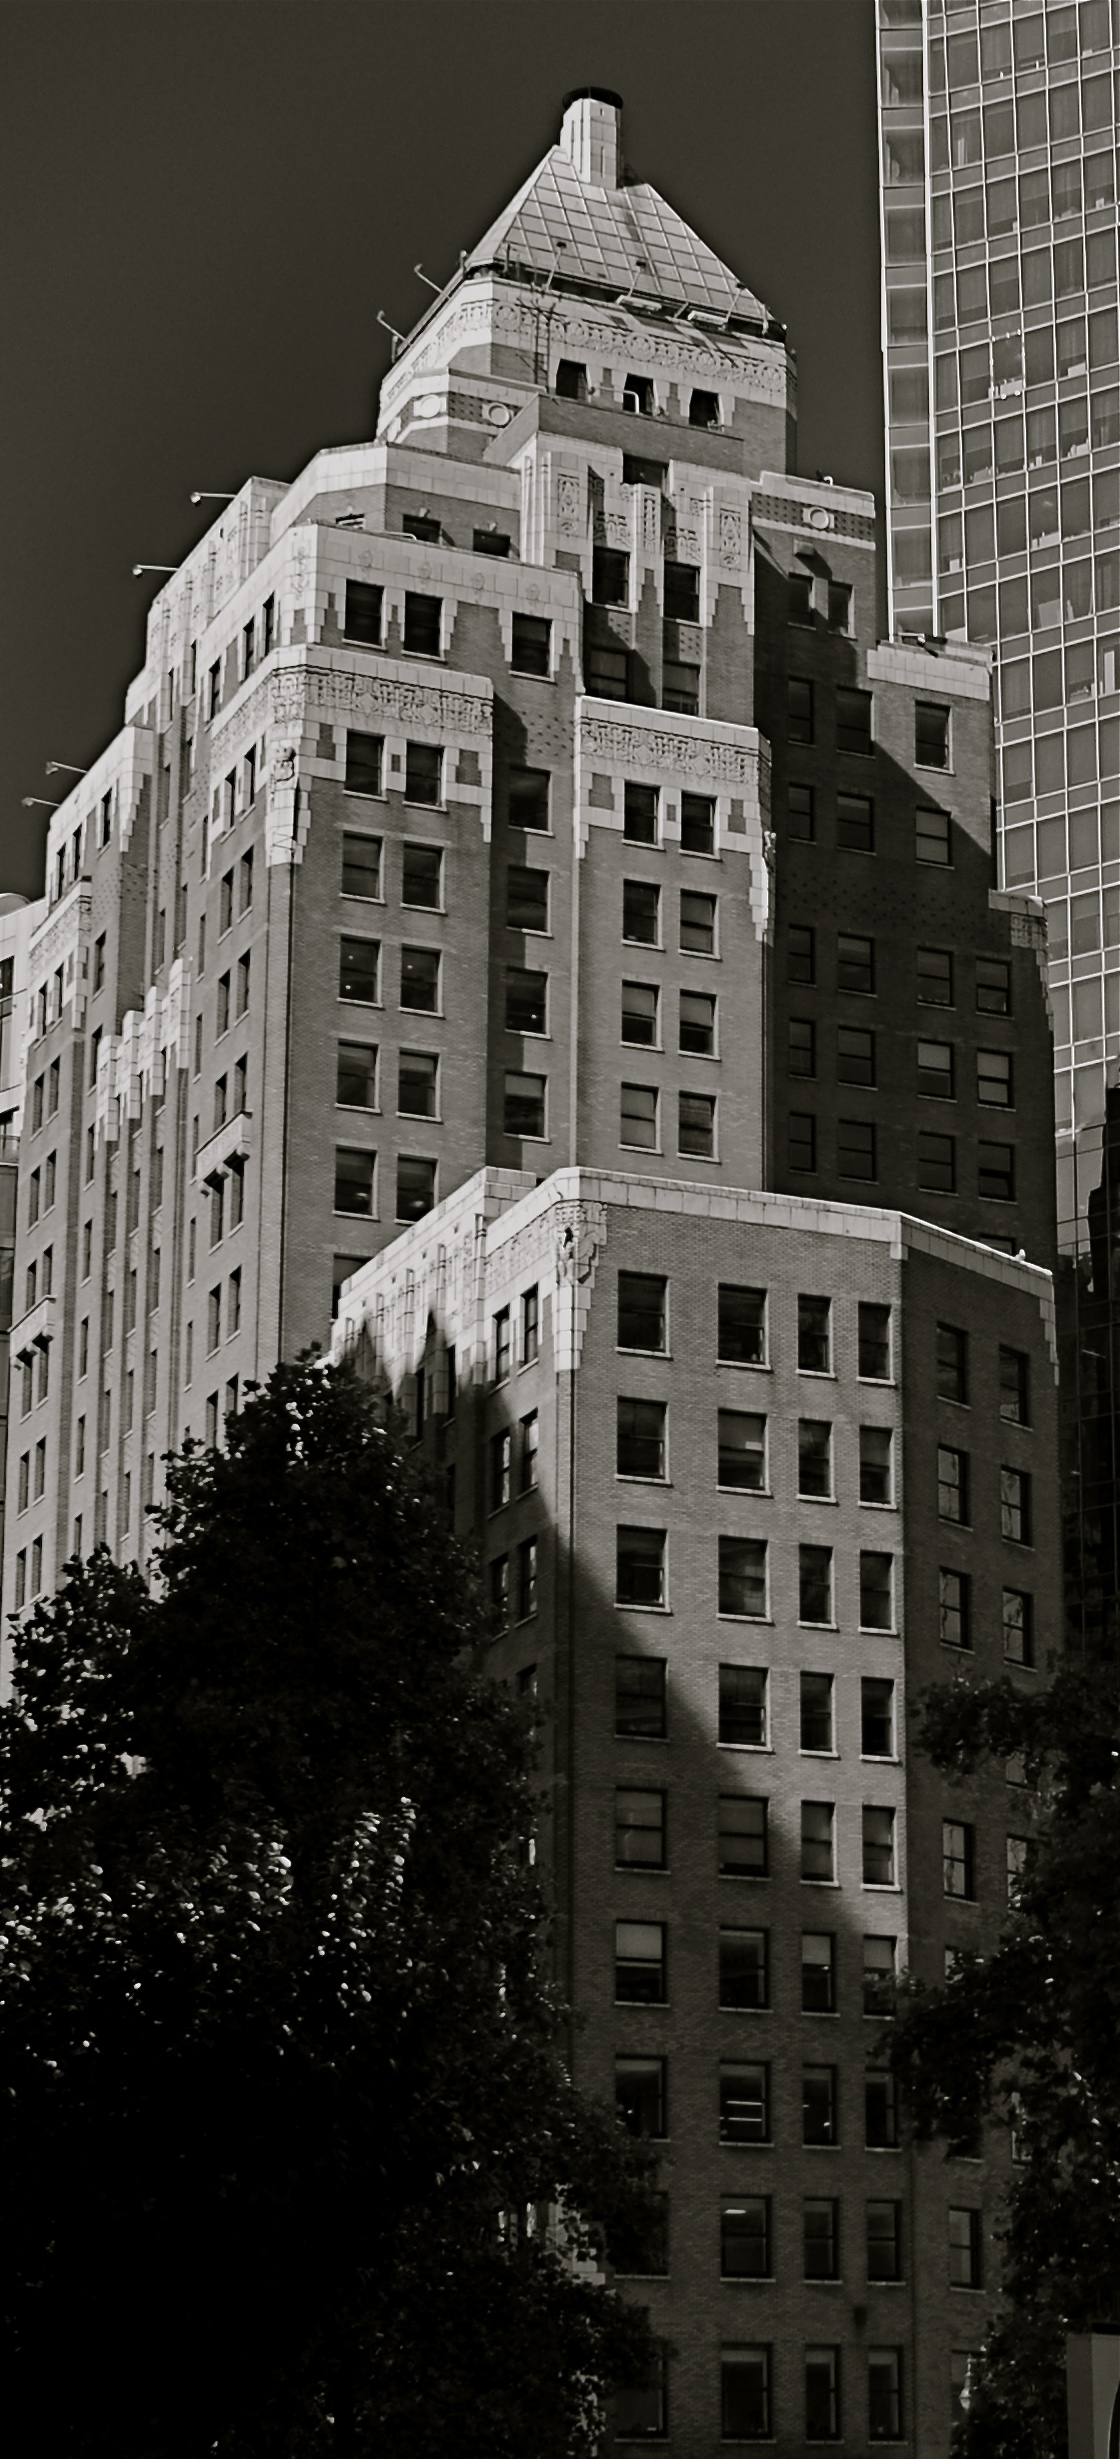
This urban shot seems to call for a sharp look overall.
There is a tendency for us to mentally default to an idea of “sharpness” when we hear the word focus, as if the only way to faithfully reproduce reality is strict adherence to that standard. But photography has never really been about reality, any more than painting or prose. We can’t help but add some small interpretive something to the process of making a picture, even if we believe a machine is largely in charge of the process. Amazingly, with very little effort, we can change the perception of an image by tiny adjustments in what is clear and what remains hazy or soft, straying selectively from the arbitrary sharpness standard.
Some subjects are rendered too coldly, too clinically, when subjected to razor focus, so that what you may gain in documentary detail you lose in intimacy, or in that undefinable feeling of being close. Applying this line of reasoning to my personal affection for architecture, there are buildings where the hard look of precision is perfectly suited to the subject; jutting skyscrapers, massive bridges, towering monuments, and the like. But put me in a small town, where the entire space feels sealed off from time itself, and the look, at least for me, becomes softer. Details take a back seat to feelings, and the harsh light of midday gives way to a soft, dreamy haze at late afternoon. The secrets of side lots, alleys and back yards become scavenger hunts. In both the big and small cities, focus is the key element in the creation of the image. And, also, in both cases, an advance visualization of the final result dictates exactly the degree of focus required.
Lenses and cameras possess wonderful technical properties that can deliver a slew of exotic effects. Still, with virtually no expense or fuss, a smarter mastery of focus is a decisive, even dramatic factor in helping a photograph develop its most effective language.
FRINGE ELEMENT

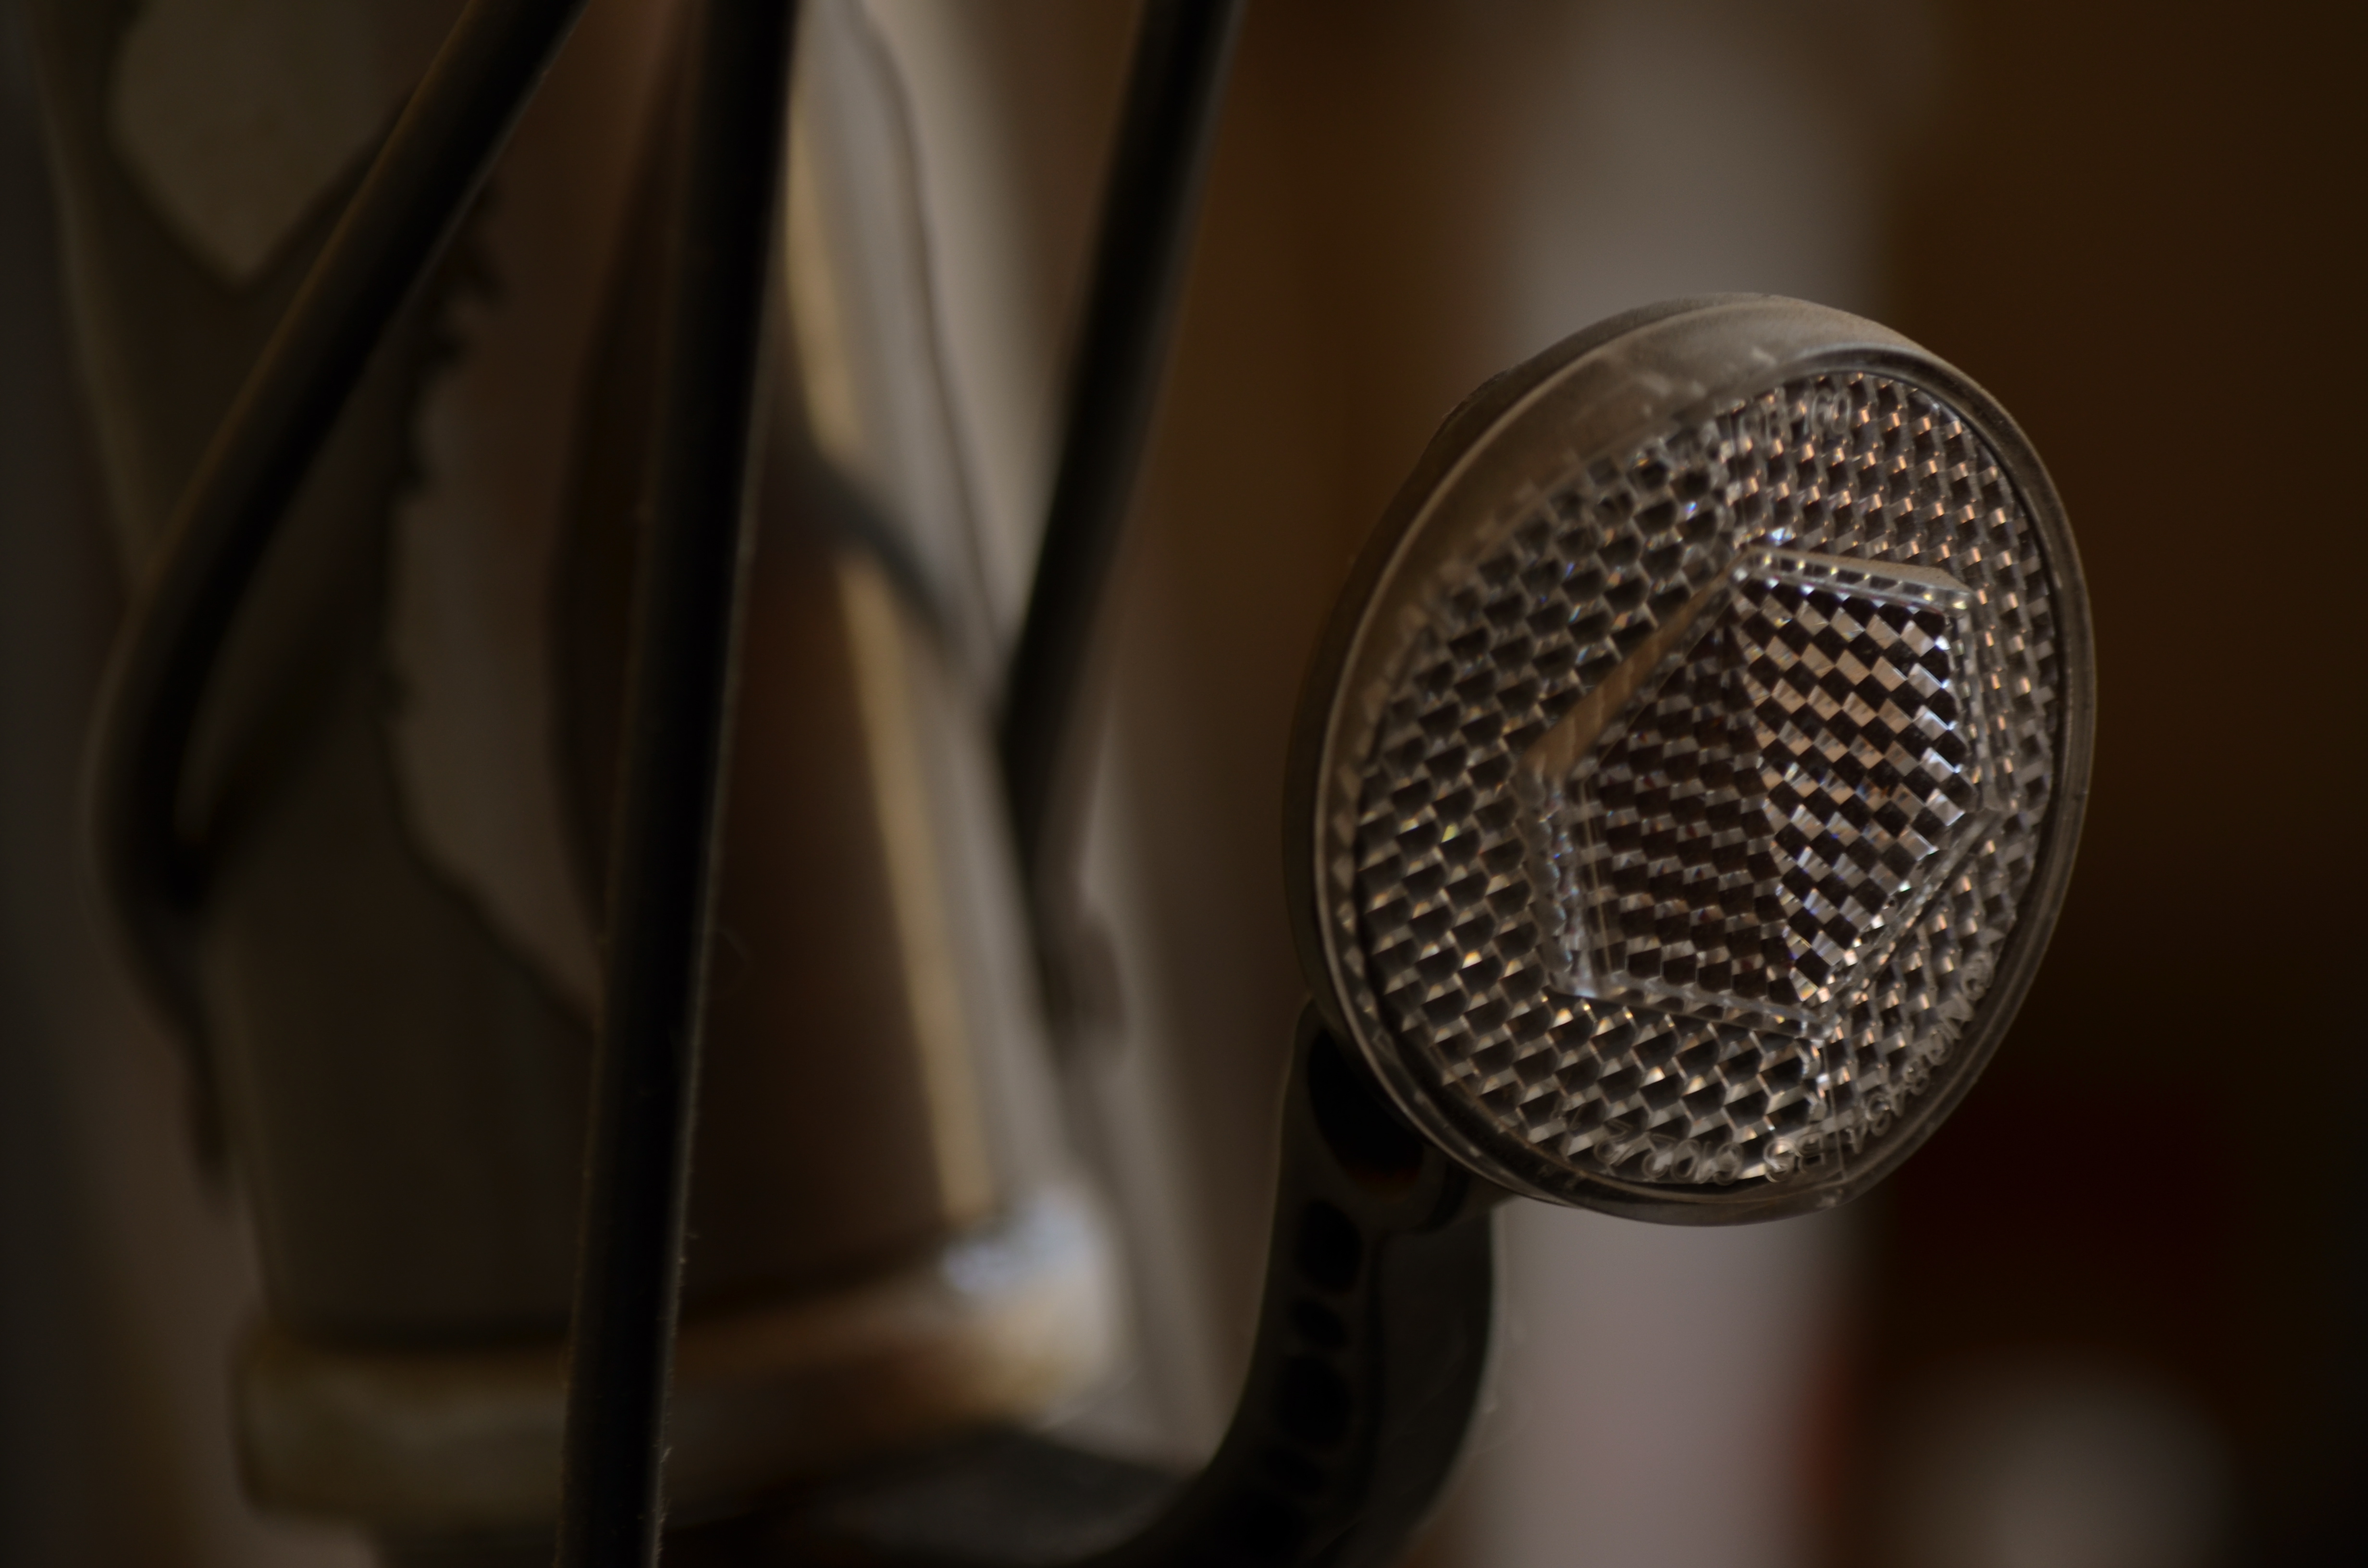
Extreme chromatic aberration (color fringeing) along the exterior line of the cactus.
By MICHAEL PERKINS
THE RESURRECTION, ABOUT TWENTY-FIVE YEARS AGO, of several low-end, cold-war-era plastic cameras as refurbished instruments of a kind of instinctual “art” photography has influenced even the digital and high-end photo markets, with light-leaking, optically sloppy toys like the Holga, the Diana and other “lomographic” devices shaking up the way many photographers see the world. Thus have these technically challenged little cameras, designed as children’s playthings, changed the conversation about what kind of formerly dreaded optical flaws we now elect to put back in to our work. Lomo shooters’ devotion to their craft has also meant a reprieve of sorts for film, since theirs in an analog realm.
But even digital shooters who don’t think of themselves as part of the “lomography” trip can dip a toe into the pool if they like, with filters on phone apps labelled “toy camera” which simulate light leaks, film-era “cross-processing” and the color variations caused by cheap plastic lenses. There are also companies like Lensbaby that manufacture all-new plastic optics designed to lend an element of creative control to what, in lomo cameras is largely random. The good news: you can, in effect, put defects into your pictures….on purpose.
Plastic lenses are generally much softer than glass lenses, giving a kind of gauzy appearance to your shots, so if you’re a fan of razor sharpness, they may not be your dish. More importantly, they produce a much higher amount of what is called “chromatic aberration”, which is more understandable under its nickname “color fringing”, since that more accurately describes how it looks. If you want a reasonably clear science-guy breakdown of CA, here’s a link to keep you busy this semester. The main take-home for most of us, though, is that the effect takes what would largely be a smoothly blended rendering of colors and makes them appear fractured, with the “fringe” look most noticeable along the peripheral edge of objects, where the colors seem to be separating like the ragged edge of an old scarf.
Why should you care? Well, mostly, you don’t have to. All lenses have a degree of CA, but in the better-built ones it is nearly undetectable to the naked eye, and can be easily processed away in Lightroom or a host of other editing suites. But people who are choosing to use plastic lenses will see it quite clearly, since such optics cause different wavelengths of light to “land” in the focal plane at slightly different speeds, meaning that, in essence, they fail to smoothly blend, hence the “fringing” effect.
Of course, chromatic aberration may be exactly the look you’re going for, if you want to create a kind of lo-fi, primitive look to your shots. In the cactus photo seen here, for example, taken with an all new plastic “art” lens, I found that the effect resembled old color printing processes associated with early postcards, and, for that particular image, I can live with it. Other times I would avoid it like the plague.
Plastic lenses, like any other add-ons or toys, come with their own pluses and minuses. Hey, if you’re a ketchup person, then soak your plate with the stuff. But if you believe that it just louses up a good steak, then push the bottle away. Just that simple.
WORKHORSES
By MICHAEL PERKINS
WHAT MAKES A LENS GREAT, AT LEAST FOR ME, is the degree to which I can forget about it.
The best images come from being able to shoot decisively and in the moment. That means knowing instinctively what your lens is good at, and using that information to salvage more pictures. Such knowledge only comes from repetition, trial and error, patience, and all those other tedious old-school virtues that drive people crazy but drive their work to perfection. And, eventually, it means you and the lens must think and react as one, without a lot of conscious thought.
I only know one way to get to that point with a given piece of glass, and that’s to be “monogamous” with it, using a given lens for nearly 100% of my work for long periods of time. Shuffling constantly from lens to lens in an effort to get “just the right gear” for a particular frame actually leads me to be hyper-conscious of the limits or strengths of what I’m shooting with, to be less focused on making pictures and more focused on calculating the taking of pictures. I believe that the best photos start coming the closer you can get to a purely reflexive process. See-feel-shoot.
If you’ve never chosen your own version of a “go-to” lens, one that can stay on your camera almost always, and give you nearly every kind of shot, I would suggest biting off a fat space of practice time and trying it. Snap on a 35mm and make it do everything that comes to hand for a day. Then a week. Then a month. Then start thinking of what would actually necessitate taking that lens off and going with something else. And for what specific benefit?

Choose your lens based on the entirety of subject matter you’re likely to try to shoot in a day.
You may find that it’s better getting 100% comfortable with one or two lenses than to have a passing acquaintance with six or seven. The above image could have been taken with about five different lenses with comparable results. But whatever lens I used, it would have been easier and faster if I had selected it because it would also work for the majority of the other shots I was to attempt that day. Less time rummaging around in your kit bag equals more time to take pictures.
Every time there is a survey on what the most popular focal length in photography is, writers tend to forget that the number one source of imagery today is a cell phone camera. That means that, already, most of the world is shooting everything in the 30-35mm range and making it work. And before we long for the “good old days” of infinite choices, recall that most photographers born before 1960 had one camera, equipped with one lens. We like to think we are swimming in choices but we need to make sure we’re not actually drowning in them.
Find the workhorse gear that has the most flexibility and reliability for what you most want to do. Chances are the lens that will give you the best results isn’t the shiny new novelty in the catalogue, but just inches away, right in your hand.
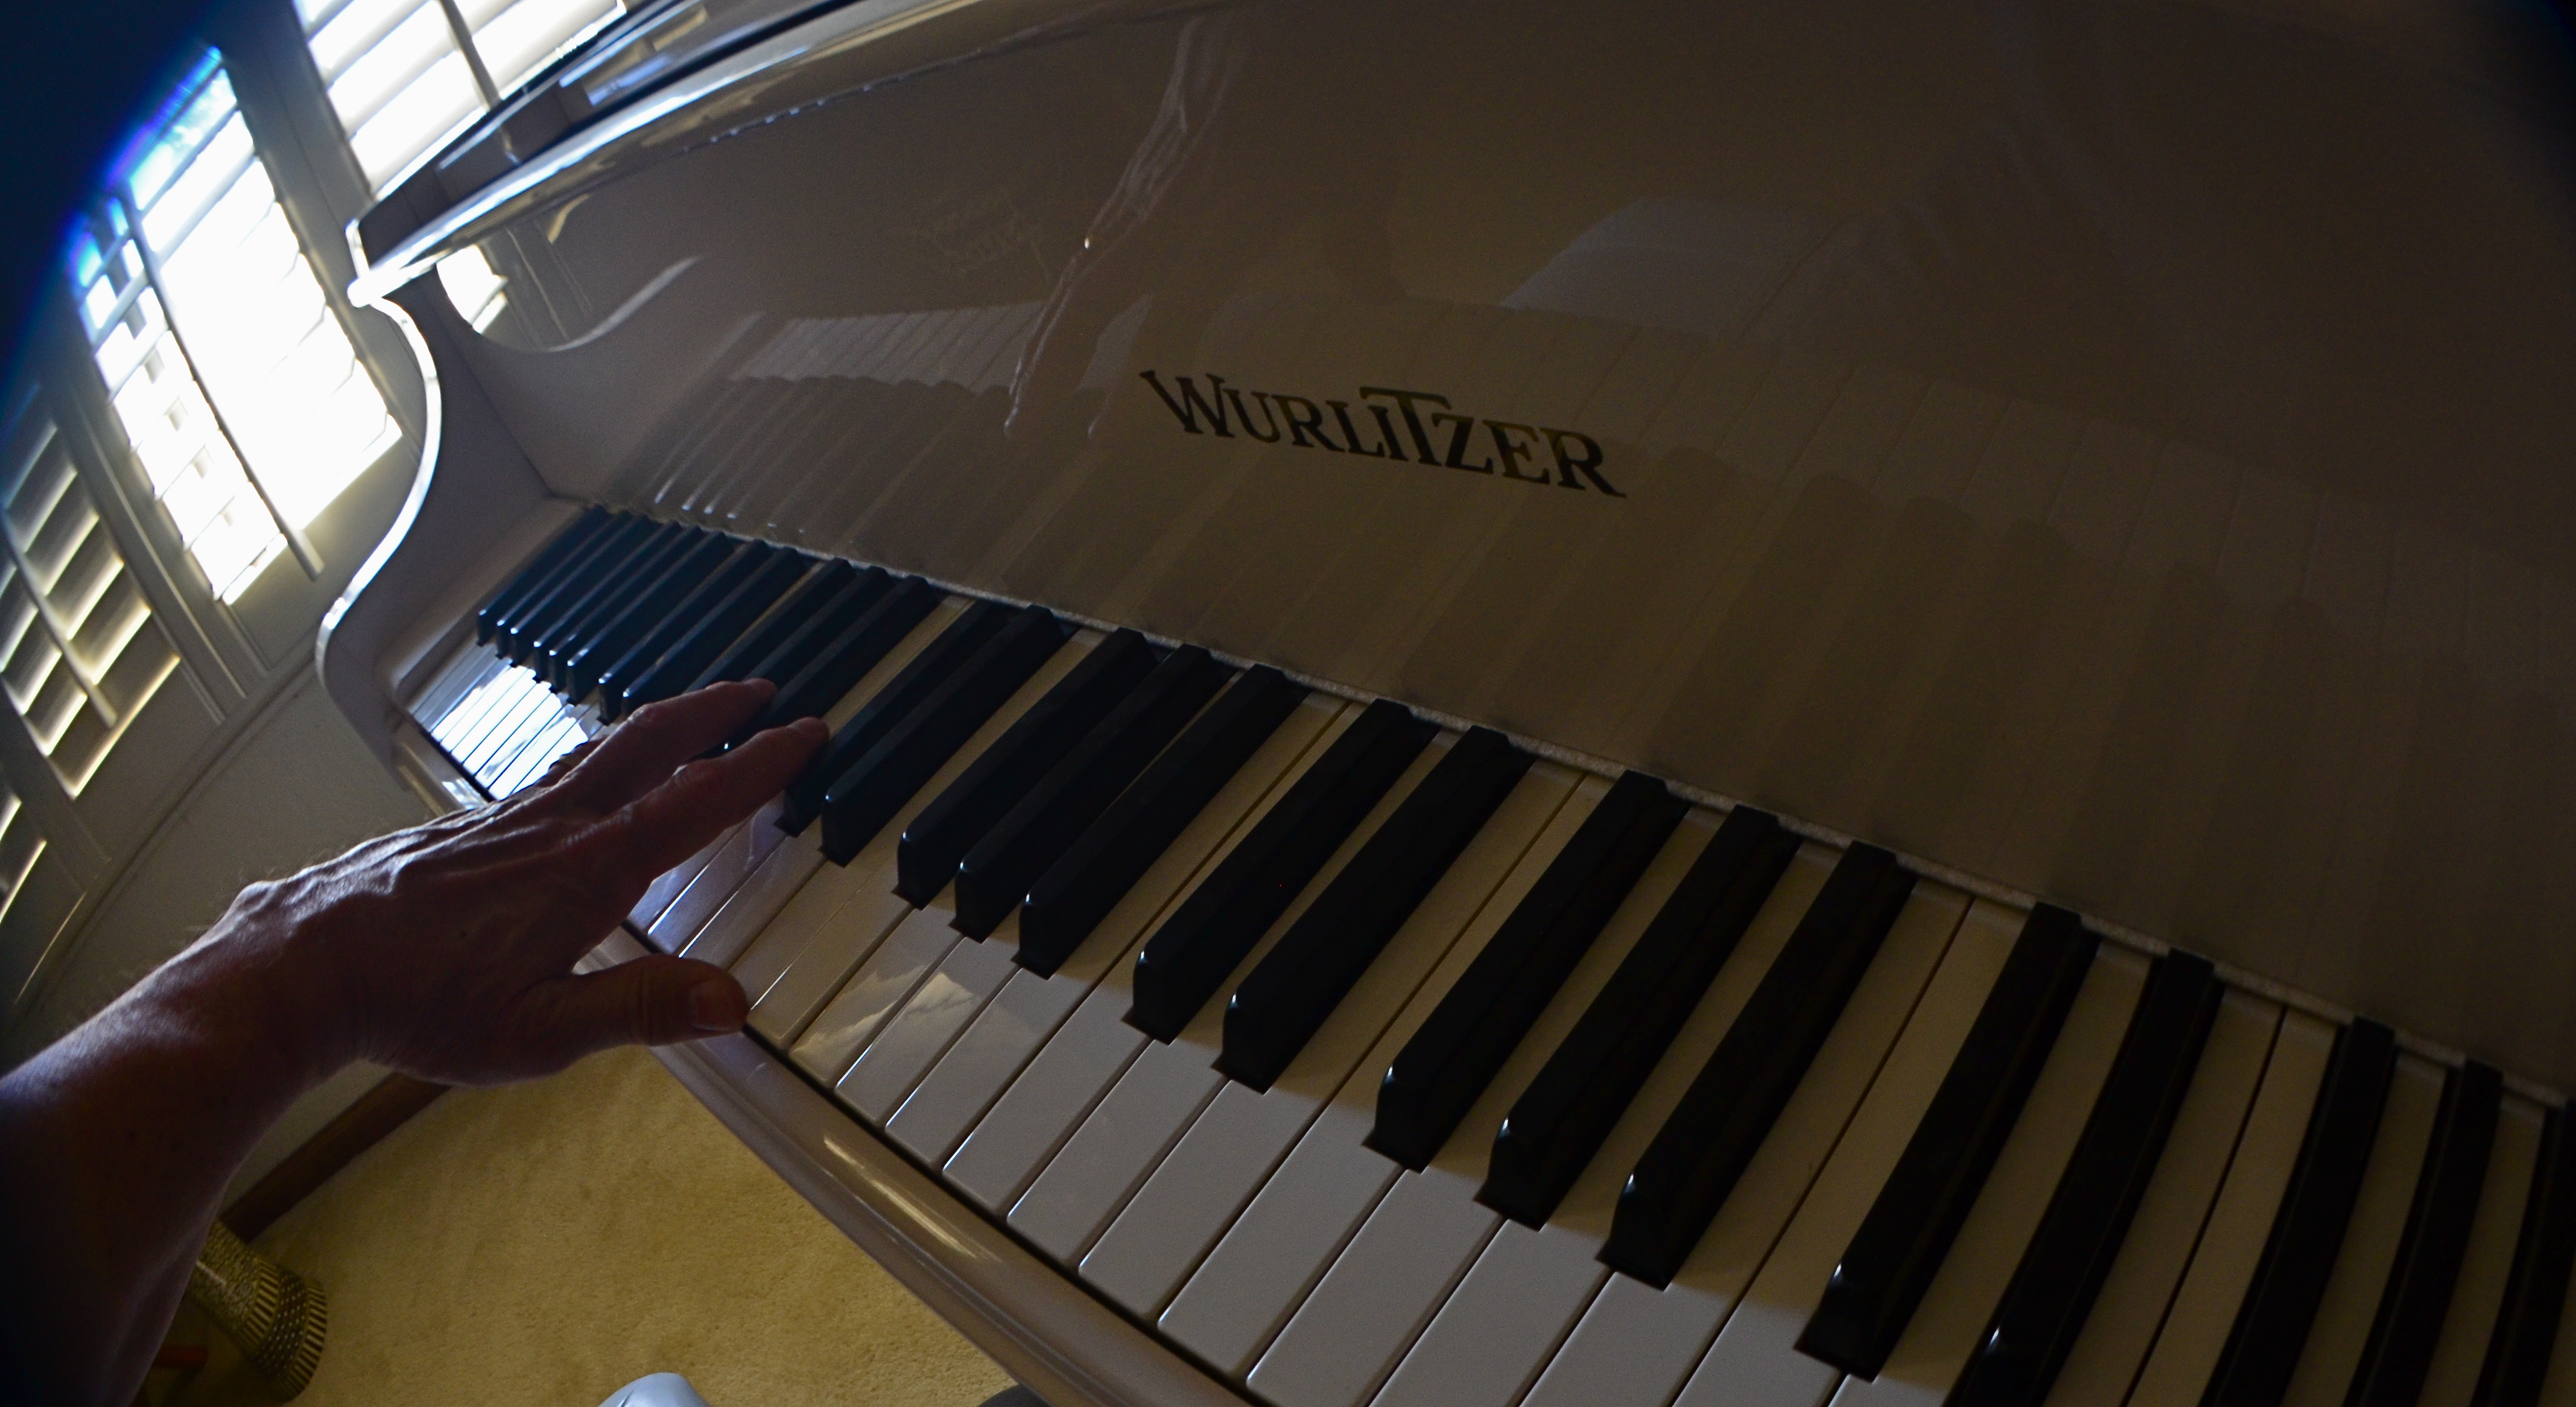
I’M LOOKING THROUGH YOU

Brookfield Breaklight, 2016.
By MICHAEL PERKINS
ANYONE WHO REGULARLY PHOTOGRAPHS GLASS SURFACES realizes that the process is a kind of shot-to-shot negotiation, depending on how you want the material to react and shape your subject. There is really no absolute “look” for glass, as it has the ability to both aid and block the view of anything it’s around, in front of, or near. Viewed in different conditions and angles, it can speed the impact of an image, or foil it outright.
I love shooting in urban environments, where the use of glass has shifted dramatically in recent decades. Buildings that were 90% brick or masonry just fifty years ago might be predominantly wrapped in glass today, demonstrably tilting the ratios of available light and also changing what I call the “see-through” factor…the amount of atmosphere outside a building can be observed from inside it. This presents opportunities galore of not only what can be shown but also how abstracted glass’ treatment of reflection can serve a composition.
Against the advice of many an online pundit, I keep circular polarizing filters permanently attached to the front of all my lenses so that I can modify reflections and enhance color richness at my whim. These same pundits claim that leaving the filter attached when it’s not “needed” will cost you up to two stops of light and degrade the overall image quality. I reject both these arguments based on my own experience. The filters only produce a true polarizing effect if they are either at the right viewing angle vis-a-vis the overhead sun, or if they are rotated to maximize the filtering effect. If they don’t meet either of these conditions, the filters produce no change whatever.
Even assuming that the filter might be costing you some light, if you’ve been shooting completely on manual for any amount of time, you can quickly compute any adjustments you’ll need without seriously cramping your style. Get yourself a nice fast lens capable of opening to f/1.8 or wider and you can even avoid jacking up your ISO and taking on more image noise. Buy prime lenses (only one focal length), like a 35mm, and you’ll also get better sharpness than a variable focal length lens like an 18-55mm, which are optically more complex and thus generally less crisp.
In the above image, which is a view through a glass vestibule in lower Manhattan, I wanted to incorporate the reflections of buildings behind me, see from side-to-side in the lobby to highlight selected internal features, and see details of the structures across the street from the front of the box, with all color values registering at just about the same degree of strength. A polarizer does this like nothing else. You just rotate the filter until the blend of tones works.
Some pictures are “about” the subject matter, while others are “about” what light does to that subject, according to the photographer’s vision. Polarizers are cheap and effective ways to tell your camera how much light to allow on a particular surface, giving you final say over what version of “reality” you prefer. And that’s where the fun begins.
GLASS DISTINCTIONS
It went “zip” when it moved and “bop” when it stopped,
And “whirr” when it stood still.
I never knew just what it was and I guess I never will.
Tom Paxton, The Marvelous Toy

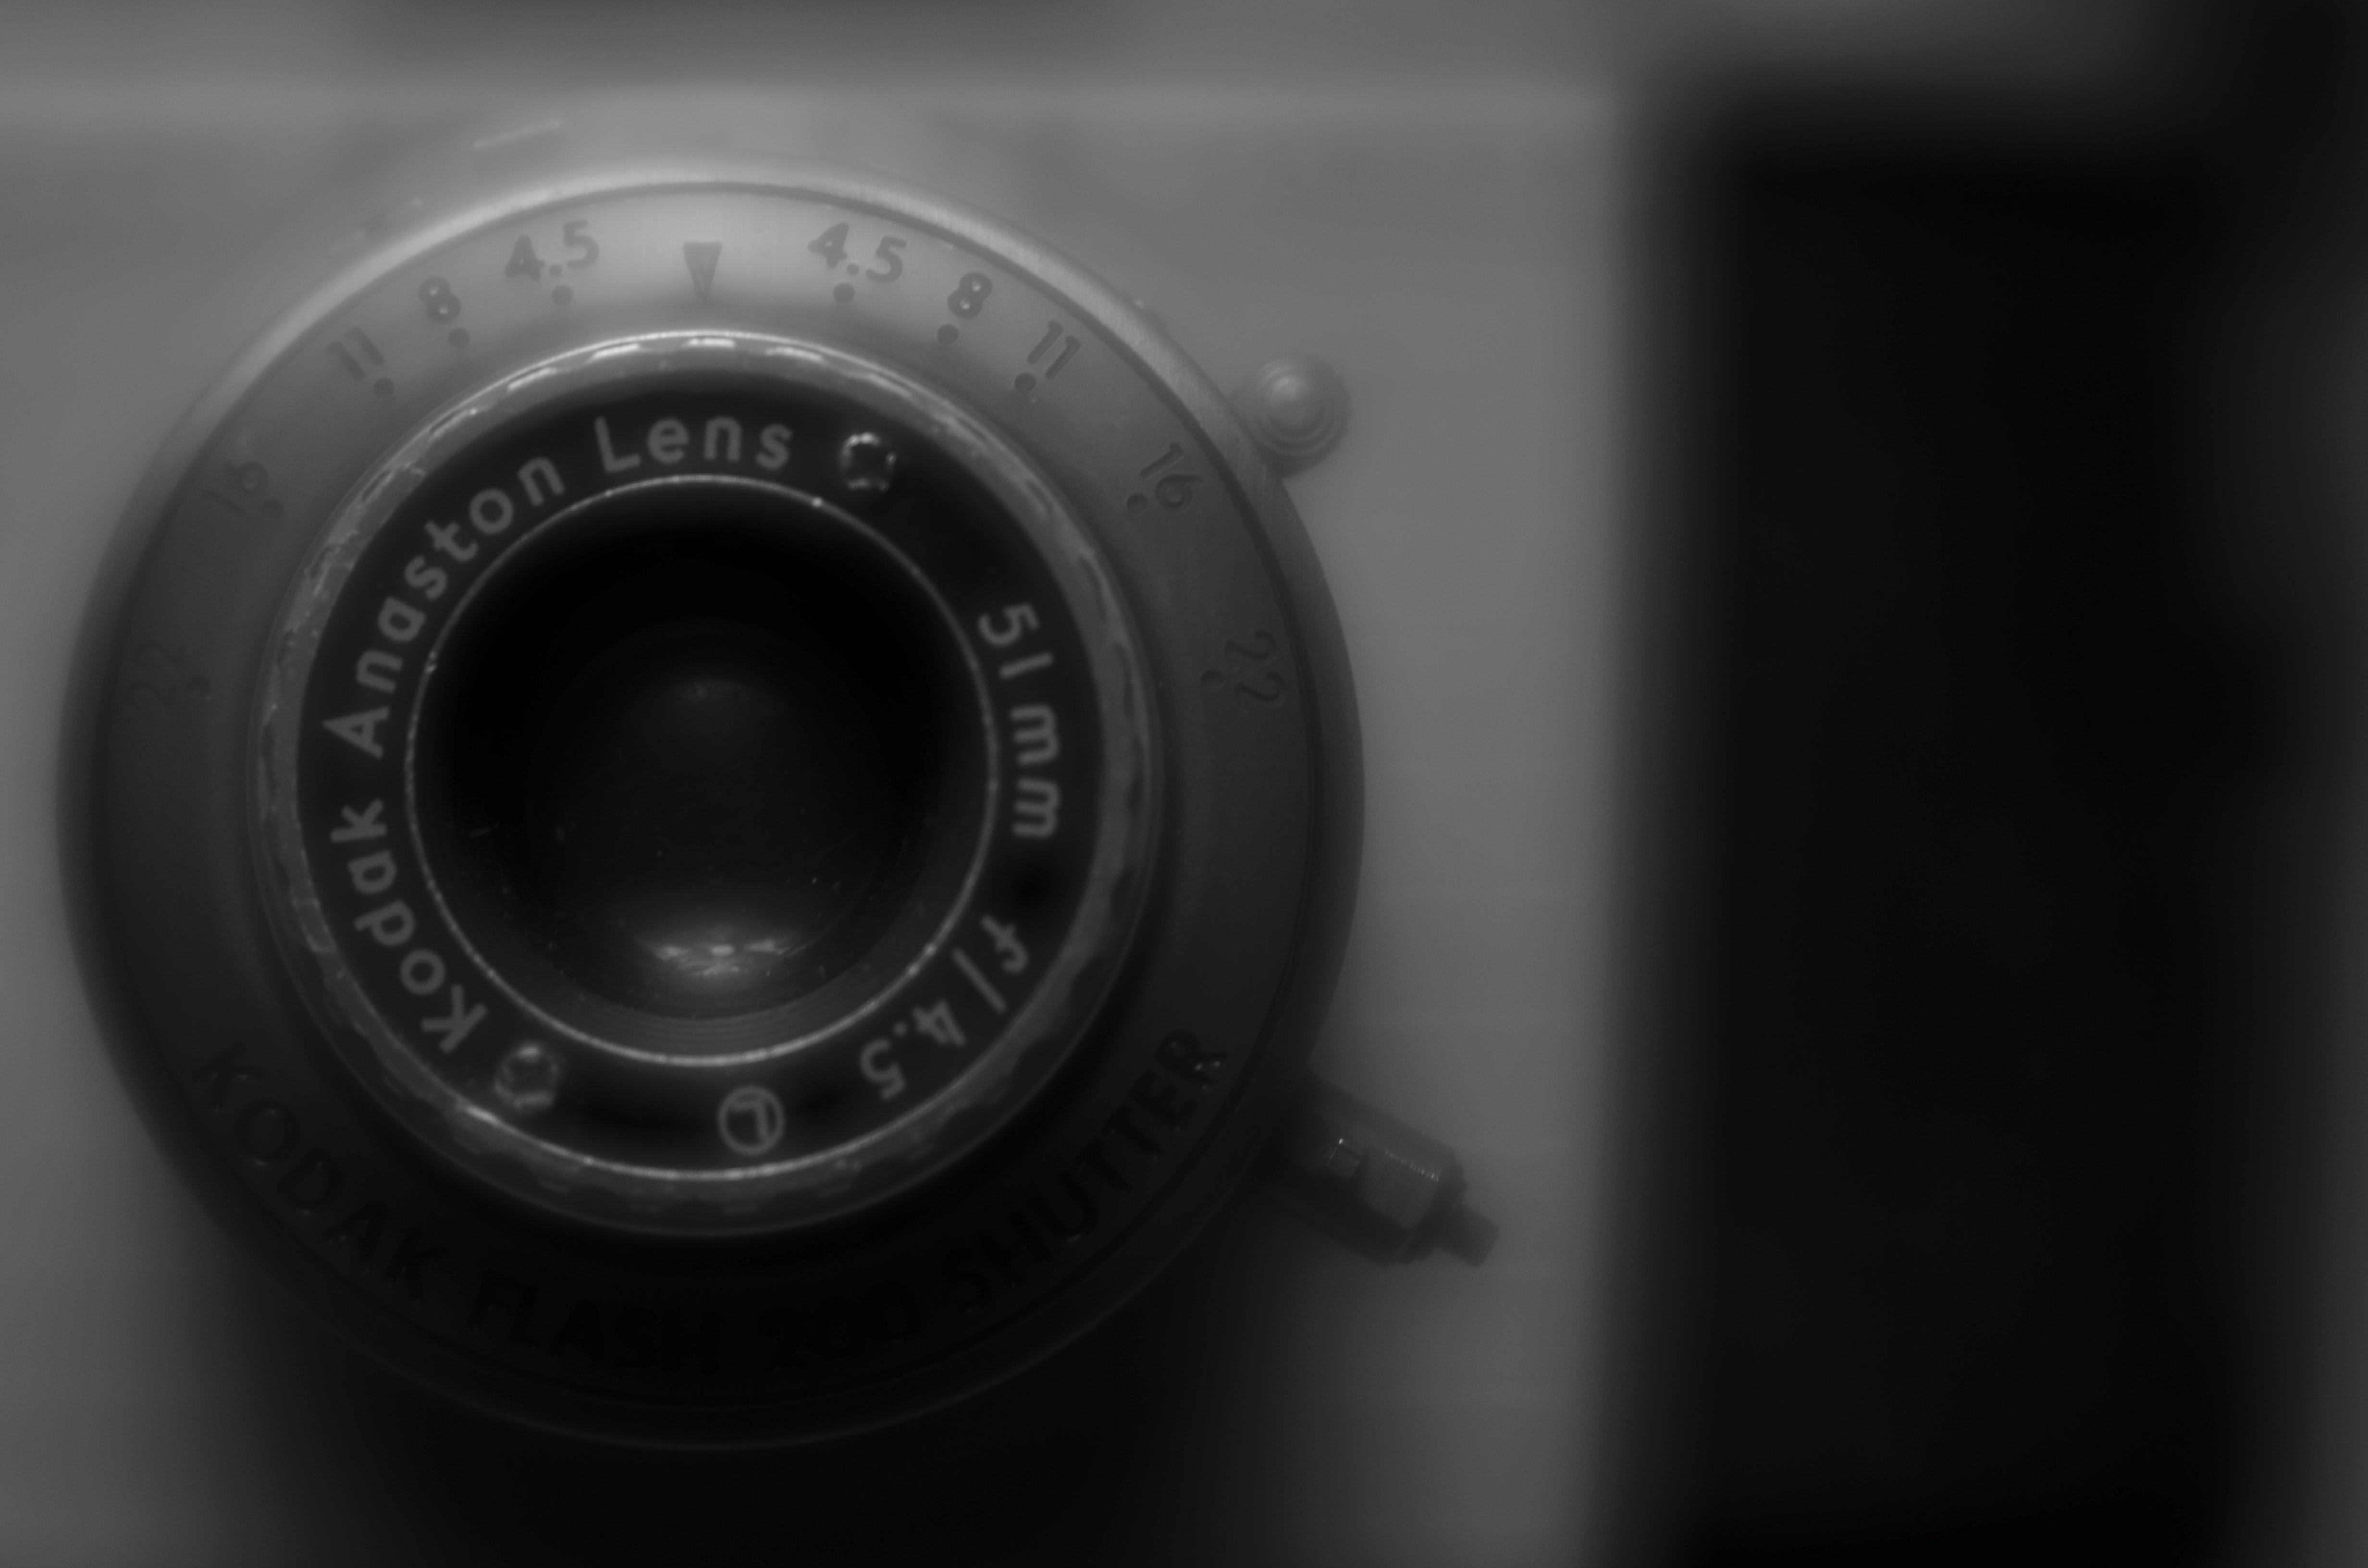
My antedeluvian Minolta SRT-500 camera body, crowned by its original f/1.7 50mm prime kit lens. Guess which part is worth its weight in gold?
By MICHAEL PERKINS
THERE ARE MORE OLD LENSES THAN THERE ARE OLD CAMERAS. There’s a reason for this. Bodies come and go like spring and fall dress collections. Lenses are the solid, reliable blue jeans that never go out of style. Lenses hold their value for decades, often selling for (or even above) their original asking prices. Bodies become landfill.
Many times, when people believe they have outgrown their cameras, they are actually just in need of glass that performs better. The importance of selecting a lens is as important in the digital age as it was in the film era. The eye through which you visualize your dreams has to be clear and precise, and so does the thinking that goes into its selection. That process, for me, breaks down into three main phases.
First, before you buy anything, raise a prayer of thanks for the Holy Internet. There is, now, not only no need, but also no excuse to buy the wrong lens. Read the manufacturer’s press releases. The reviews from both pros and amateurs nearest your own skill level. And be ecumenical about it. Read articles by people who hate the lens you think you love. Hey, better to ID a problem child before he’s living under your roof. Watch the Youtube videos on basics, like how to unpack the thing, how many parts it has, how to rotate the geetus located to the left of the whatsit to turn it on. Find out how light efficient it is, because the freer you are of flash units and tripods, the better for your photography. And, at this early shopping stage, as with all other stages, keep asking yourself the tough questions. Do I really need another lens, or do I just need to be better with what I already own (which is cheaper)? Will it allow me to make pictures that I can’t currently make? Most importantly, in six months, will it be my “go-to”, or another wondrous toy sleeping in my sock drawer?
Assuming that you actually do buy a new lens after all that due diligence, nail it onto your camera and force yourself to use it exclusively for a concentrated period. Take it on every kind of shoot and force it to make every kind of picture, especially the ones that seem counter-intuitive. Is it a great zoom? Well, hey, it might make an acceptable macro lens as well. But you’ll never know unless you try. You can’t even say what the limits of a given piece of glass are until you attempt to exceed them. Find out how well it performs at every aperture, every distance, every f/stop. Each lens has a sweet spot of optimum focus, and while that may be the standard two stops above wide open, don’t assume that. Take lots of bad pictures with the lens (this part is really easy, especially at the beginning). They will teach you more than the luck-outs.
Final phase: boot camp for you personally. Now that you have this bright shiny new plaything, rise to the level of what it offers. Prove that you needed it by making the best pictures of your life with it. Change how you see, plan, execute, edit, process, and story-tell. See if the lens can be stretched to do the work of several of your other lenses, the better to slim down your profile, reduce the junk hanging around your neck, and speed up your reaction time to changing conditions.
Work it until you can’t imagine how you ever got along without it.
RUN WHAT YA BRUNG

Didn’t bring a close-up or macro lens on this shoot, so had to ask my 24mm wide-angle to do double duty. And it could.
By MICHAEL PERKINS
NORMALEYE PHOTOGRAPHIC PARADOX No.346: You have to think hard about your equipment when you’re not shooting so that you don’t have to give much thought when you are.
Reacting “in the moment” to a photographic situation is often lauded as the highest state of human existence, and, indeed, the ability to see, and do, on the spot, can yield amazing results. But, in that marvelous inspirational instant, the smallest item on your checklist should be dithering about your gear. What it will do. What it can’t do. What you don’t know how to make it do. These are ruminations you run through when there’s no picture making going on.
Simply, the more you know about what you’ve taken to a shoot, the less creative energy will be drained off worrying about how to use it once you get there. You will get to the point where, for a given day’s subject matter, you take the wide lens, of course, or the macro lens, of course, or the portrait lens, of course. You’ll anticipate the majority of situations you’ll be in, and, unless you like driving yourself crazy, you’ll likely select one lens that will just about do it all. But whatever lens you select, you will want to know how much farther you can push it, as well. You know what you generally need it to do, but can it, in a tight spot, do a decent job outside its specialty? The answer is, probably yes.
One of my favorite lenses for landscape work is my ancient Nikkor 24mm f/2.8 prime. Nice and wide for most outdoors subjects, pretty fast for the close and dark stuff, and sharp as cheddar cheese in my most used apertures, especially the middle range, like around f/5.6. Can it do macro work, when I swing my attention from distant mountains to detail on a nearby cactus? Well, yes, within reason.
The minimum near-focus distance for this lens is about ten inches, more than close enough to fill a frame with the trunk of the saguaro with a little spare space to the right and left. I shoot in big files, so even with a post-op crop I preserve lots of resolution, and bang, the wide-angle does a respectable job as a faux macro.
I grew up around amateur race arenas which invited people to haul any old hunk of automotive junk to the track, to be run in so-called “run what ya brung” events. I personally hate to haul my entire optical array out on a project, swapping out glass for every new situation. I’d much rather save my neck and shoulder by calculating ahead of time which lens will do most of what I want, but be able to stand-in for some other lens in special situations. There are usually work-arounds and hidden tricks in even the most limited lenses. You just have to seek them out.
Run what ya brung.
WIDE, WIDE WORLD(S)
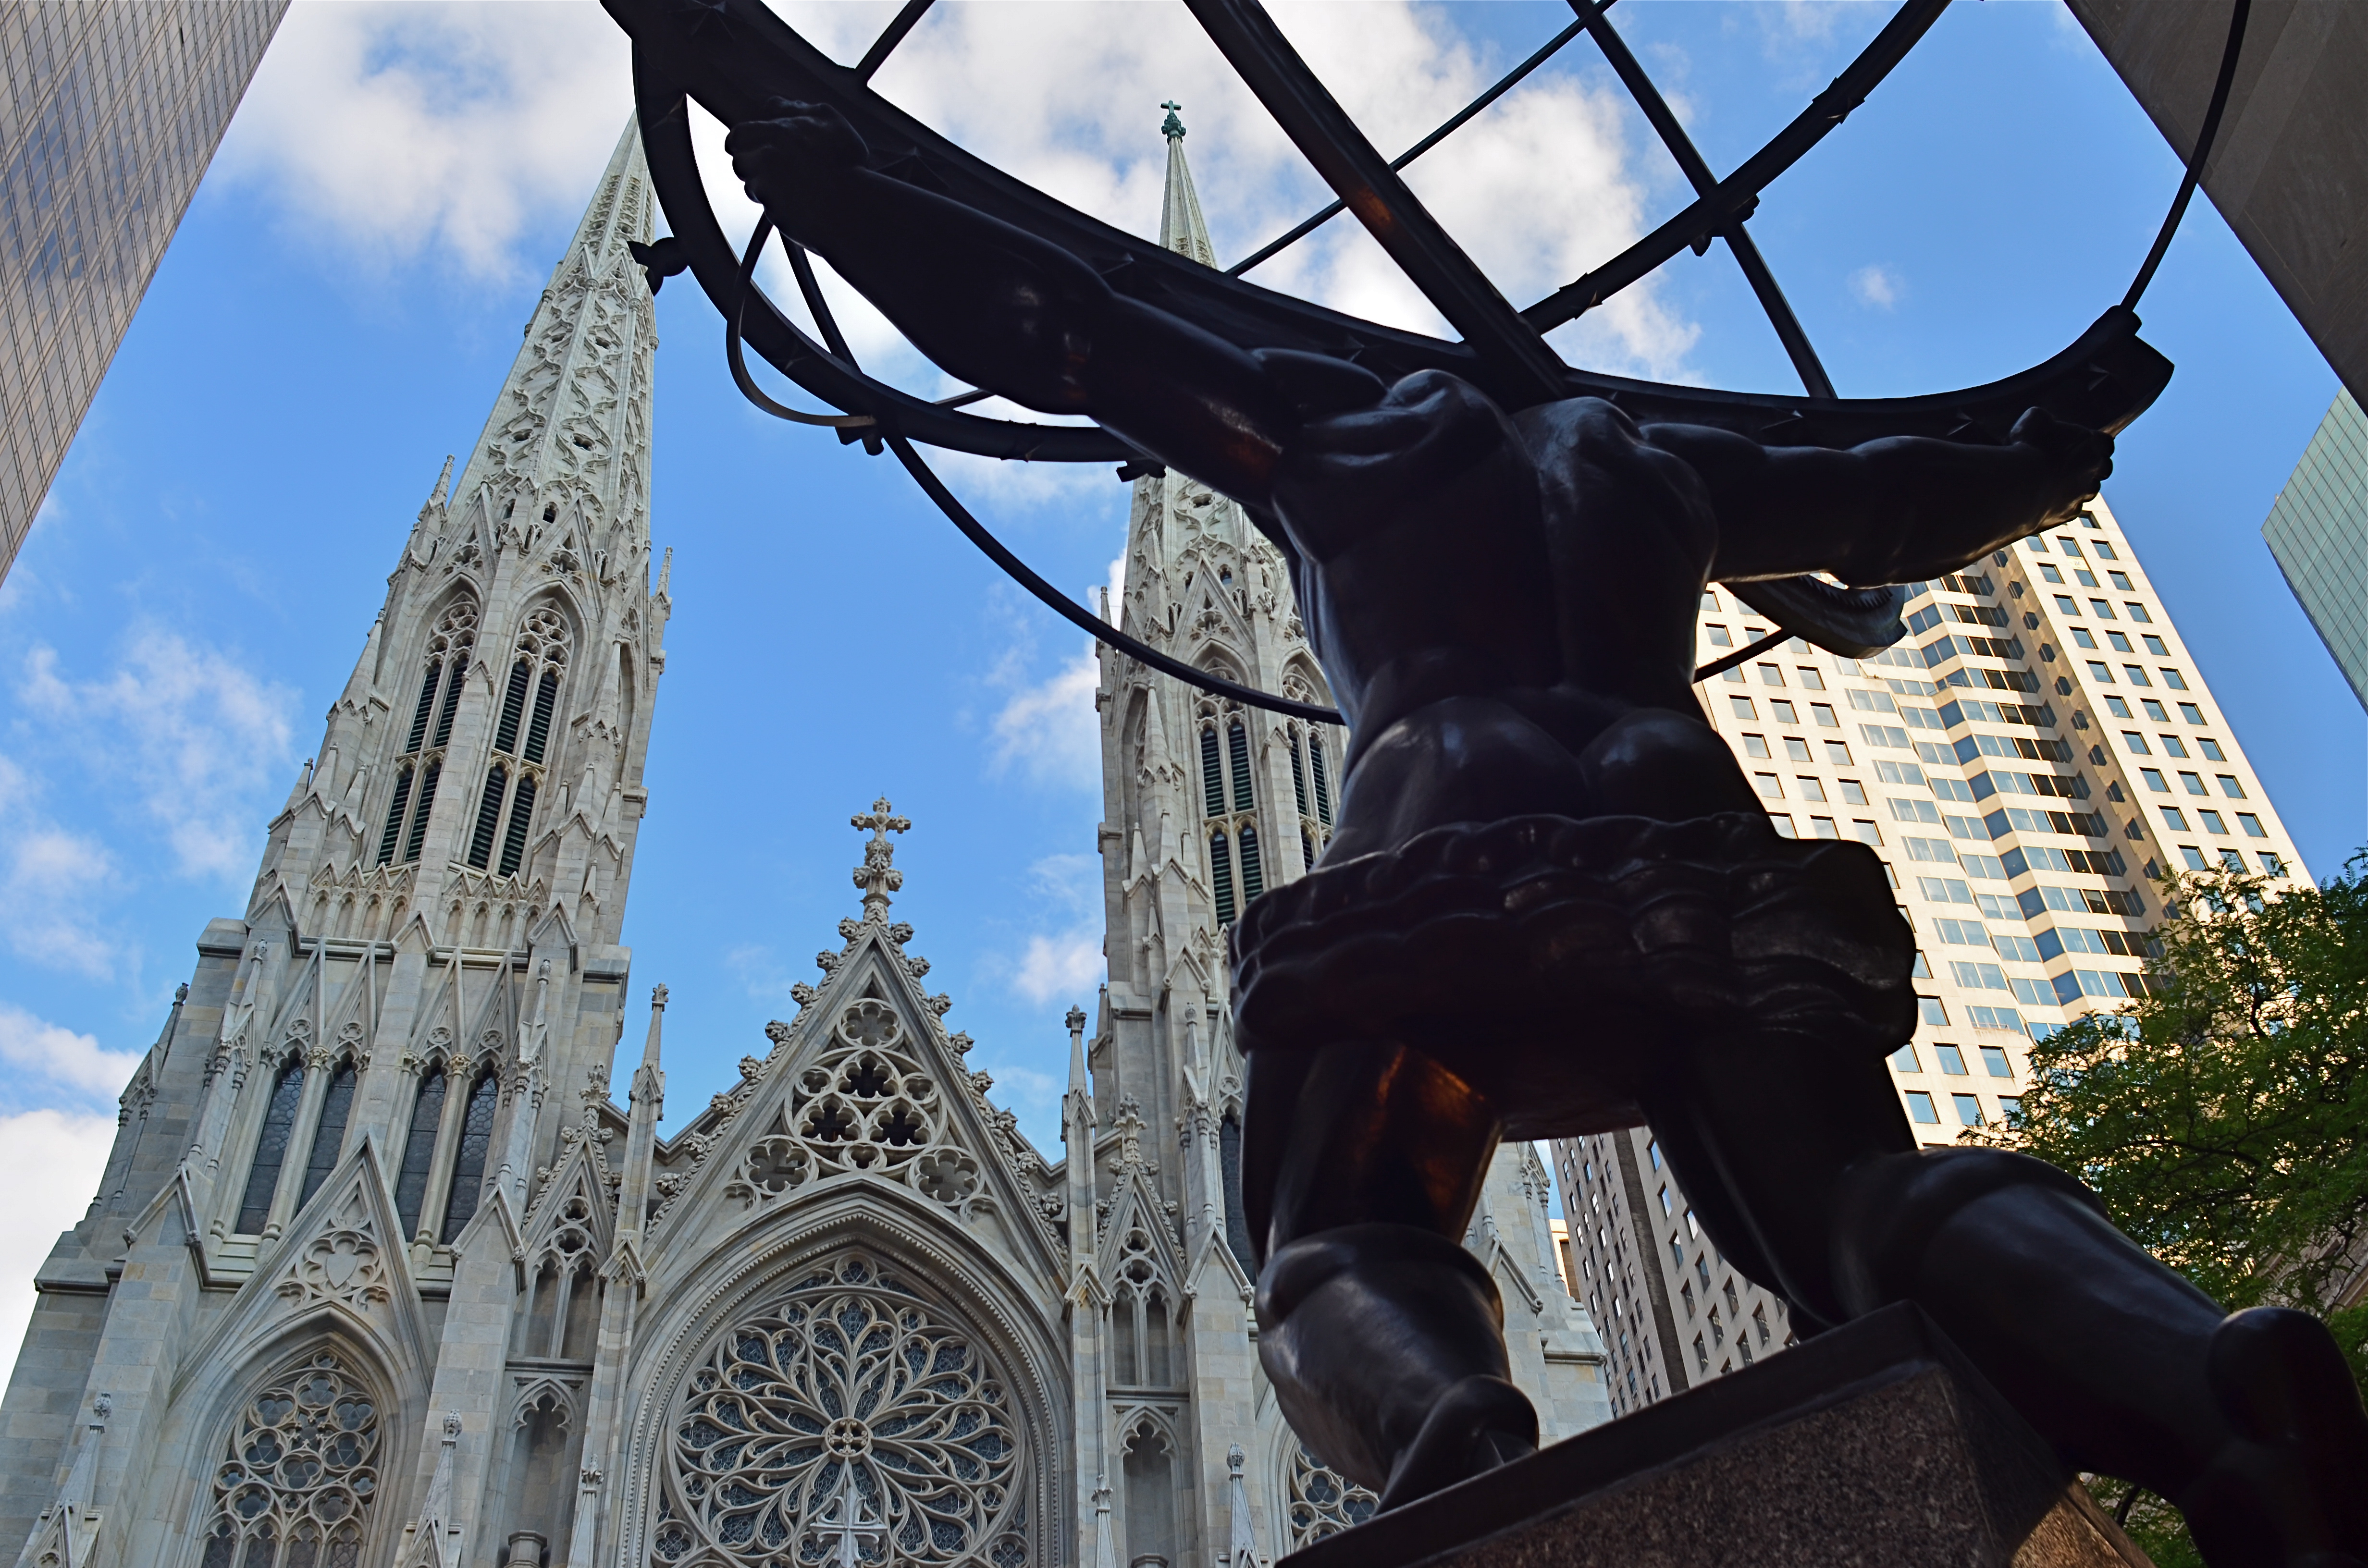
Shooting from a low crouch with a 24mm ultra-wide jacked up the natural drama of this shot to a greater, almost excessive degree.
By MICHAEL PERKINS
ULTRA-WIDE LENSES HAVE ALMOST BECOME AN UNAVOIDABLE CLICHE for people shooting in the streets of large cities, both for the great things they allow and the uber-excesses that they enable. There is, of course, a real practical benefit in being able to create an amped-up sensation of front-to-back space or side-to-side expanse while you yourself are limited in where you can stand or move. For example, if your back is crimped against a building, so that you can’t dolly backward, having the lens provide the extra width you need is great. If you’re pointing up for emphasis, the lens’ distortion of straight lines can be dramatically abstract, depending on the look you’re going for. All to the good.
Of course, depending on your selection of angle, you can get things so bendy and bizarre that you can induce motion sickness in your viewing audience, with towers and spires inclining sideways as if they about to topple to the street. Again, you have to decide what look you want: it’s not just about tilting the frame until you can “get everything in”. That’s shoveling, not shooting.
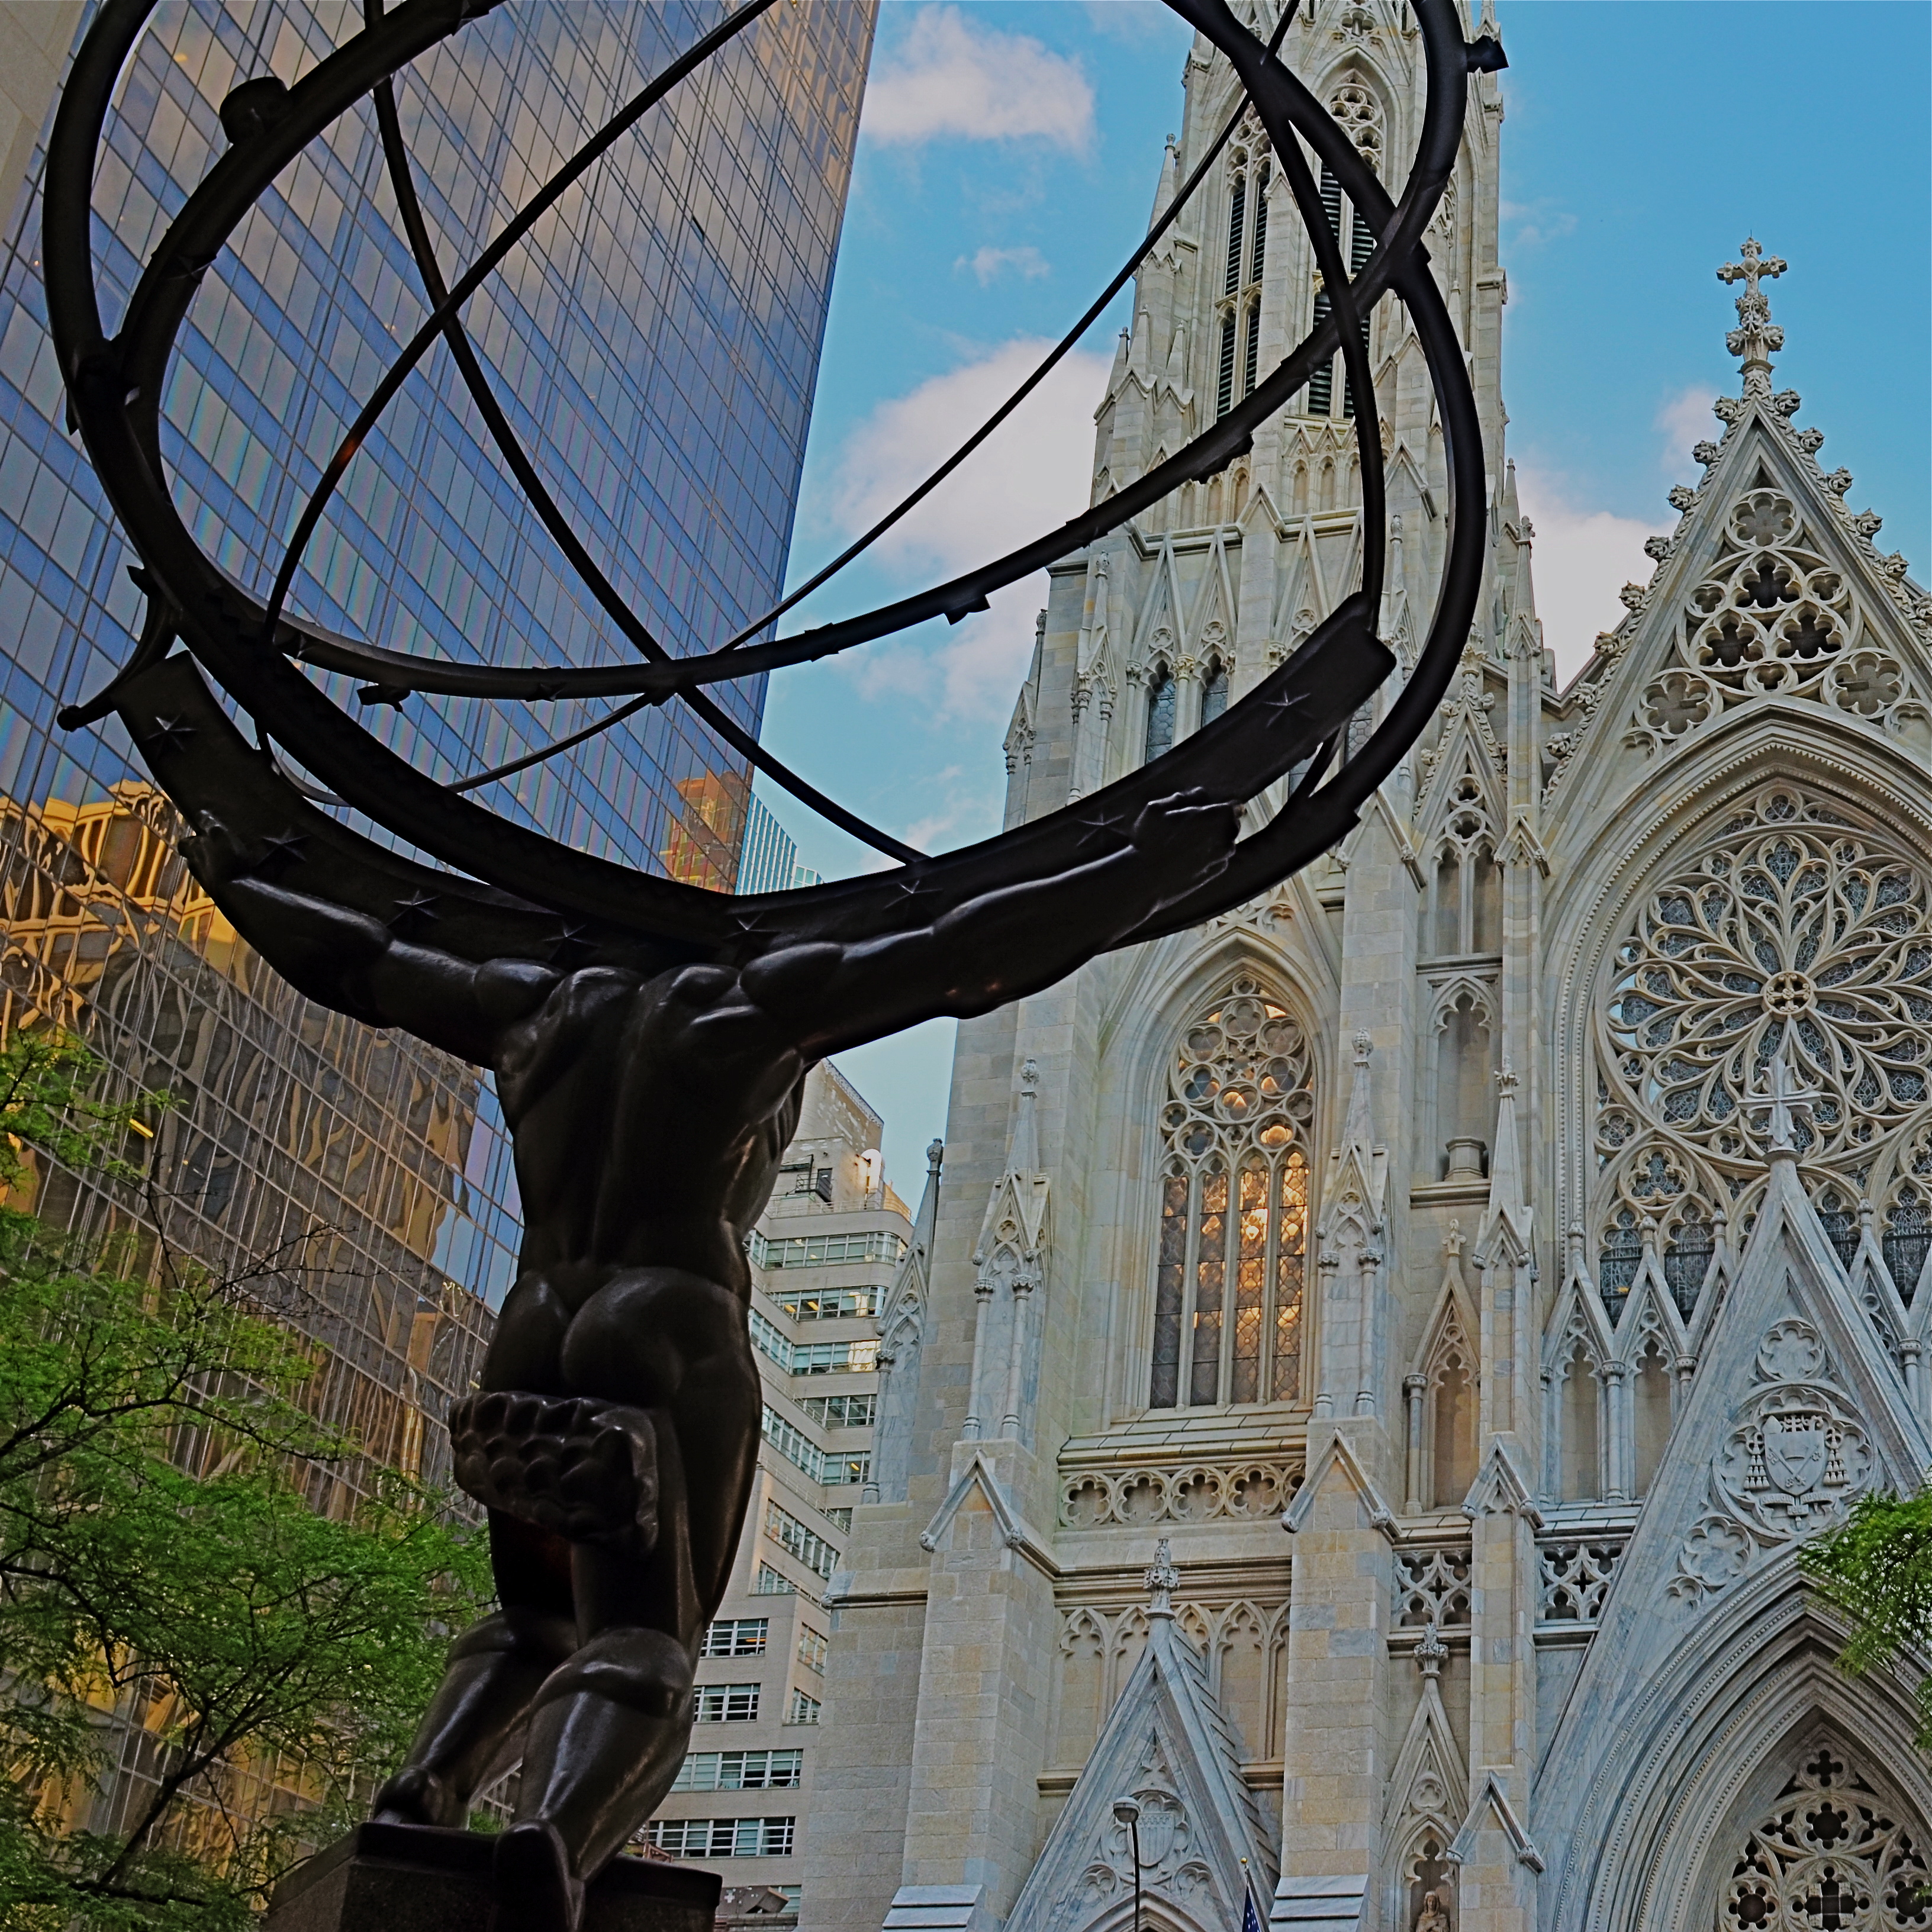
Just inches away from the framing of the earlier shot, same 24mm lens. What’s different is the shooting angle.
The thing to remember about ultra-wides in the city is how little re-framing it takes to get both the drama you want and at least a semblance of normal proportions and angles. As with almost every other situation, the salvation is in shooting a lot of coverage of a subject. Attack it from all angles and sides. You can’t know in the moment exactly what will work best…you’re working too quickly in a crowded, active environment. So walk around, attack it from all sides, and sort out the keepers later.
In the shot at the top of the page, I was interested in shooting Paul Manship’s magnificent “Atlas” sculpture, located along the Fifth Avenue edge of Rockefeller Center, from the rear, to accentuate the amazing musculature of the figure and get him in the same frame as the front of St. Patrick’s Cathedral. Now, there’s already plenty of drama in the statue’s pose as is, but in the first photo, I angled the lens further upward to get an even bigger arc of action. In the lower image, I simply changed the up-down angle of the same 24mm lens I was using to get angles that were a bit more normal. Two different effects, just inches away from each other in approach and angle, but markedly different in result. Which one’s the keeper? Not my argument and not my problem. However, if I don’t shoot both images, I don’t get to make the choice.
Once more, the advantage of digital is pronounced. You can now shoot everything you think you might need. We’re not counting “roll” exposures in our heads any more. We can’t “run out of film”, so click away. Shoot it all while you’ve got it in front of you and throw everything you know how to try at the problem at hand. The bad pictures will speed the arrival of the good ones.
THE GENTLE WELCOME
By MICHAEL PERKINS
But soft! What light through yonder window breaks? —Shakespeare
OKAY. AS IT TURNS OUT, IN THE ABOVE LINE, ROMEO WAS ACTUALLY RHAPSODIZING about his main squeeze, rather than ideal photographic conditions. Still, I often think of the quote when a sudden shaft of gold explodes from behind a cloud or a sunset lengthens shadows, just so. I have lots of But, soft! moments as a photographer, since light is the first shaper of the image, the one element that defines the terms of engagement.
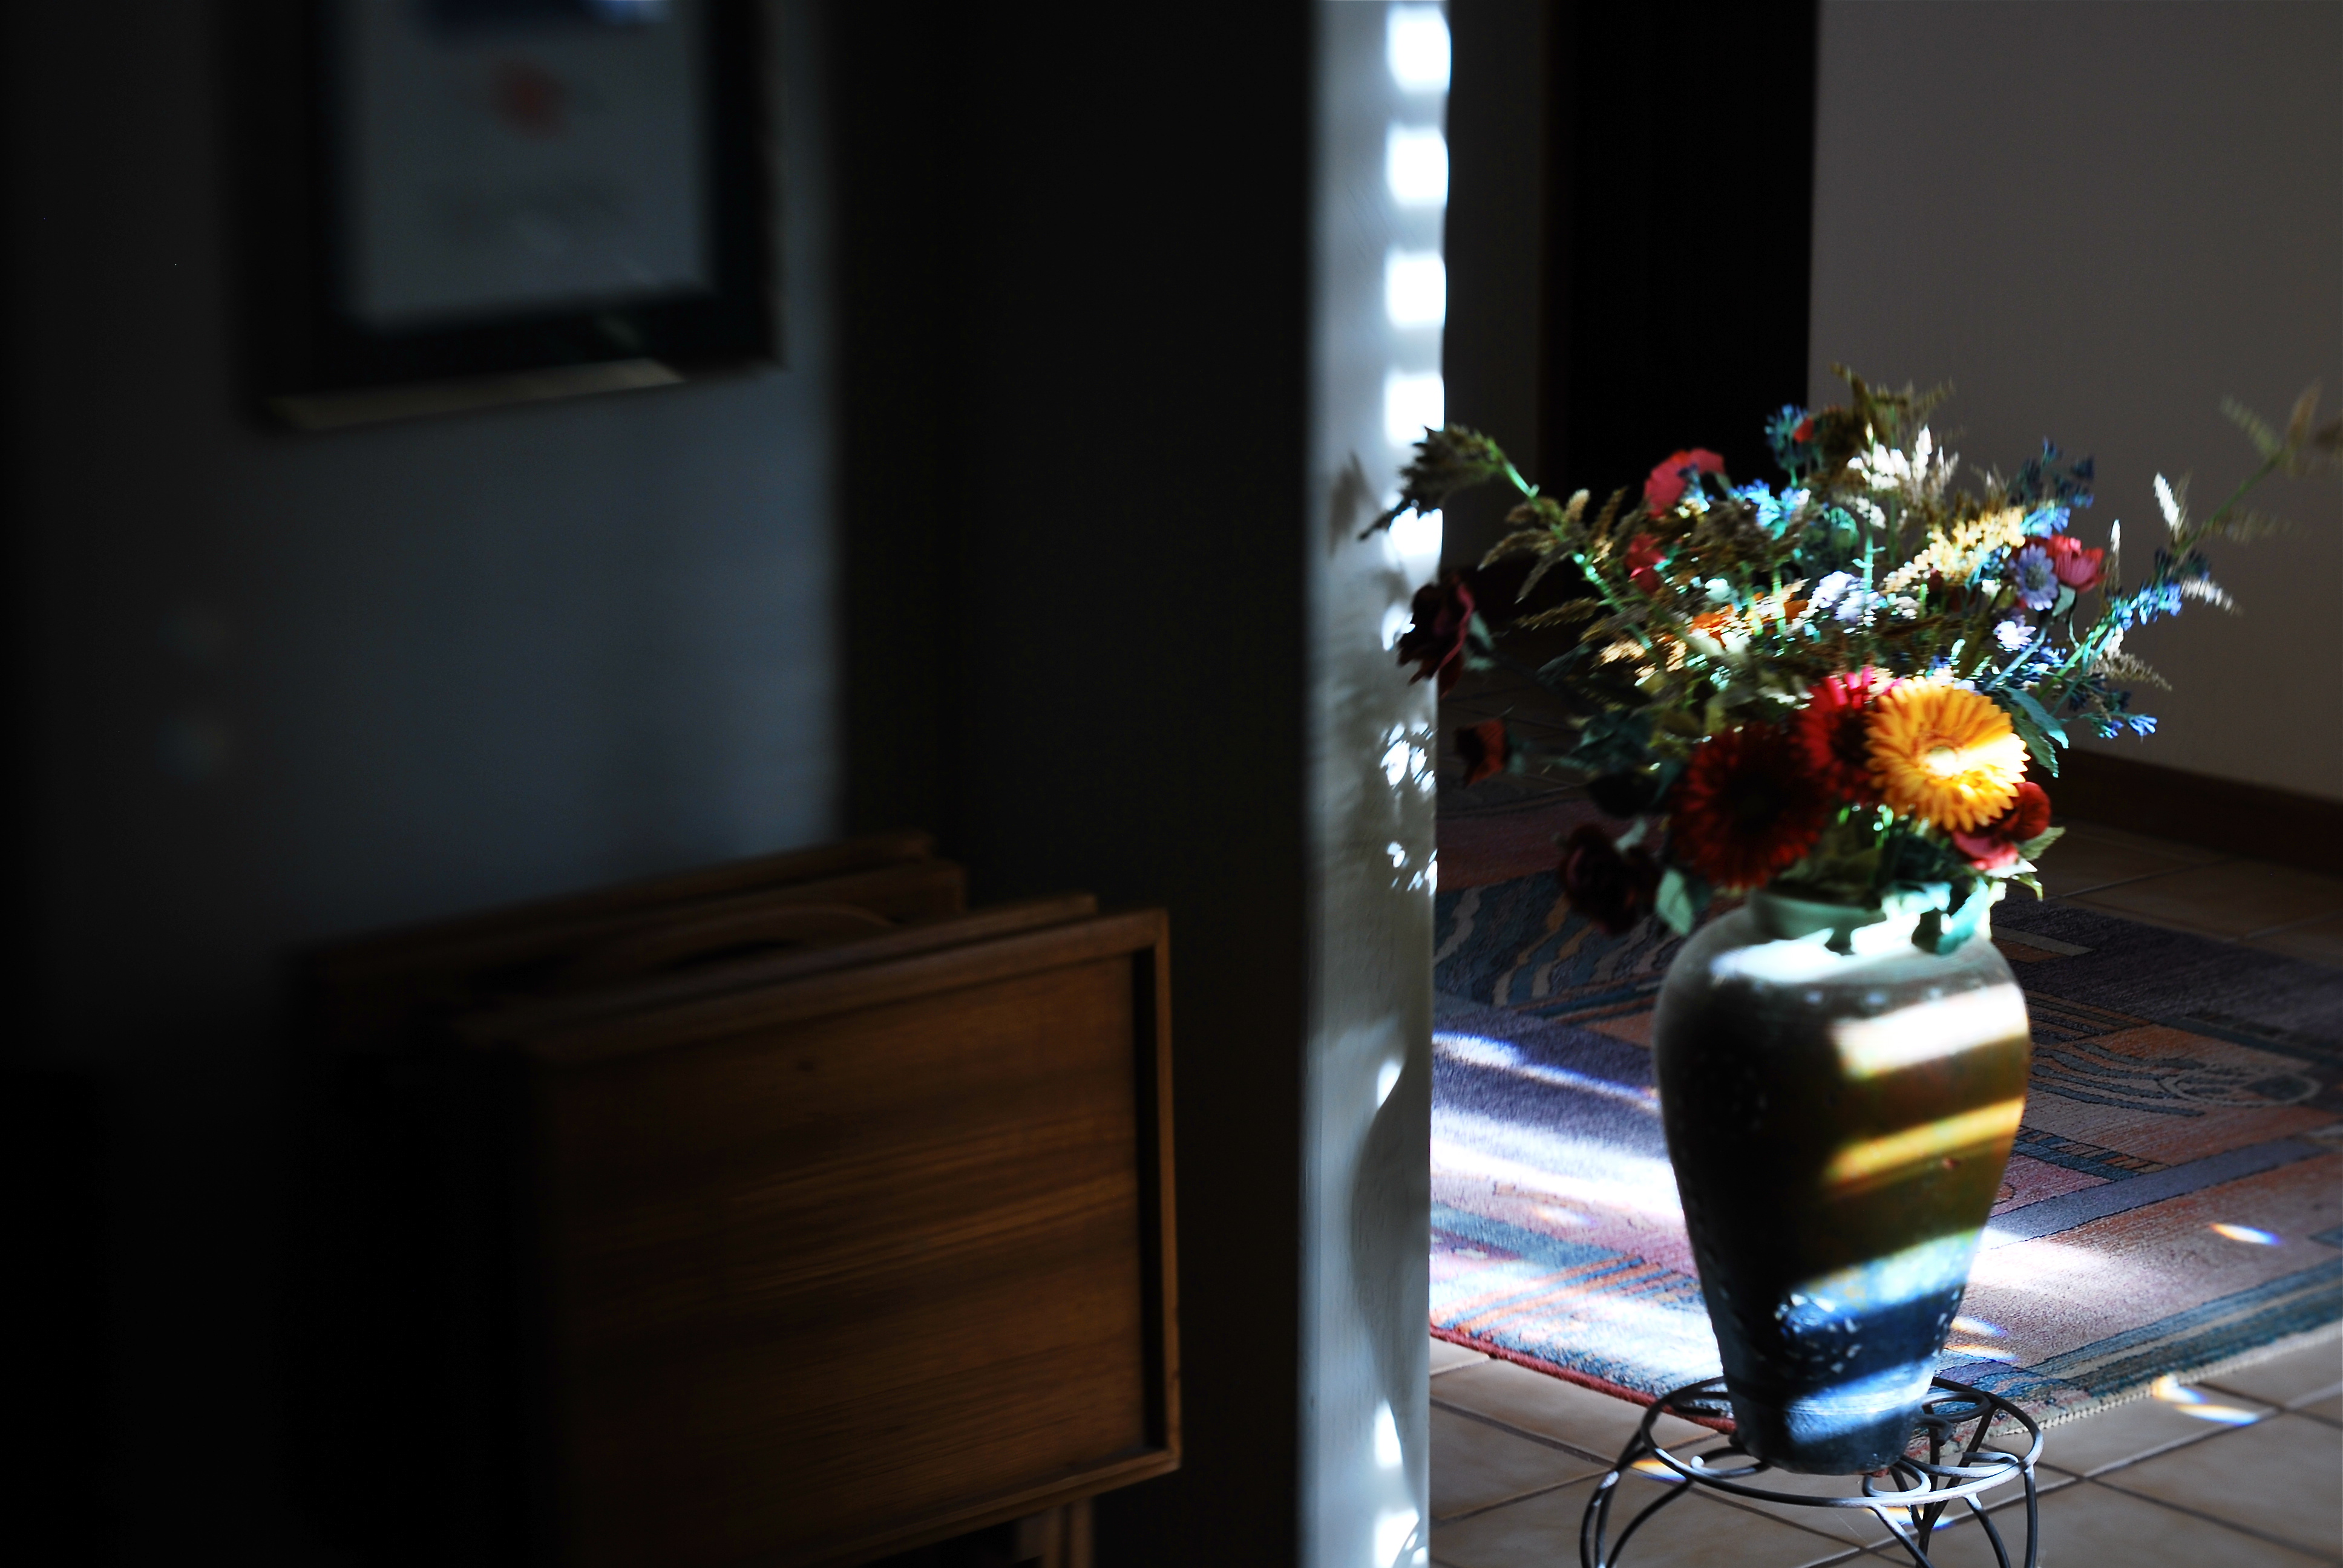
Selective focus on the cheap: image made with the economical Lensbaby Spark lens. 1/40 sec., f/5.6, ISO 100, 50mm.
After light, for me, comes focus. Where it hits, where it peaks, where it falls off, and how all these aspects shape a composition. Soft or selective focus especially seems more intimate to me, a gentle welcome to share something special between picture and viewer. In recent years, focus has become almost as fine-tune-able as light itself, with the introduction of new, affordable alternatives to expensive “tilt-shift” lenses, which allow the selective blurring of elements within the frame. For example, the revolutionary Lensbaby products are now helping shooters make their own choices on where the focal “sweet spot” should occur in a picture, and at a fraction of the cost of a true tilt-shift. It’s a fiscal shortcut that makes it possible for almost anyone to learn how to create this effect.
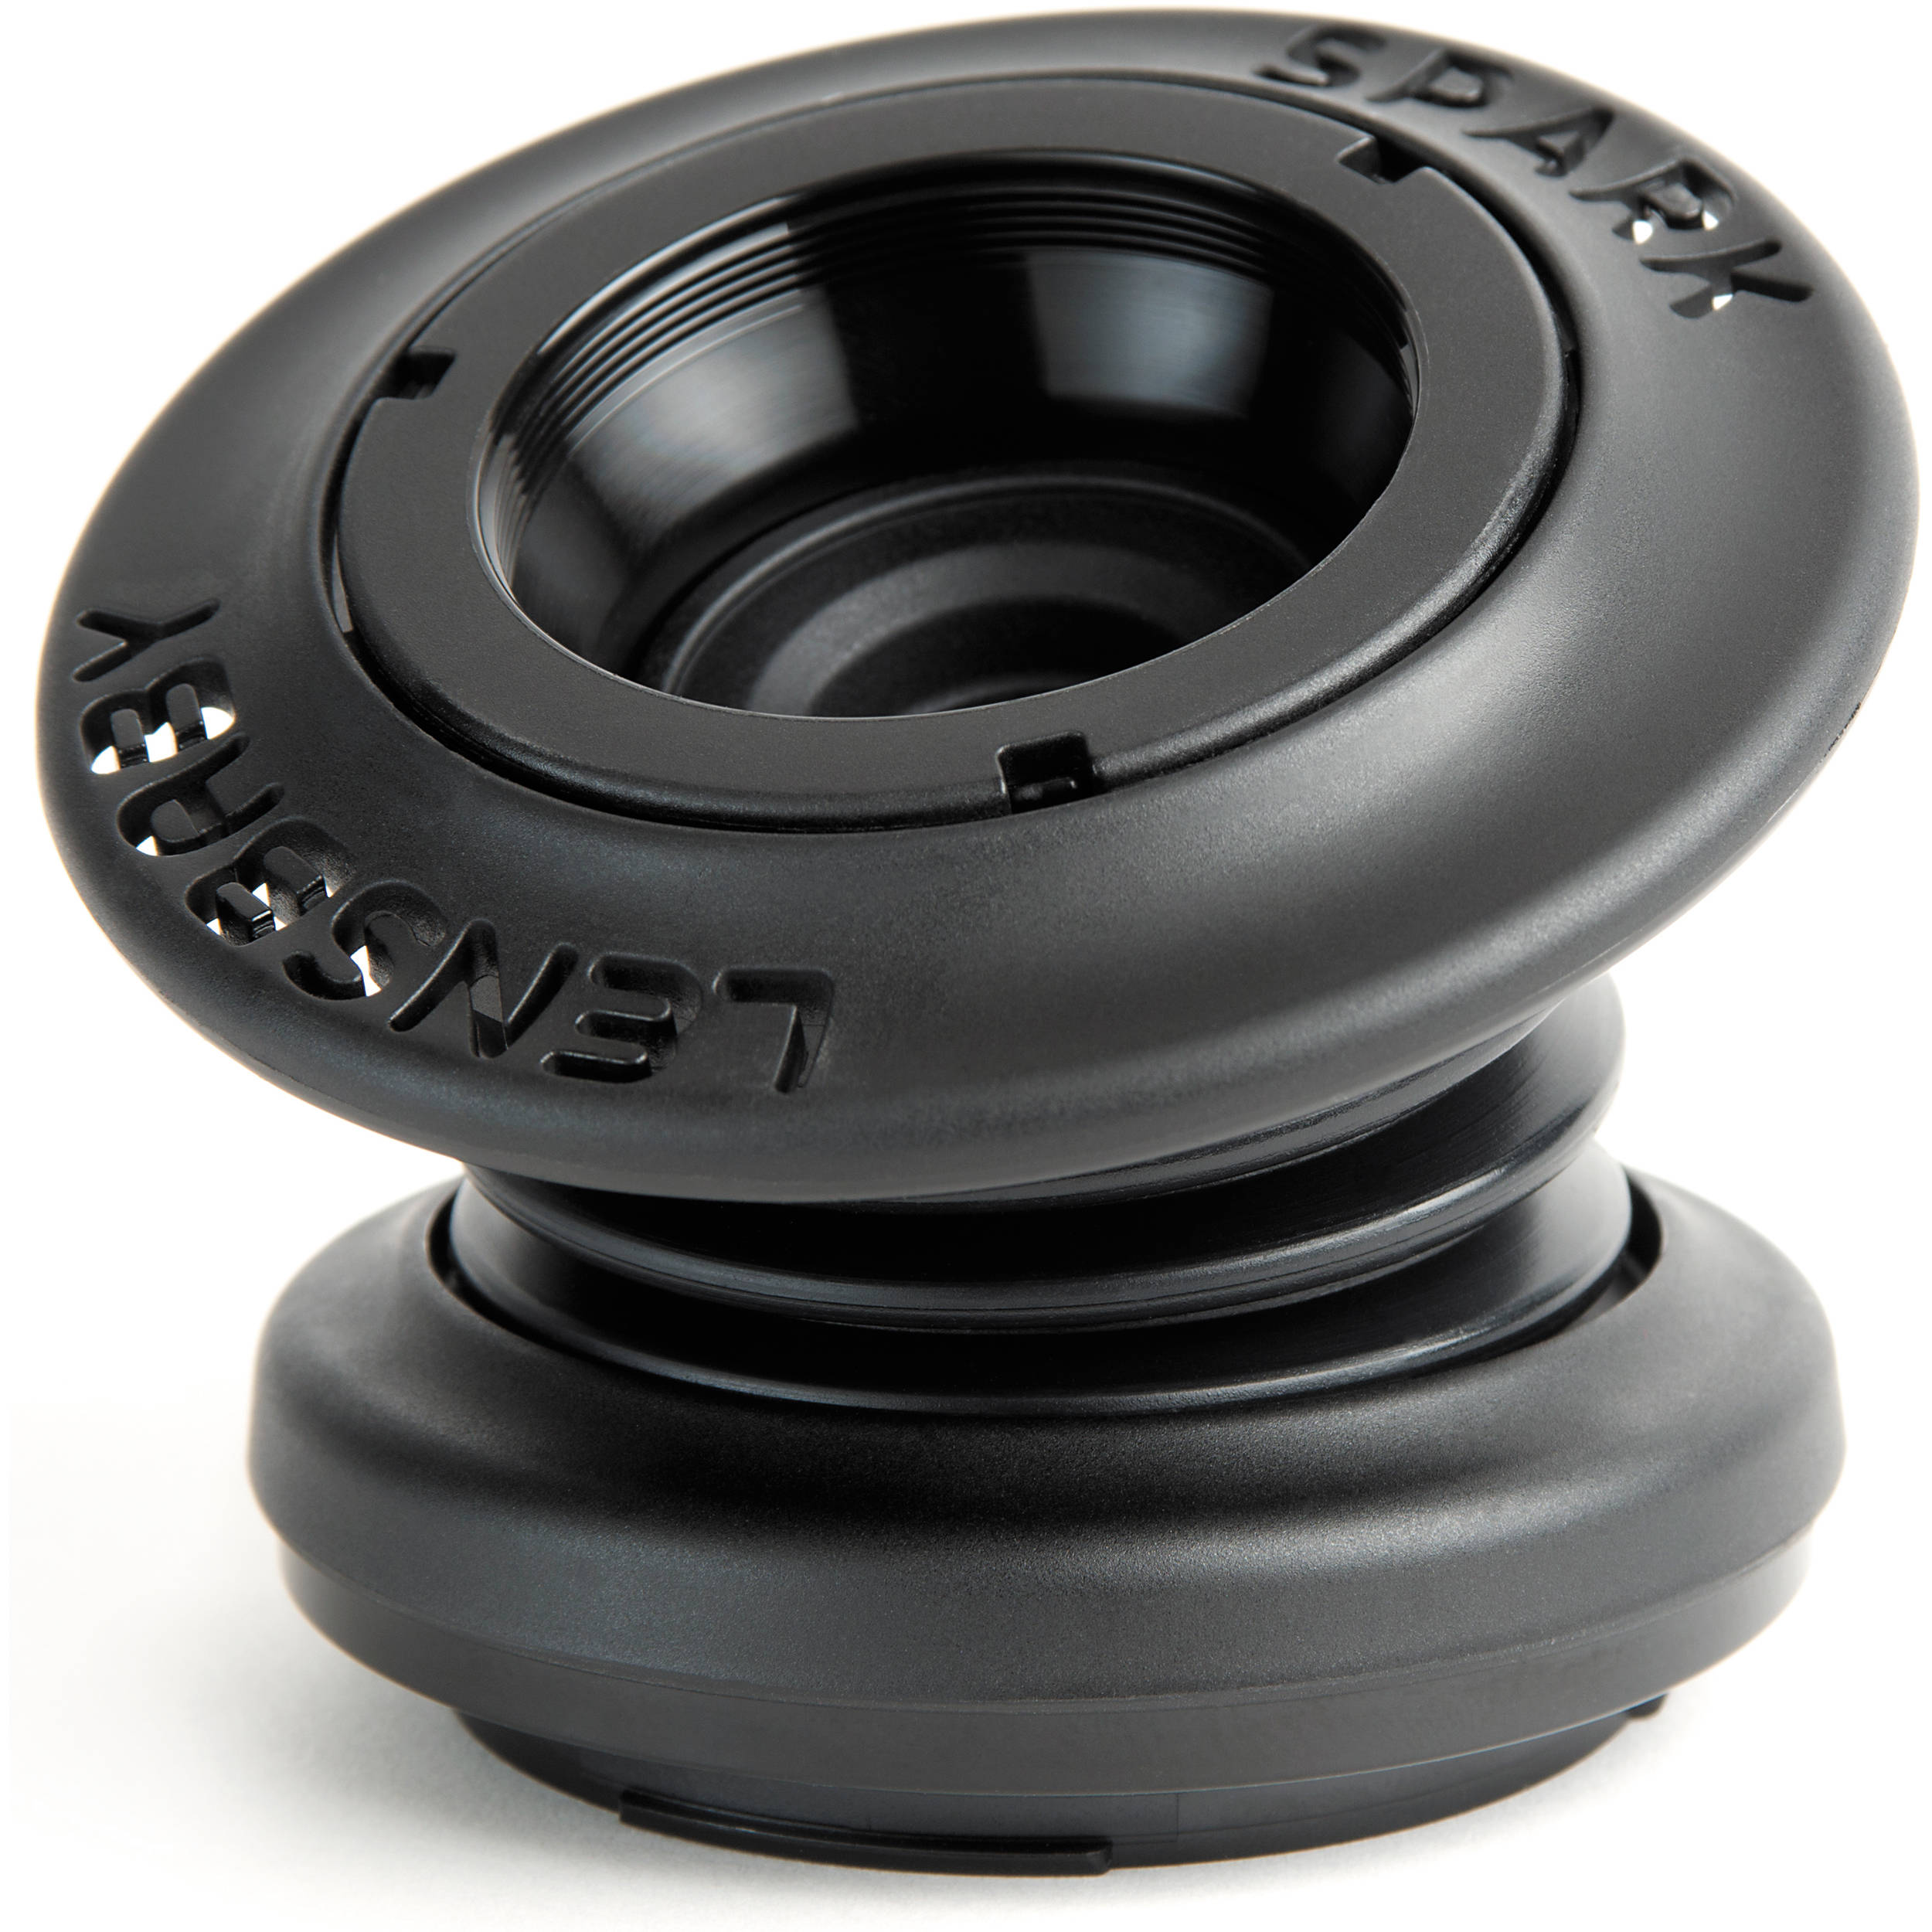
Focus on the Lensbaby Spark is achieved by squeezing the lens bellows until focus registers wherever you want to place it.
Some Lensbabies can run to several hundred dollars and have precise systems for dialing in the part of a photograph that will, through sharp focus, attract optimum attention to a subject, gently blurring the image on all sides around that point. However, for those with steady fingers and shallow pockets, the company’s gateway drug, coming in at around $90, is the Lensbaby Spark, a springy bellows lens that snaps onto your DSLR in place of a regular lens and can be compressed around the edges to place the focal sweet spot wherever you want it.
The Spark takes more muscle control and practice than the more mechanical Lensbaby models, but it’s a thrifty way to see if this kind of imaging is for you. Just squeeze the fixed f/5.6, 50mm lens until the image is sharp at the place you want it, and snap. Some DSLRs allow the Spark to be used on aperture priority, but for most of us, it’s manual all the way, with a lot of trial-and-error until you develop a feel for the process. The company also sells several insert cups so that you can choose different apertures. Pop one f-stop out, pop another one in.
For those of you who like to custom-sculpt focus and light, the gauzy, intimate effect of the Lensbaby will in fact be a gentle welcome. Finally, it’s one more component that could be either toy or tool. Your shots, your choice.
THE BEST KIND OF SECOND-GUESSING

You don’t need a dedicated macro lens to shoot this image. Just maximize the average glass that you have. 1/100 sec., f/2.8, ISO 100, 35mm.
By MICHAEL PERKINS
I TRY MY BEST TO ANTICIPATE EXACTLY WHAT KINDS OF SHOTS I will be taking in a given photo situation. This helps minimize the delay and hassle of changing gear in the field by heading out with a single lens that will do most of what I want. It saves me lugging along every hunk of glass I own on a project (trying vainly to be ready for anything), and makes me far more familiar with the real limits of whatever lens I decide will be my primary go-to for the day. Not a perfect plan…still, a loose plan is better than totally trusting to instinct or luck.
You can, of course, plan too generally and accidentally limit yourself. For example, on a day in which you’re to shoot a ton of landscapes, it’s easy to assume you’ll want an ultra-wide lens to capture those vast vistas. However, if something amazing appears on a far horizon and you can’t zoom any closer than, say, 55mm, you’ve suddenly got the wrong lens. Moreover, if your day takes you inside a dark cave, and your ultra-wide can’t shoot any faster than f/3.5, you’re likewise hamstrung to some degree.
In the above image, I decided, as I often do, to spend the entire day with a 35mm prime, a lens which affords me more latitude in more situations than any other glass I own. Of course, I can’t zoom with that lens, so I have to be reasonably sure that anything I want to shoot with it can be framed by simply walking closer or farther away. The 35 can open up to f/1.8, so it’s great in the shade, or where I want a shallow depth of field, and that can make it a viable, if modest, close-up lens…not true macro, but a good tool for selective subjects just a short distance away (in this case, about five feet). Also, shooting with the biggest image file setting available allowed me to crop away up to 75% of my original, as I did here, and still maintain good resolution. However, is the 35 of any value if I suddenly spy a bald eagle on the wing 300 yards away? Not so much.
But it’s not about finding a universal, one-lens-fits-all solution. It is about anticipating. The most valuable habit you can develop before every sustained shoot is to mentally rehearse (a) what kind of situations you’re likely to encounter and (b) what you want to be able to do about it. That sounds absurdly simple, but it really is about taking as many obstacles out of your own path before they even appear as obstacles. In other words, practice getting out of your own way.
UP CLOSE AND POISONAL
Gee, this 300mm telephoto shot has it all. Terminal mushiness, hazy washout, crappy contrast. Who could ask for anything more? You could.
By MICHAEL PERKINS
THERE MAY BE A STATISTICAL TABLE SOMEWHERE that breaks down the percentage of photographers who use telephoto lenses consistently versus those who only strap one on for special occasions, but I have never seen one. Of course, I’ve never seen a three-toed sloth either, and I’m sure they exist. Fact is, there are always enough telephoto newbies (or “occasional-bies”) out there to guarantee that many of us make some pretty elemental mistakes with them, and come home with fewer jewels than we hoped for. I should know, since I have produced many such “C-minus” frames, like the image seen above. For a better understanding of everything I did wrong here, read on.
If telephotos just had to deliver magnification, and otherwise worked the same as standard lenses, they wouldn’t produce so many problems. In fact, though, they need to be used in several very different ways. For one thing, zooming in exponentially increases not only the chance of camera shake but the visible results of camera shake. A little bit of tremble at 35mm may go undetected, with little discernible effect on sharpness, while the very same amount of shake at 300mm or above creates a mathematically greater amount of instability, rendering everything soft and mushy.
This means that handheld shots at the longer focal lengths are fundamentally harder to do. Solutions can include faster shutter speeds, but that cuts light at apertures of f/3.5 and smaller, where light is already diminished. You might get around that with a higher ISO, which may not produce acceptable noise on a brightly lit day, but you must experiment to see. If you simply must have longer exposures, you’re pretty much onto a tripod, and, if workable, a cable release or wireless remote to guarantee that even your finger on the shutter doesn’t create a tremor. Remember, you’re talking about very minor amounts of movement, but they’re all magnified many times by the lens.
Some people even believe that a DSLR’s process of swinging its internal mirror out of the way before the shutter fires can create enough vibration to ruin a shot at 400mm or further out. In such case, many cameras allow you to move the mirror a little earlier, so that it’s stopped twitching by the time the shutter opens. Lots of trial and error and home-bred calculus here.
One of the factors fouling many of my own telephoto shots comes from shooting at midday near major cities, adding both glare and pollution to the garbage your lens is trying to see through. Colors get washed out, lines get warped, sharpness goes bye-bye. For this, you might try shooting earlier, taking off your haze filters (’cause they cut light) and seeing if things come out clearer and prettier.
Telephotos are a fabulous tool, but like anything else you park in front of your camera, they introduce their own technical limits and challenges into the mix. Seldom can you get results by just swinging your subject into view and hitting the shutter. Get comfortable with that fact and you will find yourself taking home more keepers per batch.
THE FASTEST MAN ALIVE
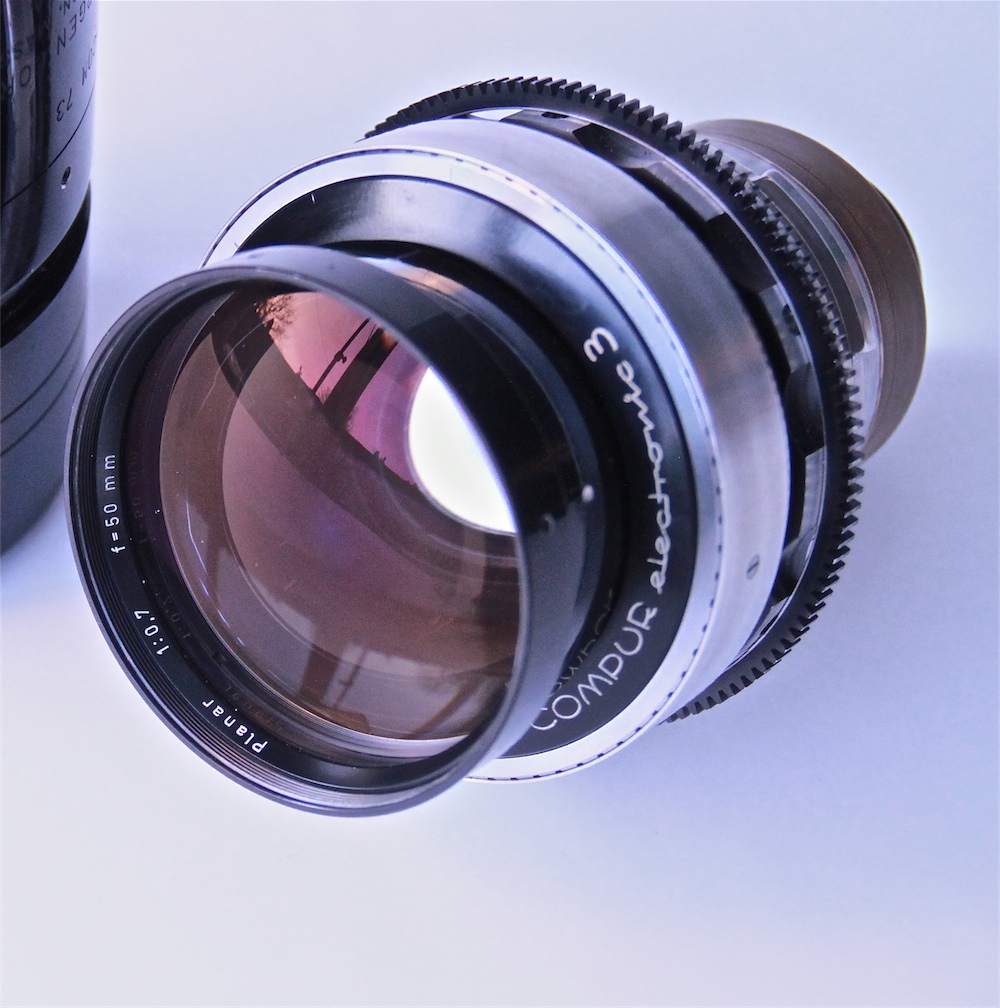
The Mutant: Stanley Kubrick’s unbeatable light sucker, the Zeiss 50mm f/0.7 lens.
By MICHAEL PERKINS
IF THE SUPREME BEING IS CORRECTLY QUOTED, as having proclaimed, at the dawn of time, “Let There Be Light!”, then photographers, since the beginning of their own Creation, have more specifically pleaded, “let there be more light.” Indeed, incredible leaps in imaging technology over the last two centuries have taken us from ten-minute daguerreotype exposures to sharp, bright images snapped in thousandths of a second, and, still, the fight for more light and faster lenses continues unabated.
Between here and there, a few photographers have made their mark by pushing this envelope a little farther than the rest of us. One of them, however, tore that envelope to shreds, and his achievement in this area has never been surpassed, or even matched, by any of his peers.
That man’s name is Stanley Kubrick.
Before he began his directing career in the early 1950’s, Kubrick had years of experience under his belt as the youngest staff photographer for Look magazine, second only to Life as the premier photo-dominant national news weekly. Years before he wielded a Leica IIIf on that job, he had spent his early childhood learning the ins-and-outs of his own Graflex, one of the monster machines that battle-hardened newspaper photogs lugged to crime scenes and fires in dozens of “B” movies (stop the press). By his early ’30’s, Kubrick had amassed a personal collection of lenses and cameras that he would continue to modify and alter for use in his feature films, and by the ’70’s, he was ready to take a giant step attaining a kind of nirvana in the use of available light.

Hey, anyone got a match? The Zeiss delivers Kubrick’s candles-only visions for Barry Lyndon (1975).
As he prepared to adapt William Thackeray’s novel of 19th karmic komeuppance, Barry Lyndon, to the screen in 1974, Kubrick pondered filming the interior scenes of the story’s powdered-wig salons with no lighting whatever beyond that of candle power. Now, we’re not using the term “candle power” to refer to the measurement of light. No, I’m referring here to actual candles, and nothing else. To do so, he would have to have gear that simply did not exist in the gear closets of any major studio, or, in fact, the entire movie industry. To become the fastest man alive, lens-wise, he would have to go shopping at the same place NASA shopped.
Most commercial lenses available at the time opened no wider than around f/1.4, enough to give you and me more than enough light-gathering power for dark times around the house but far too slow to operate on a movie set without a huge battery of kliegs and floods to boost the illumination. However, Kubrick had heard that NASA had developed a lens specifically designed to allow scientists to get sharp images on the dark side of the moon, a Zeiss 50mm with a focal length of …gasp…f/0.7. Zeiss made just ten of these mutants. Six went to Houston. The company kept another one for a rainy day. And the remaining three were gobbled up by Stanley Kubrick.
Taking the aforementioned benchmark of f/1.4 as the 1970’s yardstick for “man, that’s fast”, the ability to open up to f/0.7 represented a quantum leap of at least two-and-a-half stops of extra light (check my math), allowing Kubrick’s film to be, absolutely, the only cinema feature to date to be lit exclusively by ambient light. Of course, it wasn’t all sugar cookies and Kool-Aid, since that also meant working in a range of focus so shallow that only selective parts of actors’ faces were in sharp registration at any given time, giving the players the extra problem of remembering how little their heads could move without screwing up the shot. It was the only thing that could force even more re-takes than Kubrick’s renowned mania for perfection. We’re not talking a fun shoot here.
The resulting, soft, soft, soffffft look of Barry Lyndon is intimate, delicate, and absolutely gorgeous (click the image for a slightly larger version). Practical? Not so much, but for the specific mood of that material, spot on. Critics of the final film either hailed the technique as a new benchmark or sniggered at what they regarded as a showy gimmick. Of course, audiences avoided the film like Jim Carrey fleeing vaccines, so the entire thing remains, for many, a kind of grandiose Guiness-book stunt. Still, while ever-faster lenses and films eventually allowed directors much greater freedom, Uncle Stanley’s claim as fastest gun still merits its place in the hall of frame.
As a strange post-script to the story, several companies have recently boasted that you, too, might rent the same kind of hack-hybrid that Kubrick had fashioned to support the light-sponging Zeiss glass, their ads suggesting that you might secure the needed funding with the sale of several of your more expendable internal organs. Cheap at the price. The Lord got all the light he wanted pretty much on demand. The rest of us have to curse the darkness and, well, light another candle.
NEW WINE FROM OLD BOTTLES

Wide-angle on a budget, and in a time warp: a mid-70’s manual 24mm Nikkor prime up front of my Nikon D5100.
By MICHAEL PERKINS
MANY OF US WHO BEGAN THEIR LOVE FOR PHOTOGRAPHY IN THE DAYS OF FILM have never really made a total switch to digital. It just never was necessary to make that drastic a “clean break” with the past. Far from it: through the tools and techniques that we utilized in the analog world, we still carry forth viewpoints and habits that act as foundations for the work we produce in pixels. Photography was not “re-invented” by digital in the way that transportation was when we moved from horse to car. It was refined, adding a new chapter, not an entire book.
Digital is merely the latest in a historical line of ever-evolving recording media, from daguerreotypes to salted paper to glass plates to roll film. The principles of what makes a good picture, plus or minus some philosophical fashion from time to time, have not changed. That means that tons of toys from the analog world still have years of life left in them, especially lenses.
Call it a “reverse hack” mentality, call it sentiment, but some shooters are reluctant to send all their various hunks of aged camera glass to the ashcan simply because they were originally paired with analog bodies. Photography is expensive enough without having to start from scratch with all-new components every time a hot new product hits the market, and many of us look for workarounds that involve giving a second life to old lenses. New wine from old bottles.
Some product lines actually engineer backwards-compatibility into their lenses. Nikon was the first and best company to spearhead this particular brain flash, making lenses for over forty years that can be pressed into service with the latest Nikon body off the production line. In my own case, I have finally landed a Nikon 24mm f/2.8 prime, not from current catalogues, but from the happy land of Refurbia. It’s a 1970’s-era gem that is sharp, simple, and mine-all-mine, for a fifth of the cost of the latest version of the same optic.
My new/old 24 gives me a wide-angle that’s a full stop more light-thirsty than the most current kit lenses in that focal length, and is also small, light, and quick, even as a manual focus lens. And it can be argued that the build quality is better as well. Photography is about results, not hardware, so how you get to the finish line is your business. And yet, sometimes, I must admit that shooting new pictures with legendary lenses feels like photography, as an art, is building on, and not erasing, history.
GO TO YOUR GO-TO
Simple tools are often best, like the 35mm f/1.8 prime lens used here.
By MICHAEL PERKINS
THE EVOLUTION OF ART IS SOMETIMES ABOUT SUBTRACTION RATHER THAN ADDITION. We reflexively feel that the more elements we add to our creative projects…equipment, verbiage, mental baggage…the better the result will be. I believe that, as art progresses, it actually becomes more streamlined, more pure. It becomes a process of doing the most work with the simplest, and fewest, tools.
That’s why I am a big fan of the idea of a “go-to” lens, that hunk of glass that, whatever its specific properties, answers most of your needs most of the time. Again, it doesn’t matter whether it’s a prime or a zoom or a fisheye. If it delivers more of what you need in nearly any shooting situation, then there’s little reason to keep seeking happiness by lugging extraneous gear and spending extra time swapping lenses. And, after you have been shooting and editing for a while, you will know what that piece of glass is. As a personal example, the 35mm prime lens used in the above image, which can shoot everything from moderate macro to portraits to landscapes, stays on my camera 95% of the time.
Mikey’s Golden Rule # 3,456: The more you know your equipment, the less of it you need.
Consider several advantages of becoming a go-to kind of guy/gal:
Working consistently with the same lens makes it easier to pre-visualize your shots. I believe that, the more of your picture you can see in your mind before the click of the shutter, the more of your concept will translate into the physical record. Knowing what your lens can do allows you to plan a picture that you can actually execute.
You start to see shooting opportunities that you instinctually know will play to your lens’ strengths. You can even plan a shot that you know is beyond those strengths, depending on the effect you want to achieve. Whatever your choices, you will know, concretely, what you can and can’t do.
You escape the dire addiction known as G.A.S., or Gear Acquisition Syndrome. Using the same lens for every kind of shot means you don’t have to eat your heart out about the “next big thing”, the new toy that will magically make your photography suck less. Once you and your go-to are joined at the hip, you can never be conned by the new toy myth again. Ever.
Finally, without the stop-switch-adjust cycle of lens changing, you can shoot faster. Sounds ridiculous, but the ability to just get on with it means you shoot more, speed up your learning curve, and get better. Delays in taking the pictures you want also delay everything else in your development.
There are always reasons for picking specific lenses for specific needs. But, once you maximize your ability to create great things with a particular lens, you may find that you prefer to bolt that sucker in place and leave it there. In photography as with so much else in life, informed choices are inevitably easier choices.
YOU ARE PHOTOSHOP
By MICHAEL PERKINS
EVER SINCE THE ARRIVAL OF THE DIGITAL DARKROOM and its attendant legion of post-production fixes, the world of photography has been pretty evenly divided into “befores” and “afters”, those who prefer to do most of their picture making in-camera and those who prefer to “fix” things after the shutter clicks. Most amateur photography, in the film era, was heavily weighted in favor of the “befores”, since a lot of traditional touch-up technology was economically beyond the reach of many. In the Photoshop era, however, the economic barrier to post-production was shattered, resulting in a more even balance between the two philosophies.

Shoot your black and white images as black and white images, not color shots drained of hue after the fact.
I really see this quarrel as very sharply defined when it comes to black and white photography, with many shooters making most, if not all of their monochromes from shots that were originally color, then desaturated or otherwise manipulated as an afterthought. I prefer to shoot b&ws in-camera, however, for the very simple reason that it gets you thinking in black and white terms, from lighting to composition. It also allows you to benefit from digital’s immediate feedback/playback strengths to shape your shot in the moment. If you’ve worked in mono for a while, and especially if you’ve ever shot on b&w film stock, you are used to seeing the 50 shades of gray that subtly shape the power of an image. More importantly, you realize that black and white is much more than color with the hues sucked out. It’s not a novelty or a gimmick, but a distinct way of seeing.
When you conceive a shot in color, you are shooting according to what serves color well. That means that not all color shots will translate well into grayscale. Fans of the old Superman tv show will recall that, during the series’ early b&w days, George Reeves’ uniform had to be made in various shades of brown so it would “read” correctly in monochrome to viewers who “knew” the suit was red and blue. Cameramen had to plan what would happen when one set of values was used to suggest another. Tones that give a certain punch to an image may look absolutely dead flat if you simply desaturate for mock-mono from a color shot. And, anyway, there are plenty of ways to pre-program many cameras to adjust the contrast and intensity of a b&w master image, as well as the use of filters (polarizers for instance) that do 90% of the tasks you’d typically try to achieve in Photoshop anyway.
The mid-point compromise would seem to be to take both color and black and white shots of your subjects in-camera, allowing you the option of custom processing at least one image afterward. However, knowing what tonal impact you want before you click the shutter is just easier, and usually more productive. Do your shooting with purpose, on purpose. Making a b&w “version” of a color shot after the fact will likely bake up as half a loaf.
FAR AWAY, AS CLOSE AS POSSIBLE

“Fake” macro done with a zoom at 300mm. Actual object is about six feet away. 1/160 sec., f/8, ISO 100.
By MICHAEL PERKINS
OVER YOUR LIFETIME AS A PHOTOGRAPHER, IT DOESN’T TAKE A LOT OF EFFORT TO ACCUMULATE A SMALL WAREHOUSE OF SPECIALIZED GLASS. Lens acquisition just may be the crack cocaine of photography, since we all know that the best picture of your life will be taken with the lens you don’t yet own.
We slobber with envy over magazine spreads which lovingly detail the bursting kit bags of the pros, which far too many of them pose for in magazines, at least once. I think it is a kind of passive-agressive attempt to scare most of us other shrimps into abandoning the craft altogether and finding honest work, like breaking into ATMs. I swear, there must be proof that a significant percentage of the second mortgages in the world are traceable to “daddy needs a new fisheye”.
One of the most expensive hunks of glass for many of us will be a dedicated macro lens. Assuming that you don’t buy a third-party bauble made from a child’s kaleidoscope in an emerging nation, the investment can be daunting, especially if macro shots are a small subset of your total output. Forced to choose between a dedicated macro and a decent quality zoom, however, I have sided with the zoom every time, since, in a pinch, it can serve as a decent sub for a macro. Detail is your big factor. You have to decide if you want to count the feathers on a robin’s back, or if you want to be able to see the mites that live in the feathers. If you’re a mite man, then apply for that second mortgage now.
Shot from about five feet out, zoomed to 220mm: 1/80 sec., f/8, ISO 100.
Standing just a few feet from your macro subject and zooming out to, say, 300mm allows you enough magnification to fill your frame. Of course, you should be absent any bloodstream caffeine, since camera shake will become a large part of your life. You could default to a tripod, but since you’re improvising a macro shot, you are probably too close to the object to want to impede foot traffic (or simply waste opportunities) getting set up, so it’s better to experiment with various ways of bracing the camera against your body. And again, cut the caffeine.
Your depth of field will be shallow, which will actually help out, since the bokeh will eliminate distractions around or behind your subject. You will also be far enough from what you’re shooting to keep you from casting a shadow over it with your body. If you want a sharper image, you can go to a smaller aperture, but as you’re completely zoomed out already, you are already down to f/5.6 and its attendant light loss. A smaller aperture means you’ll have to slow your exposure, and that could give your handheld shot the dreaded shakes again. Everything’s a trade-off.
Bottom line: it’s cost-effective to make the lenses you have do everything of which they are each capable than to build a mountain of specialized glass in your closet.
Remember when golf was the expensive hobby? Ah, them wuz the days.
