I’M LOOKING THROUGH YOU

Brookfield Breaklight, 2016.
By MICHAEL PERKINS
ANYONE WHO REGULARLY PHOTOGRAPHS GLASS SURFACES realizes that the process is a kind of shot-to-shot negotiation, depending on how you want the material to react and shape your subject. There is really no absolute “look” for glass, as it has the ability to both aid and block the view of anything it’s around, in front of, or near. Viewed in different conditions and angles, it can speed the impact of an image, or foil it outright.
I love shooting in urban environments, where the use of glass has shifted dramatically in recent decades. Buildings that were 90% brick or masonry just fifty years ago might be predominantly wrapped in glass today, demonstrably tilting the ratios of available light and also changing what I call the “see-through” factor…the amount of atmosphere outside a building can be observed from inside it. This presents opportunities galore of not only what can be shown but also how abstracted glass’ treatment of reflection can serve a composition.
Against the advice of many an online pundit, I keep circular polarizing filters permanently attached to the front of all my lenses so that I can modify reflections and enhance color richness at my whim. These same pundits claim that leaving the filter attached when it’s not “needed” will cost you up to two stops of light and degrade the overall image quality. I reject both these arguments based on my own experience. The filters only produce a true polarizing effect if they are either at the right viewing angle vis-a-vis the overhead sun, or if they are rotated to maximize the filtering effect. If they don’t meet either of these conditions, the filters produce no change whatever.
Even assuming that the filter might be costing you some light, if you’ve been shooting completely on manual for any amount of time, you can quickly compute any adjustments you’ll need without seriously cramping your style. Get yourself a nice fast lens capable of opening to f/1.8 or wider and you can even avoid jacking up your ISO and taking on more image noise. Buy prime lenses (only one focal length), like a 35mm, and you’ll also get better sharpness than a variable focal length lens like an 18-55mm, which are optically more complex and thus generally less crisp.
In the above image, which is a view through a glass vestibule in lower Manhattan, I wanted to incorporate the reflections of buildings behind me, see from side-to-side in the lobby to highlight selected internal features, and see details of the structures across the street from the front of the box, with all color values registering at just about the same degree of strength. A polarizer does this like nothing else. You just rotate the filter until the blend of tones works.
Some pictures are “about” the subject matter, while others are “about” what light does to that subject, according to the photographer’s vision. Polarizers are cheap and effective ways to tell your camera how much light to allow on a particular surface, giving you final say over what version of “reality” you prefer. And that’s where the fun begins.
INSTANT VELVET
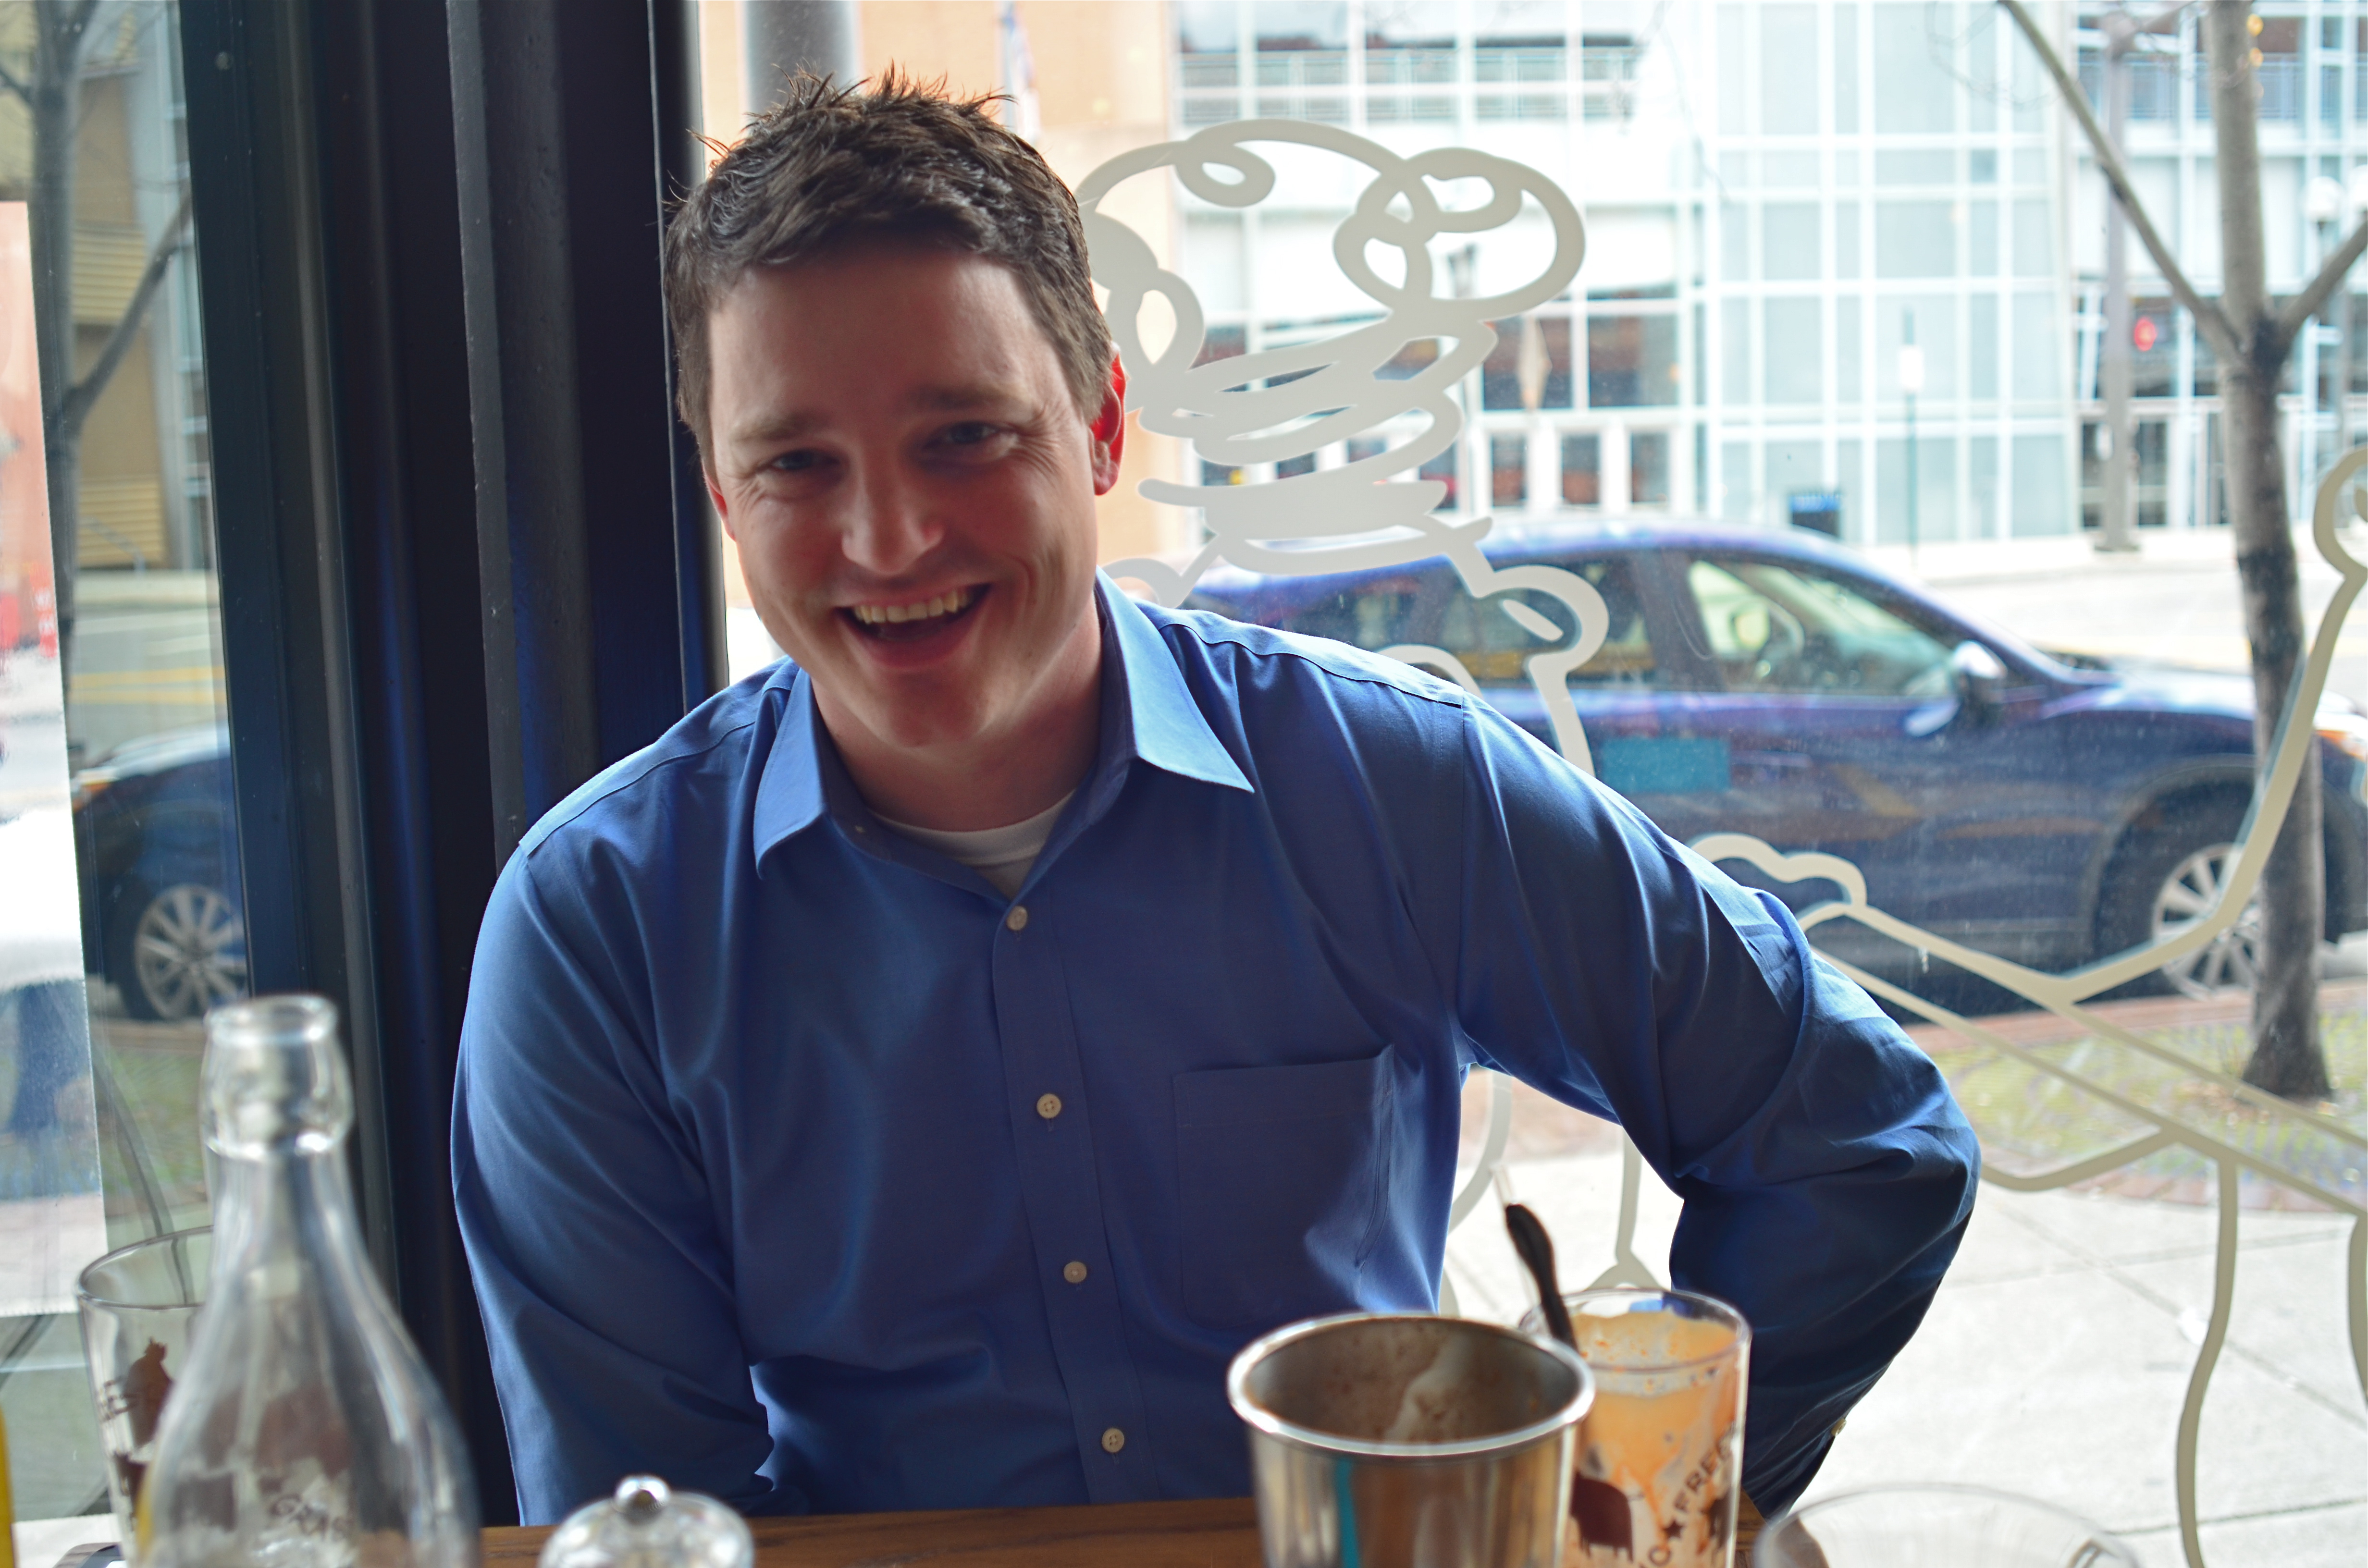
A portrait straight from my camera, with no prior filtration.
By MICHAEL PERKINS
THERE WERE, IN THE DAYS OF FILM, two main ways to create the velvety glow of uniformly soft focus so prized by portrait subjects. The more expensive route lay in purchasing a dedicated portrait lens that achieved more or less of the effect, depending mainly on aperture. The other, cheaper way was to screw-on a softening filter, making any lens adaptable to the look. Now, in the digital era, those two options have been joined by softening apps for phone cameras and in-camera “filters”, which add the effect after the photograph has been snapped.
That’s the beauty of where we are in the history of photography, where every problem has a half-dozen different solutions, offered at different levels of complexity, ease, and affordability. In the golden days of Hollywood, cinematographers achieved the soft look with some Vaseline smeared over the lens, or by attaching different gauges of gauze to the glass. Both tricks made yesterday’s matinee idols look like today’s ingenues, and now, anyone with a reasonably sophisticated camera can achieve the same success with half the bother.

The same image after the application of Nikon’s in-camera “soft” filter.
I myself prefer to shoot soft focus “live”, that is, in the moment, with either a dedicated lens or a filter, but you aren’t always in the same frame of mind when you shoot something as when you review it later. In-camera processing, while offering less fine control (tweaking pictures that have already been shot), can at least give you another comparative “version” of your image at literally no trouble or cost. With Nikon, you simply select the “Retouch” menu, dial down to “Filters”, select “Soft” and scroll to the image you want to modify. For Canon cameras, go to the “Playback” menu, select “Creative Filters”, scroll to “Soft” and pick your pic. The image at left shows the result of Nikon’s retouch filter, applied to the above picture.
One personal note: I have tried several phone app softeners as post-click fixes, and find that they generally degrade the quality of the original image, almost as if you were viewing the shot through a soup strainer. Your mileage may vary, but for my money, the app versions of soft focus are not ready for prime time yet. Best news is, the soft-focus effect is so popular that eventually all solutions will be generally equal, regardless of platform, since the marketplace always works in favor of the greatest number of people making pictures. Always has, always will.
All things considered, we got it pretty soft.
THE EYE OF MEMORY
By MICHAEL PERKINS
PHOTOGRAPHY DEALS IN FEELINGS, those inexact sensations of the heart that we try to capture or evoke in our visual messaging. Some subjects, such as war or celebration, convey emotions with such immediacy that we are really only acting as recorders, with the associative power of our minds providing much of the detail. Pictures of loss or celebration, such as the aftermath of a disaster or the birth of a new life, can be fairly simple to convey. What you see is what the thing is. For subtler regions of the brain, however, photos must use, if you will, a different vocabulary.
Newbie photographers are trained, to a a great degree, to seek the sharp image, to master focus as a technical “must”, but, as we vary the kinds of messages we want to convey, we change our attitudes about not only sharpness but most of the other “musts” on the beginner’s list. We learn that we should always do a certain thing….except when we shouldn’t. It’s worth remembering that some of the most compelling photos ever published were, according to someone’s standard, “flawed” in some way.
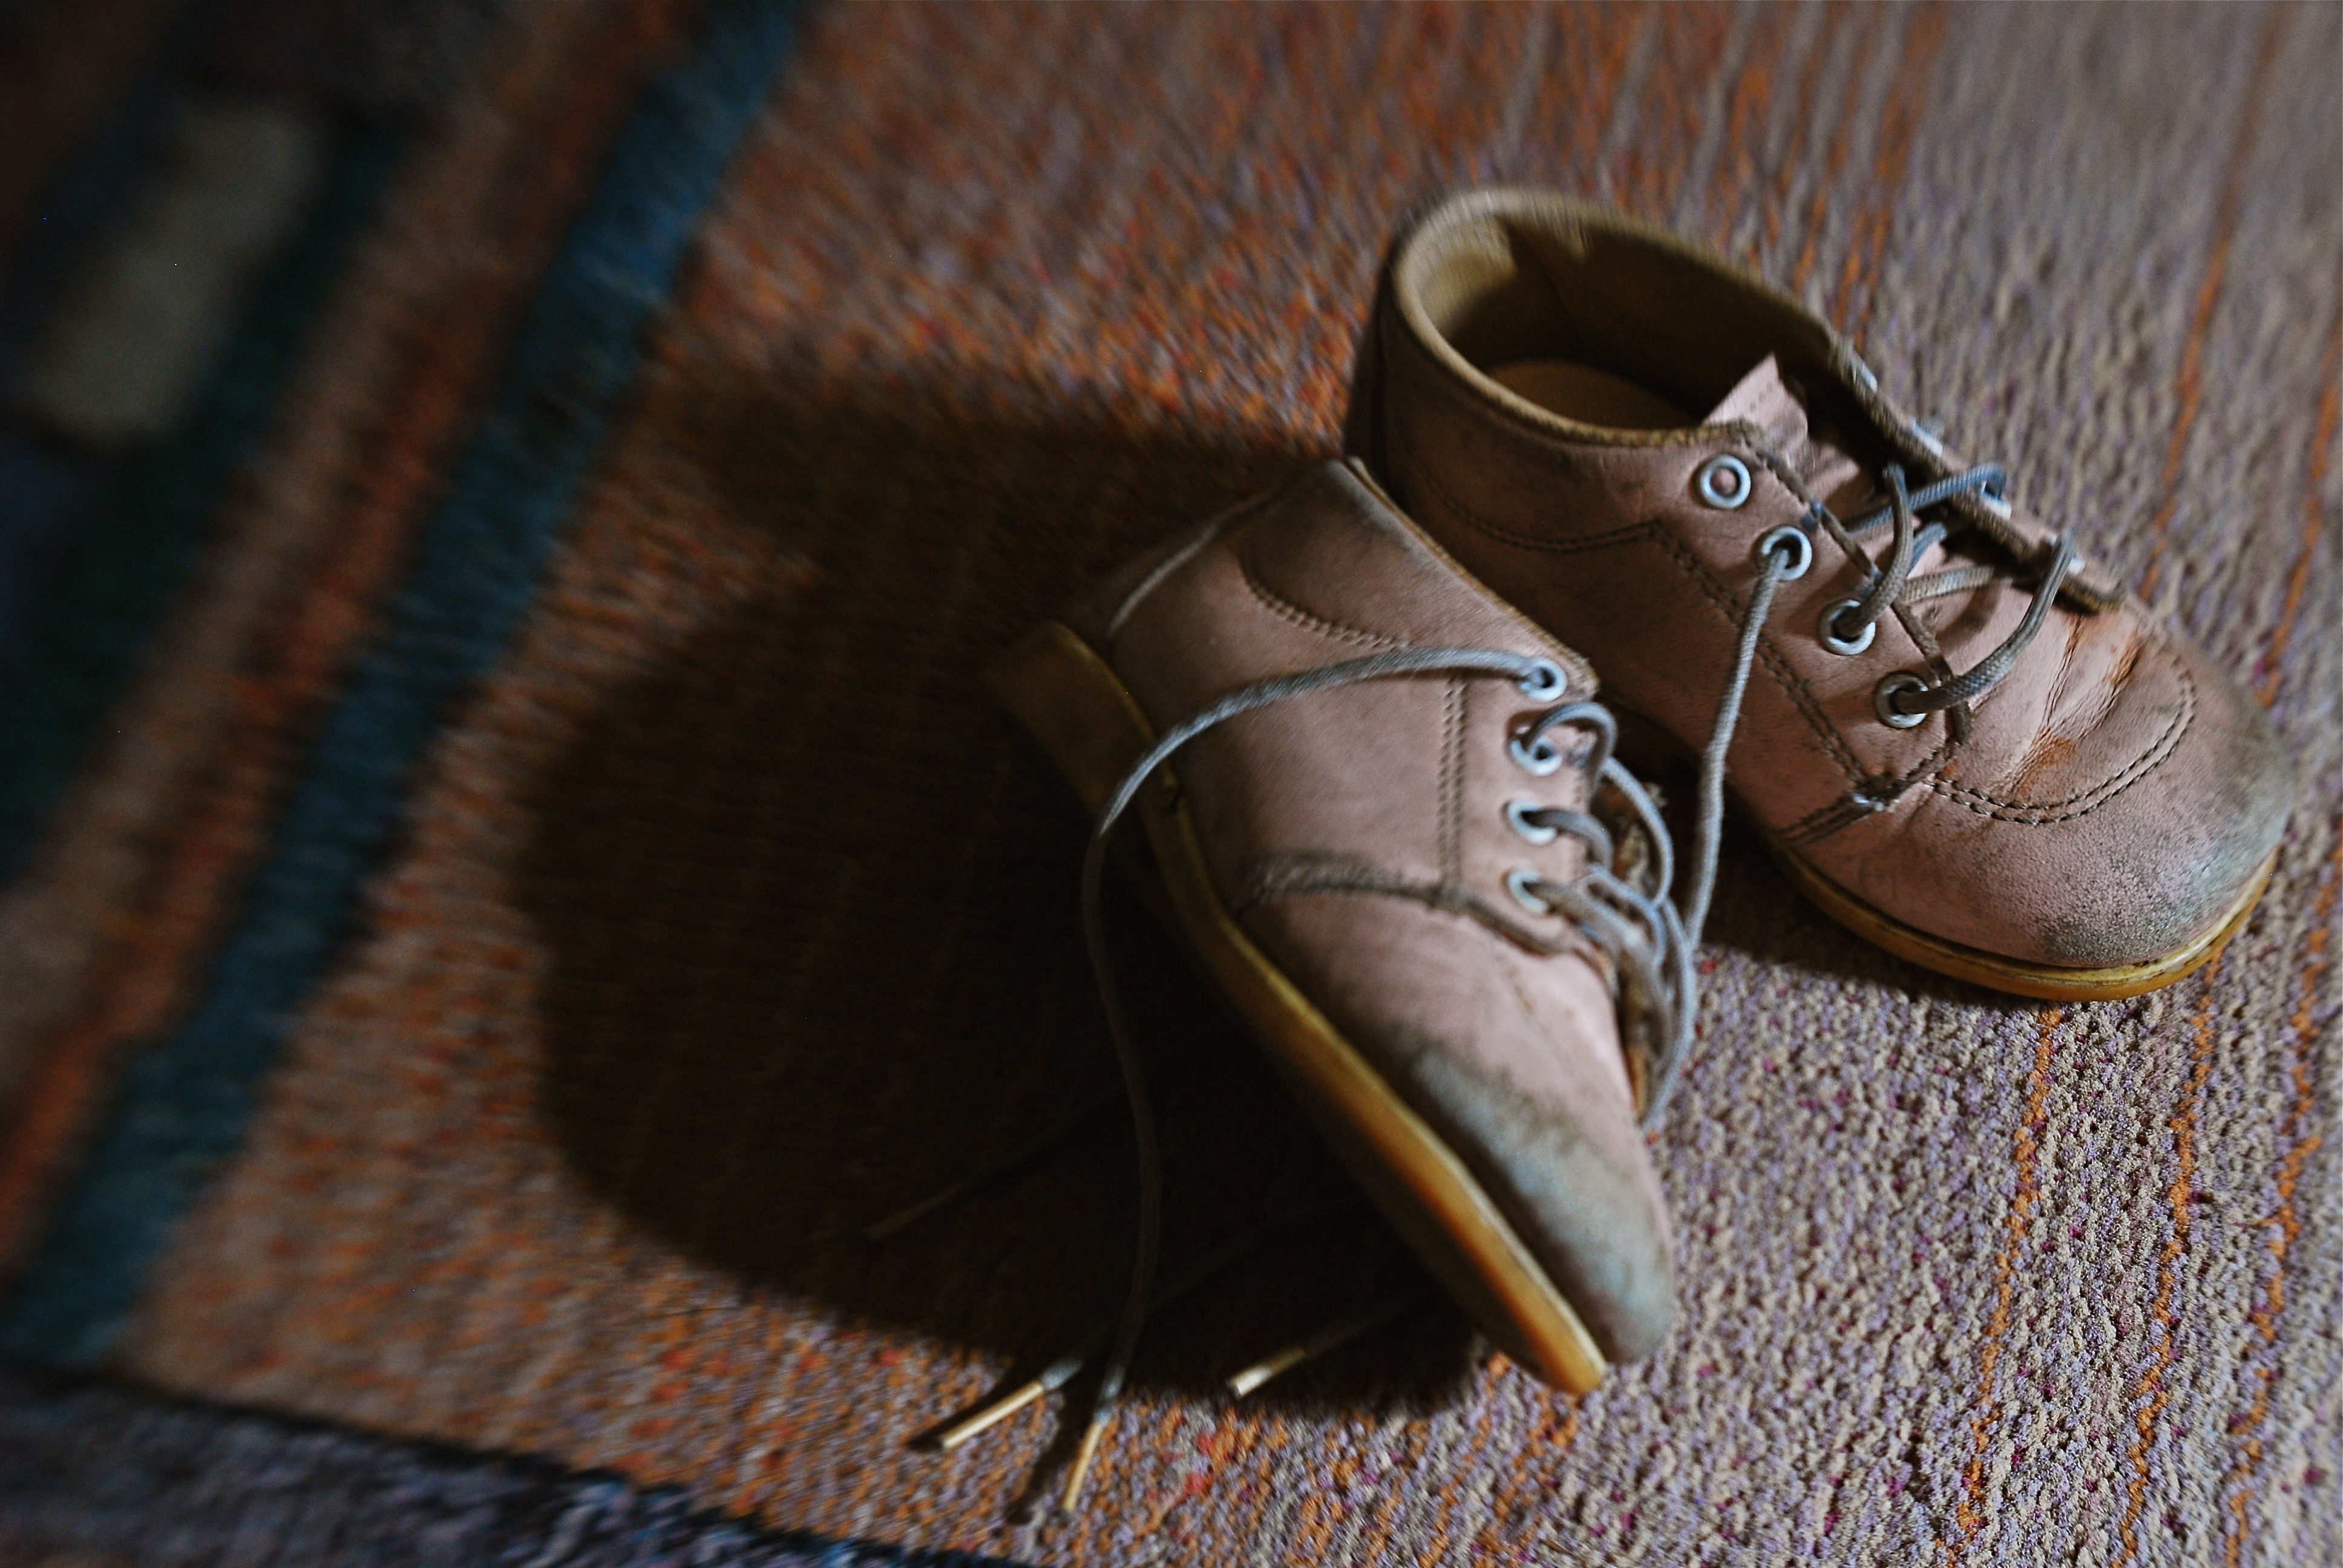
De-saturated color, soft focus. Items dealing with feelings, especially memory. are better served with less “realism”.
News shooters have long since learned that the emotional immediacy of a picture, along with its raw “news value”, outweighs mere technical precision by a country mile. The rules get bent or broken because, in their most perfect application, they may actually dull the impact of a given image. Thus, many a journalist has a Pulitzer on his wall for a picture that a beginner might regard as “wrong”. And the same goes for any picture we may want to make where an emotion simply must be conjured. Mere visual accuracy can and will be sacrificed to make the picture ring true.
Asa personal example, I find that images that plumb the mysteries of memory often must stray from the arbitrary standards of so-called “realism”. When you work in the realms of recall, nostalgia, regret, or simply fond remembrance, a certain fluid attitude toward the niceties of sharpness and exposure may actually sell the idea better. Memory is day-dreaming, after all, and, in a dream, as Alice found in Wonderland, things look a bit…off. Dimension, delineation, depth…all these properties, and more, morph with the needs of the desired image. “Real” sells some things superbly. Emotion, however, as earlier stated, demands a language of its own.
The baby shoes shown in the image above are shot in uneven sharpness to suggest the gauzy nature of the memories they may evoke. Likewise the color is a bit washed-out, almost pastel, since a full, vibrant range of hues may seem less dreamy, more rooted in reportorial reality…which we don’t want for a picture like this. Rule-breaking ensues simply because nothing, no rule, no standard, is as important as making the picture work. If it doesn’t speak to the viewer, then the fact that it’s technically superb means nothing.
As Mr. Ellington sez, it don’t mean a thing if it ain’t got that swing.
A TRICK OF THE LIGHT
By MICHAEL PERKINS
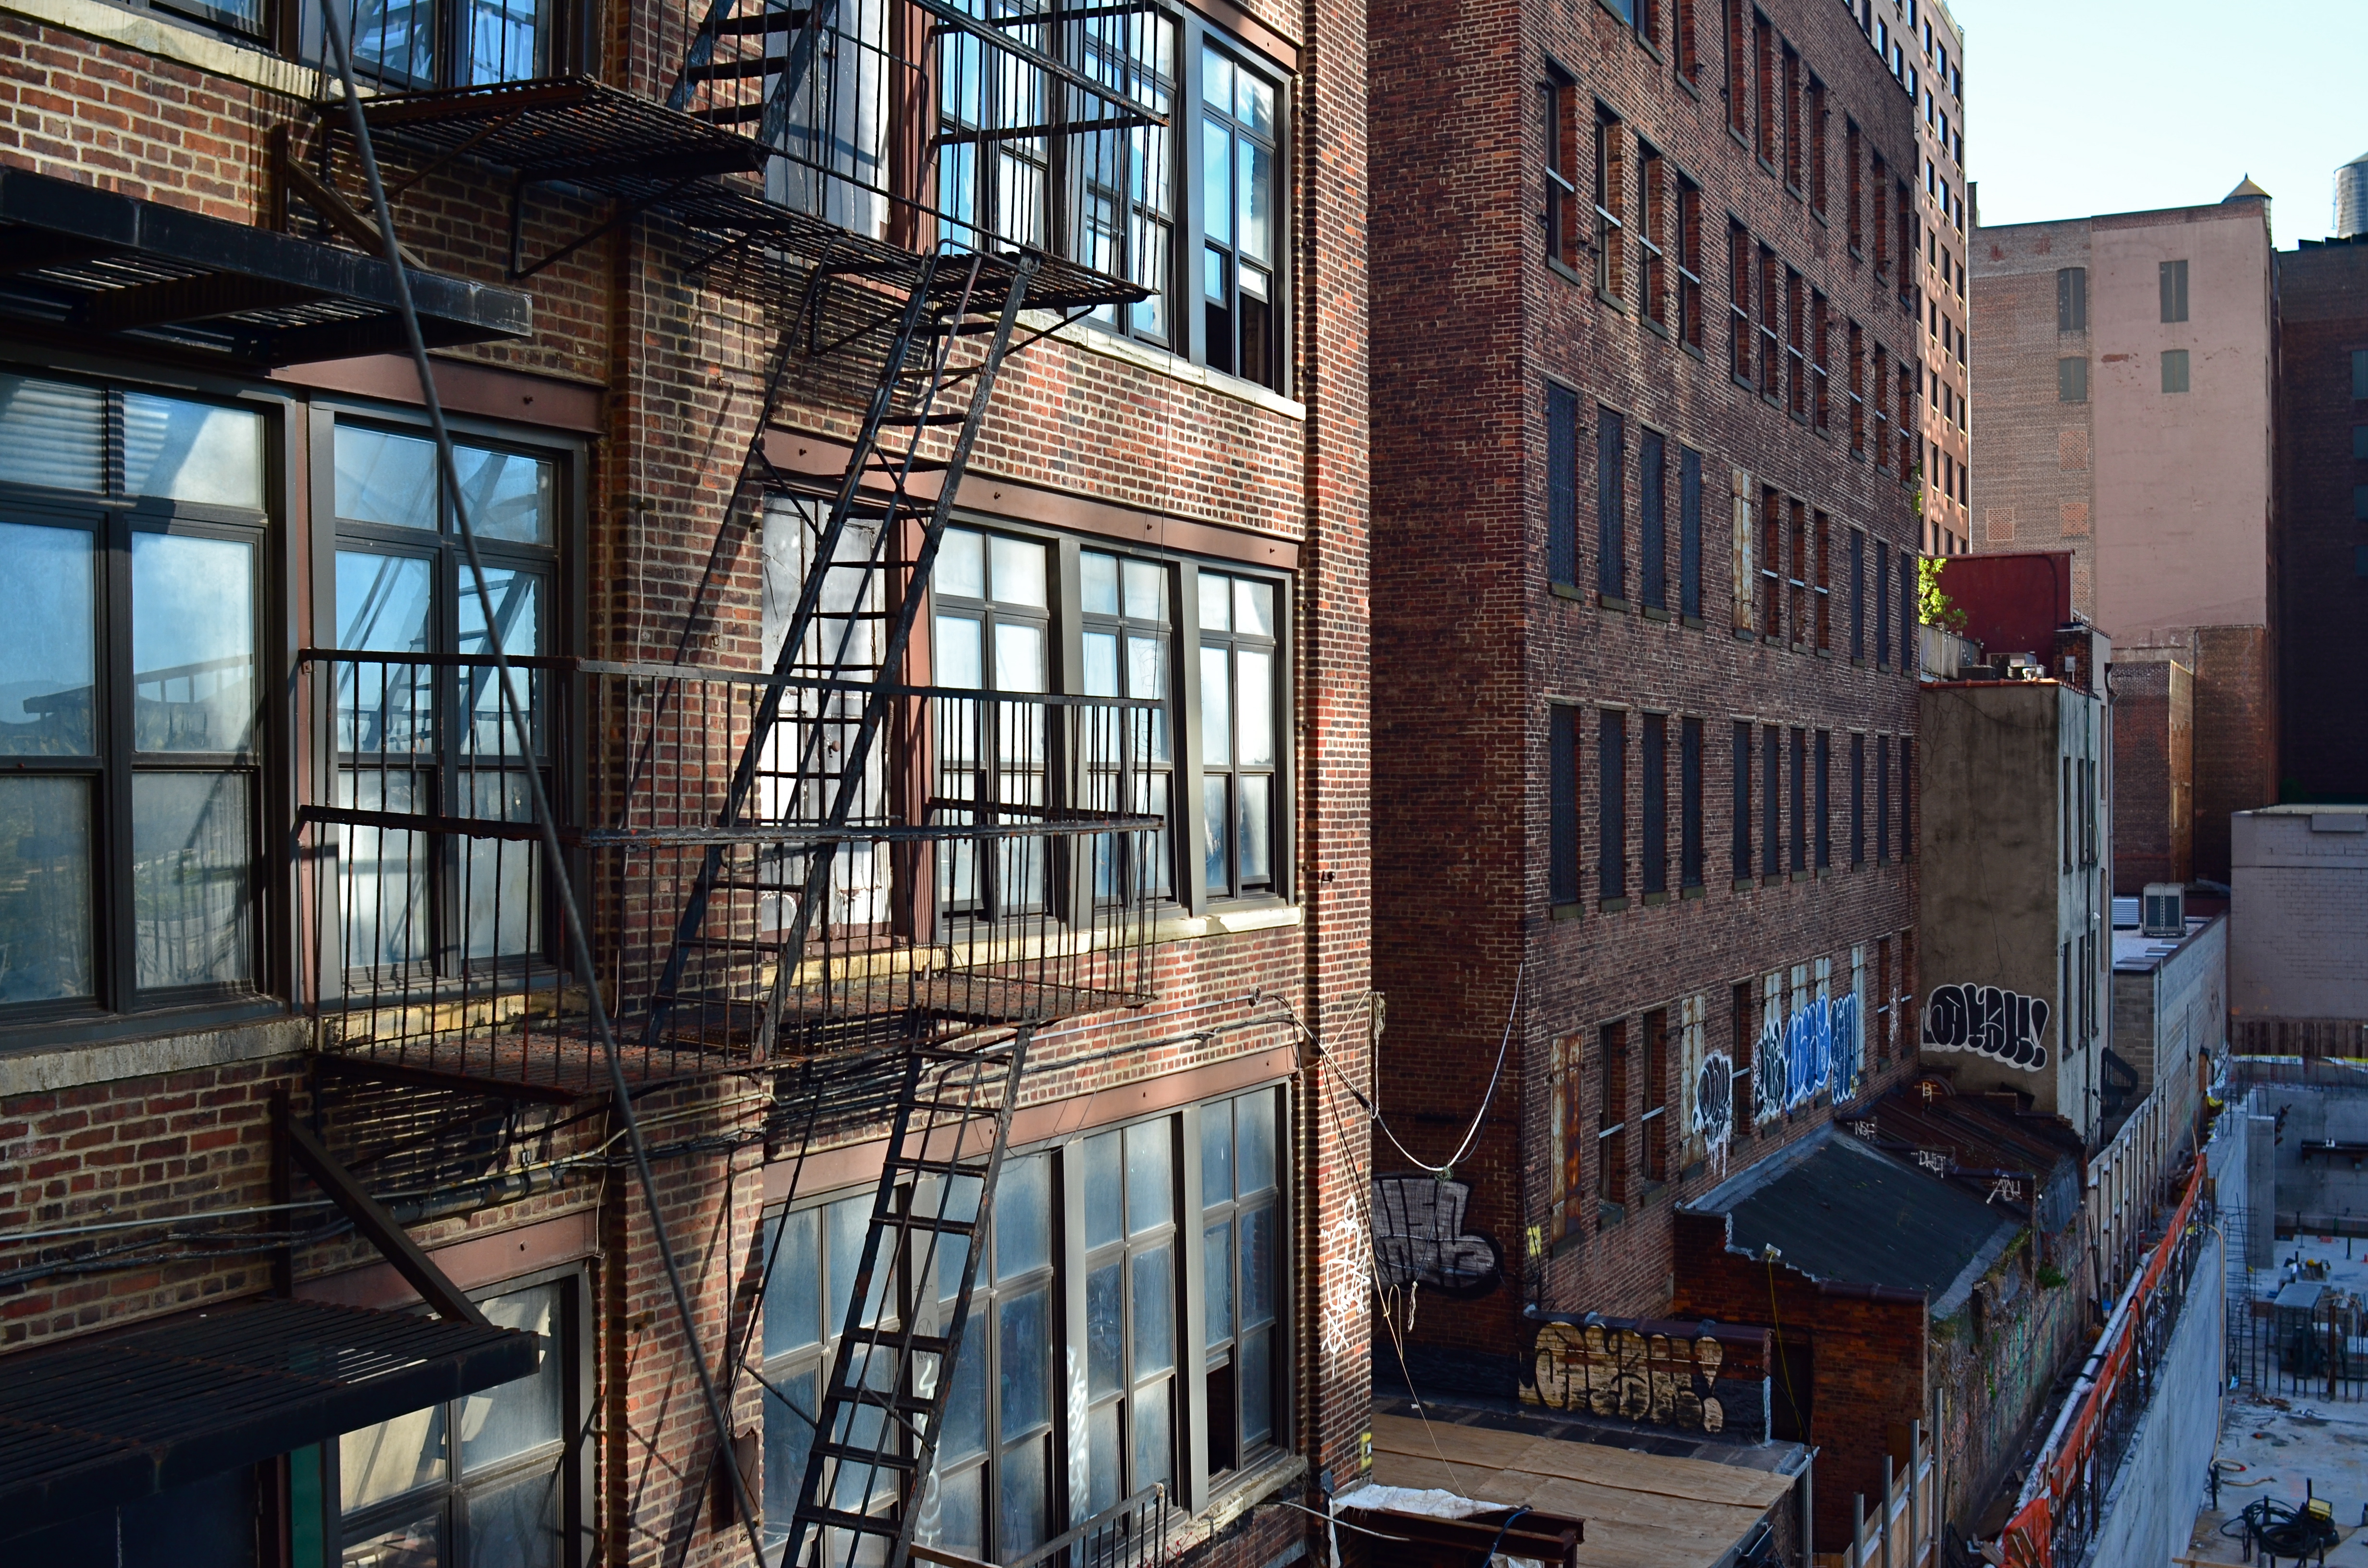
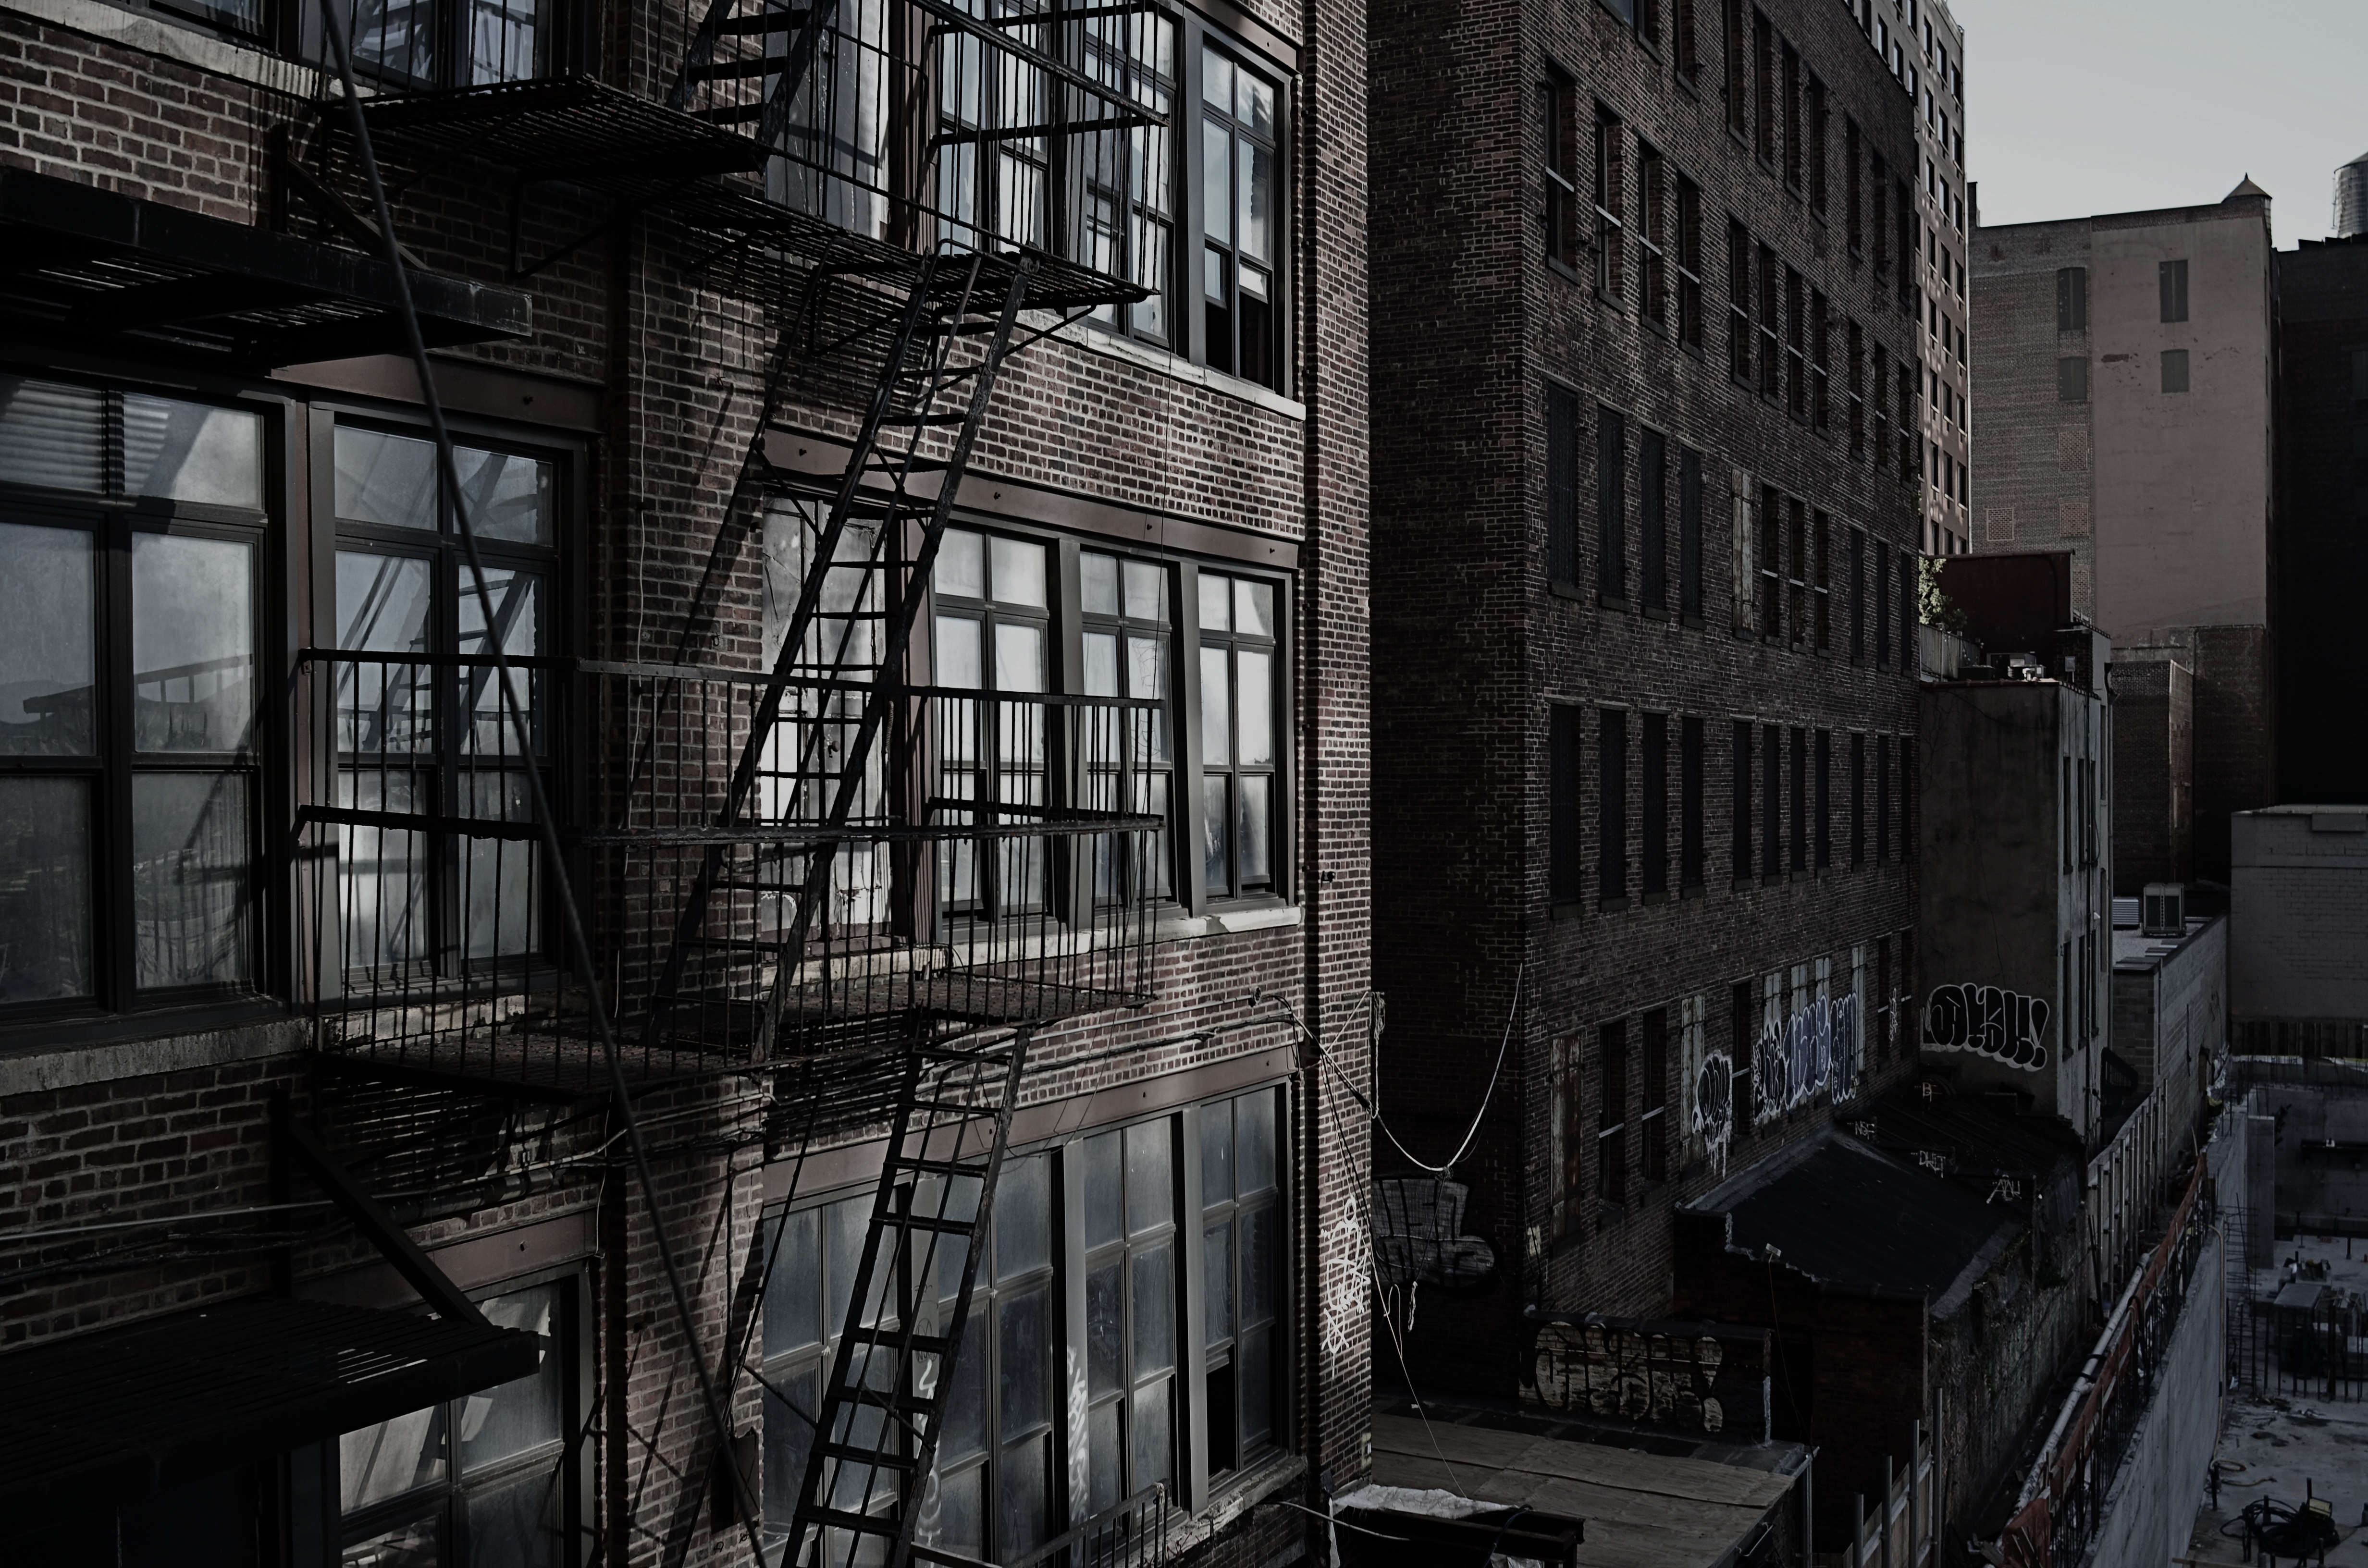
PHOTOGRAPHERS WHO TRACK THE SUN AS IT TRAVELS EAST TO WEST over the vast expanse of the Grand Canyon have made amazing images of the way light changes contours, shadows, even the sensation of depth and scale over the course of a single day. Such hour-by-hour portfolios present pictures which are less about the subject matter and more about how light shapes that subject. And the same tracking exercise is possible in canyons of another sort, the vertical jungles we call cities.
Buildings in urban settings reveal more in pictures than their own particular physical shapes and designs: they also have visual artifacts tattooed onto them from their neighbors, which block, warp and reflect light patterns in their direction. Thus the most architecturally drab tower can become hypnotic when bathed in patterns of shadows shaped by the tower next door. And that means that those seeking abstract images may find that ordinary parts of the city can be rendered extraordinary by light’s odd bounces. Additionally, the fact that many of these light effects are fleeting, visible, in some cases, only for minutes each day, presents both a challenge and an adventure for the photographer.
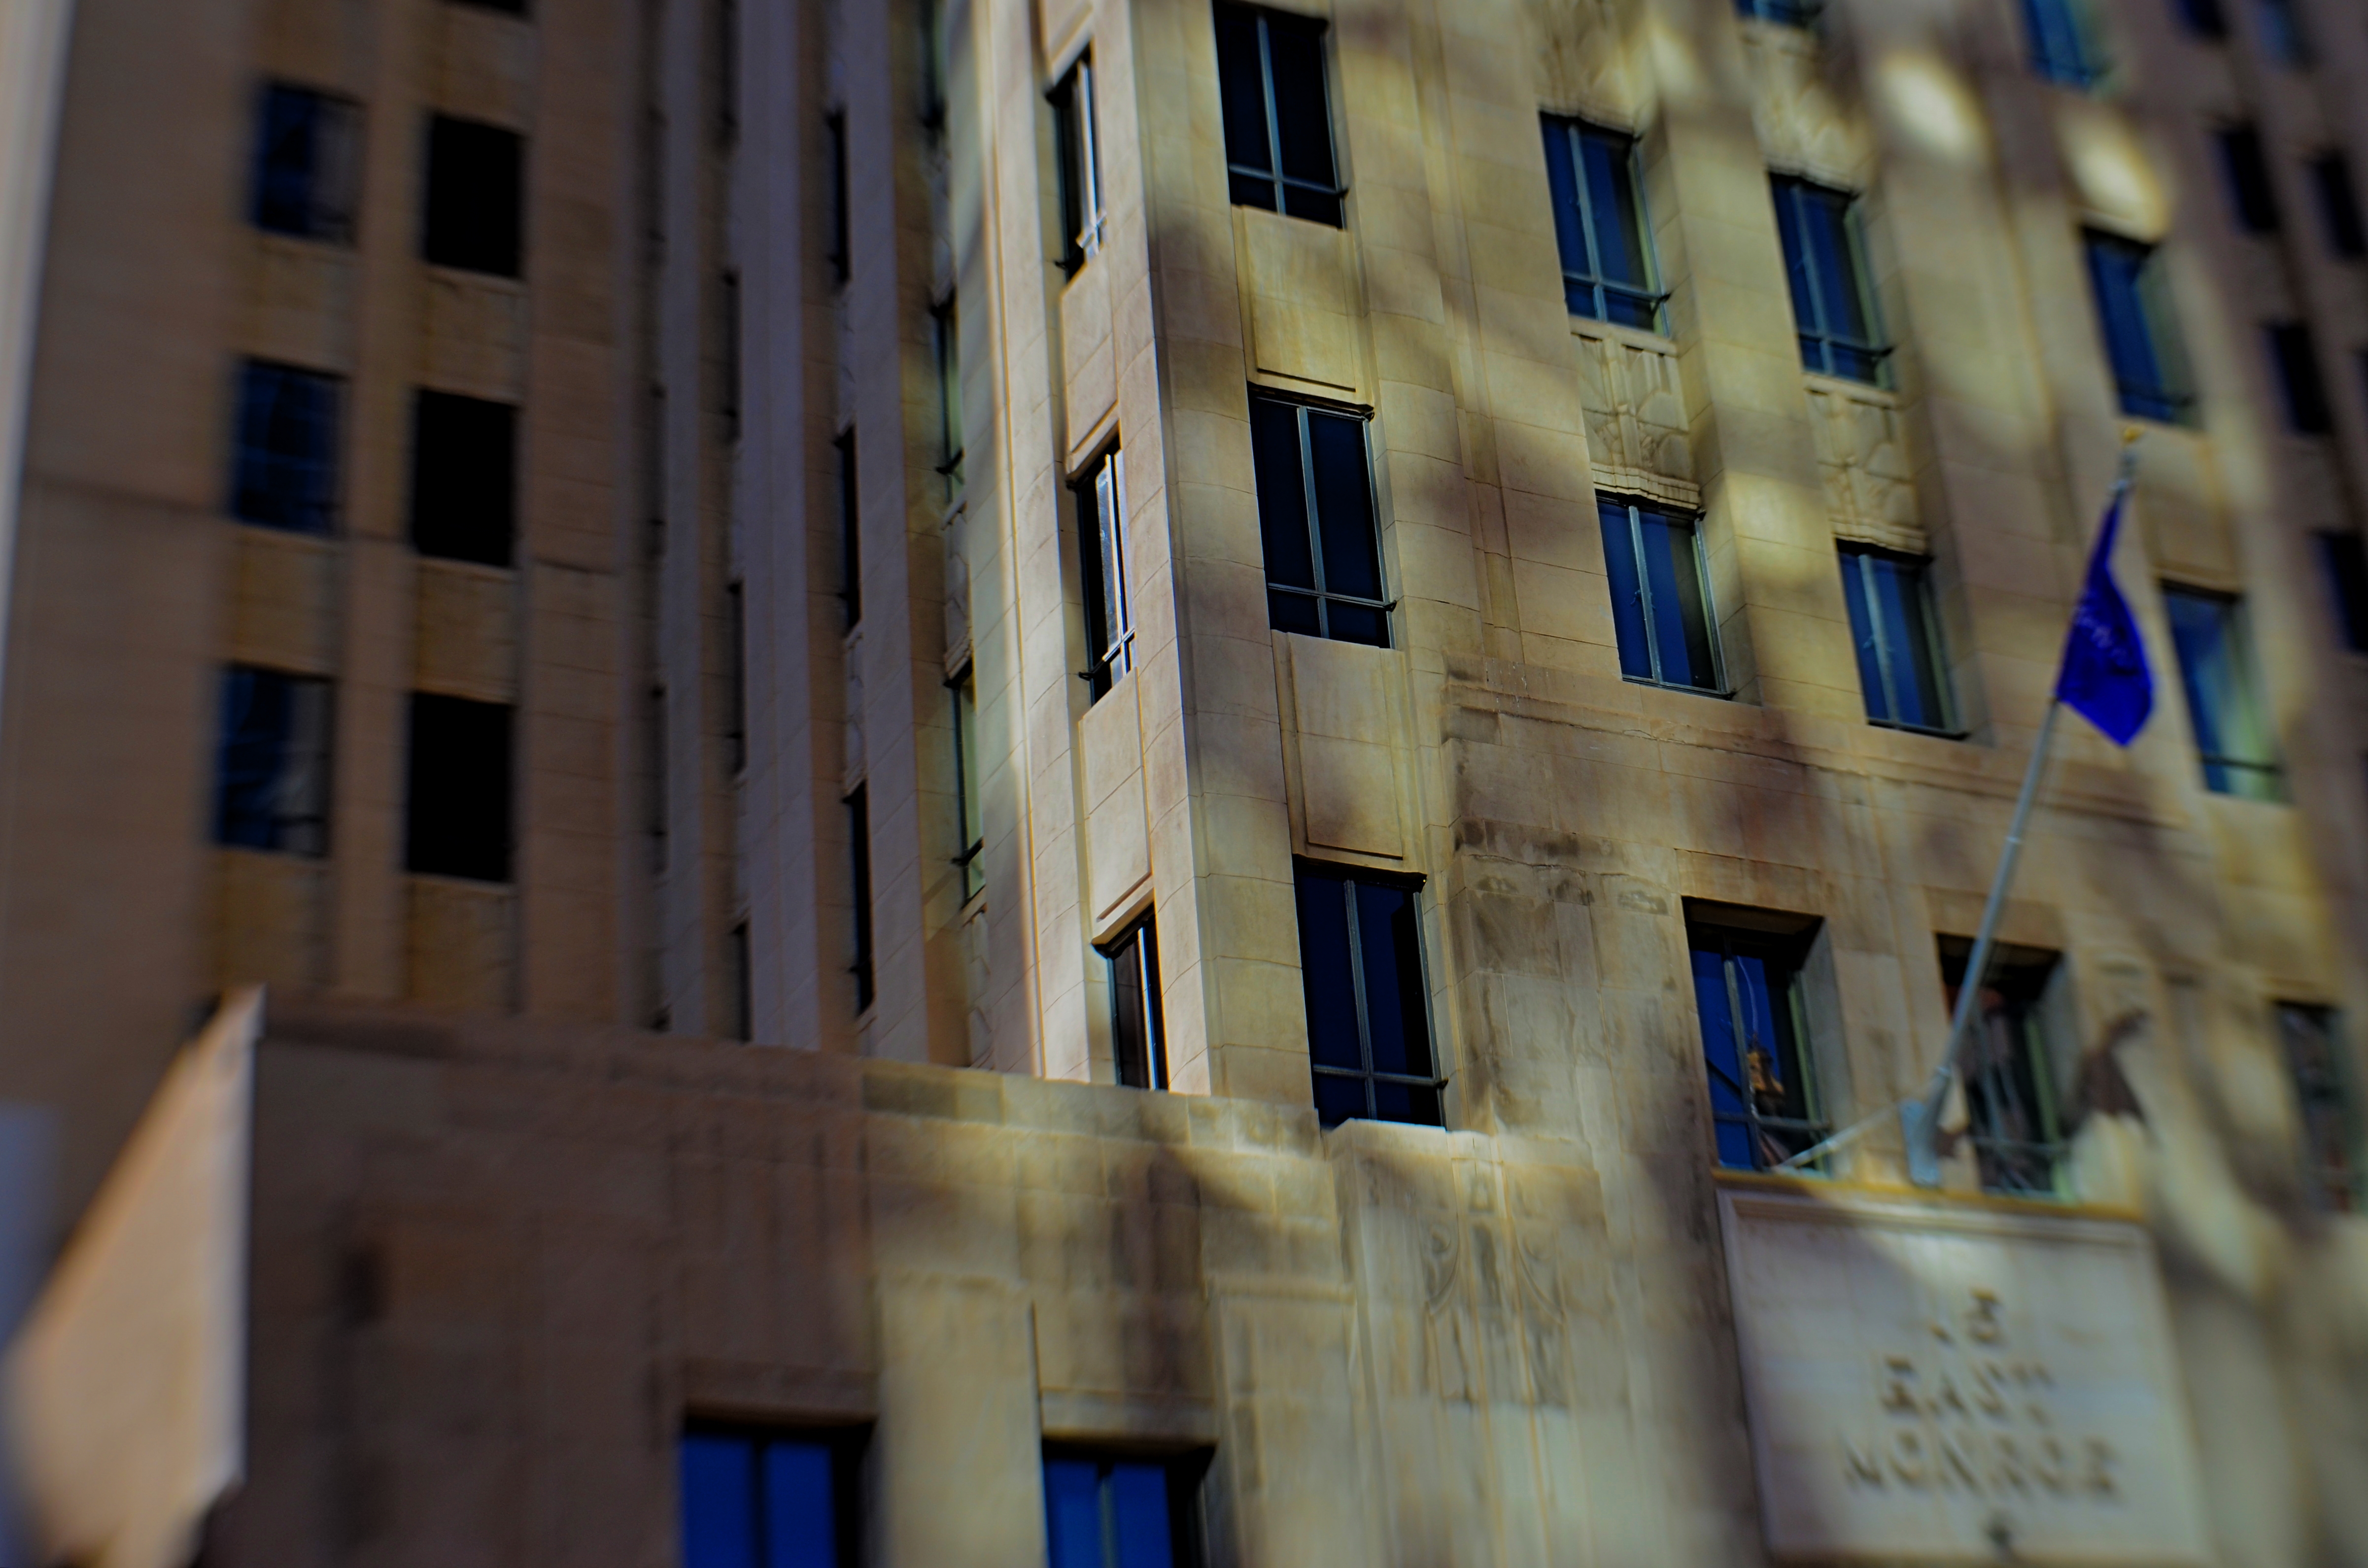
Fifteen East Monroe, 2016.
In the shot above, a gorgeous Art Deco building in downtown Phoenix, Arizona benefits from a light effect that has only been possible for the last forty years of its existence. Erected in the late 1930’s, the northern face of 15 East Monroe Street would not, at its opening, have been dappled with the shadow patterns seen here. No, it took a soul-less glass box from the ’70’s, located across the street, to bounce patterns of reflected light onto the building as you see it here, and only for about two hours a day between late morning and noon.
During that window, 15 East Monroe displays a wonderfully checkered mix of reflected illumination on its golden terra-cotta exterior. I first observed the patterns ten years ago, and have been going back for occasional looks ever since. The trick, in this image, was to keep the texture of the building from looking too sharp, since the effect itself is somewhat dreamy, and works better if the overall photo of the building is also a little soft. I used a selective focus lens (sharp at the middle, softer toward the edges) to give the overall building a gauzy look, and let the picture really be about the light effect, rather than any specific part of the building. Even at this point, I am imagining about a half-dozen other ways to accomplish this, but this image can at least serve as an initial study, a guideline for what may, eventually, be my final word on the subject.
Photography, clinically defined, is the art of writing with light. Sometimes, regardless of the object in our viewfinder, what light does to things is, by itself, enough for an interesting picture. It takes some restraint to let the light be the subject, and to let the picture, in its most basic form, breathe.
ADVENTURES IN INNER SPACE
By MICHAEL PERKINS
PHOTOGRAPHERS CHOOSE LENSES BASED ON LOTS OF CRITERIA, depending on what kind of “reality” they seek to visualize. In recent years, there has been a solid return to so-called “normal” or prime lenses, glass with focal lengths of 35-85mm which produce a perspective most like human vision, fairly free of the spatial distortion seen in ulta-wide lenses. At the same time, the use of ultra-wides in television and film, even for scenes in which a dramatic viewing angle is not particularly appropriate, is on the rise as well, and the widest consumer-level wides, including various types of fisheye lenses, are becoming sharper and cheaper than ever before.
I mention cinema here because it’s only after the emergence of 1950’s-era wide-screen processes like Panavision and Cinemascope that such lenses began to sell in larger numbers to amateur photographers, becoming an active part of the hobby. By the ’60’s, ultra-wides created stunning mutations of space in films like Stanley Kubrick’s Dr. Strangelove and Orson Welles’ The Trial, but, in such cases, the idea was still to deliberately distort reality for dramatic effect. Today, the most common “kit lens” accompanying a new DSLR is the 18-55mm, which at its widest, can make vertical lines bend inward in a way that is dramatic, but not a true measure of natural distance relationships. And, yes, they allow you to stand closer to your subject and “get it all in frame”, but, at that point, you’re also making a decision about whether your image is to be interpretive of reality, or reflective of it.
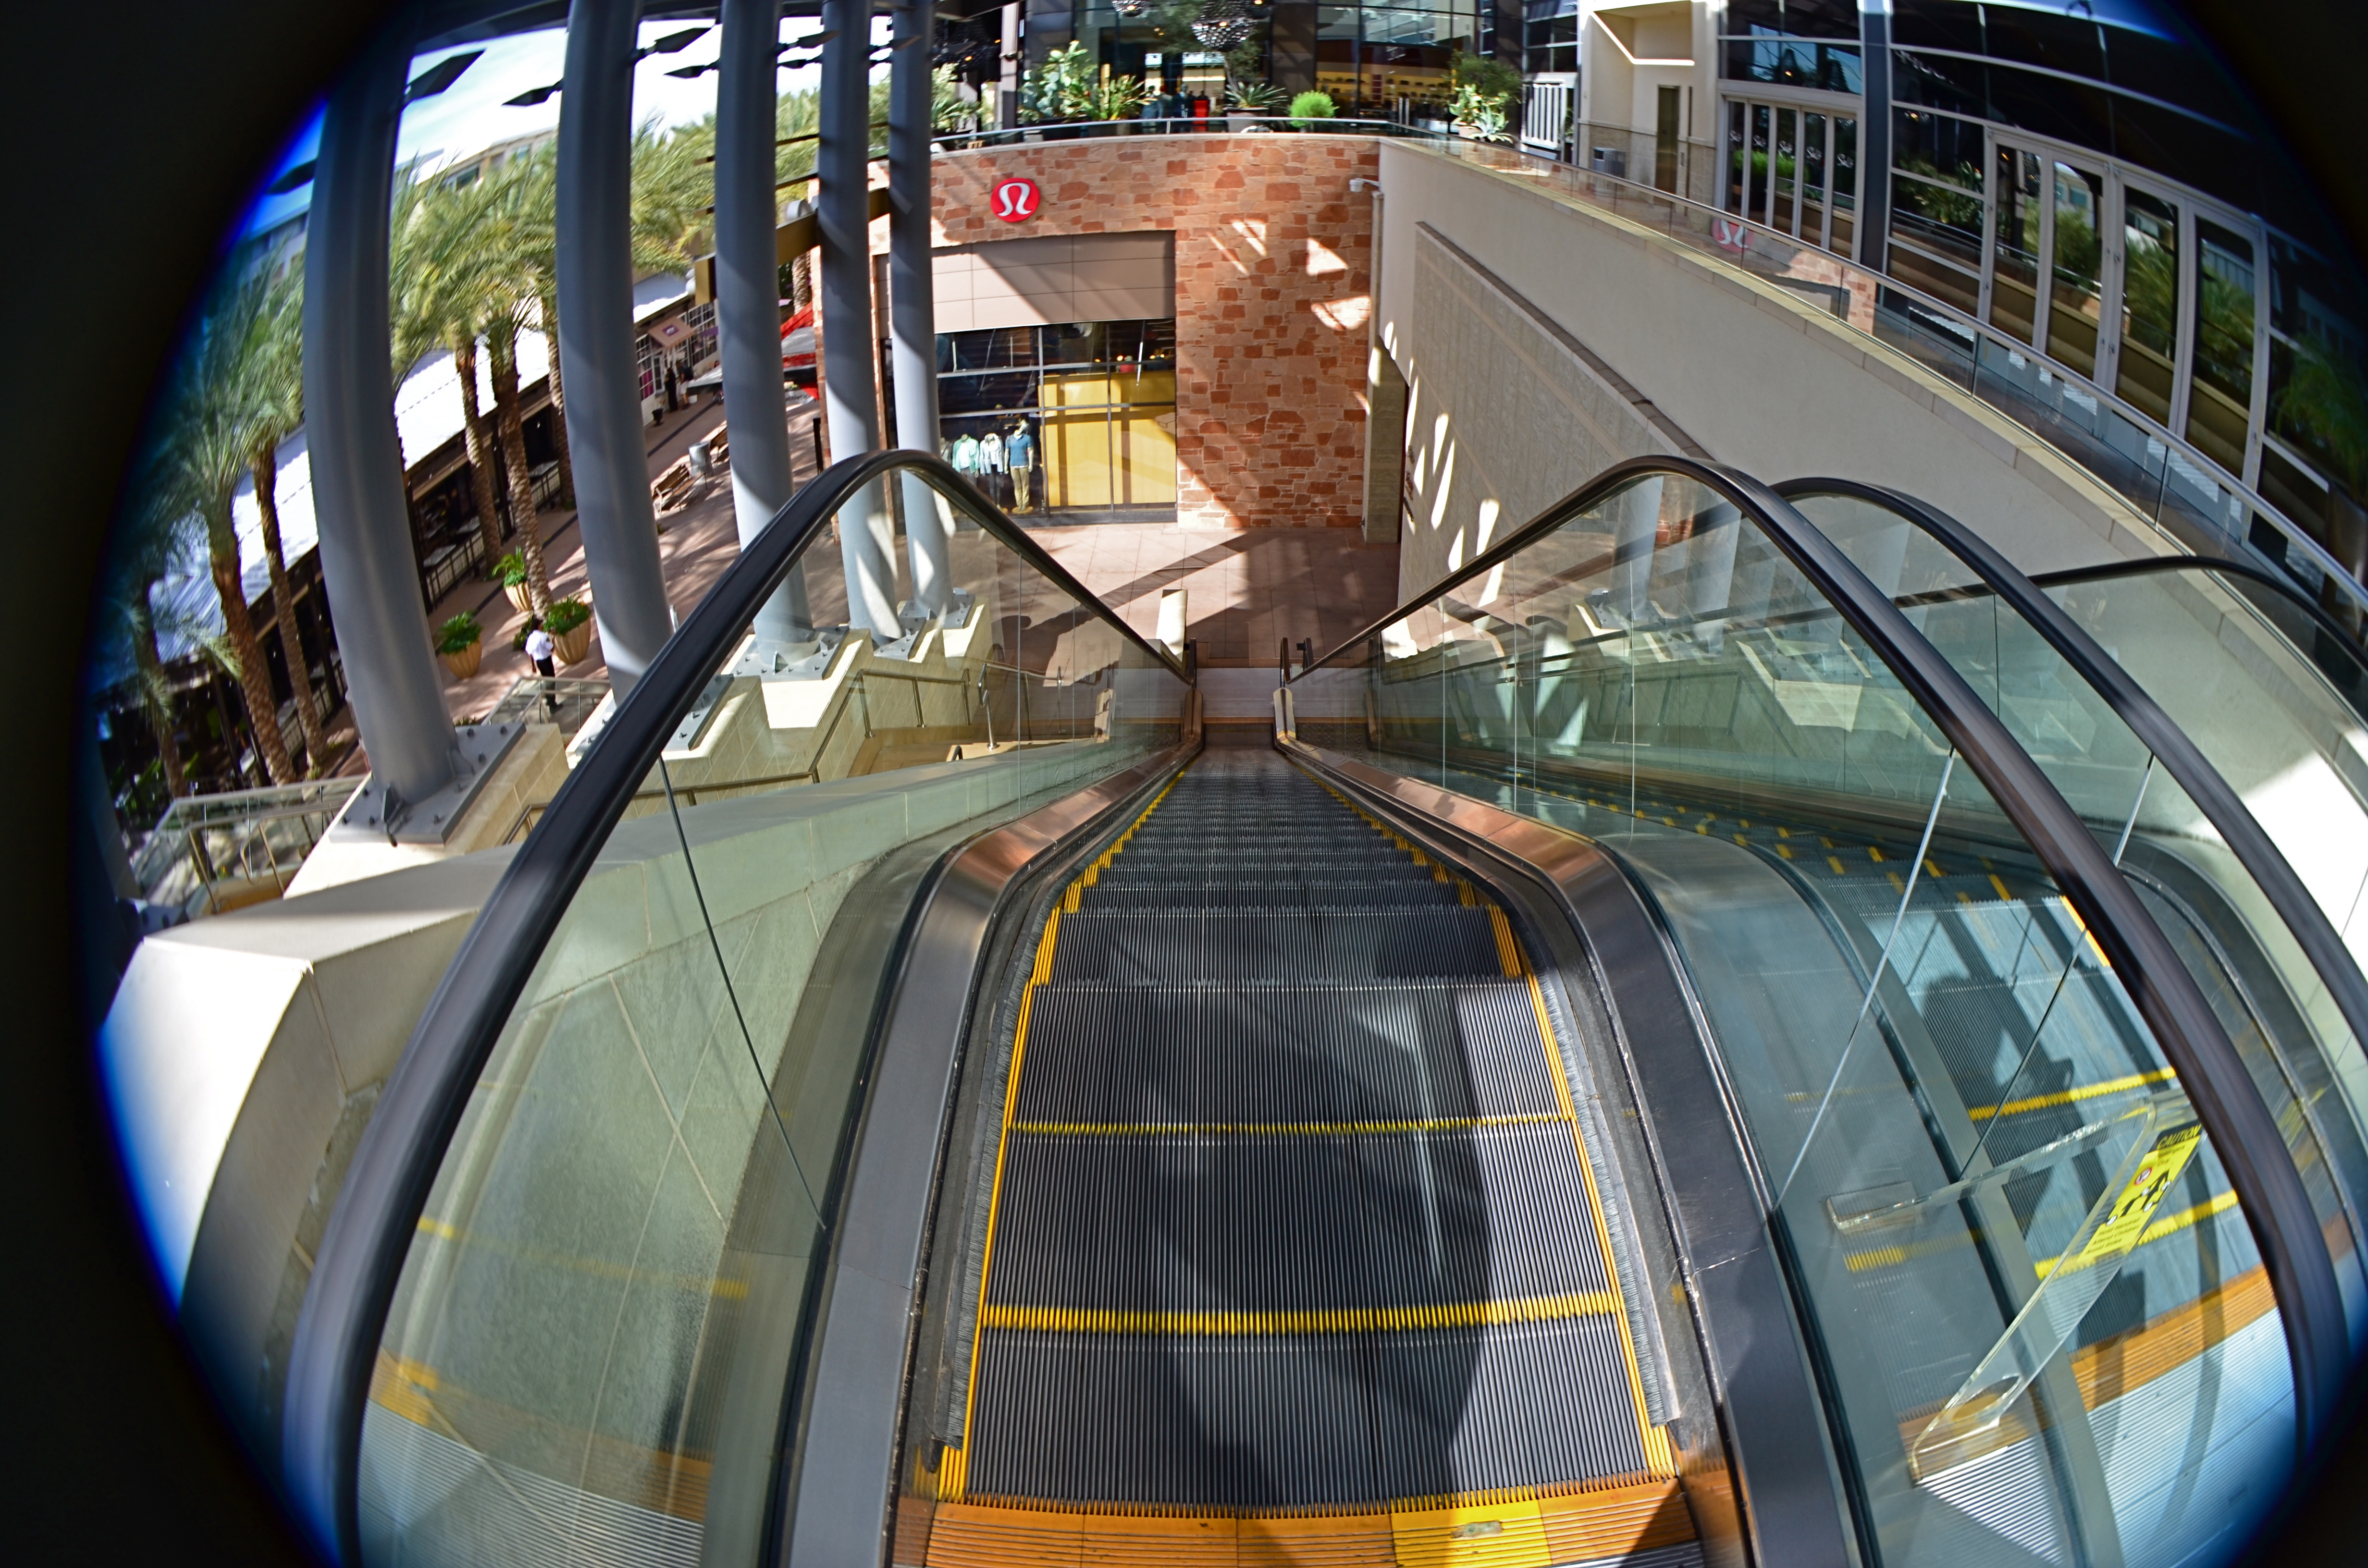
This mall escalator is nowhere near as high as a 13mm fisheye lens makes it appear.
Extreme wides, including fisheyes, can widen to 8 or 9mm, making the bending of lines so severe that the image elements seem to form a circle, with all lines arching sharply toward the center. And depending on what your image’s particular “reality” is to be, the distances of objects from front to back within the frame are also intensely exaggerated. Things which, in a “prime” lens image, appear just ten feet apart, can, in a fisheye shot, seem half a football field from each other. TV and film shooters exploit this big-time. If you’re shooting within a cramped interior and need to balloon its scope to suggest a larger scale, an ultra-wide really opens the place up. Medium-sized studios used in political debates now appear cavernous: ordinary city buildings shot wide for a crime drama take on intimidating height and depth, appearing to occupy entire blocks.
In the above image, if I want to make the viewer a little dizzy and daunted at the top of this rather modest escalator, I must use an ultra-wide to cheat, to trick the eye into concluding that it’s actually standing at the top of a sky-high ski jump. The tricky thing about ultra-wides, however, is that they mutate everything in the frame. And if part of that “everything” includes humans, your subjects can be taffy-twisted into some very alarming dimensions. Anything wider than about 24mm is downright uglifying for portraiture, unless a stylized effect is part of your interpretation. Lenses are not mere recording equipment. Their limits, biases, and faults can be exploited based on whatever kind of world you’re trying to conjure.
TINY TOWNS AND BIG DREAMS
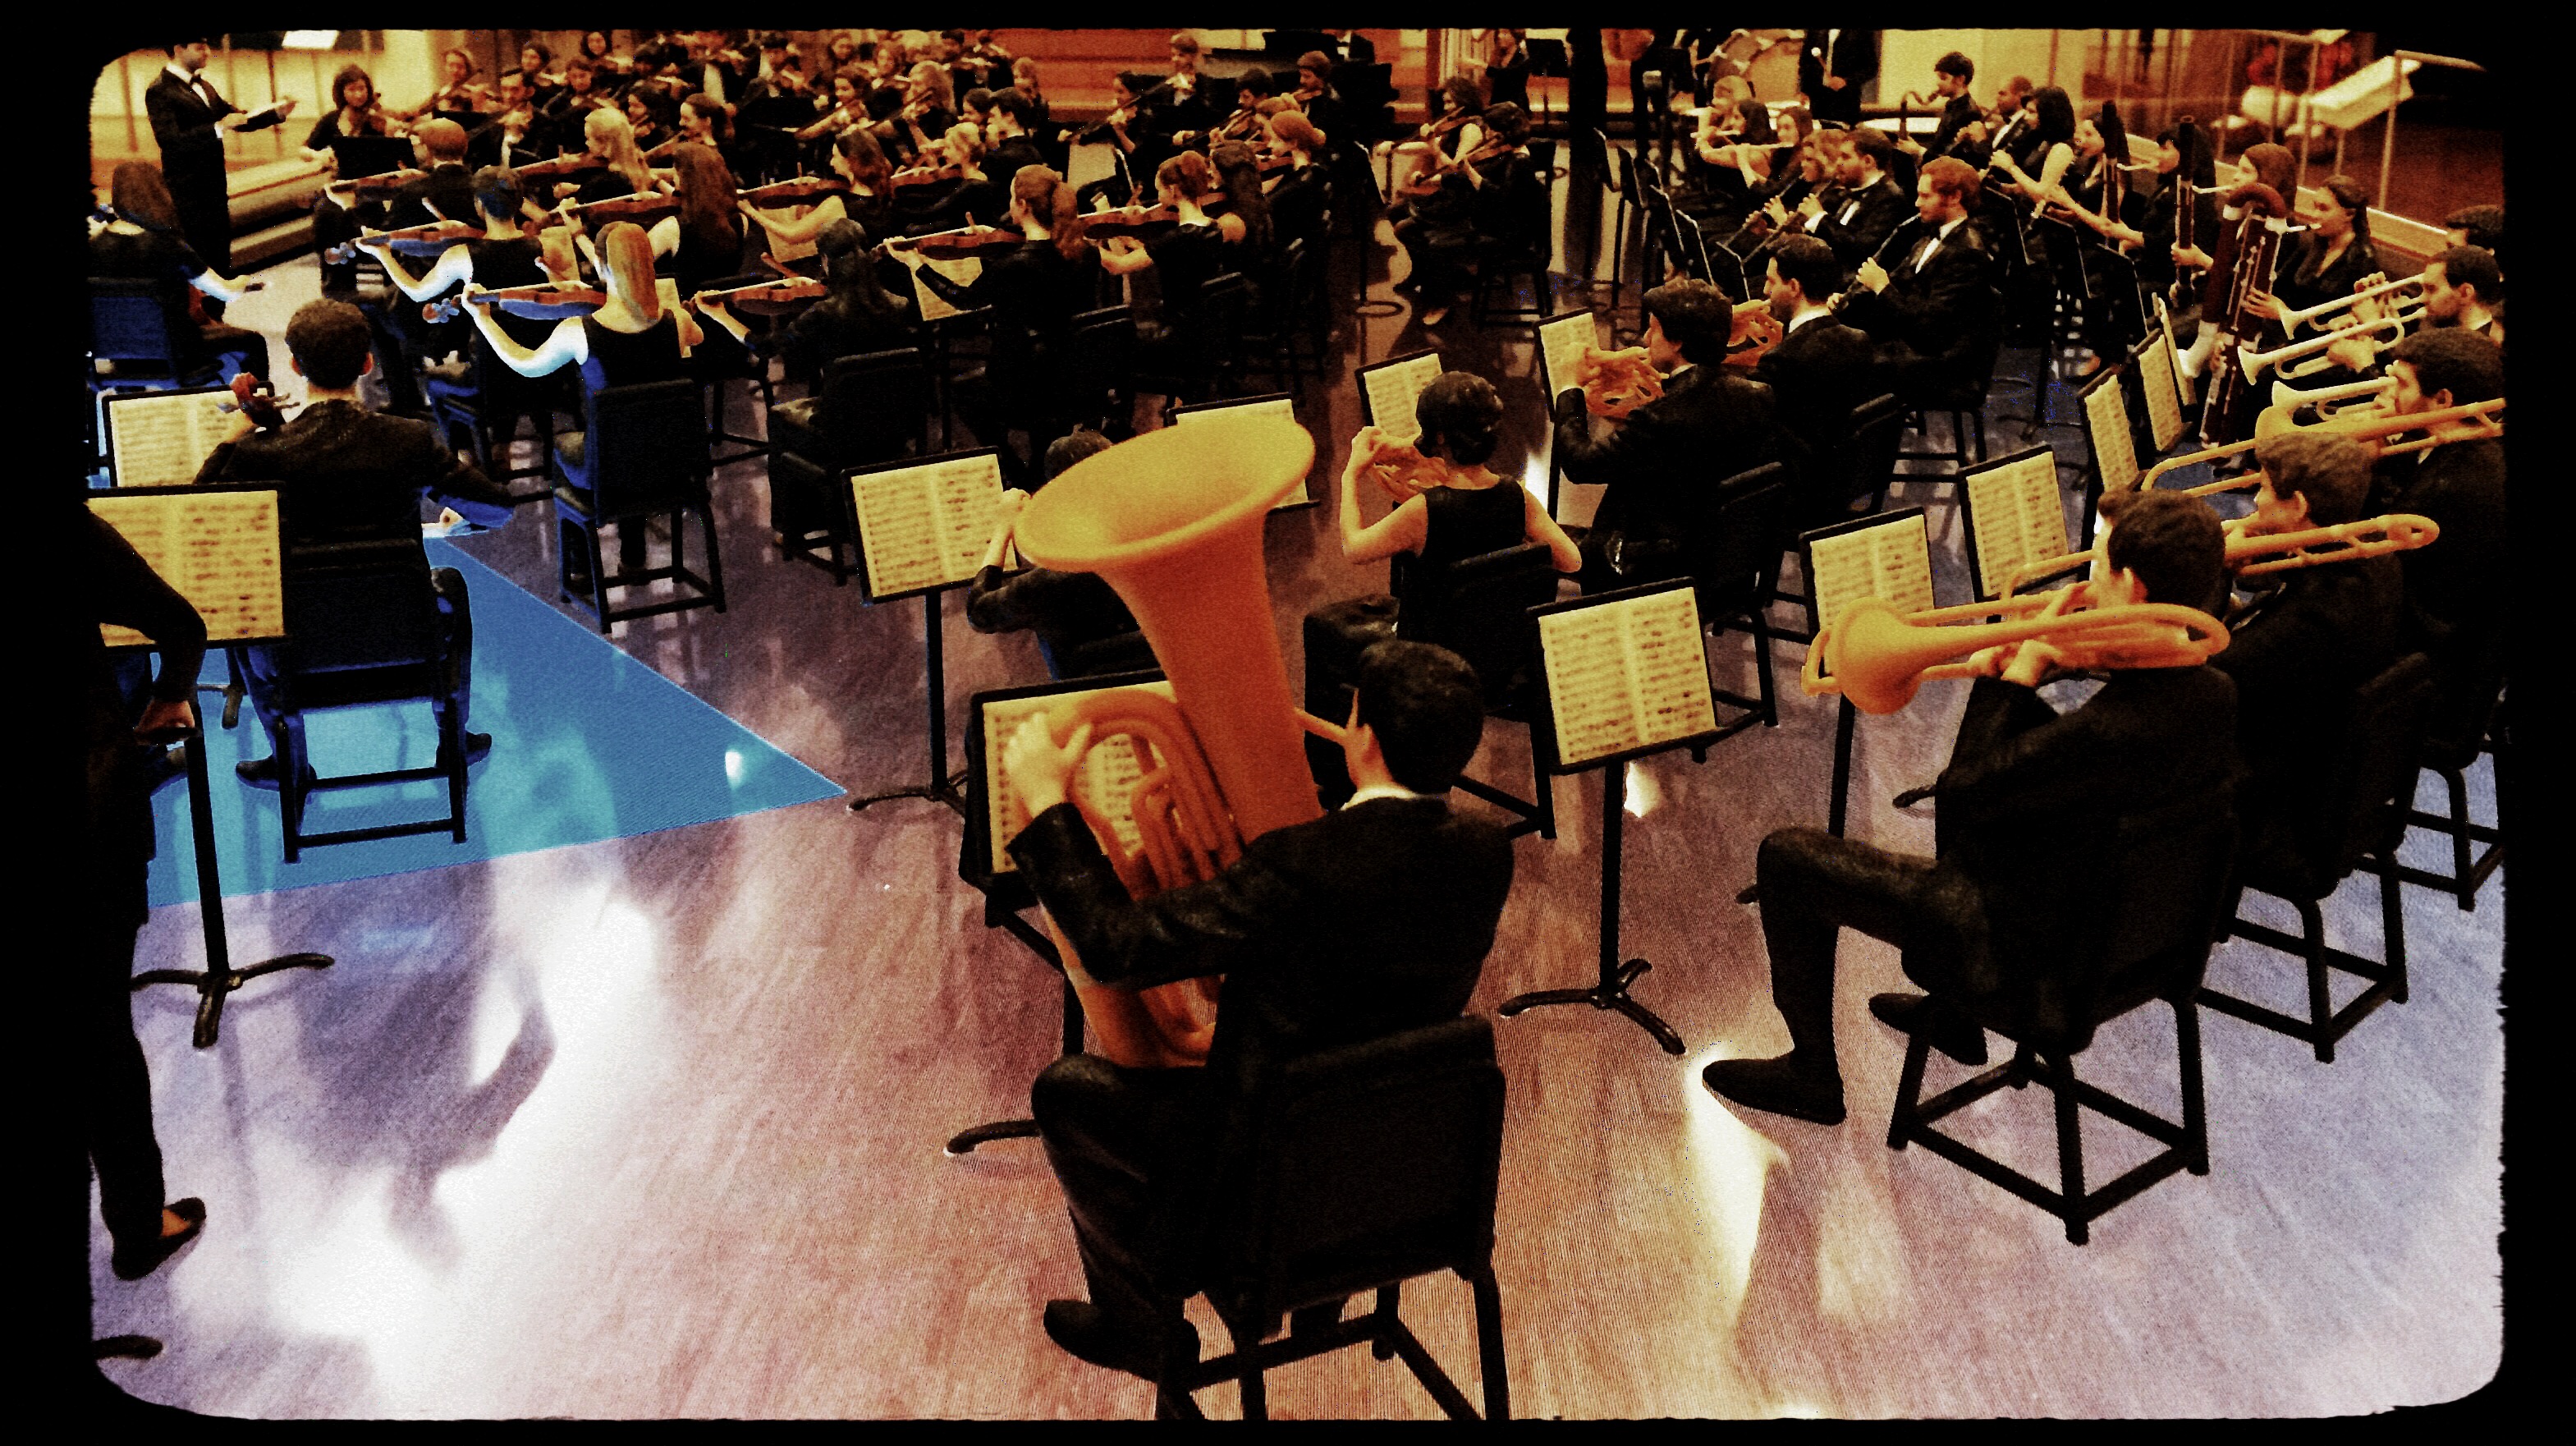
Eclectic Light Orchestra: Shooting the Musical Instrument Museum’s amazing orchestral diorama to scale.
By MICHAEL PERKINS
THE ART OF MESSING ABOUT WITH THE MIND’S CONCEPT OF SIZE, making the small look large, has been part of photography since the beginning, whether it’s been crafting the starship Enterprise at 1/25 scale for primitive special effects or making Lilliputian mockups of Roman warships for a sea battle in Ben-Hur. Making miniatures a convincing stand-in for full-size has been a constant source for amazing images.
Oddly, there has also been a growing fascination, in recent years, with using new processes to make full-sized reality appear toy-like, as if Grand Central Station were just a saltine box full of HO-scale boxcars. Seems no one thinks things are as they should be.
This turnabout trend fascinates me, as people use tilt-shift and selective-focus lenses, along with other optics, to selectively blur and over-saturate real objects taken at medium or long distances to specifically create the illusion that you’re viewing a tabletop model. Entire optical product lines, such as the Lensbaby family of effects lenses, have been built around this idea, as have endless phone apps and Photoshop variants. We like the big to look small just as much as we like the teeny to look mighty. Go figure.
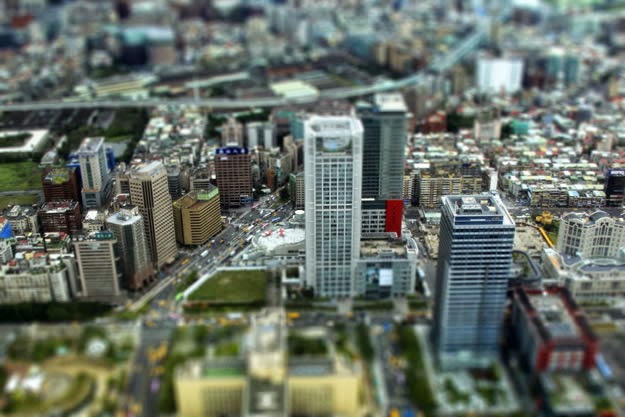
Lefz Lim brings it on down to Tiny Town, converting a real city scene to a mock miniature.
And who can resist playing on both sides of the street?
The image at the top is the usual fun fakery, with my tiny-is-full-size take on the marvelous diorama made for the Musical Instrument Museum (the crown jewel of Phoenix, Arizona), which reproduces a complete symphony orchestra in miniature. This amazing illusion was created using a spectacular photo system that creates a 360-degree scan of each full-sized player, maps every item of his features, costume, and instrument, then converts that scan to a 3-d printed, doll-sized version of every member of the symphony. To read about this awesome process, go here.
As for making regular reality look like Tiny Towns, we offer the image at the left, taken by photographer Jefz Lim as part of his online tutorial on the creation of the “model” effect. We are in the age of ultimate irony when we deliberately try to palm off the real as the fake. The “how” of this kind of image-making is basic focus-pocus. The “why” is a little harder to put your finger on.
Size does matter. Ah, but what size matters the most…..that’s your call.
CONJURING GHOSTS
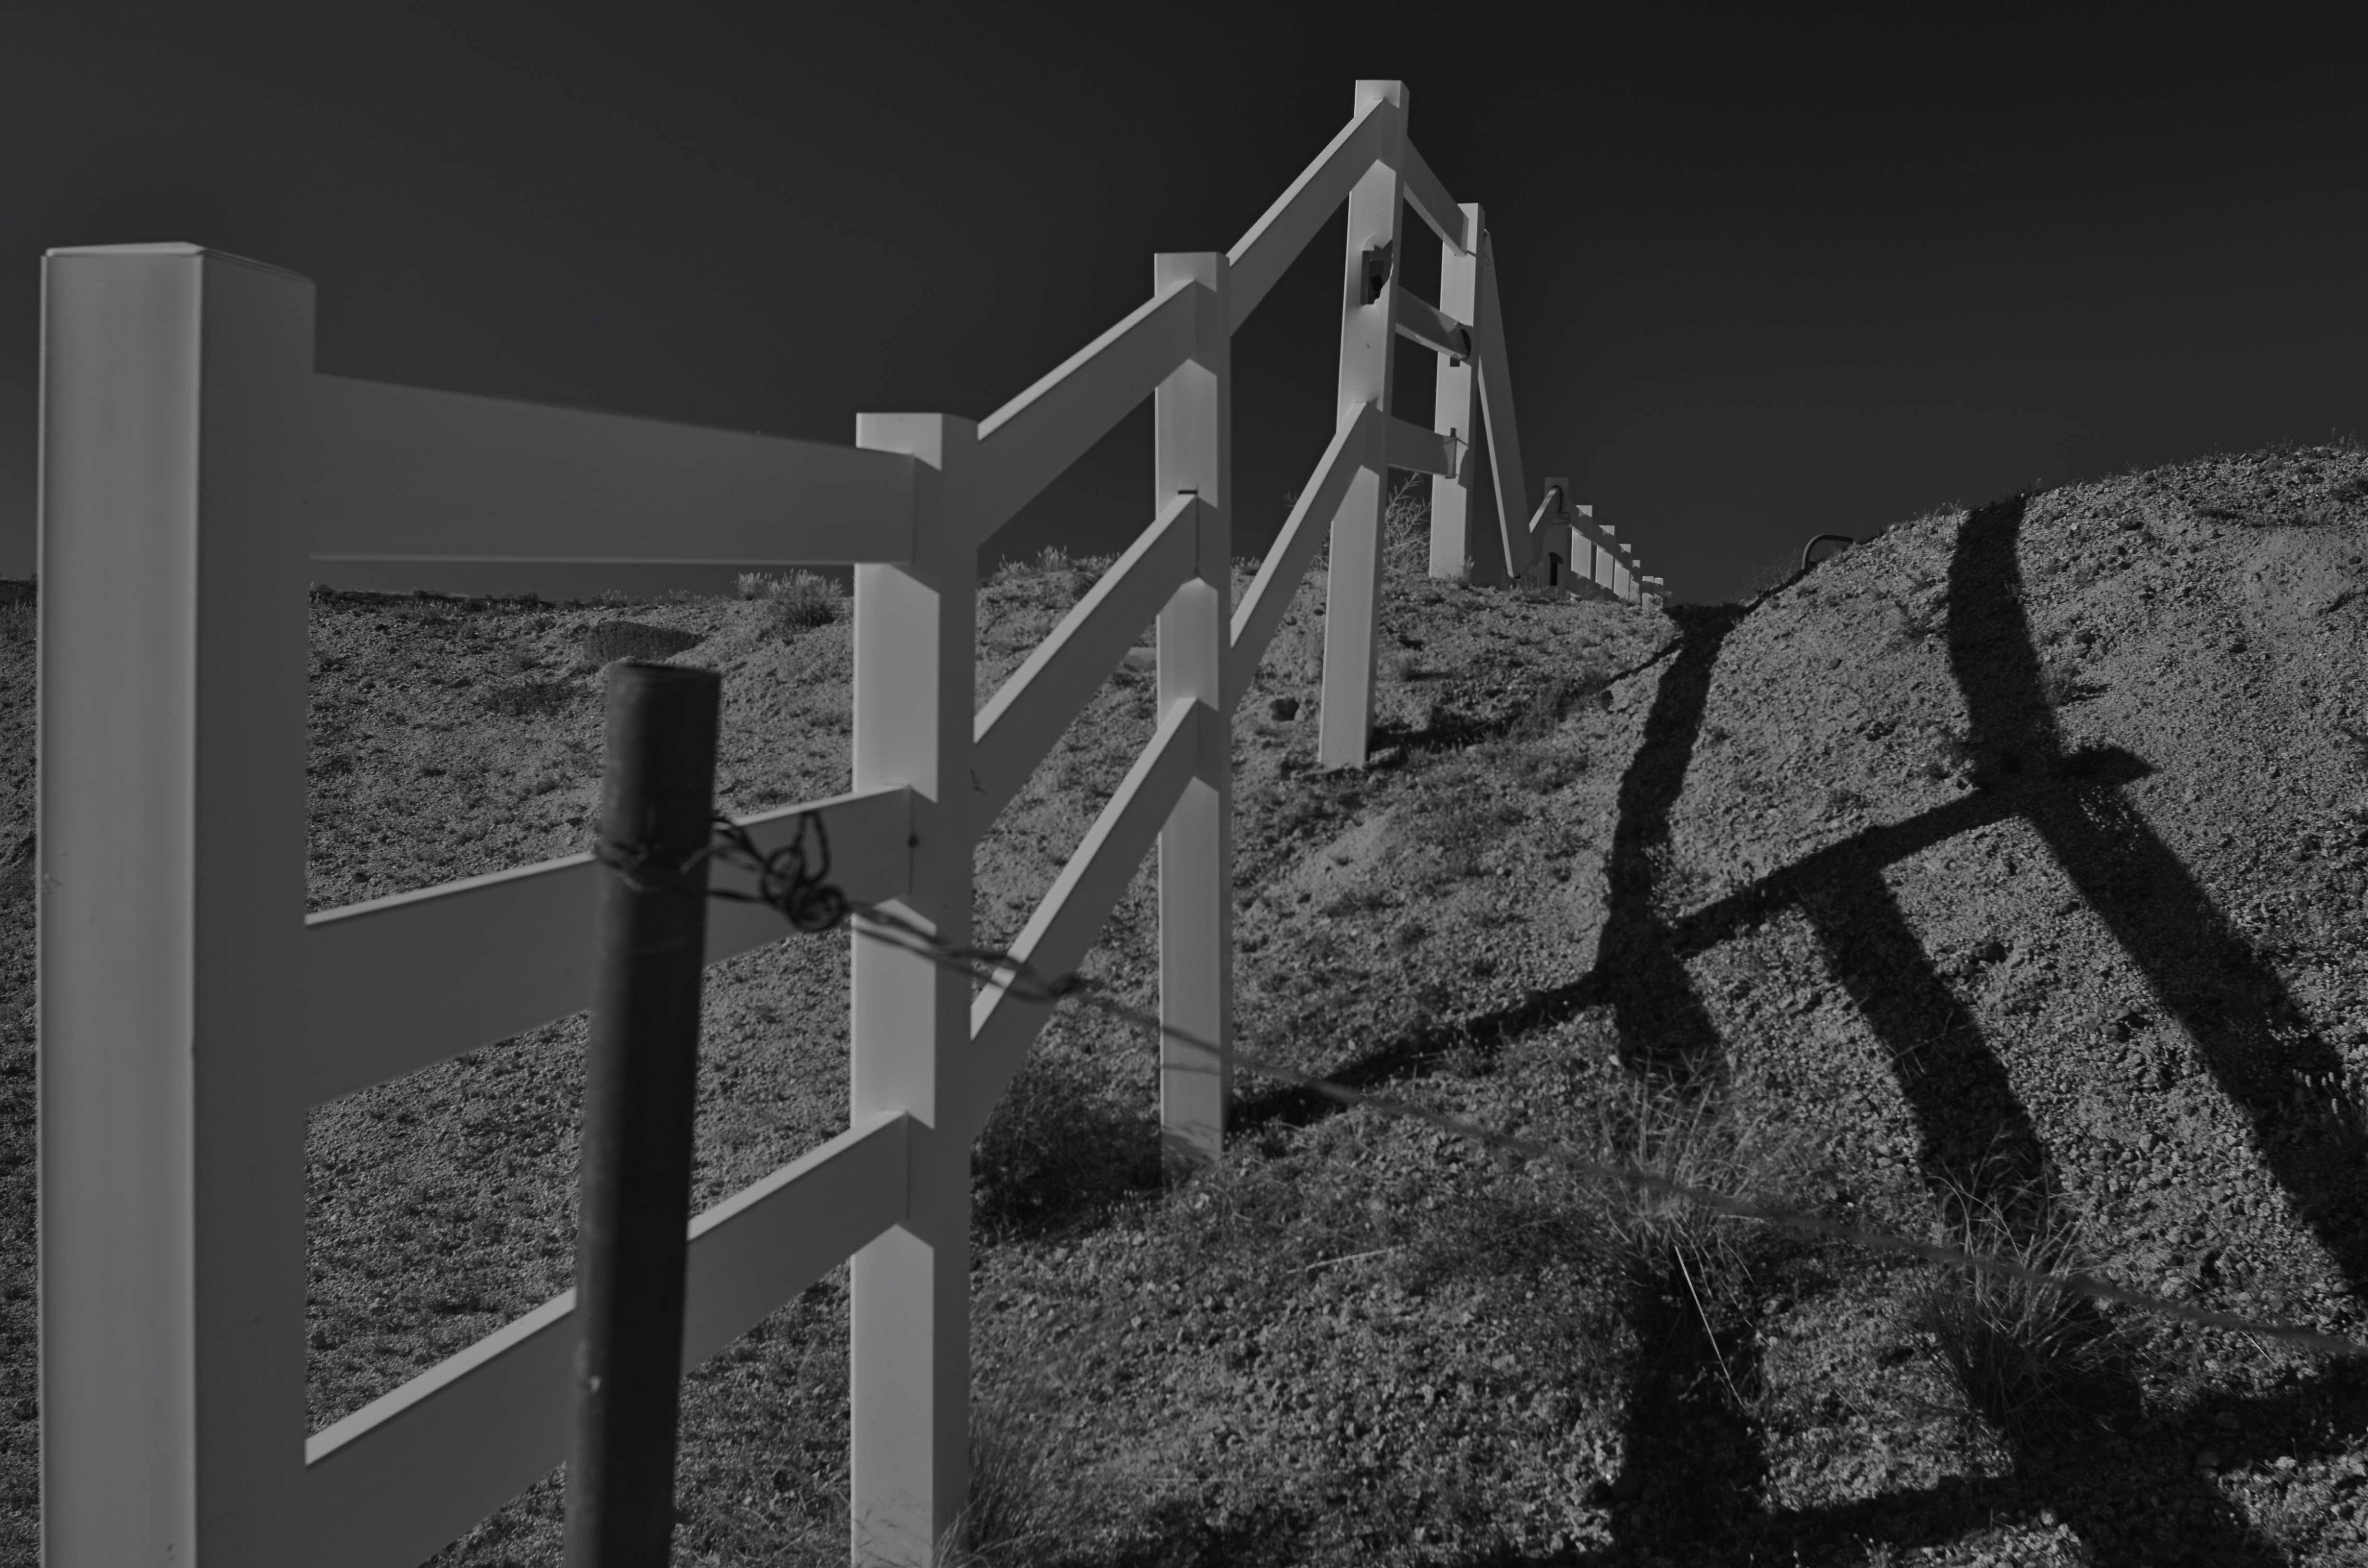
I know all the songs that the cowboys know
‘Bout the big corral where the doggies go
‘Cause I learned them all on the radio
Yippie yi yo kai yay
“I’m An Old Cowhand”, music and lyrics by Johnny Mercer
By MICHAEL PERKINS
SOMETIMES IT SEEMS THAT WE ARE NEVER REALLY FINISHED with photography’s past, using today’s technology to summon forth the look and spirit of what we see as the early innocence of the art. Photographers are always trying to wrench free of yesteryear, and yet, in our images, we love to romance the echoes of the shooters that we were, as well as the world that what there to shoot.
We like to conjure ghosts.
We’ve reached a place where, through one process or another, it’s easy to evoke almost any phase of photography we desire, a strange nostalgia that has artificially extended the use of film by a good many years into the digital era. We like the feel, the habits, even the defects of film as a storage medium. We build brand-new pinhole box cameras: we revive and repair old tool dies so we can manufacture factory-fresh editions of defective old gizmos. We write computer code that allows our smartphones to imitate the grain and texture of archaic celluloid emulsions.
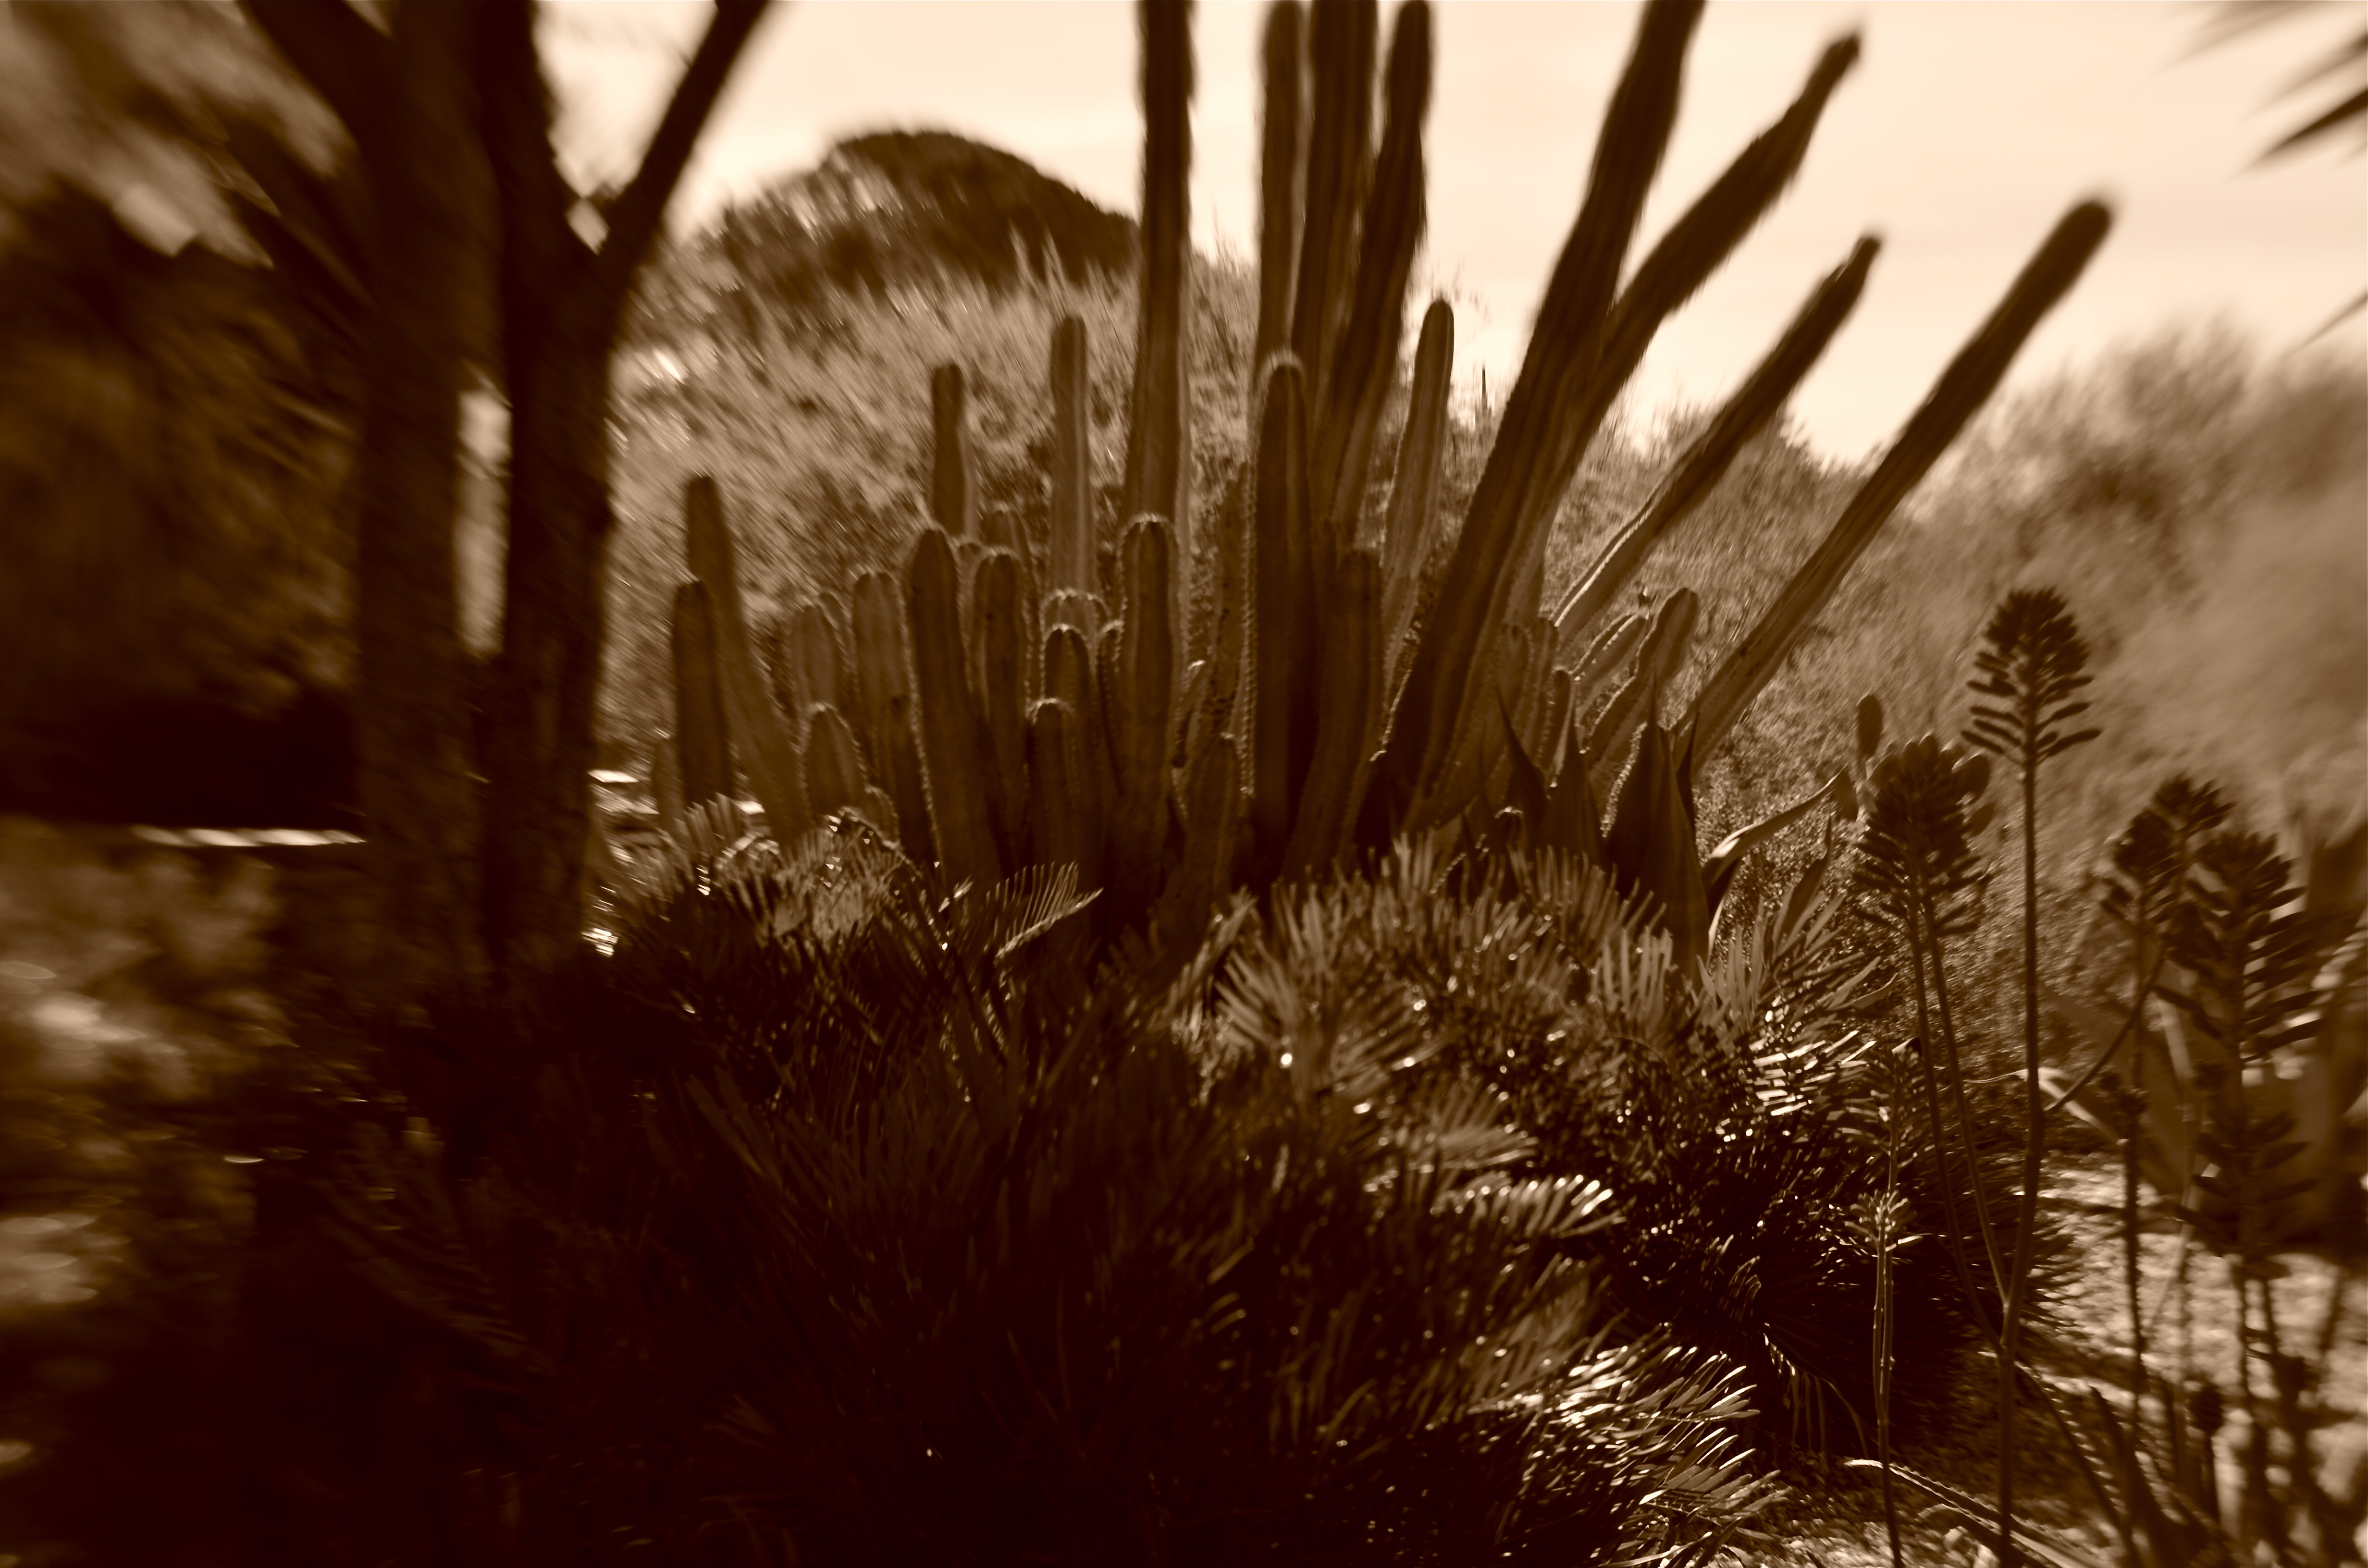
Of course, there has to be subject matter to feed all this retro-tech, and, in the American west, the medium matches the message as we drench memories of the frontier in our own brew of reflective processes. Sepia tone, soft focus, high contrast, long exposures, all of them are used to summon the bygone glories of cactus and canyon. The settling of the west will always create a kind of poignant ache for photographers. The surveyors, the settlers, even the Hollywood myth-makers all stole a march on us. We bring our cameras to try to spook up a smidgen of the Big Pictures that we missed.
It’s a kind of harmless fakery that we paint upon mesa and mountain, a re-interpretation of a truth none of us really knows for sure. It’s dressing up to play cowboys and indians, with the camera’s eye to help make the best, most authentic forgeries we can muster. Living in the west in the 21st century, I find that conjuring ghosts, like indulging in any other kind of fantasy photography, is like building a doll house. I control the furniture, the wall paper, the layout of the rooms. We all arrived to late to ask the Riders of the Purple Sage to smile for the birdie. But there are still smiles of a sort, even an occasional tear, to be drawn in the dust.
SAVING FACE
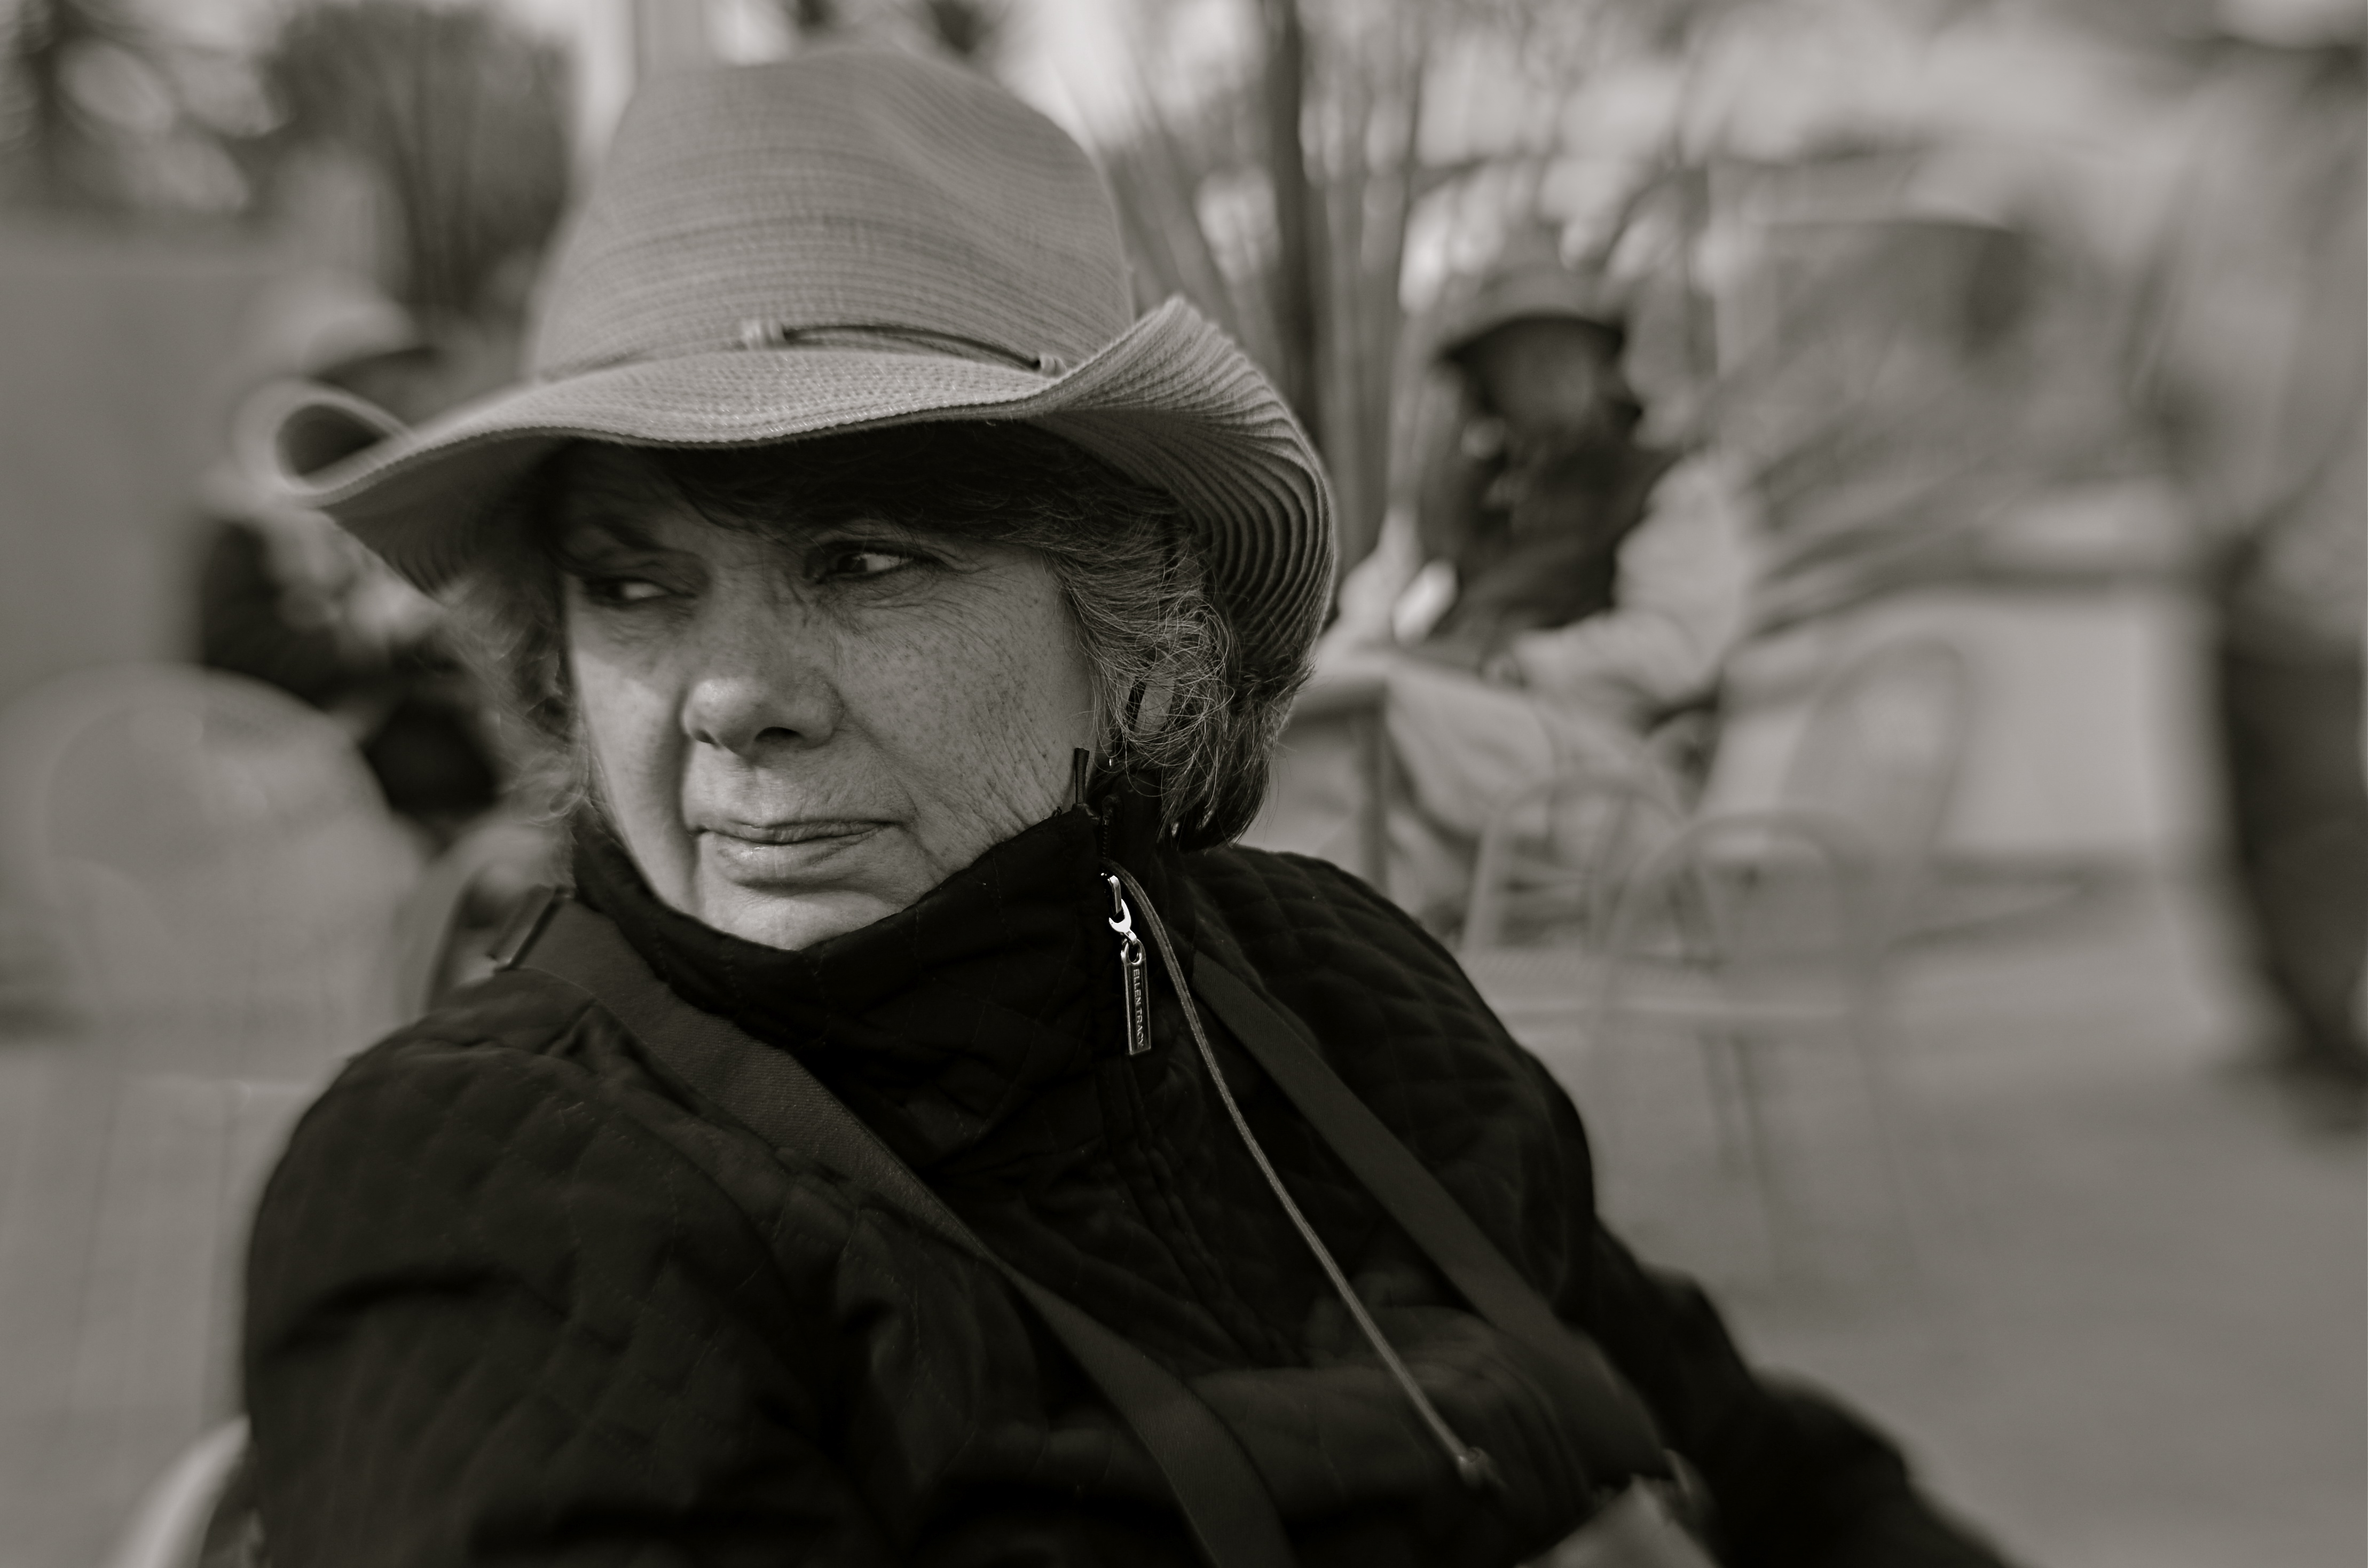
Looking West, 2016. A portrait shot with a Lensbaby Composer Pro, an effects lens with a moveable “sweet spot” of selective focus.
By MICHAEL PERKINS
THE CREATIVE USE OF SHARPNESS is one of the key techniques in photography. From the beginning of the medium, it’s been more or less conceded that not everything in an image needs to register at the same level of focus, that it can be manipulated to direct attention to the essence of a photograph. It’s always about telling the viewer to look here, ignore this, regard this as important.
This selective use of focus applies to the human face no less than to any other element in a composition. It’s strange that photography drew so strongly on painting in its early years without following the painter’s approach to portraits…..that is, that individual parts of a face can register in different degrees of sharpness, just like anything else in the frame. From the earliest days of photo-portraiture, there seems to have been an effort to show the entire face in very tight focus, de-emphasizing backgrounds by hazing them into a soft blur. It took a while before photography saw itself as a separate art, and thus this “always” rule only became a “sometimes” rule over a protracted period of time.
The Pictorialism fetish of the early 20th century, which avidly imitated the look of paintings, went completely the other direction, generating portraits that were almost uniformly soft, as if shot through gauze, or, you guessed it, painted on canvas. In recent years, shooters have begun a new turn toward a kind of middle stance, with the selective use of sharpness in specific parts of a face, say an eye or a mouth. It’s more subtle than the uniform crispness of olden days, and affords shooters a wider range of expression in portraits.
Some of this has been driven by technology, as in the case of the Lensbaby lenses, which often have a tack-sharp “sweet spot” at their center, with everything else in the frame fanning outward to a feathery blur. Additionally, certain Lensbabies, like the Composer Pro, are mounted on a kind of ball turret, allowing the user to rotate the center of the lens to place the sweet spot wherever in the image he/she wants. This makes it possible, as in the above shot, for parts of objects that are all in the same focal plane to be captured at varying degrees of sharpness. Note that, while all of the woman’s face is the same distance from the camera, only her eyes and the right side of her face are truly sharp. This dreamlike quality has become popular with a new breed of portraitists, and, indeed, there are already wedding photographers who advertise that they do entire events exclusively with these kinds of lenses.
The face is a composition element, and, as such, benefits from a flexible approach to focus. One man’s blur is another man’s beautification.
THE GENTLE WELCOME
By MICHAEL PERKINS
But soft! What light through yonder window breaks? —Shakespeare
OKAY. AS IT TURNS OUT, IN THE ABOVE LINE, ROMEO WAS ACTUALLY RHAPSODIZING about his main squeeze, rather than ideal photographic conditions. Still, I often think of the quote when a sudden shaft of gold explodes from behind a cloud or a sunset lengthens shadows, just so. I have lots of But, soft! moments as a photographer, since light is the first shaper of the image, the one element that defines the terms of engagement.
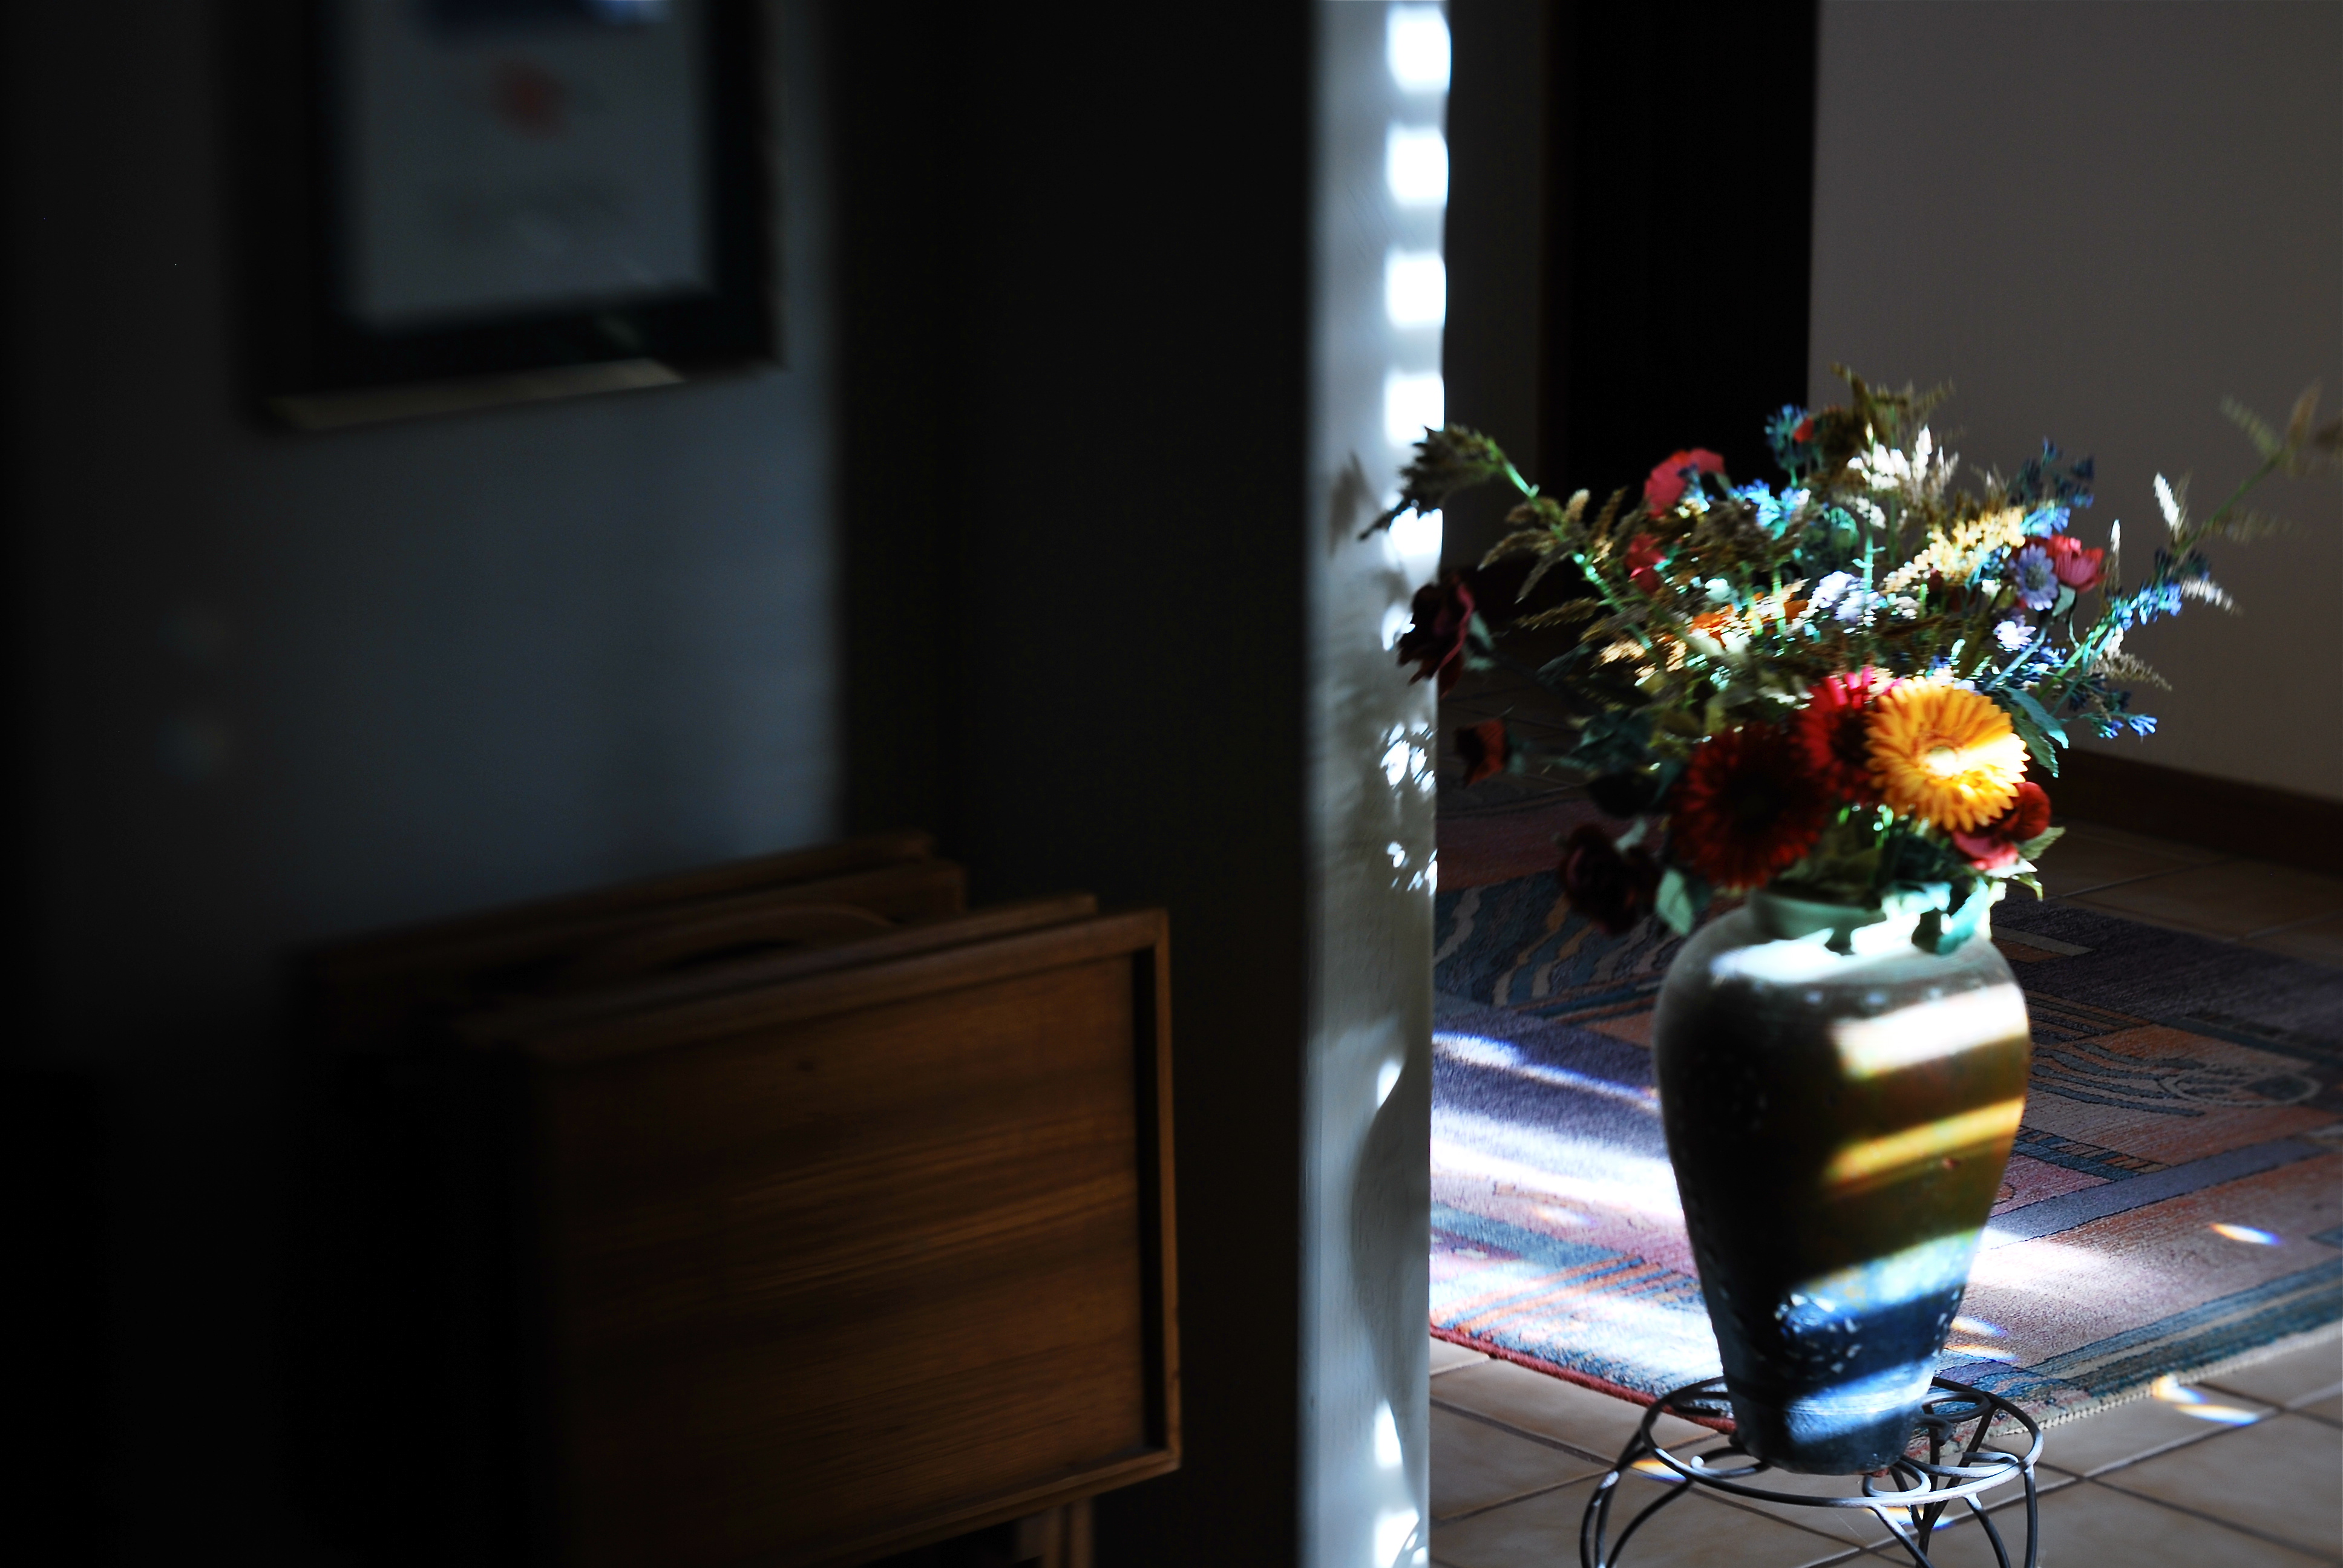
Selective focus on the cheap: image made with the economical Lensbaby Spark lens. 1/40 sec., f/5.6, ISO 100, 50mm.
After light, for me, comes focus. Where it hits, where it peaks, where it falls off, and how all these aspects shape a composition. Soft or selective focus especially seems more intimate to me, a gentle welcome to share something special between picture and viewer. In recent years, focus has become almost as fine-tune-able as light itself, with the introduction of new, affordable alternatives to expensive “tilt-shift” lenses, which allow the selective blurring of elements within the frame. For example, the revolutionary Lensbaby products are now helping shooters make their own choices on where the focal “sweet spot” should occur in a picture, and at a fraction of the cost of a true tilt-shift. It’s a fiscal shortcut that makes it possible for almost anyone to learn how to create this effect.
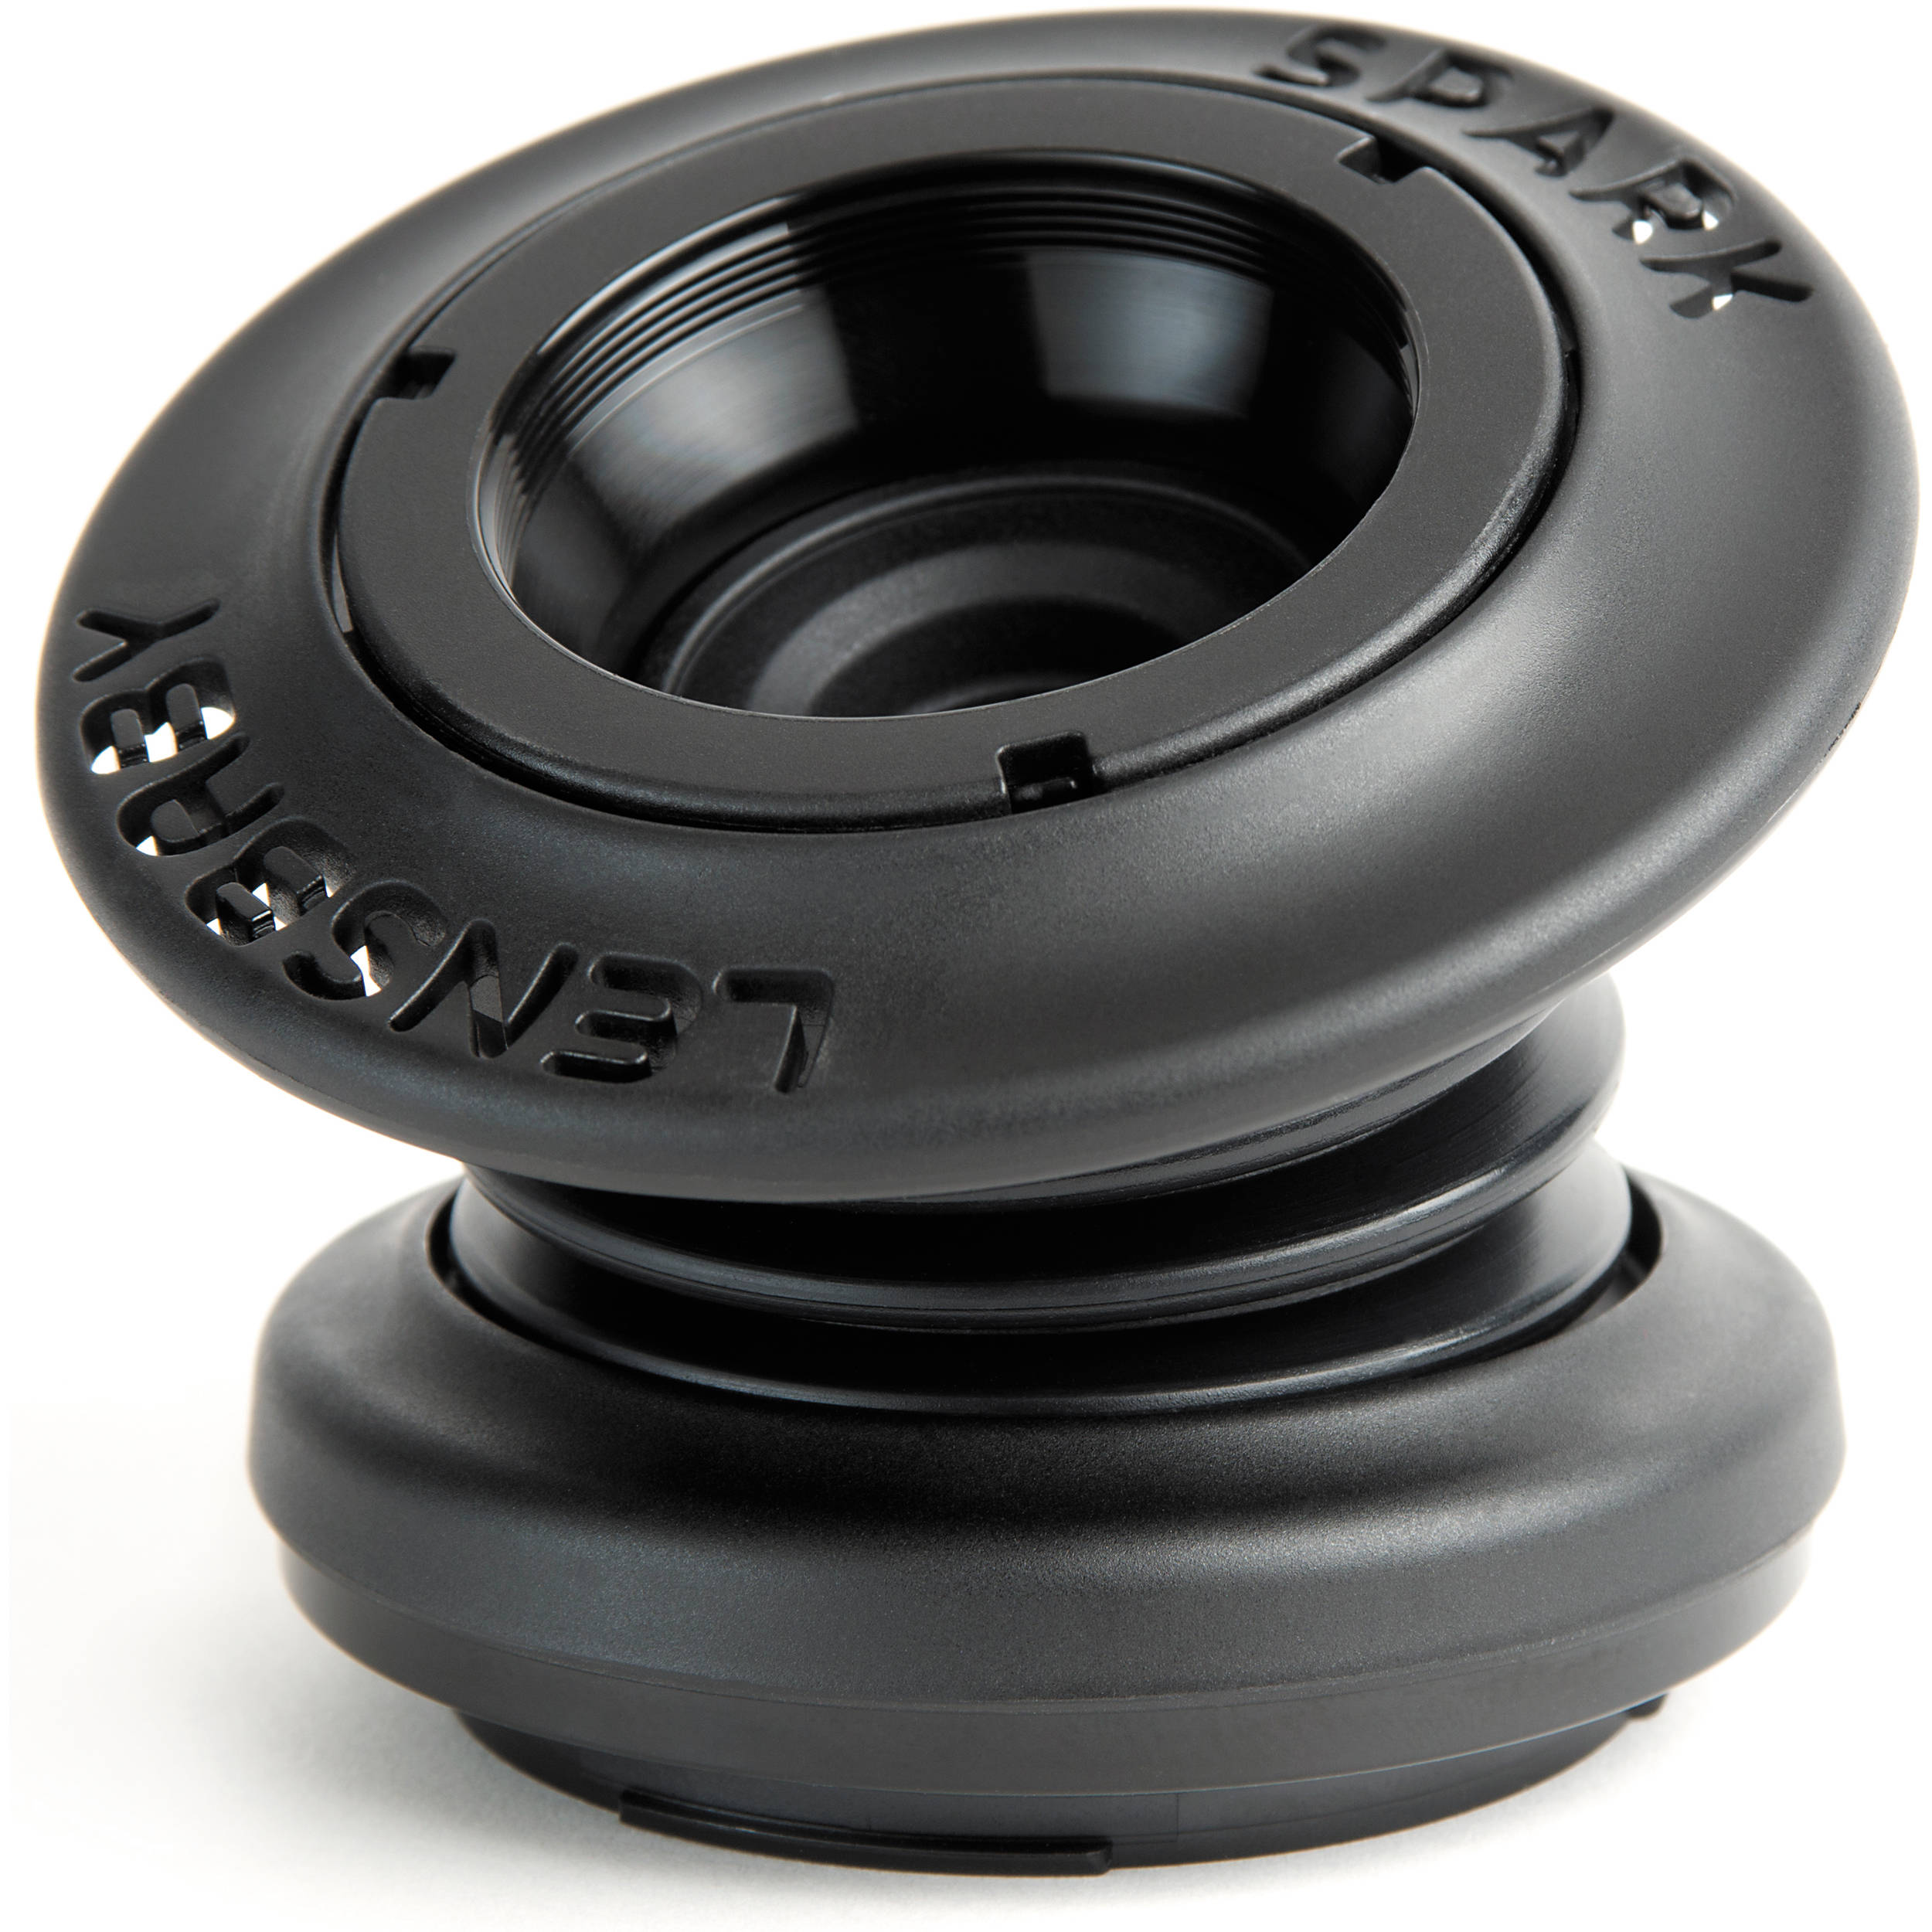
Focus on the Lensbaby Spark is achieved by squeezing the lens bellows until focus registers wherever you want to place it.
Some Lensbabies can run to several hundred dollars and have precise systems for dialing in the part of a photograph that will, through sharp focus, attract optimum attention to a subject, gently blurring the image on all sides around that point. However, for those with steady fingers and shallow pockets, the company’s gateway drug, coming in at around $90, is the Lensbaby Spark, a springy bellows lens that snaps onto your DSLR in place of a regular lens and can be compressed around the edges to place the focal sweet spot wherever you want it.
The Spark takes more muscle control and practice than the more mechanical Lensbaby models, but it’s a thrifty way to see if this kind of imaging is for you. Just squeeze the fixed f/5.6, 50mm lens until the image is sharp at the place you want it, and snap. Some DSLRs allow the Spark to be used on aperture priority, but for most of us, it’s manual all the way, with a lot of trial-and-error until you develop a feel for the process. The company also sells several insert cups so that you can choose different apertures. Pop one f-stop out, pop another one in.
For those of you who like to custom-sculpt focus and light, the gauzy, intimate effect of the Lensbaby will in fact be a gentle welcome. Finally, it’s one more component that could be either toy or tool. Your shots, your choice.
WHEN TOY BECOMES TOOL
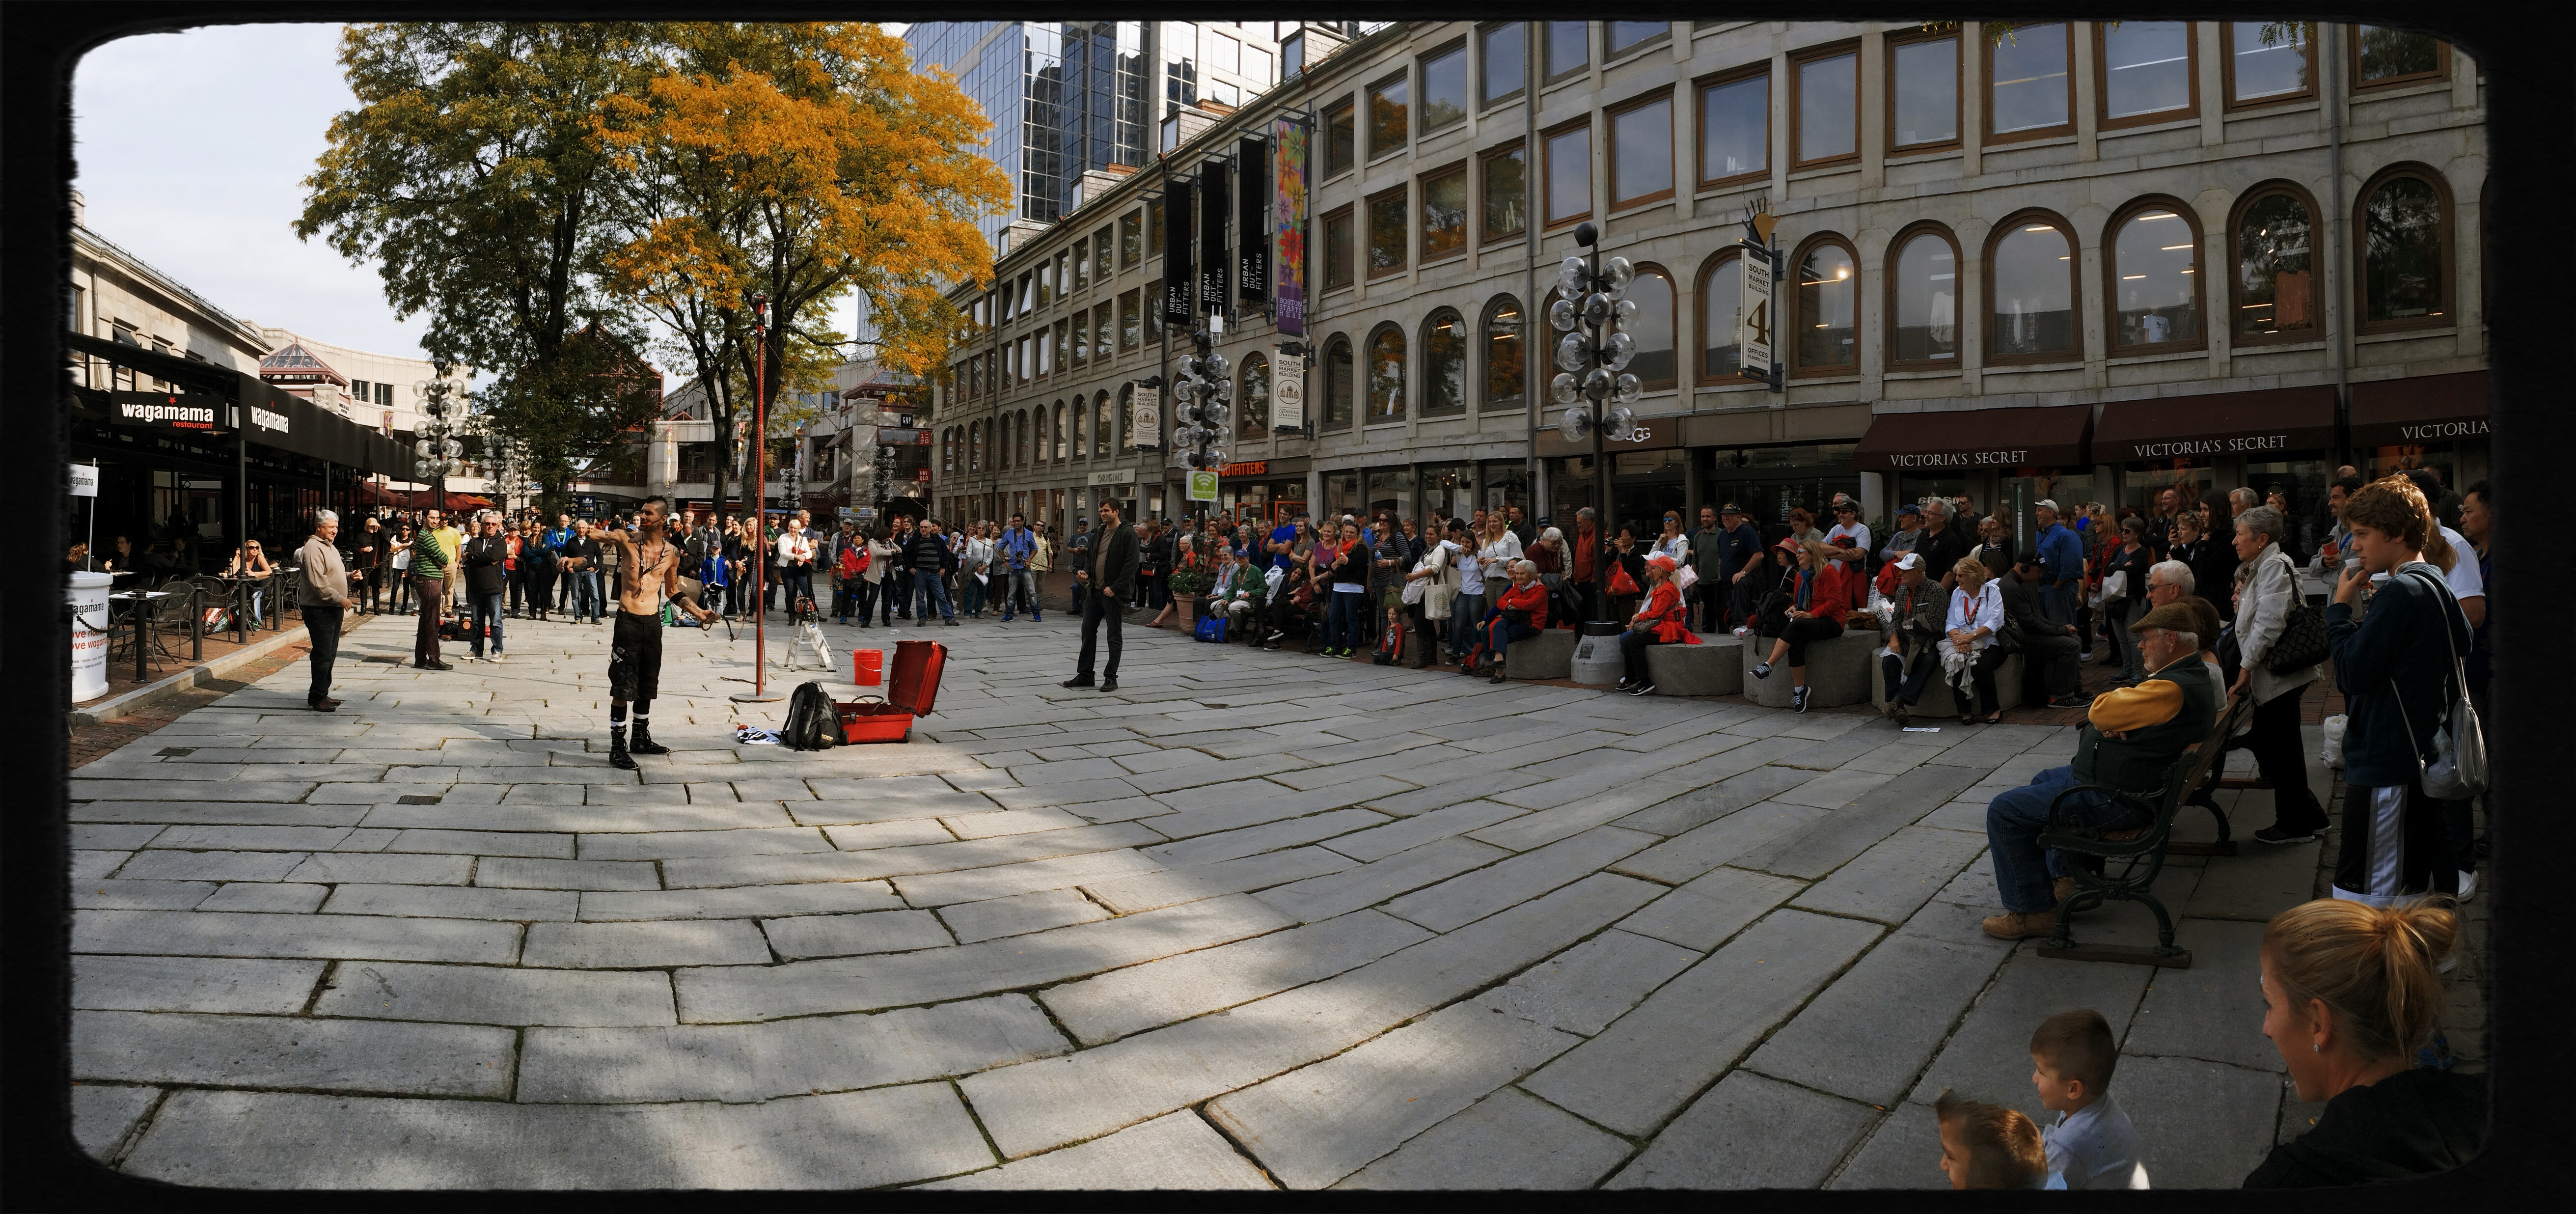
It’s possible to get a truly steady wide-angle image from iPhone’s in-camera pano tool. But it takes some real work, and not a little luck.
By MICHAEL PERKINS
EVERY TECHNICAL ADVANCEMENT IN THE HISTORY OF PHOTOGRAPHY has been a double-edge sword, creating either novel gimmickry or a wider array of serious technique, depending on who’s playing the game. The most popular tools available to the widest number of users, from fisheye lenses to phone app filters, illustrate this point again and again. Some people pick up these new features, play with them for a bit, then abandon them forever, while others use them as a way to expand their approach to visualizing an image.
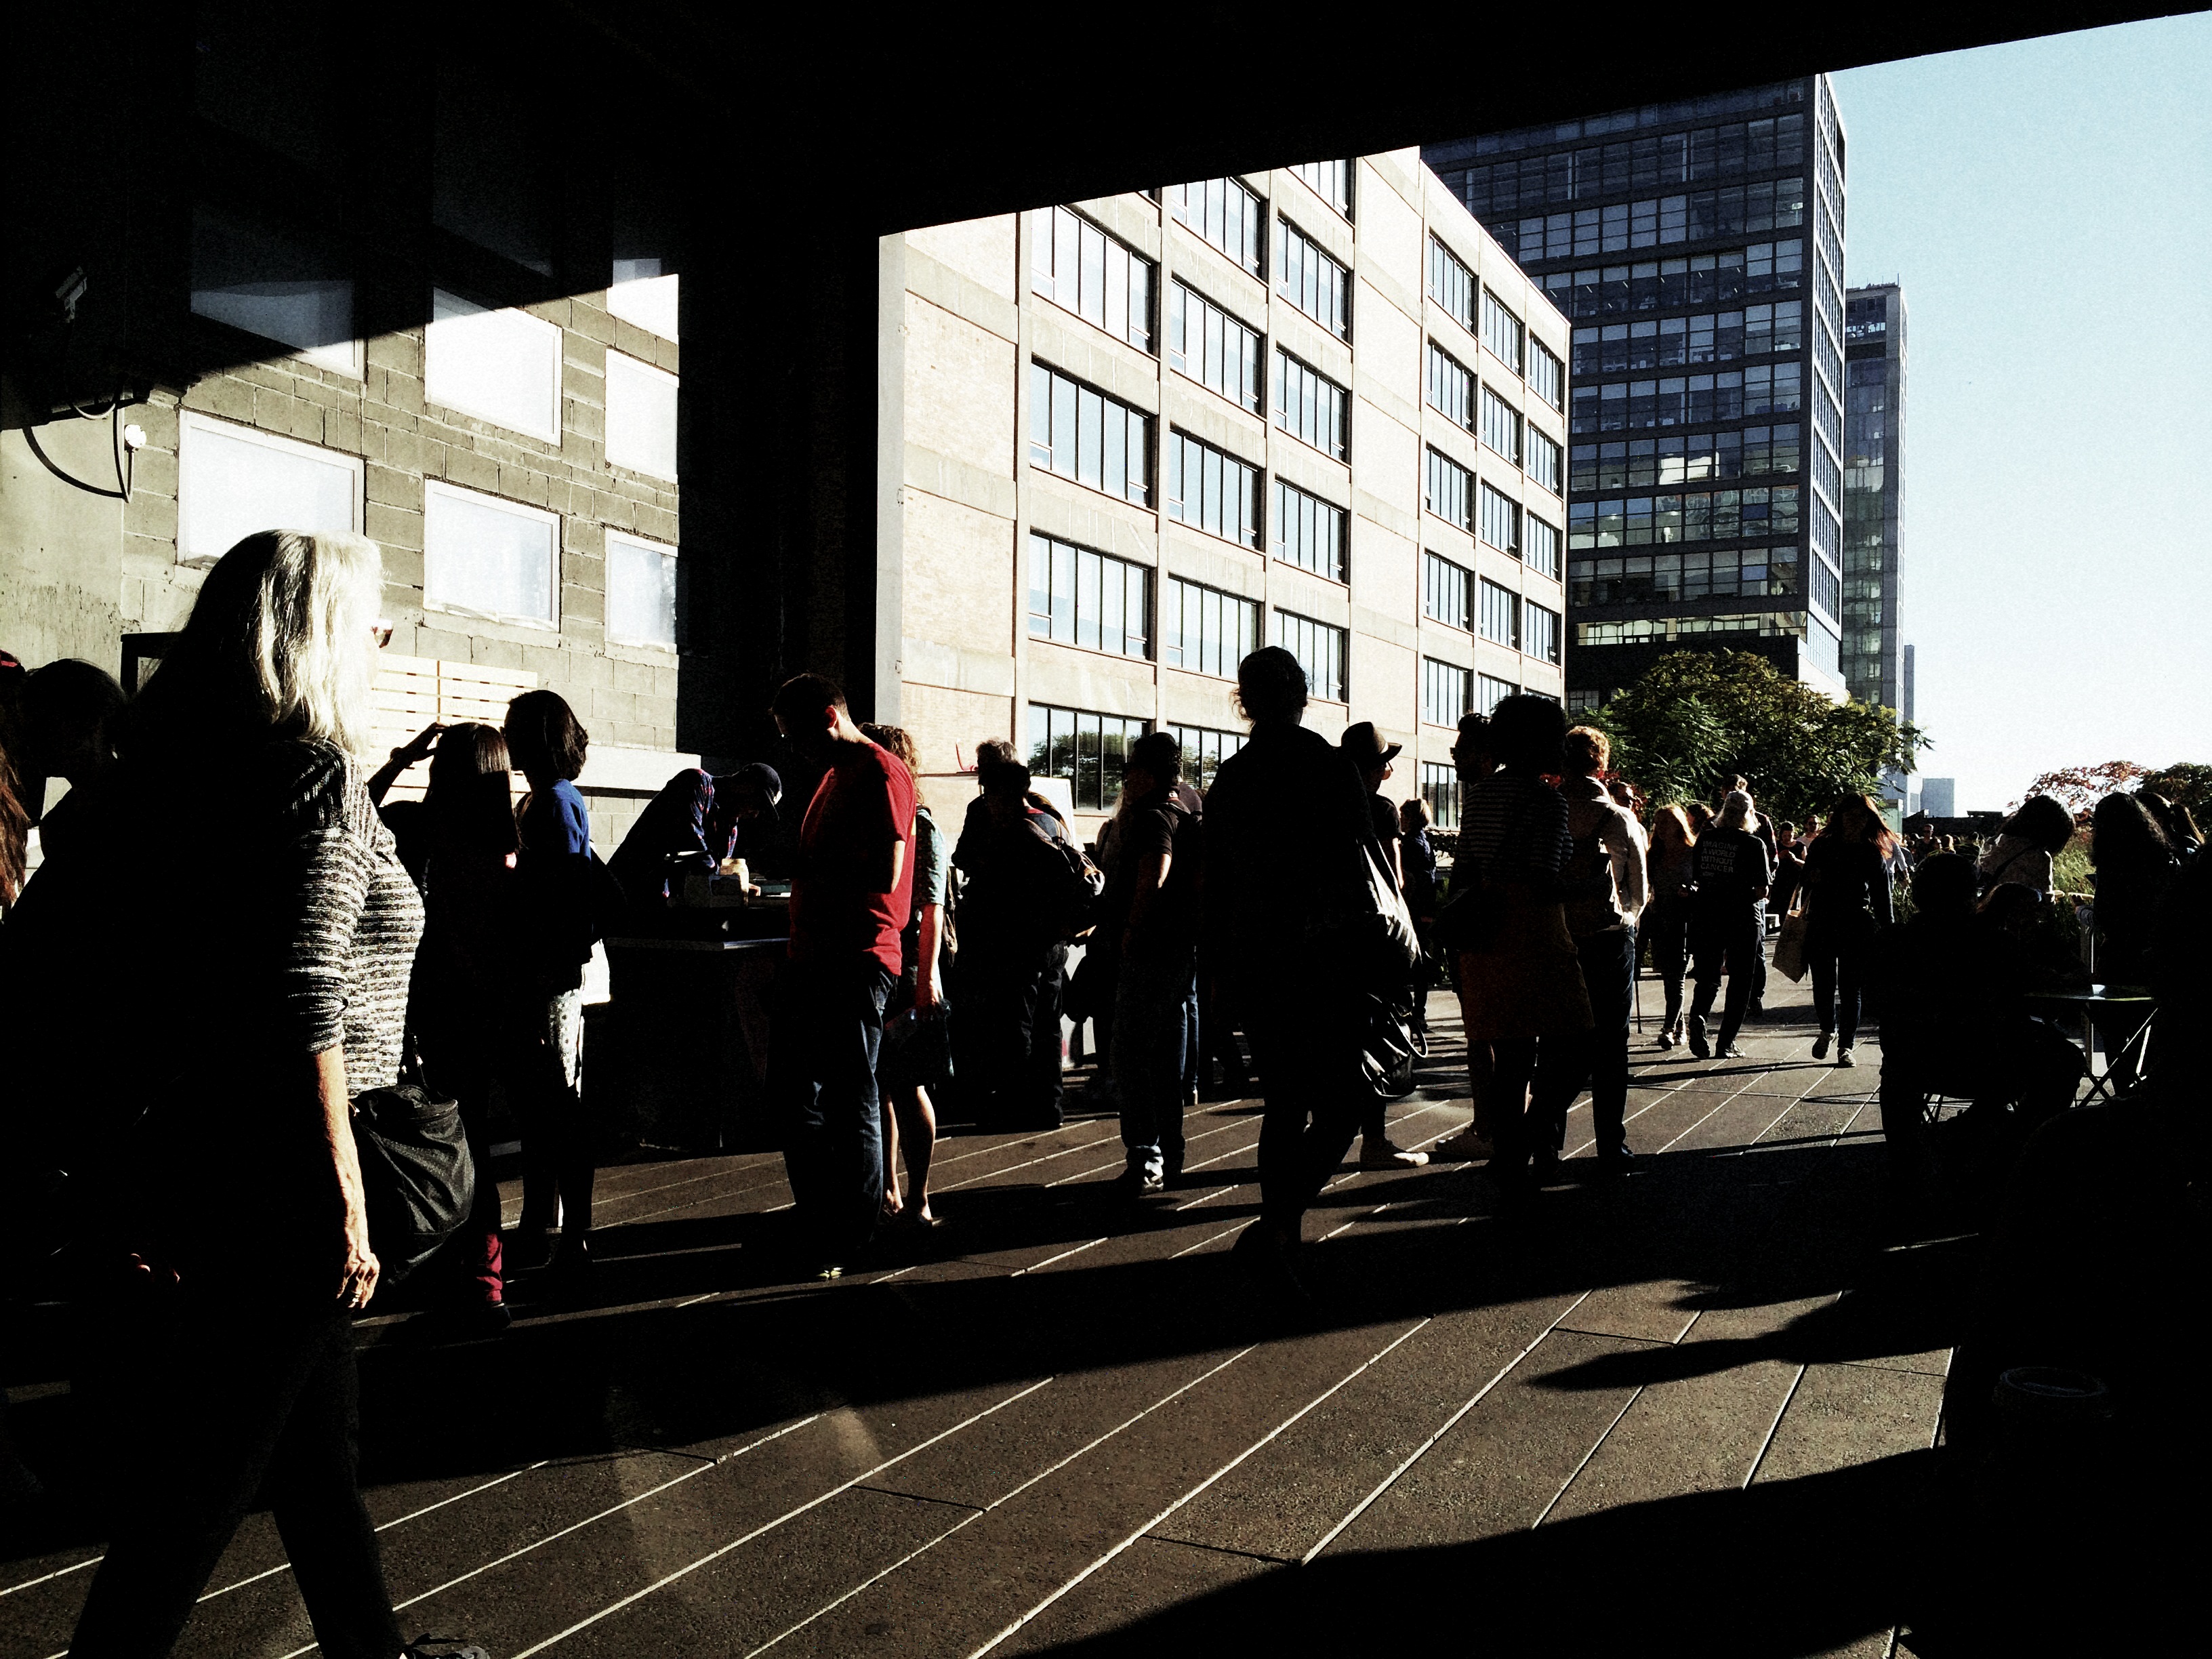
I have written here before about iPhone’s in-camera panoramic tool, which I expect was originally included as a family-friendly option, perfect for making sure that everyone on the Little League team or the family reunion could be captured in one frame, the app instantly stitching a series of narrower photos taken in real time during a left-to-right pan. And, while it can certainly serve in that snapshot-y task, it creates its own set of technical problems. Nonetheless, I have become convinced, over the last few years, that it can lend additional ooomph to serious image making if (a) one is extremely selective in what is shot with it, and (b) the built-in shortcomings of the app can be worked around in the moment.
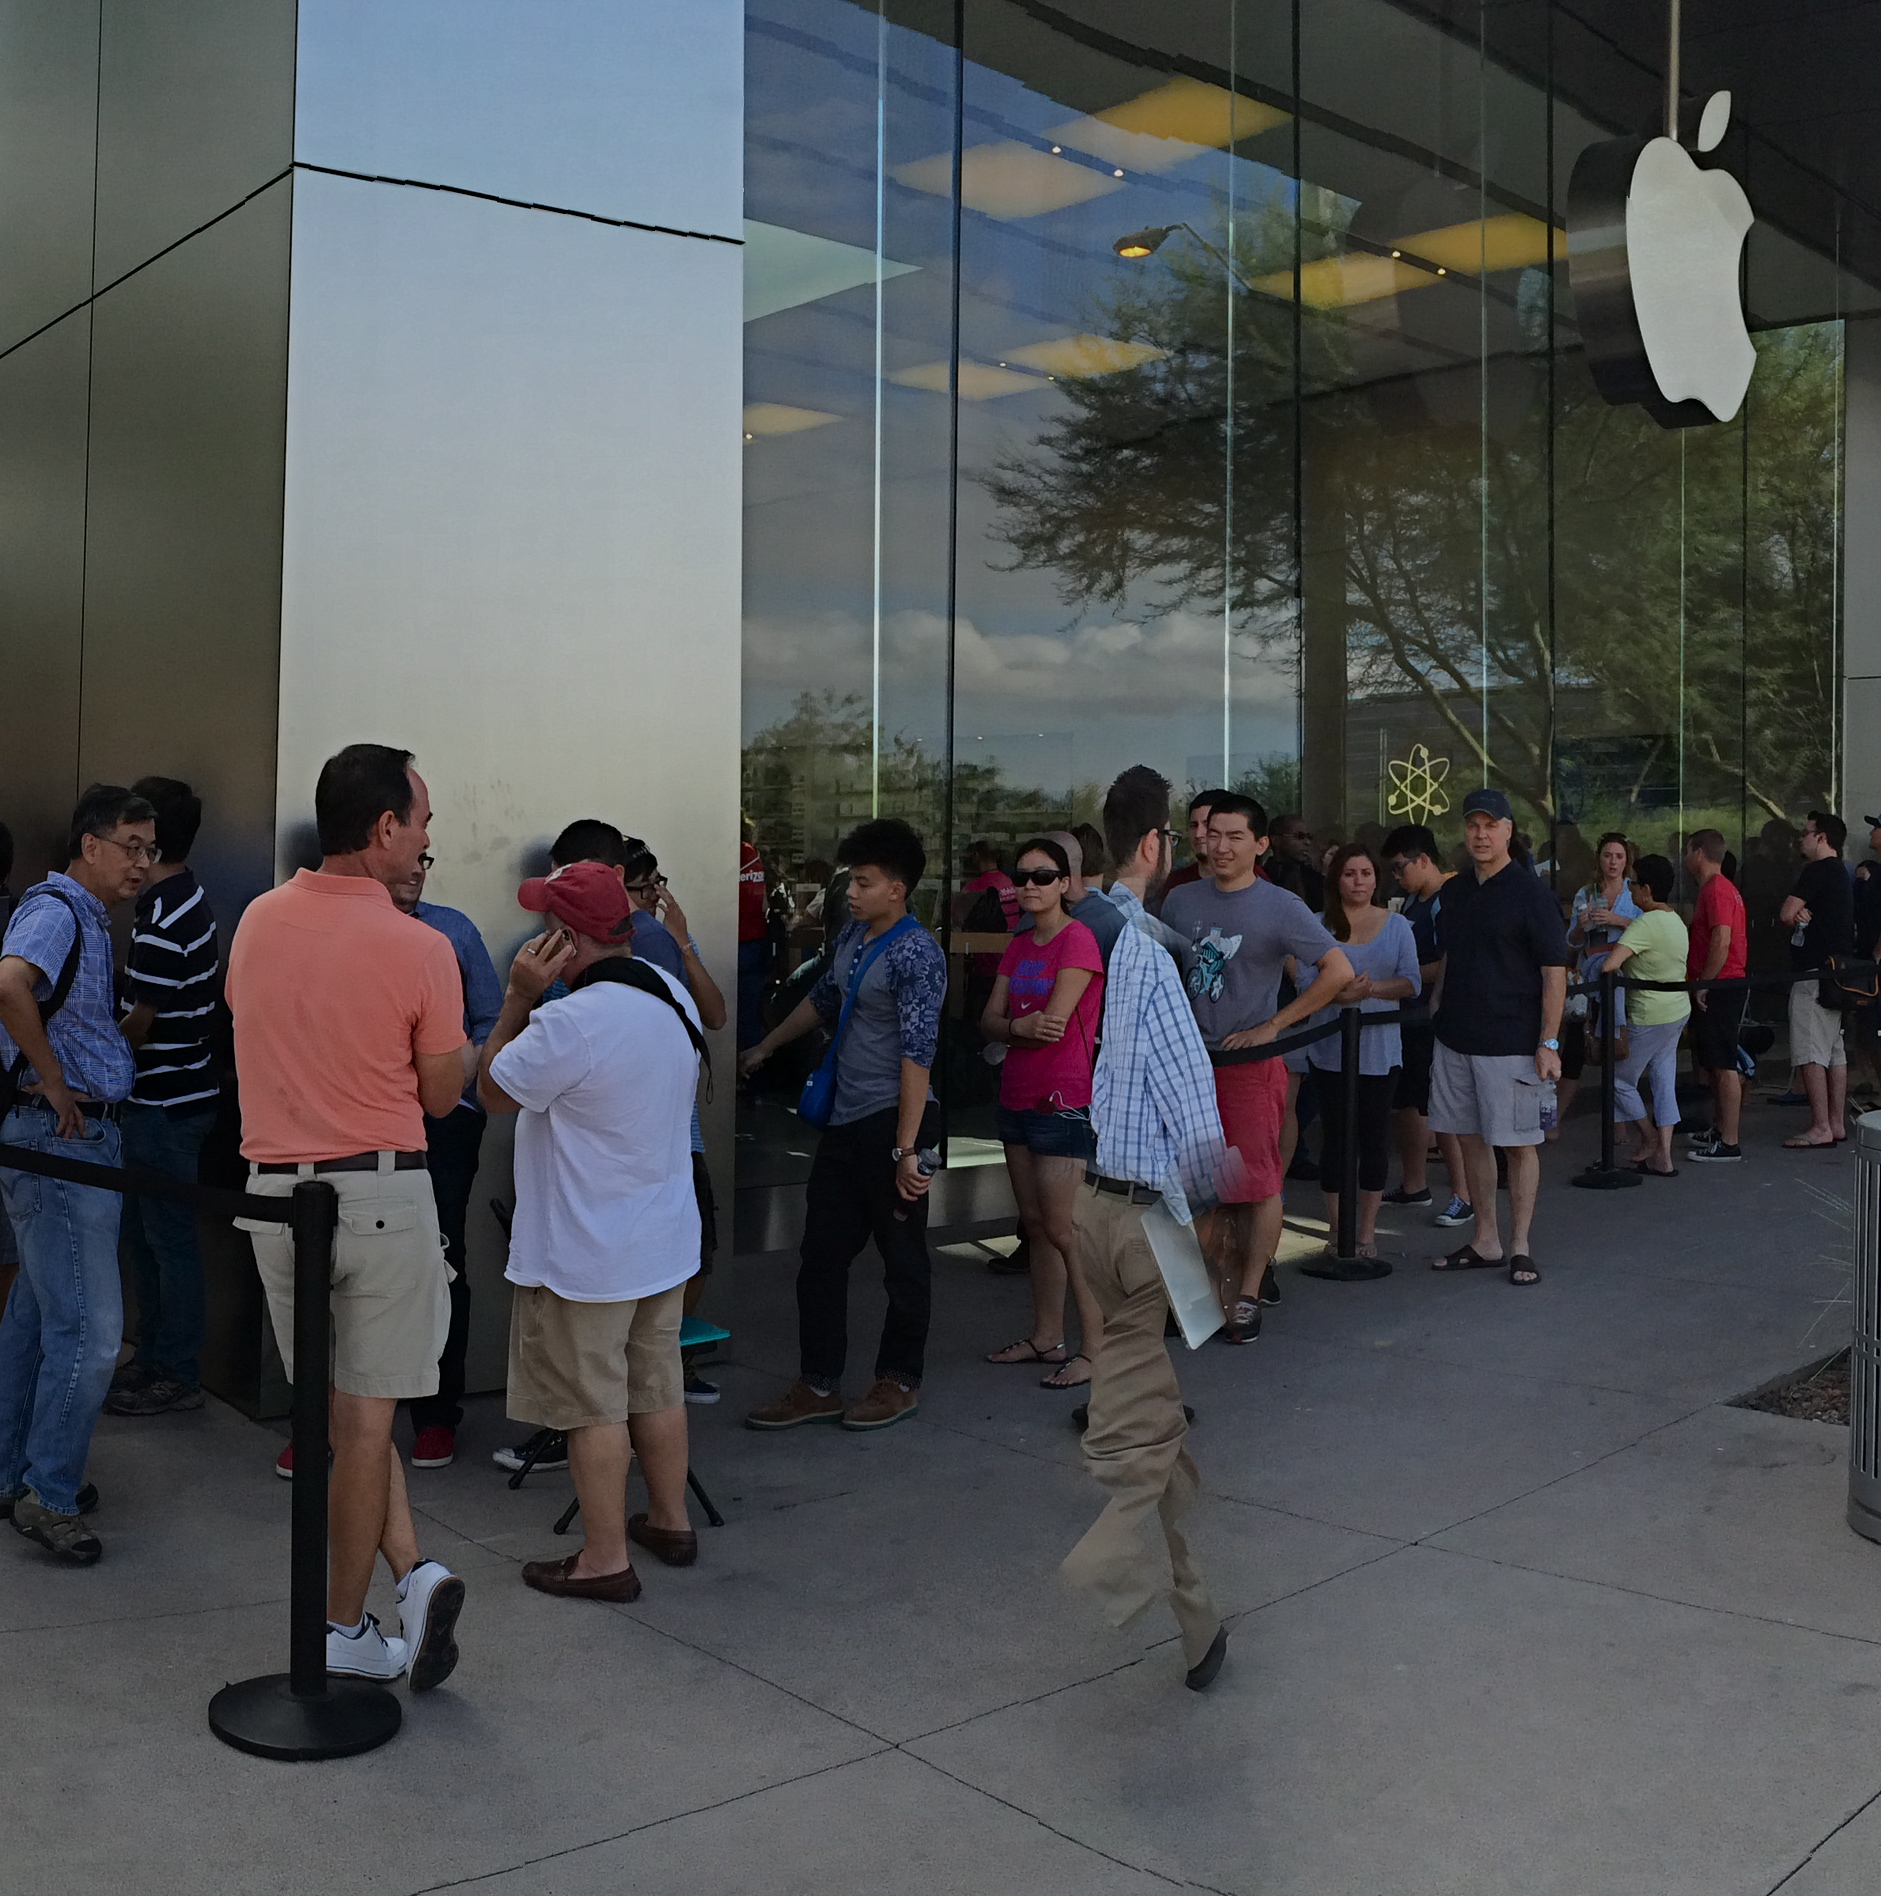
When people move through your iPhone pano panning sweep, they get kind of “scissored away”.
As with any other technical toy/tool, the results depend on how well you understand the strengths and weaknesses of iPhone’s pano app and plan your shots. Since you pan by pivoting your body (as if it’s the hub of a wheel), you can’t maintain the same distance from your entire subject as you move the camera left to right. That means that the center of that pivot, or what’s dead ahead of you, will tend to distort outward, like the center of a fisheye shot. Depending on what’s at the middle of your shot and how far you are from it, this can give you some unwanted funhouse results.
Also, in what is odd for a tool that’s designed to take pictures of lots of people, using the iPhone pano app to shoot a live, moving crowd is truly hit-or-miss. If a person moves through your picture as you are panning in the same space they occupy, they may be recorded as a slice or a piece of themselves, being caught partly in some of the picture’s vertical “tiles” but absent from the ones directly adjacent to it, causing them to register as a disembodied leg or a slivered torso floating in the air (see left).
In the shot at the top of this page, I was lucky that the street magician at left was standing still during the time I panned across him (once I’ve recorded his part of the frame, he can do what he likes, since the lens no longer “sees” that part of the picture). Likewise the crowd, enthralled by his performance, was remaining pretty static as I completed the pan across their part of the frame. The result has all the story-telling power of an ultra-wide shot, and, because of the composition, actually uses the fisheye-ish bulge to make the segmented pavement appear to be radiating outward from the performer.
And of course there is the subject itself, which has to benefit from all that left-right arrangement of information if you want to avoid just taking the picture for the sake of the effect alone. And there we have the balance between toy and tool that every photographer hopes to strike. Toys get cast aside once boredom sets in. Tools stay around and add to your work in very real ways.
A DIFFERENT BRAND OF DARK
A texturally rich subject, but its natural color is too Disney.
By MICHAEL PERKINS
ONE PHOTOGRAPHER’S LAB ACCIDENT IS, OCCASIONALLY, ANOTHER PHOTOGRAPHER’S EUREKA MOMENT. Take the case of a visual effect that, in the film era, may have originated with an error in darkroom technique, and which is now being sought after by movie directors and amateurs alike as a look that they actively desire. Recent use of this effect ranges from the gritty, muted color and high-contrast of films like Steven Spielberg’s Saving Private Ryan, to lab-less shortcuts in Photoshop and even shorter shortcuts in ready-to-eat iPhone apps. The look is called Bleach Bypass and it’s worth a look for certain moods and subjects.
The term derives its name from one of the steps used in film processing color film in which bleach is used to rinse away silver nitrate. By skipping this step, the silver is retained in the emulsion along with the color dyes. The result is a black-and-white image over a color image…kind of a photo sandwich. The resulting composite is lighter in hue but packs more extreme contrast and graininess in the monochrome values…an intense, “dirty” look.
The same shot with a simulated bleach bypass effect, done in Photomatix.
Now, for those of you that don’t have a traditional darkroom handy, creating a bleach bypass “look” is easy in nearly any basic editing software suite. Check out the basic steps for Photoshop here. In most cases, you duplicate your original shot, desaturate it slightly, and convert the dupe shot to complete monochrome. The mono copy must also be manipulated for ultimate contrast, and the two shots must be layered in software to give you the desired blend. I tend to use Photomatix more often than Photoshop, since I work a lot with various kinds of tone-mapping for HDR, so I processed the “after” shot you see here in that program’s “exposure fusion” tab. However, as I say, lots of programs can do this with virtually no sweat.
Another path: an iPhone image with the AltPhoto app’s Bleach Bypass filter applied.
The third image in this article (at left) was produced with a click and some swipes with the Bleach Bypass simulator in the AltPhoto app, which also mimics the look of antique film stocks from Kodachrome to Tri-X. As with many phone apps, it doesn’t offer much in the way of fine control, but if you do all your shooting and/or retouching in your mobile, it’s a pretty good quickie fix.
Once again, in the digital era, what was once (a) messy and troublesome becomes (b) no fuss, no muss, and therefore, (c) something that will be adopted and used by many, many more shooters. Democracy in technology does not, of course, guarantee equality of results. You just have more tools to serve you when the ideas come.
WINDOW OF OPPORTUNITY
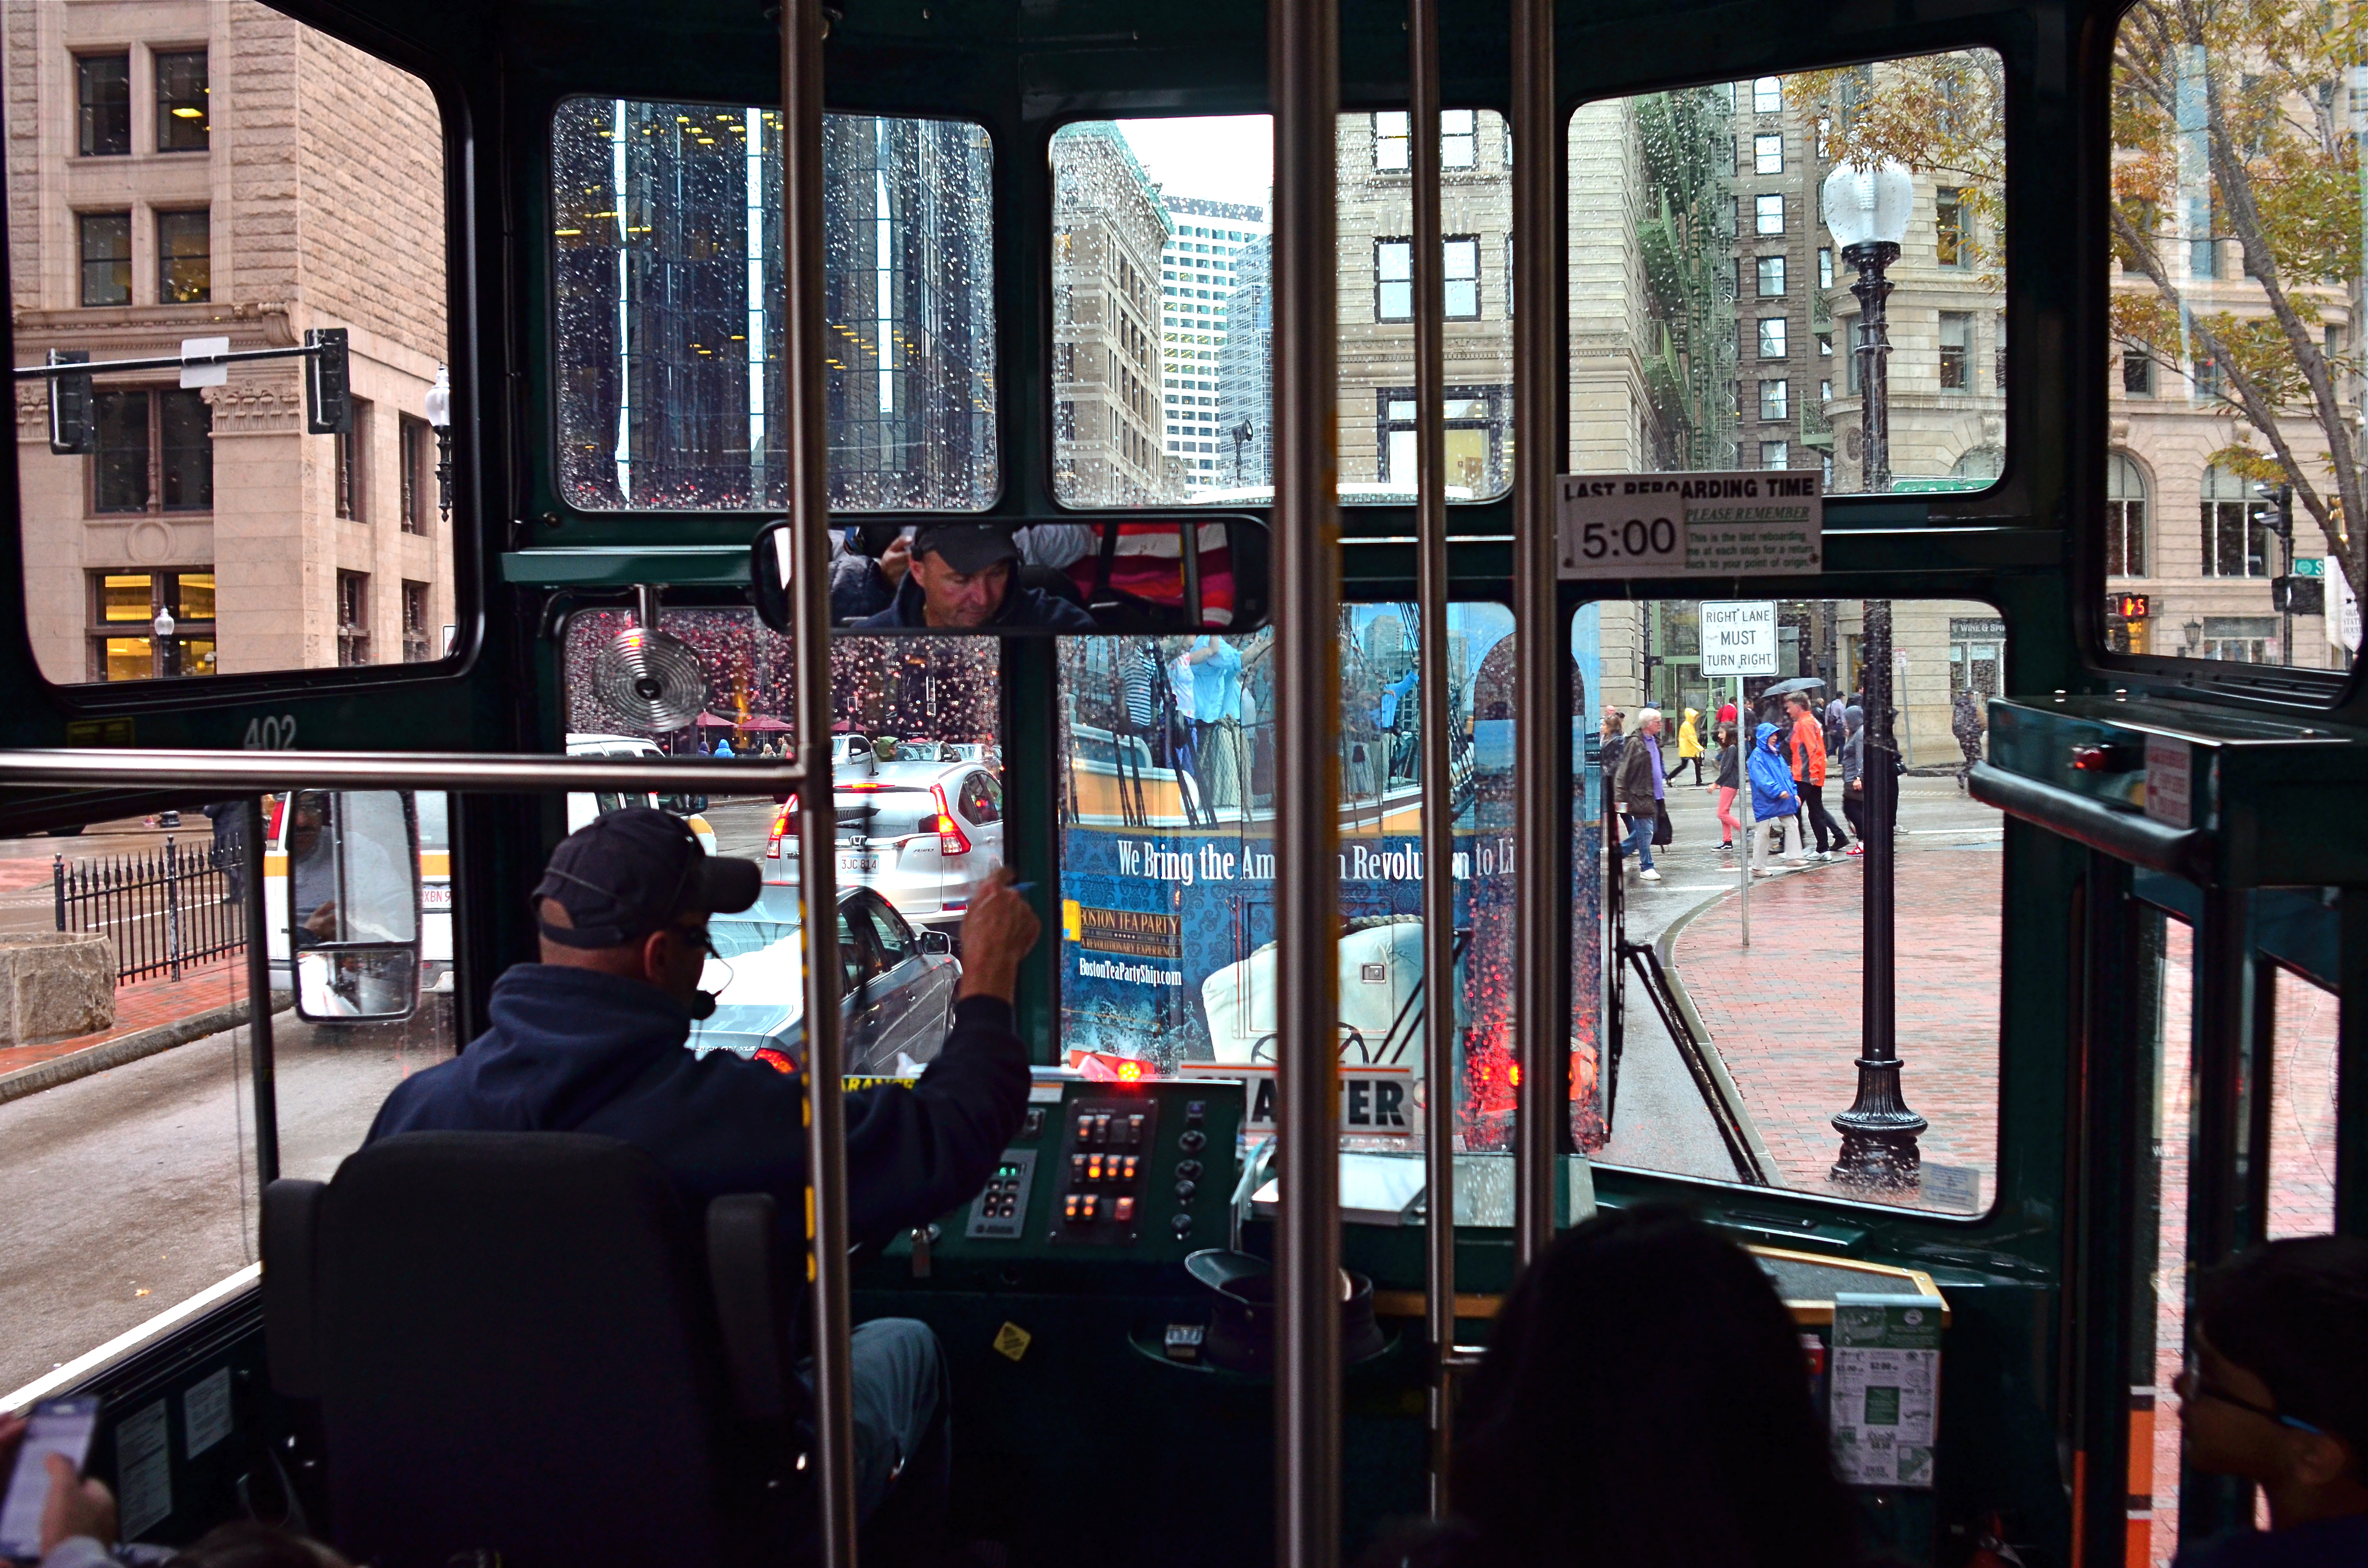
“…the driver on the bus says……” Sometimes a window is part of the story.
By MICHAEL PERKINS
PHOTOGRAPHERS’ FIRST USES OF FILTERS WERE AS THE TWIST-ON TOOLS designed to magnify, nullify or modify color or light at the front end of a lens. In the digital era, filtration is more frequently added after the shutter clicks, via apps or other post-production toys. You make your own choice of whether to add these optical layers as a forethought or a post-script. However, one of the simplest and oldest of filtering options costs no money and little time, and yet continues to shape many a great image: a window.
Early morning + tinted window=moody, right? Gettysburg from the tour bus.
No panes are optically identical, just as the lighting conditions that affect them are likewise completely unique, so the way that they shape pictures are constantly in flux, as are the results. It’s no surprise that the shoot-from-the-hip urban photographers who favor spontaneity over all pay little attention to whether shooting through a window “ruins” or “spoils” an image. Taking an ad-lib approach to all photographic technique, the hip shooters see the reflections and reflections of glass as just another random shaper of the work, and thus as welcome as uneven exposure, cameras that leak light, or cross-processed film: another welcome accidental that might produce something great.
Windows can soften, darken or recolor a scene, rendering something that might have been too strait-laced a little more informal. This quality alone isn’t enough to salvage a truly bad shot, but might add a little needed edge to it. The images seen here were both “what the hell” reactions to being imprisoned on tour buses, the kinds that don’t stop, don’t download their passengers for photo or bathroom breaks, or which are booked because I am tired of walking in the rain.
In the case of the tour driver’s cab, his inside command center and personal view are really part of the story, and may outrank what he’s really viewing. In the side-window shot of an early morning in Gettysburg, Pennsylvania, the tinted glass acted much in the way of a polarizing filter, making the resulting photo much moodier than raw reality would have been.
Which is the point of the exercise. When you feel yourself blocked from taking the picture you thought you wanted, try taking it the way you don’t think you want to. Or just think less.
Wait, what did he just say?
DON’T MESS WITH MR. IN-BETWEEN
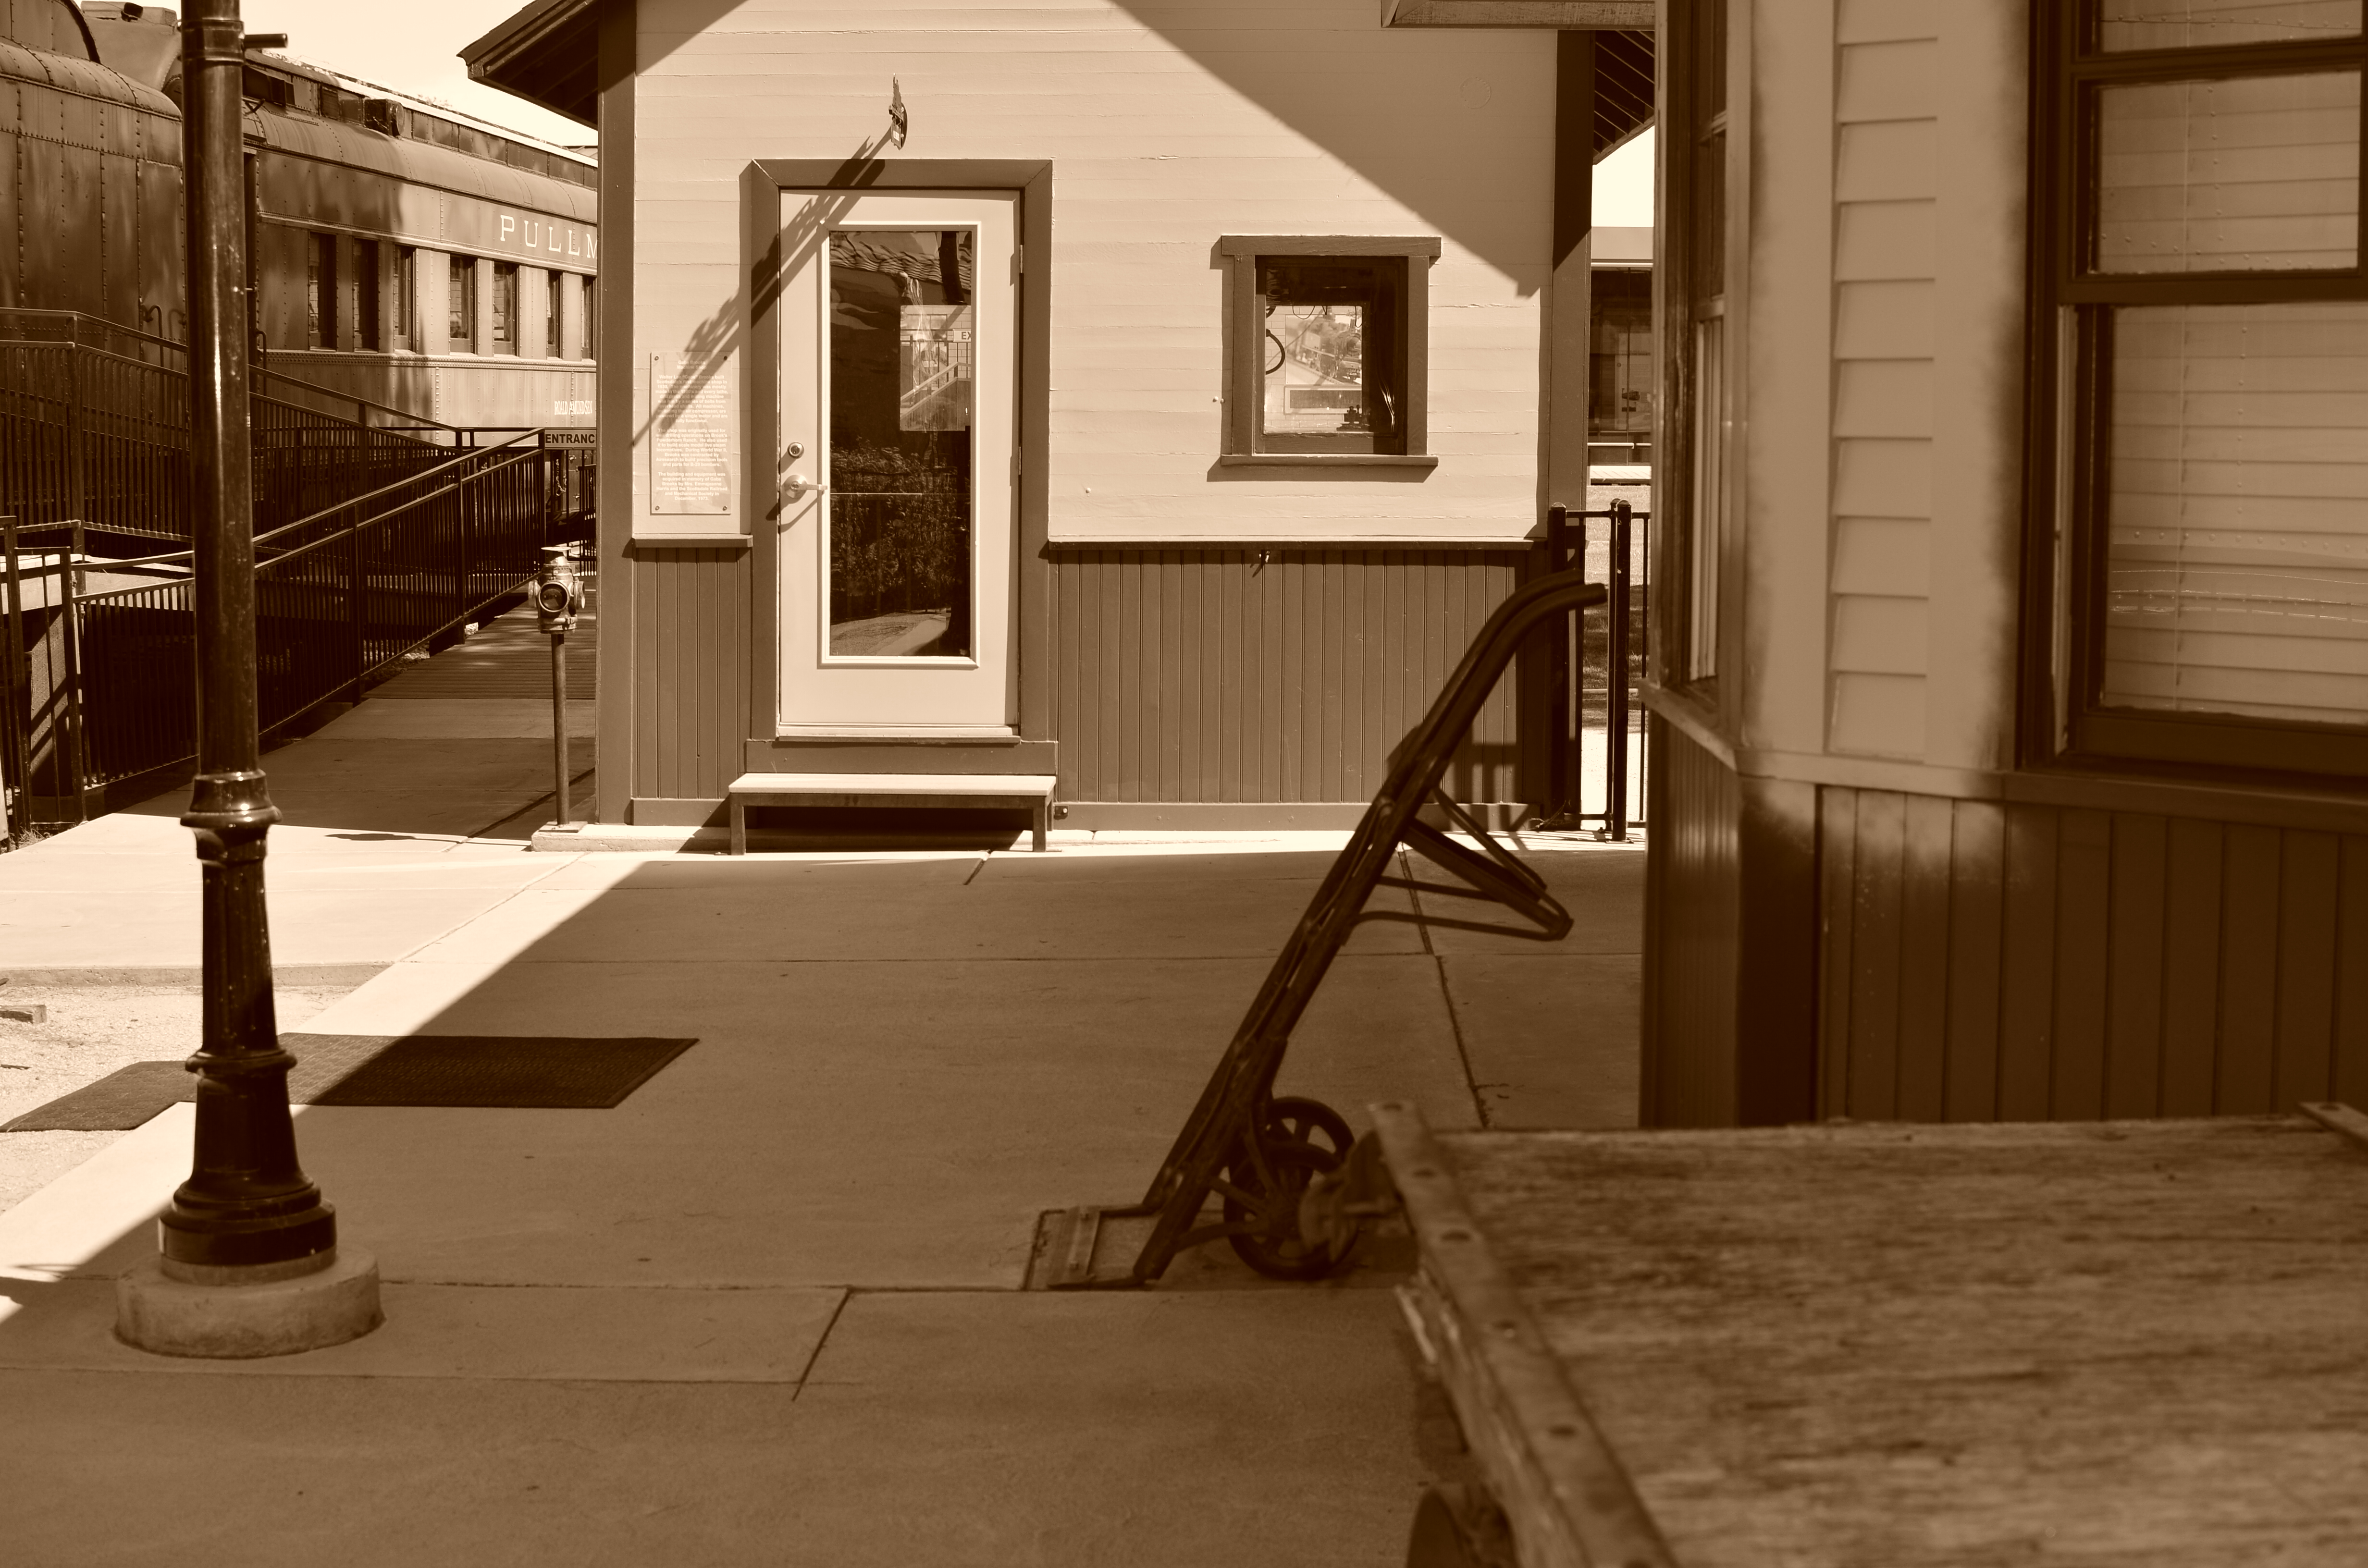
The light on this railroad depot was not as harsh or contrasty as seen here: I merely liked it better that way.
By MICHAEL PERKINS
PHOTOGRAPHY ALWAYS SEEMS TO BE ABOUT TWO THINGS THAT ARE POLAR OPPOSITES. On one hand, we have labored mightily for nearly two hundred years to make our little boxes reproduce as full a representation of the range of tone in nature as possible, to ape the eye to a clinical certainty. On the other hand, we love to distort that reality for specific purposes…..call it abstraction, minimalism, or your own favorite buzz word. We extol the natural look and revere the unnatural in nearly the same breath.
Originally, there wasn’t much in the way of attenuation between light and dark in photographs. Black was blackblackblack and white was whitewhitewhite (yes, I read a lot of e.e. cummings as a child). Better films eventually led to a greater variance in shades and nuances, and pioneering work by Uncle Ansel and other Big Saints produced exhaustive studies on precisely how many shades of grey could be delivered in a carefully crafted photograph. But even as we can now easily produce images with great variances in light and dark, some pictures are still served better by going back to clean, simple boundaries for values.
Hard, high-contrast blacks and whites are killers of texture but they are great modelers of dimension. A cube with stark differences between its light and dark sides takes on the more tangible feel of a solid object occupying space, and that extra degree of dimensionality helps in the success of certain compositions.
The above image was originally far more nuanced than the altered version you see here, but, as a very basic arrangement of shapes in space, I like the picture better without too much midrange value. It helps the faux nostalgia feel of the subject matter as well, even though it might be altogether wrong for a million other subjects. The unscientific answer is, you know it when you see it.
One thing is for sure. Even when we look for the ring of truth in our images, turn out that there’s more than one ring tone. Decide what you need for a specific image. Maximized selection of tools is the most single important part of making a picture.
PUT ‘ER IN REVERSE
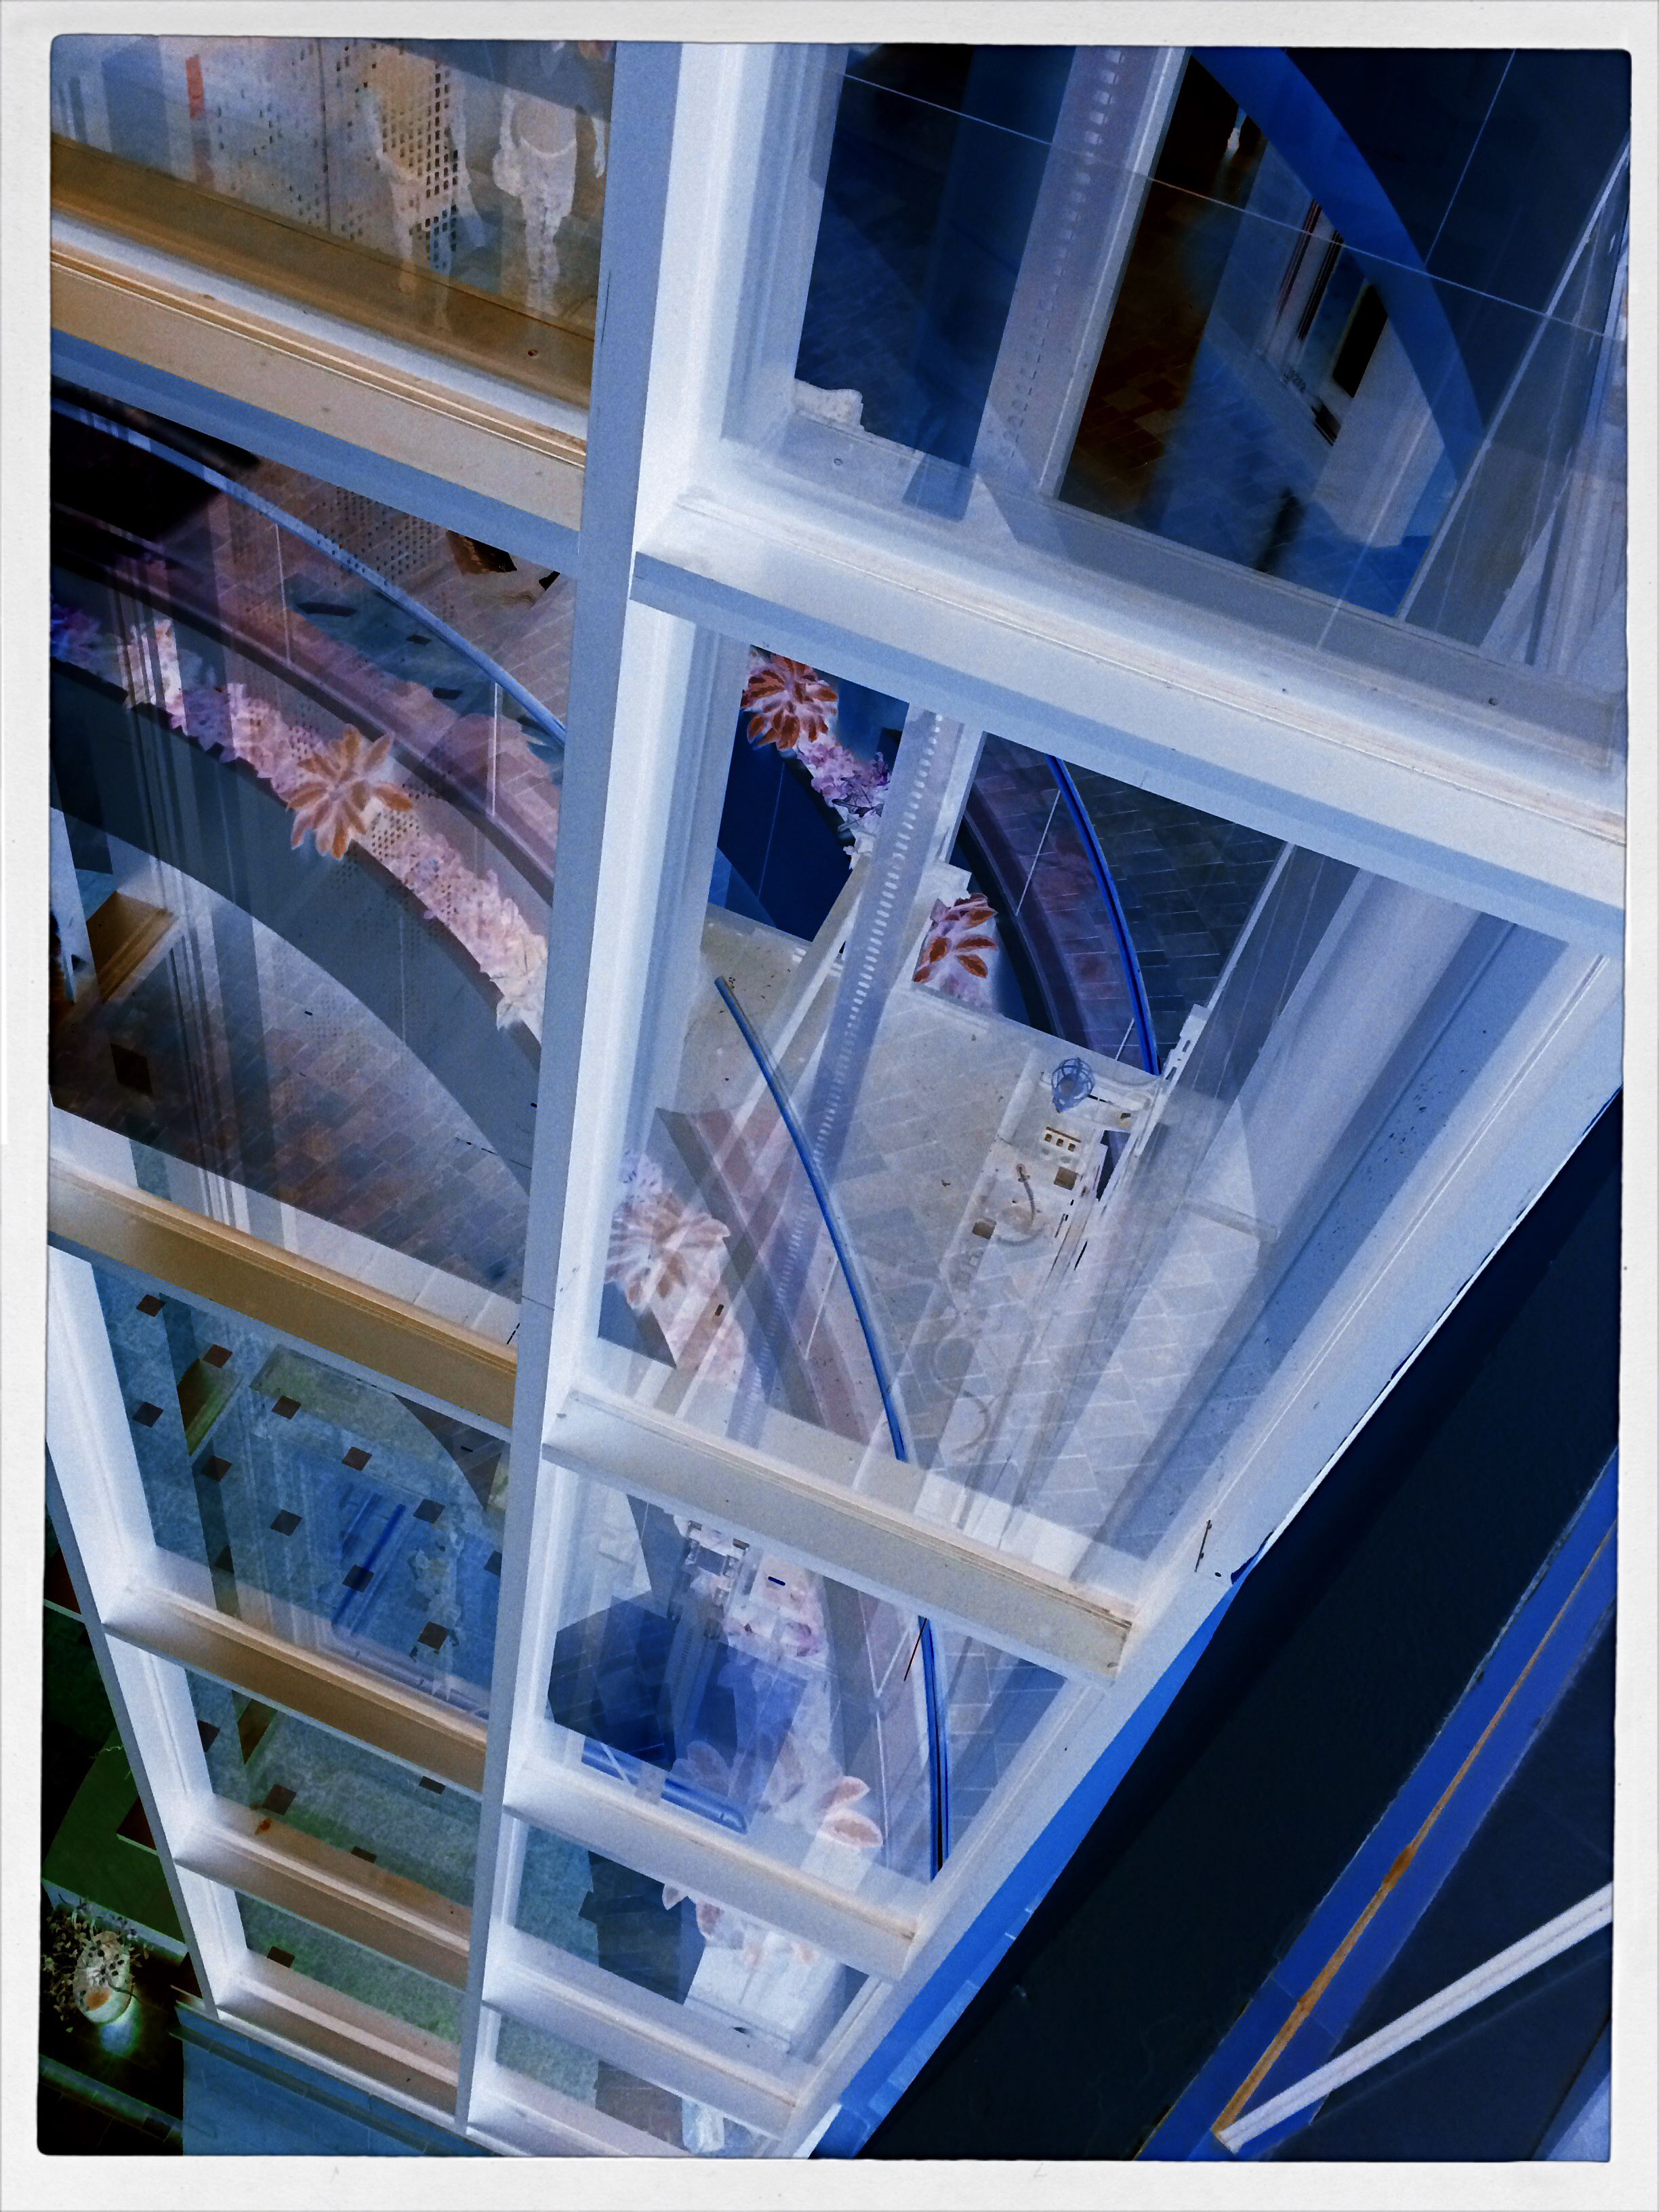
A glass elevator at a shopping mall, converted to a negative, then a fake Technicolor filter in a matters of seconds, via the phone app Negative Me.
By MICHAEL PERKINS
THERE ARE MANY WAYS TO FORCE YOUR AUDIENCE TO SEE THINGS ANEW, to strip away their familiar contexts as everyday objects and create a completely different visual effect. The first, and most obvious form of abstraction we all learned in our cradle, that of rendering a subject in black and white. Some early photographers spent so many years in monochrome, in fact, that they actually regarded early color with suspicion, as is it was somehow less real. The moral of the story is: the photograph demonstrates the world that you dictate, shown strictly on your own terms.
Abstraction also comes about with the use of lenses that distort distances or dimensions, with re-assignment of color (green radishes, anyone?), and by compositions that extract subjects from their natural surroundings. Isolate one gear from a machine and it becomes a different object. Magnify it, light it differently, or show just a small portion of it, and you are taking it beyond its original purpose, and into abstraction. Your viewer is then free to re-interpret how he sees, or thinks, about that thing.
One swift gift of the post-digital world that I find interesting is the ability, through apps, to render a negative of any image with a click or swipe, then modifying it with the same color filters that you might apply to a positive photo. This affords an incredible amount of trial-and-error in a remarkably short space of time, and better yet, you’re out in the world rather than in the lab. Of course, negatives have always been manipulated, often to spectacular effect, but always after it was too late to re-take the original picture. Adjustments could be made, certainly, but the subject matter, by that time, was long gone, and that is half the game.
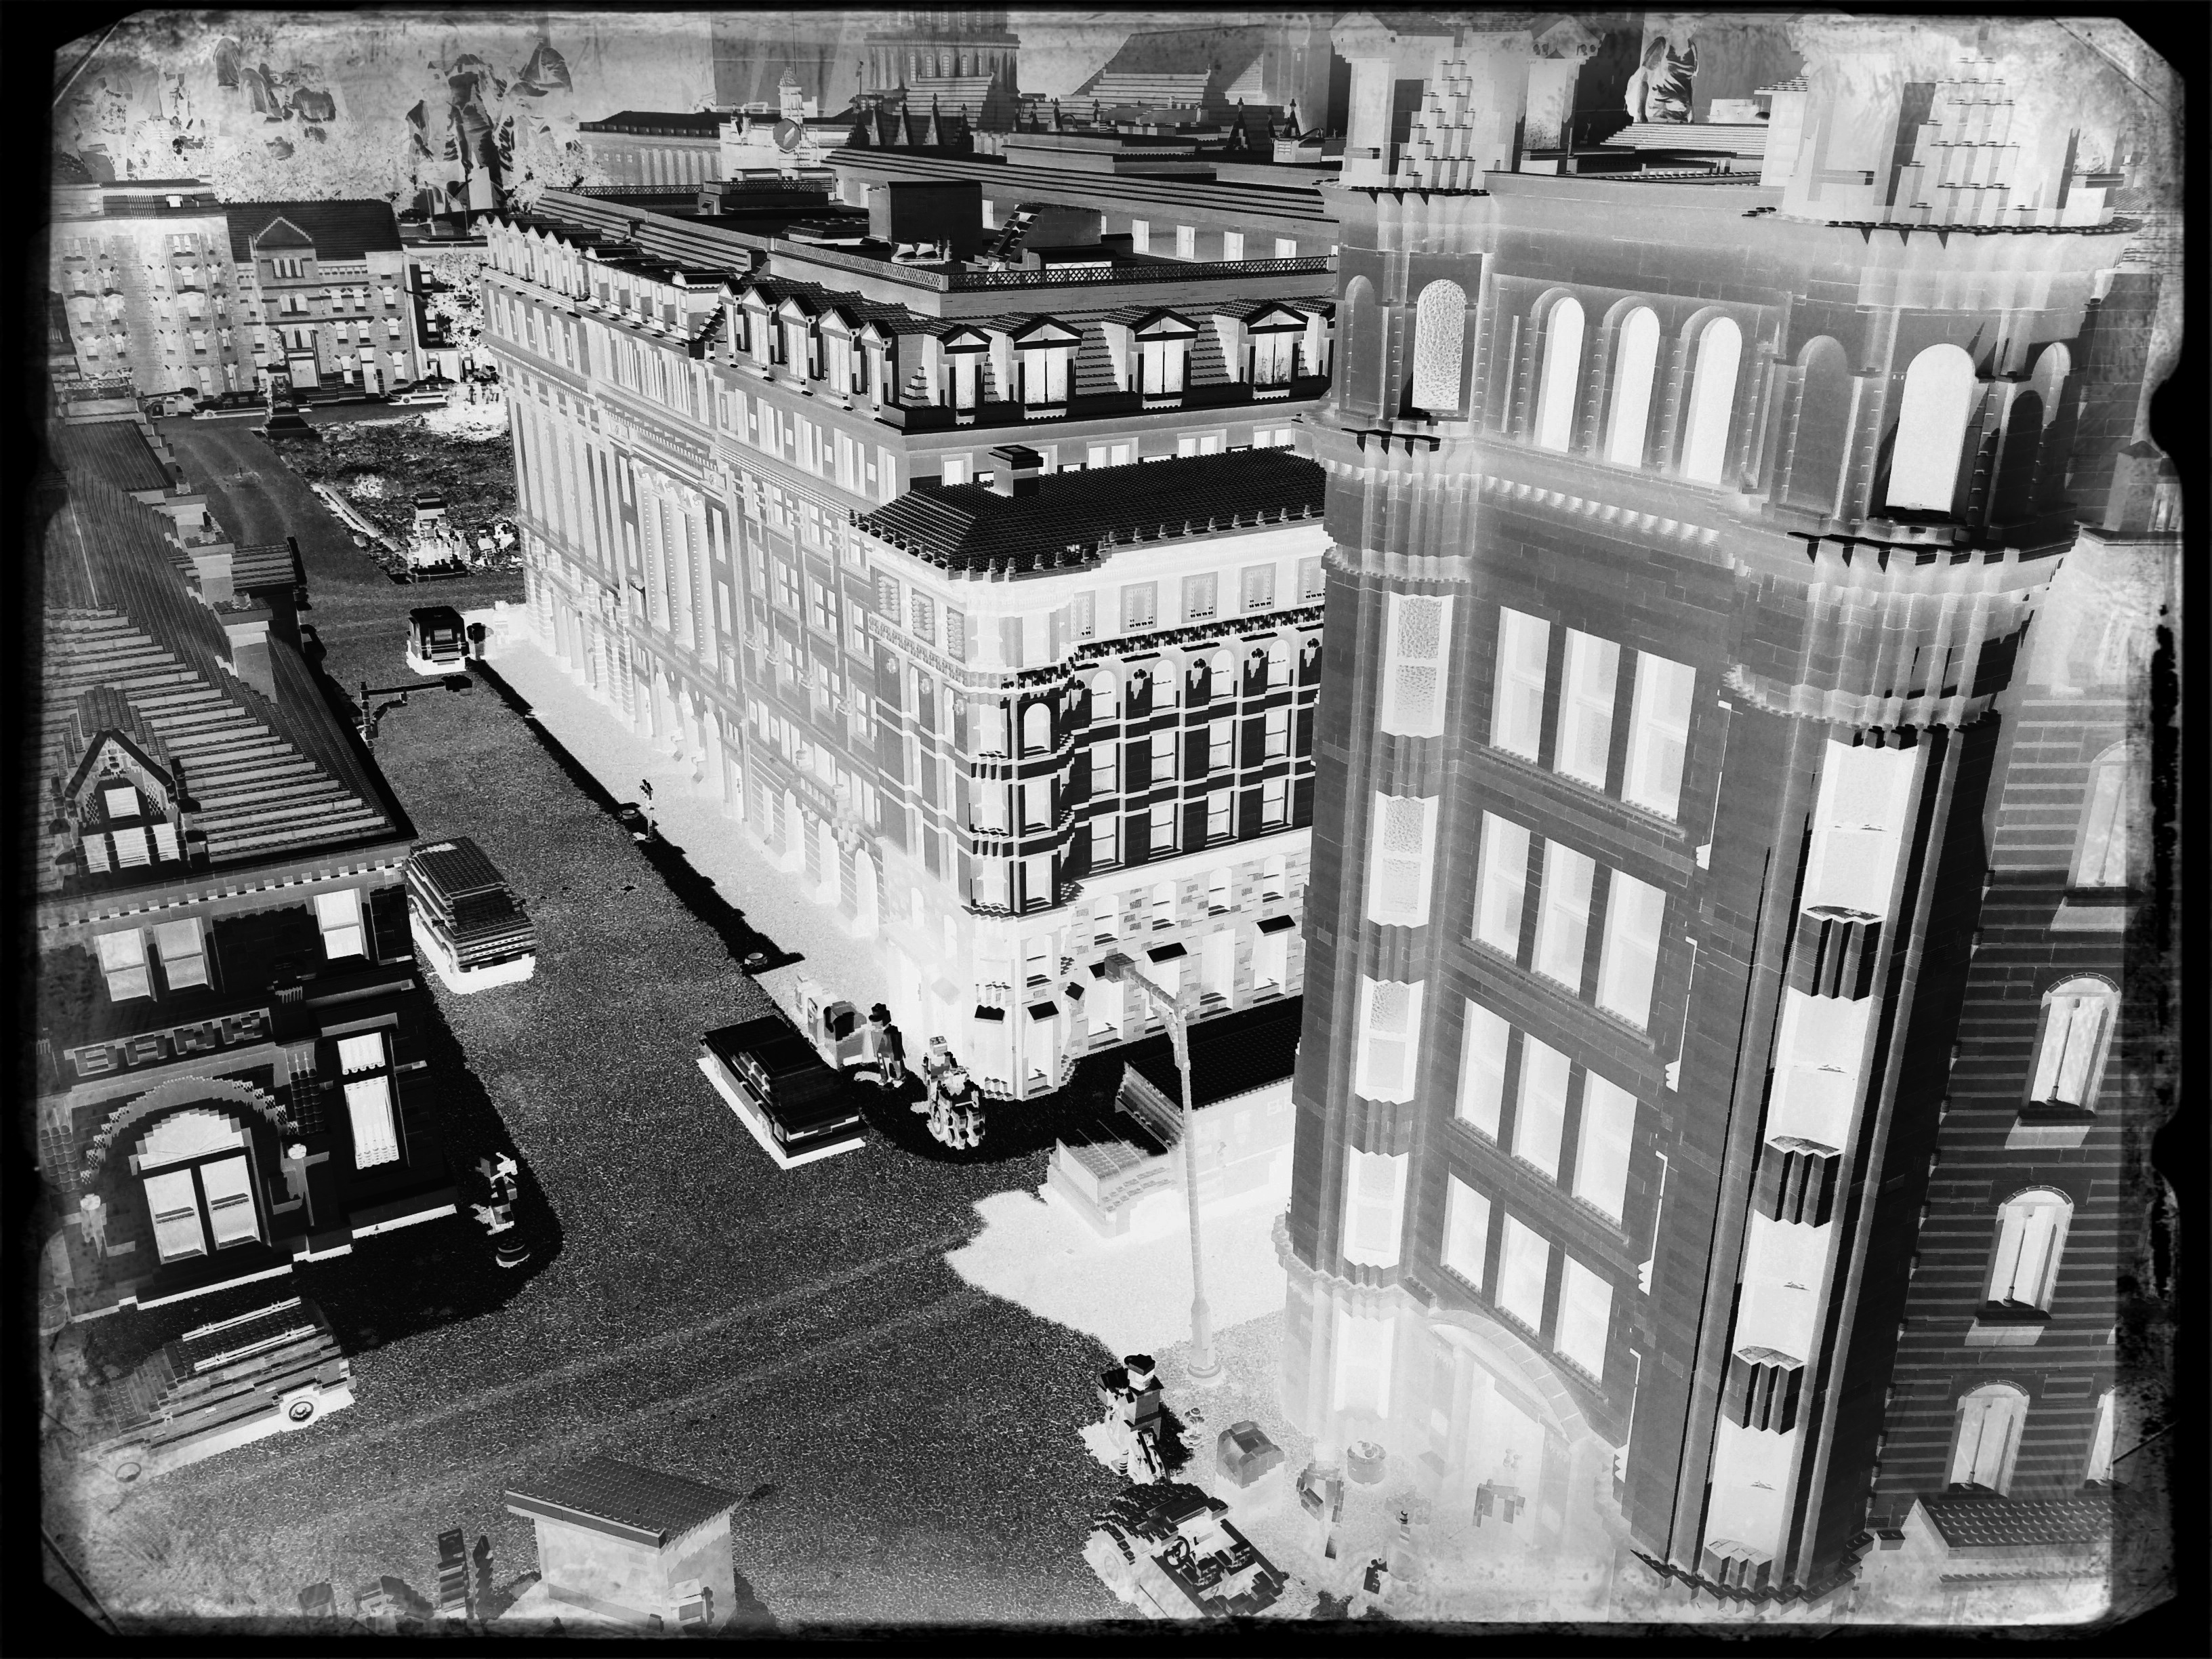
The eerie look of a an aerial reconnaissance photo, here applied to a city model at Legoland.
Reversing the color values in a photograph is no mere novelty. Sometimes a shadow value can create a stunning design when “promoted” to a lead value with a strong color. Sometimes the original range of contrast in the negative can be made more dramatic. And, occasionally, the reversal process renders some translucent or shiny surfaces with an x-ray or ghostly quality. And, of course, as with any effect, it can just register as a stupid novelty. Hey, it’s a gimmick, not a guarantee.
“Going negative”, as they say in the political world, is now an instantaneous process, allowing you the most flexibility for re-takes and multiple “mixes” as you combine the neg with everything from toy camera effects to simulated Technicolor. And while purists might rage that we are draining the medium of its mystery, I respectfully submit that photographers have always opted for fixes that they can make while they are in the field. And now, if you don’t like the direction you’re driving, you can put ‘er in reverse, and go down a different road.
YA BIG SOFTIE
These uber-cupcakes didn’t look nearly seductive enough in reality, so I added a gauzy layer in SoftFocus and a faux Technicolor filter in AltPhoto.
By MICHAEL PERKINS
ONE OF THE MOST FREEING THINGS about digital photography, especially in the celphone era, has been the artificial synthesis, through aftermarket apps, of processes that used to require lengthy and intricate manipulation. Much has been written about various apps’ ability to render the look of a bygone film stock, an antique lens, or a retro effect with just a click or swipe. The resulting savings in time (and technical trial and error) is obvious in its benefit, as more people shoot more kinds of images in which the shooter’s vision can be realized faster, perhaps even more precisely, than in the days of analog darkrooms.
Okay, now that the sound of traditionalists’ heads exploding subsides, on to the next heresy:
The creation of the so-called Orton technique by Michael Orton in the 1980’s was a great refinement in effects photography. The idea was simple: take two images of a subject that are identical in every spec except focus, then blend them in processing to create a composite that retains rich detail (from the sharp image) and a gauzy, fairy-tale glow (from the softer one). The result, nicknamed the “slide sandwich”, was easy to achieve, even for darkroom under-achievers. The most exacting part was using a tripod to guarantee the stability of the source images. Looked nice, felt nice.
Early on in digital, editing suites like Photomatix, designed to create HDR chiefly, also featured an option called Exposure Fusion, which allowed you to upload the source images, then tweak sliders for the best blend of sharp/no sharp. And finally, here come the soft-focus phone apps like Adobe Photoshop Express, Cool Face Beauty, Camera Keys, and yes, Soft Focus, allowing you to take just one normally focused shot and add degrees of softness to it.
Caveat emptor footnote: not all these apps (and there are many more not cited here) allow you to begin at a “zero effect” start point, that is, from no softening to some softening. They start soft and get softer. Also, most allow basic tweaks like brightening and saturation, but that’s about it. If you want to add contrast or something sexier, you may have to head back to the PC.
The important thing about softening apps are: (1) they save time and trouble in the taking of the source image, of which you only need one (which can be handheld now), and (2) they don’t so much as soften the master image as layer a gauzy glow over top of it.You either like this or you don’t, so, as Smokey says, you better shop around. Gee-whiz factor aside, the old rule for gimmicks still applies: tools are only tools if you like and use them
UNDER A DARKENING SKY
Dark skies, old-school way: a red 25 filter in front of a DSLR.
By MICHAEL PERKINS
SOMEONE HANDIER WITH A SLIDE RULE THAN ME RECENTLY OBSERVED that the raw numerical totals, on photo sharing sites, had shifted in favor of mobile images over those taken with more conventional cameras. In other words, the war was over, and the phones had won, at least in the sheer tonnage of uploaded images. Not sure that I yet regard that assertion as divine revelation, but the fact is that, as mobiles become a bigger component of overall photography, a second shift in technique will also continue, that between conceptualizing and compensation.
Dark skies on a cel phone with the addition of a “red sensitivity” app effect.
By conceptualizing, I mean the system, for traditional photographers of planning their shots before the shutter clicks, choosing settings, pre-editing the composition in the frame, any kind of advance prep. By compensation, I mean the emphasis, with mobiles, on adding filters and fixes after the click, technically learning how to make the most of what you were able to get.
One rather fun element I like to play with at present is the two approaches to high contrast black & white, especially the “black sky” effect which can force foreground objects to pop with greater drama. Shooting out in the Arizona desert for years, I have more frequent use for this effect than I might in more, well normal areas of the country. Traditional approach to this with a DSLR, of course, is the attachment of a red filter. You have to grope around for the right exposure, since you might lose the equivalent of two stops of light, depending on the situation, but it’s a great look. So that’s for us “conceptualizing” folks. See an example up top of the page.
The “compensation” peeps, who might have done their original shot on a phone, in color, is often referred to in apps as “red sensitivity” which adds the dark-sky look as it converts the shot to black and white. Usually you can only tweak the intensity of the effect (sometimes brightness as well), but it delivers a fairly good facsimile of the DSLR’s red filter, albeit with a little black lint kind of texture to the skies that you can usually get rid of with a noise reduction slider in your computer. The results, as you can see off to the left, are fairly acceptable.
If you’re shopping for filters beyond those in your own camera native app, consider adding one that includes red sensitivity. It’s one more “compensation” tool that’s nice to carry in your back pocket.
POCKET PALS
A color shot converted in the app Alt-Photo, using its simulated red filter for super-contrasty monochrome.
By MICHAEL PERKINS
QUICK, DO YOU KNOW WHO MADE THE HAMMER IN YOUR KITCHEN DRAWER? Let’s assume that it’s not a Sears Craftsman, but something you bought on the spot when you just needed, like, a hammer. Yeah, I’ll wait.
Follow-up question: does your off-brand Thor-wacker drive nails any less efficiently than a Sears? Or is it really all in the wrist?
In photography, sometimes tools is just tools. Cellphone apps comprise one of the the most glutted product markets ever, and, while some products do rise to the top and/or international prominence, there are gobs of different players out there to help us solve the same old problems, i.e., composition, exposure, color range, special effects. Those are the basics, and you need not be loyal to any predominant type-A app when, by the time I type the rest of this sentence, forty more guys will have served up their own solution for the exact same need. Go with what works. Add, subtract, adopt, dump, delete, and adore as needed.
Most cel camera apps, toolwise, are closer to a Swiss Army knife than a scalpel, blunt instruments that either apply an effect all-on or all-off. Single click, caveman-level stuff. Still, even the casual cel photog will pack a few of them along to do fundamental fixes on the go, and I recently noticed that I had acquired a decent, basic utility belt of bat-remedies, including, in no particular order:
Negative Me. Just what it says. Converts positive images to negative. Not something you’ll use a lot, but..
Simple DOF. A quick calculator that measures near, far and infinite sharpness based on distance, aperture and lens.
Fused. Instant double exposures, with about ten different blending formulas.
Soft Focus. Sliders for sharpness, brightness, color saturation. Instant glamor for portraits.
Timer Cam. Get in the photo.
Instants. Genuine fake Polaroid borders around your landscape or square images. Because we can’t give up our hipster groove.
AltPhoto. Best simulations of older classic film stocks from Kodachrome to Tri-X, as well as red filter, toy camera and antique effects.
Tilt-Shift Focus. Narrow the sharp areas in your images from a pinpoint to a basketball.
Flickr. Direct link to the mother ship
Pic Stitch. Framing templates for collages of two or more images. Drag and drop simplicity.
Use of these gimcracks ranges from the (yawn) occasional to the (yes!) essential, and your mileage may vary. Thing is, it’s truly a buyer’s (and user’s) market out there. Gather your own gold and click away.
REVERSAL OF FORTUNE
The bell of an engraved sousaphone, converted into a negative and color-boosted to resemble a faux vortex.
By MICHAEL PERKINS
FOR THOSE OF US WHO SWEATED IN LITERAL DARKROOMS (as opposed to digital ones), there has always been a fascination with the print photographer’s equivalent for “RAW” files, the celluloid negative. Manipulated properly, one neg could yield an almost endless variety of print results, as the sciences of burning, dodging and pure imagination were applied to coax subtle tonal changes and modulations out of either color or monochrome images. Ansel Adams’ frequently quoted remark that the negative was the score and the print was the performance was born out in his own visual “symphonies” along with those of millions of others.
But the negative need not merely be the understudy for the “final” version of a picture, but the final itself. And as we’re freed to experiment via new digital apps, we are more frequently re-imagining shots with reversed tones, often creating dramatically more effective results than the “positive” originals. Again, apps are speeding the time of practice and development in a way that chemically-based, film-based manipulation never could. Tap and you’re done. Tap, tap, and the result is either sent to the keeper pile or re-done in an instant. It’s pretty irresistible.
There have always been amazing examples of artists who made their negatives the “official” version of their pictures, although the neg is traditionally thought of as a step in a process, not an art form it itself. I remember being thrilled when, as a teen, I first saw F.W. Murnau’s silent masterpiece Nosferatu, which includes a thrilling, eerie scene with a ghostly, horse-drawn carriage on its way to Count Orlok’s castle, deliberately printed in negative to boost the creepy drama of the sequence. And with new phone-based apps, it’s easy and fast to get a basic version of this effect, albeit with some limits.
The app I use, called Negative Me, is a very basic (and free) tap-on layer. Choose a file photo, apply the effect, and you’re done. It’s also possible to shoot new pictures directly through the app. Yes, it’s frustrating that you can’t attenuate the tone or the intensity in any way, but, you can always take the extra step of feeding the first negative image into additional apps or editing suites where more precise processing can be added. It’s still easier than any process that was available in the film era, and, while it merely adds strangeness to many photographs, it allows some to be reborn as abstractions that are unearthly and dramatic.
Producing a negative variation on certain shots is just another way to re-interpret a shot, no less useful than any other color filter or post-processing tool. Like anything else, it’s the impact of the result, not the effect itself, that makes the shot.
I’LL JUST HAVE A LIGHT SANDWICH
Learning to dissect your “happy accidents” might allow you to start doing better stuff on purpose.
By MICHAEL PERKINS
SOMETIMES FACING OUR OWN PHOTOGRAPHIC WORK is less like dredging up memory and more like staring into the face of a complete stranger. Even seconds after the shutter snaps, a real distance widens between what we did in the moment and what we hold in our hands. Who did this? What were we thinking? Why did this work (or, in many cases, not work)?
Shooting quickly on the street worsens this feeling of alienation. We might not have even been so mindful of all the factors at work in a picture while it was being made, which makes learning from both the duds and the keepers that much more difficult. Learning to completely deconstruct a shot is, therefore, one of the most valuable skills for any photographer. It’s not always an easy thing.
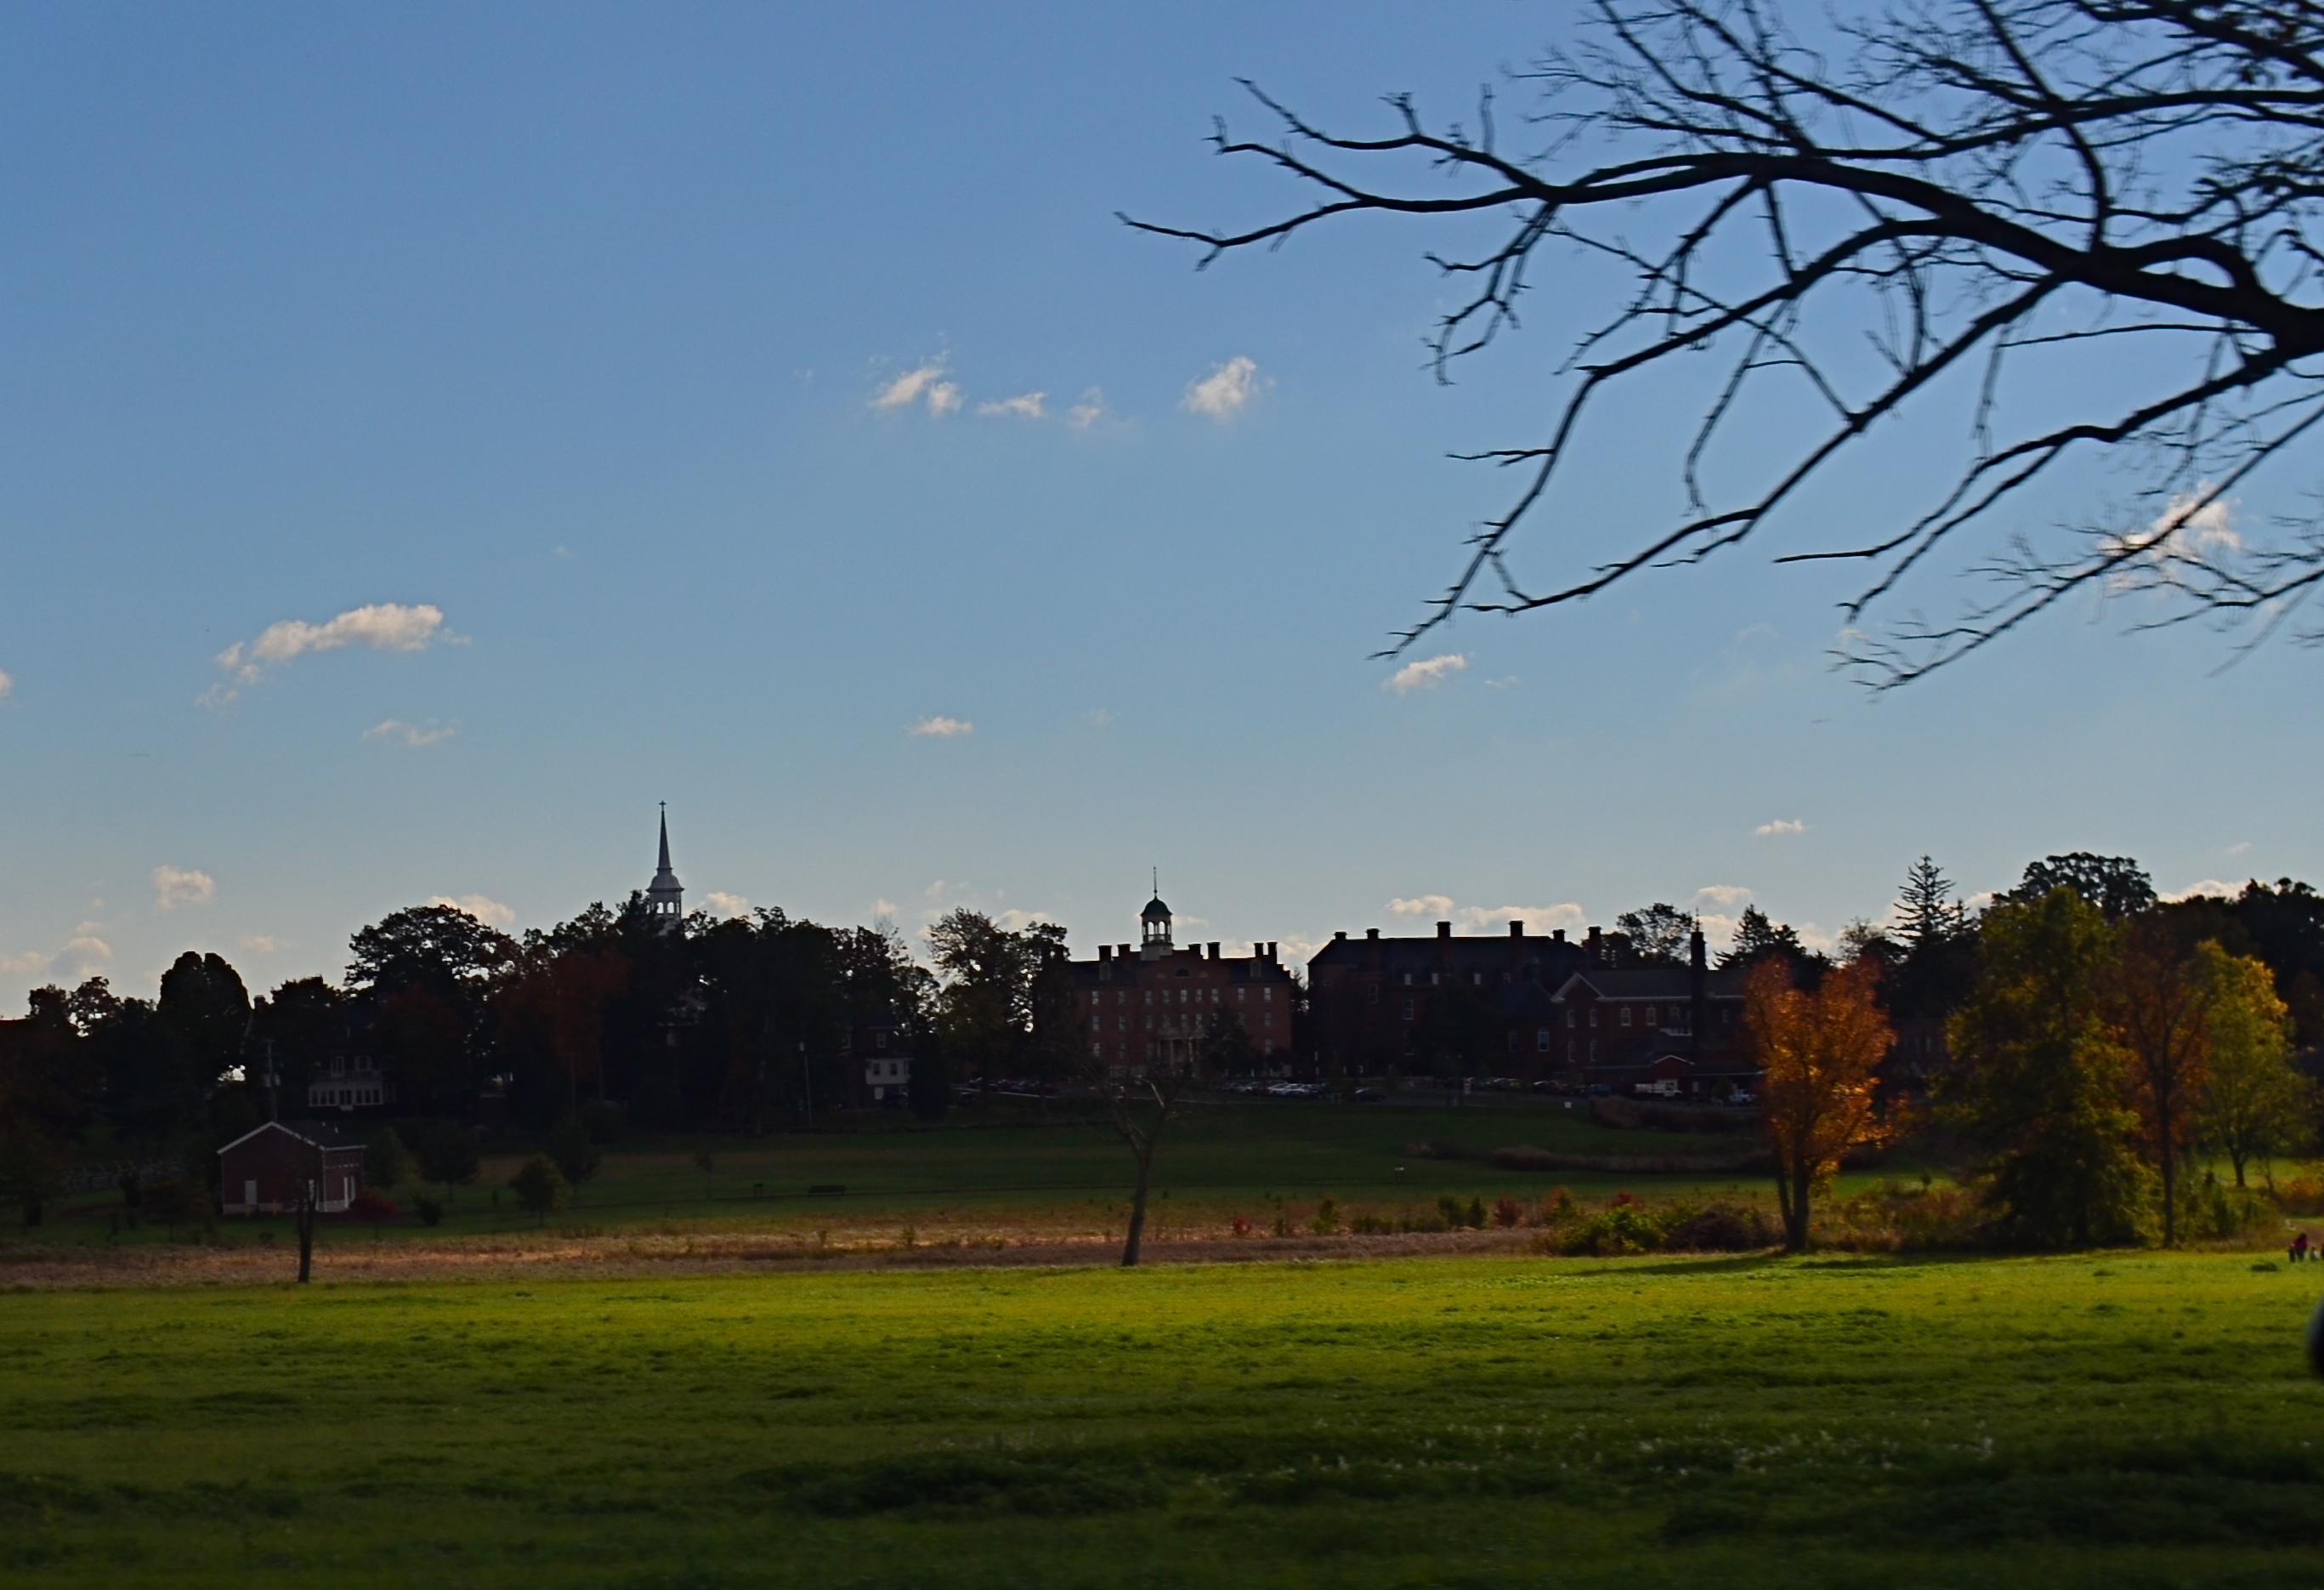
In the above shot, there are a number of contributing factors at work, not all of them in play for any other single shot taken on the afternoon I made it. For starters, I was lucky enough to be about 200 feet above average terrain, so the golden light of early dusk is hitting the face of the church pretty hard, as well as adding to the deepening blue of the sky. Secondly, I am shooting with my camera set on “vivid”, building even more saturation into the shot. At the same time, I am shooting through a polarizing filter, which, while not working fully at this late hour of the day, is also deepening the sky. Finally, the church, which is already glowing from the sunset light, is also being floodlit with sodium lamps, amping up the orange tones and contrasting even harder against the sky.
The effect is a kind of “light sandwich” four layers deep, a combo that only works for this particular shot. One or two shots later in the same sequence, these same conditions rendered the colors over-rich and pretty unreal in appearance. Sadly, I can’t even take credit for having deliberately planned the shot in this way, since, if I had, I probably would have chosen a slightly faster shutter speed and avoided the softness in the passing cars. Still, as I dissect it after the fact, it’s good practice to be able to do a post-Sherlock to see exactly what happened, in case I ever do want to manipulate a photo in this general way.
Ot I could just say, “cool” and move on.
And, sure, I’ve done that too.
SPREADING OUT THE SPRAWL
By MICHAEL PERKINS
PANORAMIC PHOTOGRAPHY IS REGARDED BY MANY AS A BIT OF A GIMMICK, an effect confined to the same realm as 3-d, fisheye lenses and faked pictures of cats driving sports cars. As a result, it’s rare that a pano is used for anything serious beyond landscape views, and, although apps have allowed even modest phone cameras to produce a modified panoramic effect, the majority of shots are still of ultra-wide, scenic vistas….the view from the beach to the resort hotel two blocks inland, and so forth.
But panos can be used to convey both scope and scale on subjects that have nothing to do with mountains or shorelines, and it’s encouraging to see more new photographers using the recently evolved technology to take advantage of that storytelling option. To use one example, the whole concept of sprawl–congested cities, vast arrays of clutter, the aftermath of the industrial age—seems custom-made for the panoramic’s less limited space requirements. It can actually open up editorial angles on a whole new range of subject matter.
The Ponderous Pile, 2015. Some subjects benefit from this obvious distortion of perspective.
Panos are great for showing overabundance, the sensory overload of contemporary life. In the above photo, it’s used to show the bulging, burgeoning, out-of-control volume of stuff in a congested antiquarian bookstore. The composition is dictated by the ultra-wide format to a degree, but when it’s married to the right subject matter, the shots can have a singular impact.
As with any other effect, there has to be a bottom-line benefit to the tale you’re trying to tell. It’s not enough to elicit a reaction of “wow, that looks weird”. That just relegates what you’ve shot to mere novelty. The upfront question should be: why are you deciding to distort visual reality or amp up the drama on this particular occasion? The effect has to seem inevitable in the result, with your audience admitting that, certainly, that was the best way to approach the shot and get the story across.
Sometimes photographs are about both process and subject. Panoramics have their place in serious photography, but only in serious hands.
